小伙伴们都知道,做一个app是少不了和图片打交道的,而不管是jpg还是png格式的图片,android的显示的时候最终都是将它们变换为Bitmap显示的,而Bitmap占用内存巨大,打个比方假如是ARGB_8888格式的Bitmap的话,每像素占用四个字节,占用的内存总共大小就是4*width*height,可想而知如果图片多的话,而引起的内存抖动肯定会引起界面卡顿的有没有,就算你牺牲一个颜色通道,创建RGB_565格式的Bitmap的话,占用大小也是2*width*height,随着图片的增多也很有可能因为频繁申请内存和释放内存,而引起界面卡顿。
有的小伙伴会说了,我加载图片都是用的Glide、ImageLoader、Fresco,没有遇到过这个问题,那是当然因为这几个框架都为你做了优化。如果你想知道里面的到底做了哪些优化,相信你一定会去研究研究源码的。
ok,废话不多说,咱们第一篇先来探讨一下ImageLoader的缓存策略。
1、最经典的算法最常使用算法
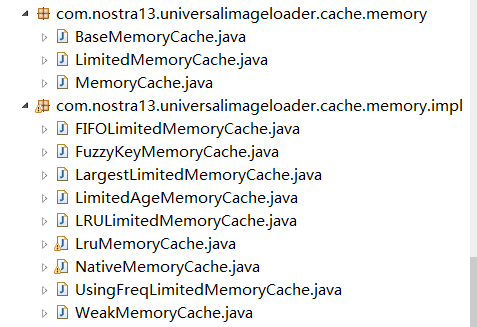
android的3.1系统以后有给我们提供LruCache这个类,就是专门用来缓存Bitmap的类,如果你想自己处理大量图片的话(例如电商页面的产品搜索界面)RecycleView的itemView会有很多图片界面。这里算法的源码以ImageLoader框架为例,它缓存采用的是设计模式中的策略模式,为用户满足不同的需求时选择不同的缓存策略,缓存相关的类全部在这两个包下:
LruMemoryCache这个类就是实现了最常使用算法(什么是最常使用算法,就是说每次从集合中拿数据,那就说明你用图了,那么在拿的同时,它会往队列前面移动位置,也就是说最少使用的对象会被放在队尾,每次移除对象的时候从队尾开始),而这个类用到的集合类是
LinkedHashMap<String, Bitmap>(0, 0.75f, true);最后一个参数为true的情况下,在集合的get方法的时候,会将用到的数据向前面移动。所有的缓存类都需要实现下面这个接口
public interface MemoryCache {
	/**
	 * Puts value into cache by key
	 *
	 * @return <b>true</b> - if value was put into cache successfully, <b>false</b> - if value was <b>not</b> put into
	 * cache
	 */
	boolean put(String key, Bitmap value);

	/** Returns value by key. If there is no value for key then null will be returned. */
	Bitmap get(String key);

	/** Removes item by key */
	Bitmap remove(String key);

	/** Returns all keys of cache */
	Collection<String> keys();

	/** Remove all items from cache */
	void clear();
}
也就是说如果你需要制定自己的缓存策略,实现这个接口就ok了,接下来来看一下这个集合get方法做了什么?
 public V get(Object key) {
        LinkedHashMapEntry<K,V> e = (LinkedHashMapEntry<K,V>)getEntry(key);
        if (e == null)
            return null;
        e.recordAccess(this);
        return e.value;
    }
移动对象位置的方法是recordAccess方法中实现的,如下:
  void recordAccess(HashMap<K,V> m) {
            LinkedHashMap<K,V> lm = (LinkedHashMap<K,V>)m;
            if (lm.accessOrder) {
                lm.modCount++;
                remove();
                addBefore(lm.header);
            }
        }
这里的判断刚好是前面所说的第三个参数来配置的,先来看一下加入对象put的方法,要不有点懵逼,如下:
public V put(K key, V value) {
        if (table == EMPTY_TABLE) {
            inflateTable(threshold);
        }
        if (key == null)
            return putForNullKey(value);
        int hash = sun.misc.Hashing.singleWordWangJenkinsHash(key);
        int i = indexFor(hash, table.length);
        for (HashMapEntry<K,V> e = table[i]; e != null; e = e.next) {
            Object k;
            if (e.hash == hash && ((k = e.key) == key || key.equals(k))) {
                V oldValue = e.value;
                e.value = value;
                e.recordAccess(this);
                return oldValue;
            }
        }

        modCount++;
        addEntry(hash, key, value, i);
        return null;
    }
这个方法的意思是先通过key获取hash值,然后通过hash值,找到这个hash值得所在的那一队,判断这个key是否已经在集合中存在,存在的话覆盖掉以前的值,不存在的话直接通过 addEntry(hash, key, value, i);添加
 void addEntry(int hash, K key, V value, int bucketIndex) {
        if ((size >= threshold) && (null != table[bucketIndex])) {
            resize(2 * table.length);
            hash = (null != key) ? sun.misc.Hashing.singleWordWangJenkinsHash(key) : 0;
            bucketIndex = indexFor(hash, table.length);
        }

        createEntry(hash, key, value, bucketIndex);
    }
void createEntry(int hash, K key, V value, int bucketIndex) {
HashMapEntry<K,V> old = table[bucketIndex];
LinkedHashMapEntry<K,V> e = new LinkedHashMapEntry<>(hash, key, value, old);
table[bucketIndex] = e;
e.addBefore(header);
size++;
}这两个方法的意思就是将对象添加到数组的末尾(如果容量够的话,如果超过现在数组的容量则复制扩容),最后将链表的头设置为header,也就是说每次有新的对象进来的话都插入到链表的最后(这里的链表是双向链表),继续来看看获取数据的代码:
 void recordAccess(HashMap<K,V> m) {
            LinkedHashMap<K,V> lm = (LinkedHashMap<K,V>)m;
            if (lm.accessOrder) {
                lm.modCount++;
                remove();
                addBefore(lm.header);
            }
        }
这里可以看出每使用一次这个key值得对象,moCount这个变量就会加1(类似于命中率)
private void remove() {
            before.after = after;
            after.before = before;
        }
而remove方法就是将当前的对象和它所引用的前后对象中移除,让它的前后对象互相引用,通俗的将就是将这个对象从这个链表中移除
 private void addBefore(LinkedHashMapEntry<K,V> existingEntry) {
            after  = existingEntry;
            before = existingEntry.before;
            before.after = this;
            after.before = this;
        }
最后再调用这个方法,将当前对象变为队头,最后再来看一下当缓存图片超过你所设置的最大容量的时候遍历集合移除数据的顺序:
Entry<K,V> nextEntry() {
            if (modCount != expectedModCount)
                throw new ConcurrentModificationException();
            if (nextEntry == header)
                throw new NoSuchElementException();

            LinkedHashMapEntry<K,V> e = lastReturned = nextEntry;
            nextEntry = e.after;
            return e;
}这里的第一个nextEntry就是从队列的尾部开始移除,也就是说同一张图片被用的越频繁的话,在图片总缓存达到你所设置的极限的时候,被用的频繁的图片被回收的几率就越低,这就是最常使用算法,你也可以叫它最少使用算法。
2、图片弱引用策略:
对应的实现类是WeakMemoryCache,这个策略就是每次加载新的图片都将它缓存起来,前提是用弱引用包裹,只要垃圾回收器回收的时候,图片都会回收掉(内存不足或内存达到阈值的时候就会自动触动垃圾回收器(不同的手机阈值不一样))。
public class WeakMemoryCache extends BaseMemoryCache {
	@Override
	protected Reference<Bitmap> createReference(Bitmap value) {
		return new WeakReference<Bitmap>(value);
	}
}
这个类的代码就这么多,只是创建一个弱引用包裹的Bitmap对象,看来工作都是父类做了,父类对象使用
private final Map<String, Reference<Bitmap>> softMap = Collections.synchronizedMap(new HashMap<String, Reference<Bitmap>>());保存图片,如下:
public boolean put(String key, Bitmap value) {
		softMap.put(key, createReference(value));
		return true;
	}
归根结底这样保存图片的方式不会影响Bitmap的回收,以不用自己手动删除集合中的引用,Bitmap没有被回收就用缓存的,回收了,就重新获取(从sd卡或网络)。这个方式的缺陷就是对于内存低的手机或者图片本身要求清晰度高的话,引起内存抖动的概率要高很多。
3、最大图片移除算法:
一听这个名字你应该猜出来这个策略是干什么的了,也就是说再缓存的Bitmap总内存超过你设置的阈值的时候,首先移除占内存最大的那些图片,对应的实现类是LargestLimitedMemoryCache,其中最重要的就是下面这个方法:
protected Bitmap removeNext() {
		Integer maxSize = null;
		Bitmap largestValue = null;
		Set<Entry<Bitmap, Integer>> entries = valueSizes.entrySet();
		synchronized (valueSizes) {
			for (Entry<Bitmap, Integer> entry : entries) {
				if (largestValue == null) {
					largestValue = entry.getKey();
					maxSize = entry.getValue();
				} else {
					Integer size = entry.getValue();
					if (size > maxSize) {
						maxSize = size;
						largestValue = entry.getKey();
					}
				}
			}
		}
		valueSizes.remove(largestValue);
		return largestValue;
	}
循环遍历集合,找出占内存最大的那个Bitmap,然后移除这张Bitmap。
4、时间过期移除算法:
通俗的讲就是如果图片在内存中过期的话就会被移除,对应的实现类为LimitedAgeMemoryCache
public boolean put(String key, Bitmap value) {
		boolean putSuccesfully = cache.put(key, value);
		if (putSuccesfully) {
			loadingDates.put(key, System.currentTimeMillis());
		}
		return putSuccesfully;
	}
public Bitmap get(String key) {
		Long loadingDate = loadingDates.get(key);
		if (loadingDate != null && System.currentTimeMillis() - loadingDate > maxAge) {
			cache.remove(key);
			loadingDates.remove(key);
		}

		return cache.get(key);
	}
如果超过过期时间,则移除缓存中的Bitmap,则Bitmap会重新获取,这种方式的缺点就是如果设置的有效时间过长的话有可能会引起内存溢出,如果设置时间过短的话,这个缓存也就和没有一个样了,不建议使用。
5、先进先出移除算法:
顾名思义如果总图片所占内存大小超过你所设置的内存阈值的话,将会先移除最早保存的Bitmap,对应实现类为FIFOLimitedMemoryCache,最重要的方法如下:
	protected Bitmap removeNext() {
		return queue.remove(0);
	}
移除集合中第一个Bitmap,也就是先存的Bitmap,对应集合类为LinkedList,所以是先进先出。
6、去除同一个url,因为缩放不同而保存多份的策咯:
这个策咯的意思就是,你再从网络获取图片之后将会在你设置的ImageView的大小上进行缩放,以省内存,但是可能这个接口在不同的地方被用到,但是你设置的ImageView大小会有区别,所以不用这个策咯的话,缓存中会保存多份,而这个策咯是在你原来的基础上用到了装饰者模式将重复的url,只保存一份,这得看你什么需求了
最重要的方法如下:
public boolean put(String key, Bitmap value) {
		// Search equal key and remove this entry
		synchronized (cache) {
			String keyToRemove = null;
			for (String cacheKey : cache.keys()) {
				if (keyComparator.compare(key, cacheKey) == 0) {
					keyToRemove = cacheKey;
					break;
				}
			}
			if (keyToRemove != null) {
				cache.remove(keyToRemove);
			}
		}
		return cache.put(key, value);
	}
先删除有重复url的选项,然后再保存到集合中,其中比较的实现如下:
public static Comparator<String> createFuzzyKeyComparator() {
		return new Comparator<String>() {
			@Override
			public int compare(String key1, String key2) {
				String imageUri1 = key1.substring(0, key1.lastIndexOf(URI_AND_SIZE_SEPARATOR));
				String imageUri2 = key2.substring(0, key2.lastIndexOf(URI_AND_SIZE_SEPARATOR));
				return imageUri1.compareTo(imageUri2);
				//return key1.compareTo(key2);
			}
		};
	}
保存的时候key值得实现如下:
public static String generateKey(String imageUri, ImageSize targetSize) {
		return new StringBuilder(imageUri).append(URI_AND_SIZE_SEPARATOR).append(targetSize.getWidth()).append(WIDTH_AND_HEIGHT_SEPARATOR).append(targetSize.getHeight()).toString();
}好了,今天就介绍到这里,第二篇将介绍Glide的缓存策略,以及它强于ImageLoader的缓存方式。