学习的第一个Android程序
程序讲解
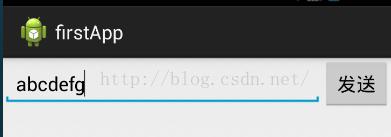
首先我们来看一下界面的样子


实现的效果是,当我们在输入出输入任何文字等等,然后点击发送按钮,就可以在另一个界面上看到我们刚才输入的文字信息
知道了效果,我们来看看各部分大的代码吧!
首先我们要看的是第一个界面的代码firstapp.xml
<span style="font-size:18px;"><strong><?xml version="1.0" encoding="utf-8"?>
<LinearLayout xmlns:android="http://schemas.android.com/apk/res/android"
    android:layout_width="match_parent"
    android:layout_height="match_parent"
    android:orientation="horizontal" >

	<EditText
        android:id="@+id/edit"
        android:layout_width="wrap_content"
        android:layout_height="wrap_content"
        android:layout_weight="1"/>
    <Button
        android:id="@+id/send"
        android:layout_width="wrap_content"
        android:layout_height="wrap_content"
        android:text="发送"
        android:onClick="SendMessage"/>
</LinearLayout>
</strong></span>
我们来解析一下代码中的一些东西
首先我们来讲一下父标签中的orientation属性,这个属性有两个可选值,分别是"horizontal"和"vertical"前者表示的是该界面上的控件按水平排布,后者表示的是垂直排布
接着我们来说说weight属性,该属性在这里的作用是把一行划分为几部分,这里是划分为了一份,而由于是水平排布的控件,后面还有一个按钮,所以当该EditText占了一份以后,剩下的都属于Button
以下这部分是在API开发文档中的定义
The weight value is a number that specifies the amount of remaining space each view should consume, relative to the amount consumed by sibling views. This works kind of like the amount of ingredients in a drink recipe: "2 parts vodka, 1 part coffee liqueur" means two-thirds of the drink is vodka. For example, if you give one view a weight of 2 and another one a weight of 1, the sum is 3, so the first view fills 2/3 of the remaining space and the second view fills the rest. If you add a third view and give it a weight of 1, then the first view (with weight of 2) now gets 1/2 the remaining space, while the remaining two each get 1/4
我们再来讲讲android:onClick属性
一般监听OnClickListener事件,我们都是通过Button button = (Button)findViewById(....);
button.setOClickLisener....这样的方式来实现。
而这里可以在xml中定义好方法名称,在Activity中实现该方法就可以了
然后我们来讲讲MainActivity.java
<span style="font-size:18px;"><strong>package com.example.firstapp;

import android.content.Intent;
import android.os.Bundle;
import android.support.v7.app.ActionBarActivity;
import android.view.View;
import android.widget.Button;
import android.widget.EditText;

public class MainActivity extends ActionBarActivity {

	public EditText edit;
	public Button btn_Send;
	public final static String EXTRA_MESSAGE="com.example.firstapp.MESSAGE";
	@Override
	protected void onCreate(Bundle savedInstanceState) {
		super.onCreate(savedInstanceState);
		setContentView(R.layout.firstapp);

	}

	public void SendMessage(View view)
	{
		Intent intent=new Intent(this,DisplayMessage.class);
		edit=(EditText) findViewById(R.id.edit);
		String message = edit.getText().toString();
		intent.putExtra(EXTRA_MESSAGE, message);
		startActivity(intent);
	}
}</strong></span>
我们通过putExtra来传递参数,同时我们会在后面通过getStringExtra来接受数据,此处传递的时字符串,所以使用的时getStringExtra来接受数据
我们还可以传递Bundle数据包
//发送数据包
Bundle b = new Bundle();
b.putString("name","abcdefg");//字符串类型
b.putInt("age",2);//int类型
Intent i = new Intent();
i.putExtra(b);//把整个Bundle作为参数传递过去
//在另一个Activity中接受数据包
Bundle data = i.getExtra();
String.Format("name=%s,age=%d",data.getString("name"),data.getInt("age"));
如果在之前的Bundle中没有这个数据,我们可以在获取的时候重载一下该方法
例如:
data.getExtra("name1","Felix");这里就是对一个名为name1的进行重载方法并且赋值Felix。如果之前有值,则会覆盖这里的赋值,即不为Felix
还有一种获取的方法就是
Bundle data= i.getBundleExtra("data");//引号中的data是之前发送的时候给的名字
i.putExtra("user",new 类名(参数1,参数2,……));
//接受数据
方法1:给类实现Serialzable(可序列化)这个接口
然后再接受的时候只需
类名 变量名 = (类名)i.getSerializableExtra("user");
接下来就直接调用类中的属性就可以了。
方法2:给类实现Parcelable接口
需要自己重写一个方法,用于保存数据
writeToParcel(Parcel dest,int flags){
dest.writeString(get属性);
dest.writeInt(get属性());
}
i.getParcelableExtra("user");
首先在onCreate中获取界面,通过setContentView(R.layout.firstapp)这样我们通过模拟器就可以看到想要的结果了,下面那个才是最关键的部分了,有了这个函数我们才能实现点击按钮实现发送数据的功能,这里我们需要注意的是函数是有参数的(自己在弄的时候忘记写参数了,导致程序出现崩溃,后来修改了以后就没事了)
这里还有要注意的几点是
- Be public 必须是public的
- Have a void return value 无返回值的
- Have a
Viewas the only parameter (this will be theViewthat was clicked) 参数必须是View的
Intent is an object that provides runtime binding between separate components (such as two activities). The Intent represents an app’s "intent to do something." You can use intents for a wide variety of tasks, but most often they’re used to start another activity.public class DisplayMessage extends ActionBarActivity {
@Override
protected void onCreate(Bundle savedInstanceState) {
// TODO Auto-generated method stub
super.onCreate(savedInstanceState);
//setContentView(R.layout.new_one);
Intent intent=getIntent();
String message=intent.getStringExtra(MainActivity.EXTRA_MESSAGE);
TextView textView =new TextView(this);
textView.setText(message);
textView.setTextSize(40);
setContentView(textView);
}
}这样我们就完成了想要功能!