1、引入相关依赖
<!-- SpringCloudConfig配置 -->
<dependency>
	<groupId>org.springframework.cloud</groupId>
	<artifactId>spring-cloud-starter-config</artifactId>
</dependency>
<dependency>
	<groupId>org.springframework.cloud</groupId>
	<artifactId>spring-cloud-starter-eureka</artifactId>
</dependency>
2、客户端注册进eureka服务列表内
eureka:
  client: #客户端注册进eureka服务列表内
    service-url:
      defaultZone: http://localhost:7001/eureka
3、编写启动类文件,开启eureka注解(@EnableEurekaClient)
@SpringBootApplication
@EnableEurekaClient //本服务启动后会自动注册进eureka服务中
public class DeptProviderSpringApplication
{
	public static void main(String[] args)
	{
		SpringApplication.run(DeptProvider8001_App.class, args);
	}
}
4、启动eureka服务端(7001)、部门服务提供者-eureka客户端(8001)

spring.application.name: microservicecloud-dept (部门服务提供者应用名称)
5、修改实例名称、并显示ip地址,容易排查错误
 instance:
    instance-id: microservicecloud-dept8001
prefer-ip-address: true #访问路径可以显示IP地址 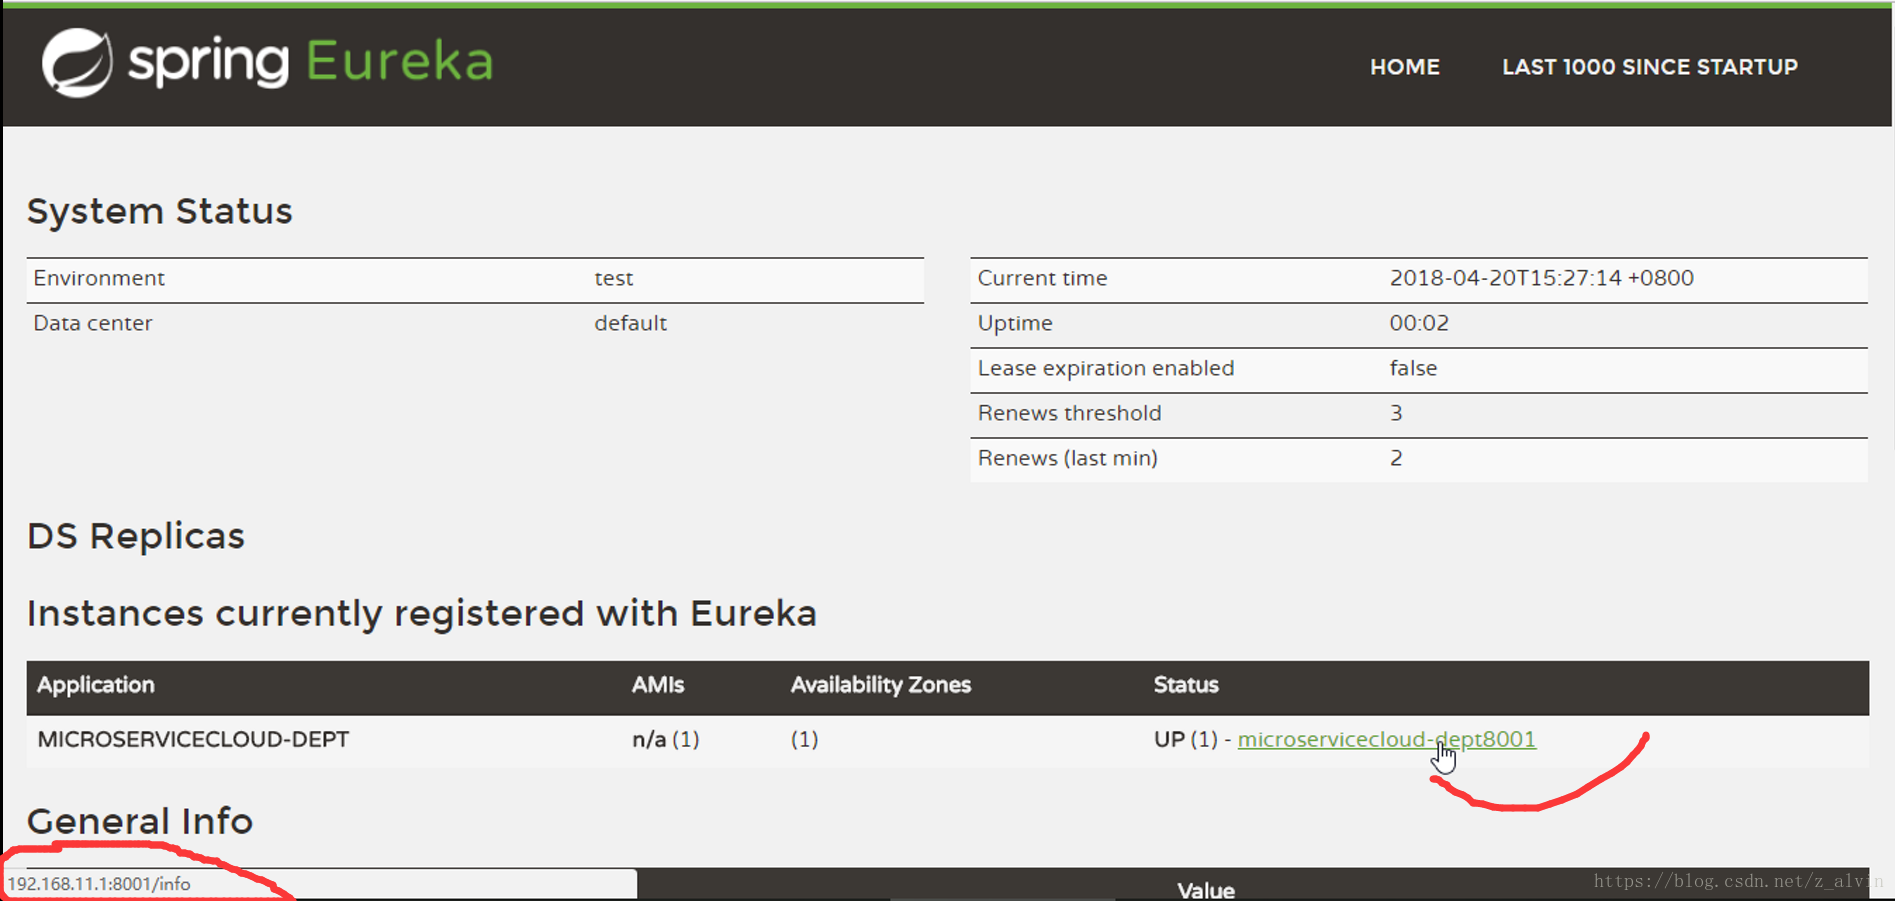
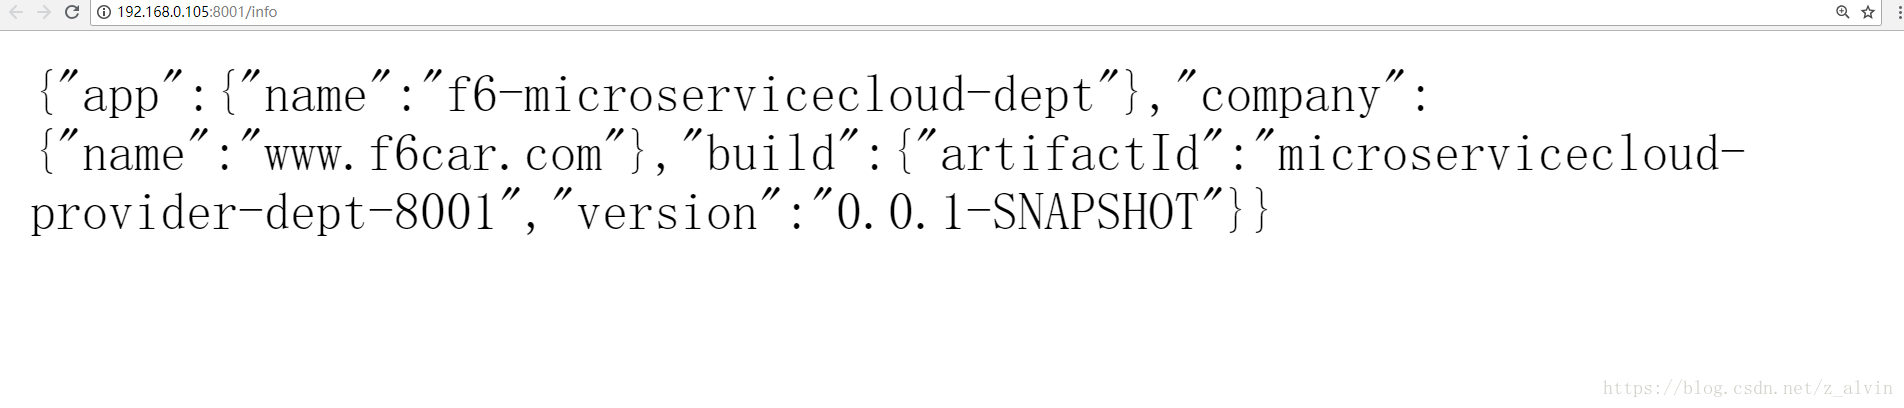
6、点击上面的链接地址,进入http://192.168.11.1:8080/info地址,由于项目里面没有info相关的接口,则会出现error page的页面;正常来说,点击http://192.168.11.1:8080/info地址时,应该显示该部门微服务的相关简介信息,那么该如何配置呢?只需在application.yml文件中进行如下配置即可:
info:
  app.name: f6-microservicecloud
  company.name: www.f6car.com
  build.artifactId: $project.artifactId$
  build.version: $project.version$
再次访问http://192.168.11.1:8080/info地址时,则会返回上面的配置信息的json字符串:
7、也可以通过服务发现的方式描述服务提供者的信息(DiscoveryClient)
开启注解:@EnableDiscoveryClient //服务发现
coding:
    @Autowired
	private DiscoveryClient client;

	@RequestMapping(value = "/dept/discovery", method = RequestMethod.GET)
	public Object discovery()
	{
		List<String> list = client.getServices(); // 服务列表
		System.out.println("**********" + list);

		List<ServiceInstance> srvList = client.getInstances("MICROSERVICECLOUD-DEPT");
		for (ServiceInstance element : srvList) {
			System.out.println(element.getServiceId() + "\t" + element.getHost() + "\t" + element.getPort() + "\t"
					+ element.getUri());
		}
		return this.client;
	}