Android之网络请求2————OkHttp的使用
一.目录
二.OkHttp的介绍
建议先阅读上一篇关于Http协议的文章后,在阅读这一篇
1. 概述
okhttp是一个第三方类库,用于Android中请求网络
这是一个开源项目,是安卓端最火热的轻量级框架,由移动支付Square公司贡献(该公司还贡献了Picasso和LeakCanary) 。用于替代HttpUrlConnection和Apache HttpClient(android API23 里已移除HttpClient)。
官网地址:OkHttp官网
git地址:https://github.com/square/okhttp
2.OkHttp与http请求
我们先构造一个http请求,并查看其具体内容
final Request request = new Request.Builder().url("https://github.com/").build();在上一篇博客里我们曾说过,http协议请求消息体分为4部分请求行、请求头部、空行和请求数据,其中请求行又包含请求方法,请求地址,请求协议。
所以说个类库要完成一个http请求, 需要包含 请求方法, 请求地址, 请求协议, 请求头, 请求体这五部分,这些在 这些都在okhttp3.Request的类中有体现, 这个类正是代表http请求的类.
 */
public final class Request {
  final HttpUrl url; //请求地址
  final String method;//请求方法
  final Headers headers;//请求头
  final @Nullable RequestBody body; //请求体
  final Object tag;
  。。。。。。
}
为什么没有请求协议,因为在http中引入了Upgrade 机制. 简单来说就是根据服务器支持那种协议(Http/1.1 Http/2),就选择那种协议
3.OkHttp与http响应
使用Okhttp保存表示一个响应
final Request request = new Request.Builder().url("https://github.com/").build();
Response response = client.newCall(request).execute(); //表示响应
在上一篇博客中,我们提过其分为四个部分状态行、消息报头、空行和响应正文,状态行又包含访问协议,响应码,描述状态的信息, 所以来说响应应包括访问协议, 响应码, 描述信息, 响应头, 响应体
在okhttp中的Response中:
public final class Response implements Closeable {
  final Request request; //持有的请求
  final Protocol protocol; //请求协议
  final int code; //响应码
  final String message; //描述信息
  final @Nullable Handshake handshake;//代表SSL/TLS握手协议验证时的信息
  final Headers headers;
  final @Nullable ResponseBody body; //响应体
  final @Nullable Response networkResponse;
  final @Nullable Response cacheResponse;
  final @Nullable Response priorResponse;
  final long sentRequestAtMillis;
  final long receivedResponseAtMillis;
}
三.Get请求
1.同步GET
同步GET的意思是一直等待http请求, 直到返回了响应. 在这之间会阻塞进程, 所以通过get不能在Android的主线程中执行, 否则会报错.
public void getDatasync(){
        new Thread(new Runnable() {
            @Override
            public void run() {
                try {
                    OkHttpClient client = new OkHttpClient();//创建OkHttpClient对象
                    Request request = new Request.Builder()
                            .url("http://www.baidu.com")//请求接口。如果需要传参拼接到接口后面。
                            .build();//创建Request 对象

                    Response response = null;
                    response = client.newCall(request).execute();//得到Response 对象
                    if (response.isSuccessful()) {
                        Log.d("OkHttp","response.code()=="+response.code());
                        Log.d("OkHttp","response.message()=="+response.message());
                        Log.d("OkHttp","res=="+response.body().string());
                        //此时的代码执行在子线程,修改UI的操作请使用handler跳转到UI线程。
                    }
                } catch (Exception e) {
                    e.printStackTrace();
                }
            }
        }).start();
    }
运行结果:

注意事项:
- Response.code是http响应行中的code,如果访问成功则返回200,这个不是服务器中设置的,而是http协议中自带的,res中的code才是服务器设置的。
- response.body().string()本质是输入流的读操作,所以它还是网络请求的一部分,所以这行代码也必须放在子线程中。
- response.body().string()只能调用一次,在第一次是有返回值,第二次调用就会返回null。原因:response.body().string()的本质是输入流的读操作,必须有服务器的输出流的写操作时客户端的读操作才能得到数据。而服务器的写操作只执行一次,所以客户端的读操作也只能执行一次,第二次将返回null。
2.异步GET
异步GET是指在另外的工作线程中执行http请求,请求时不会阻塞当前的线程,所以可以在Android主线程中使用
  private void getDataAsync() {
        OkHttpClient client = new OkHttpClient();
        Request request = new Request.Builder()
                .url("http://www.baidu.com")
                .build();
        client.newCall(request).enqueue(new Callback() {
            @Override
            public void onFailure(Call call, IOException e) {
            }
            @Override
            public void onResponse(Call call, Response response) throws IOException {
                if(response.isSuccessful()){//回调的方法执行在子线程。
                    Log.d("OkHttp","获取数据成功了");
                    Log.d("OkHttp","response.code()=="+response.code());
                    Log.d("OkHttp","response.body().string()=="+response.body().string());
                }
            }
        });
    }
异步请求的打印结果和注意事项和同步请求时相同,最大的不同就是异步请求不需要开启子线程,enqueue方法会自动将网络请求部分放在子线程中执行。
注意事项:
- 回调接口onFailure和onResponse执行在子线程。
- response.body().string()方法也必须放在子线程中。当执行这行代码得到结果后,再跳转到UI线程修改UI。
四.POST请求
POST请求和GET一样,都有同步和异步两种方法,其区别和GET一样,在下面的代码都使用异步距离
1. Post方式提交String
下面使用POST提交到服务中,这里的例子是提交一个markDown文件到web服务,以html方式渲染markdown。
    public static final MediaType MEDIA_TYPE_MARKDOWN = MediaType.parse("text/x-markdown; charset=utf-8");
    public void getDataAsync(){
        OkHttpClient client = new OkHttpClient();
        String postBody = ""
                + "Releases\n"
                + "--------\n"
                + "\n"
                + " * _1.0_ May 6, 2013\n"
                + " * _1.1_ June 15, 2013\n"
                + " * _1.2_ August 11, 2013\n";

        Request request = new Request.Builder().url("https://api.github.com/markdown/raw").post(RequestBody.create(MEDIA_TYPE_MARKDOWN, postBody)).build();

        client.newCall(request).enqueue(new Callback() {
            @Override
            public void onFailure(Call call, IOException e) {
            }

            @Override
            public void onResponse(Call call, Response response) throws IOException {
                if (response.isSuccessful()) {//回调的方法执行在子线程。
                    Log.d("OkHttp", "获取数据成功了");
                    Log.d("OkHttp", "response.code()==" + response.code());
                    Log.d("OkHttp", "response.body().string()==" + response.body().string());
                }
            }
运行结果:

2. POST方式提交流
以流的方式POST提交请求体,请求体的内容由流写入产生,这个例子是流直接写入OKio的BufferedSink. 你的程序可能会使用OutputStream,你可以使用BUfferedSink.outputStream()来获取,OkHttp的低层对流和字节的操作都是基于Okio库,Okio库也是Square开发的另一个IO库,填补I/O和NIO的空缺目的提供简单便于使用的接口来操作I/O
public void getDataAsync() {
OkHttpClient client = new OkHttpClient();
RequestBody requestBody = new RequestBody() { //构建流请求体
@Nullable
@Override
public MediaType contentType() {
return MEDIA_TYPE_MARKDOWN;
}
@Override
public void writeTo(BufferedSink sink) throws IOException {
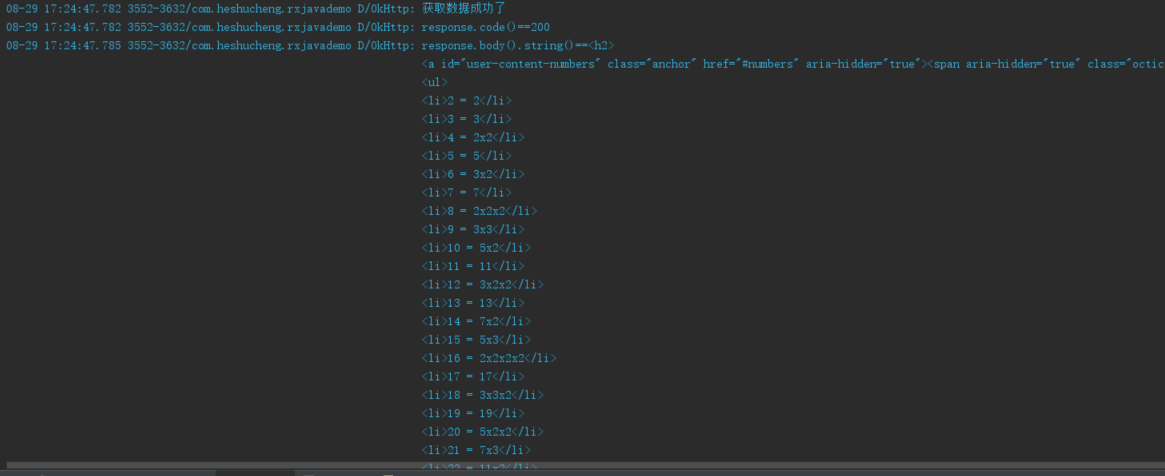
sink.writeUtf8("Numbers\n");
sink.writeUtf8("-------\n");
for (int i = 2; i <= 997; i++) {
sink.writeUtf8(String.format("* %s = %s\n", i, factor(i)));
}
}
private String factor(int n) { //分解因子
for (int i = 2; i < n; i++) {
int x = n / i;
if (x * i == n) {
return factor(x) + "x" + i;
}
}
return Integer.toString(n);
}
};
Request request = new Request.Builder()
.url("https://api.github.com/markdown/raw")
.post(requestBody)
.build();
client.newCall(request).enqueue(new Callback() {
@Override
public void onFailure(Call call, IOException e) {
}
@Override
public void onResponse(Call call, Response response) throws IOException {
if (response.isSuccessful()) {//回调的方法执行在子线程。
Log.d("OkHttp", "获取数据成功了");
Log.d("OkHttp", "response.code()==" + response.code());
Log.d("OkHttp", "response.body().string()==" + response.body().string());
}
}
});
}运行结果:
3.POST方式提交文件
以文件为请求体是比较简单的
 public void getDataAsync() {
        OkHttpClient client = new OkHttpClient();

        //创建文件并写入
        File file =  new File(Environment.getExternalStoragePublicDirectory(Environment.DIRECTORY_PICTURES), "README.md");
        FileOutputStream outStream = null;
        try {
            outStream = new FileOutputStream(file);
            outStream.write("###数据".getBytes());
            outStream.close();
        } catch (Exception e) {
            e.printStackTrace();
        }


        Request request = new Request.Builder()
                .url("https://api.github.com/markdown/raw")
                .post(RequestBody.create(MEDIA_TYPE_MARKDOWN, file))
                .build();

        client.newCall(request).enqueue(new Callback() {
            @Override
            public void onFailure(Call call, IOException e) {
                Log.d("OkHttp", "获取数据失败了");
            }

            @Override
            public void onResponse(Call call, Response response) throws IOException {
                if (response.isSuccessful()) {//回调的方法执行在子线程。
                    Log.d("OkHttp", "获取数据成功了");
                    Log.d("OkHttp", "response.code()==" + response.code());
                    Log.d("OkHttp", "response.body().string()==" + response.body().string());
                }
            }
        });
    }
4.Post方式提交表单
使用FormEncodingBuilder来构建和HTML标签相同效果的请求体. 键值对将使用一种HTML兼容形式的URL编码来进行编码.
public void getDataAsync() {
        OkHttpClient client = new OkHttpClient();

        RequestBody fromBody  = new FormBody.Builder()
                .add("search","Jurassic Park")
                .build();

        Request request = new Request.Builder()
                .url("https://en.wikipedia.org/w/index.php")
                .post(fromBody)
                .build();

        client.newCall(request).enqueue(new Callback() {
            @Override
            public void onFailure(Call call, IOException e) {
                Log.d("OkHttp", "获取数据失败了");
            }

            @Override
            public void onResponse(Call call, Response response) throws IOException {
                if (response.isSuccessful()) {//回调的方法执行在子线程。
                    Log.d("OkHttp", "获取数据成功了");
                    Log.d("OkHttp", "response.code()==" + response.code());
                    Log.d("OkHttp", "response.body().string()==" + response.body().string());
                }
            }
        });
    }
5.Post方式提交分块请求
MultipartBody.Builder可以构建复杂的请求体,与HTML文件上传形式兼容,多块请求体中每块请求都是一个请求体,可以定义自己的请求头,这些请求头可以用来描述这块请求,例如它的Content-Disposition. 如果Content-Length和Content-Type可用的话, 他们会被自动添加到请求头中
 private static final MediaType MEDIA_TYPE_PNG = MediaType.parse("image/png");
    public void getDataAsync() {
        OkHttpClient client = new OkHttpClient();

        RequestBody requestBody  = new MultipartBody.Builder()
                .setType(MultipartBody.FORM)
                .addFormDataPart("title"," Square Logo")
                .addFormDataPart("image","logo-square.png", RequestBody.create(MEDIA_TYPE_PNG, new File("logo.jpg")))
                .build();

        Request request = new Request.Builder()
                .url("https://api.imgur.com/3/image")
                .post(requestBody)
                .build();

        client.newCall(request).enqueue(new Callback() {
            @Override
            public void onFailure(Call call, IOException e) {
                Log.d("OkHttp", "获取数据失败了");
            }

            @Override
            public void onResponse(Call call, Response response) throws IOException {
                if (response.isSuccessful()) {//回调的方法执行在子线程。
                    Log.d("OkHttp", "获取数据成功了");
                    Log.d("OkHttp", "response.code()==" + response.code());
                    Log.d("OkHttp", "response.body().string()==" + response.body().string());
                }
            }
        });
    }
五.缓存响应
OKhttp中关于缓存的详细内容:可以看这一篇博客OKHTTP之缓存配置详解
okHttp中缓存整体上来说主要在两个地方配置,一个是构造OKHttpClient时,还有一个是在构造Request时,一共就这两次,让我们分别来看。
1.在OkHttpClient构造时设置缓存路径
在使用OkHttp时,一般都会讲client的获取封装起来,因为在大多数的情况下,我们需要的OkHttpClien是一样,在封装的时候,就可以设置许多属性,其中就包括cache,配置cache后,OkHttp请求的数据就会缓存到该路径下,当手机没有联网时,就可以直接从缓存中获取
public void getDataAsync() {
        OkHttpClient client = new OkHttpClient.Builder()
                .connectTimeout(5, TimeUnit.SECONDS)
                .cache(new Cache(new File(this.getExternalCacheDir(), "okhttpcache"), 10 * 1024 * 1024))
                .build();

        Request request = new Request.Builder()
                .url("http://publicobject.com/helloworld.txt")
                .build();


        client.newCall(request).enqueue(new Callback() {
            @Override
            public void onFailure(Call call, IOException e) {
                Log.d("OkHttp", "获取数据失败了");
            }

            @Override
            public void onResponse(Call call, Response response) throws IOException {
                if (response.isSuccessful()) {//回调的方法执行在子线程。
                    Log.i(TAG, "testCache: response1 :"+response.body().string());
                    Log.i(TAG, "testCache: response1 cache :"+response.cacheResponse());
                    Log.i(TAG, "testCache: response1 network :"+response.networkResponse());
                }
            }
        });
    }
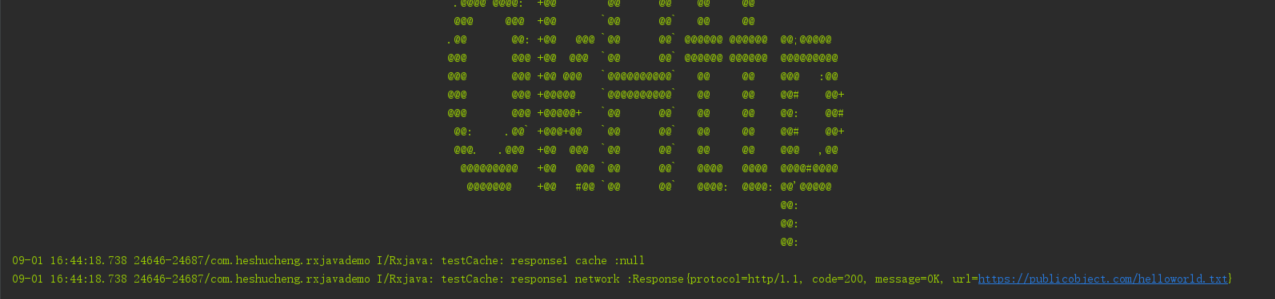
第一次访问的结果:
第二次访问结果
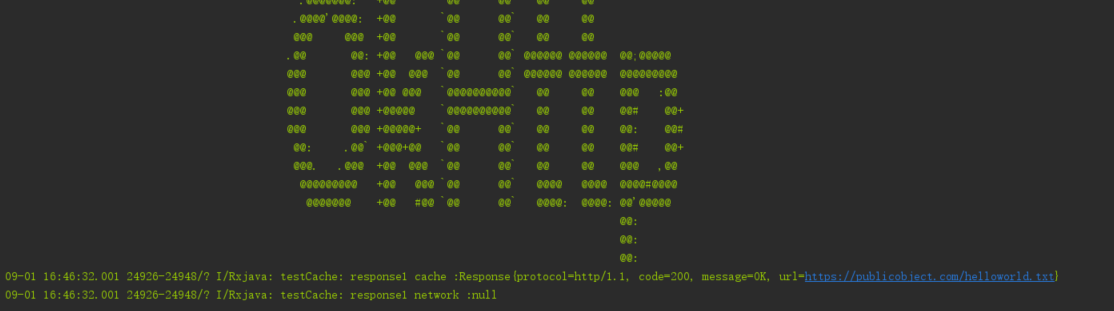
第一次访问的时候,Response的消息是NetworkResponse消息,此时CacheResponse的值为Null.而第二次访问的时候Response是CahceResponse,而此时NetworkResponse为空。也就说明了上面的示例代码能够进行网络请求的缓存。
2.构造Request时配置缓存策略
在构造Request的时候,我们可以配置CacheControl,配置有两种方式,一种是构造CacheControl,还有一种是直接使用CacheControl中的常量,我们来分别看一下:
a. 构造CacheControl
 public void getDataAsync() {
        OkHttpClient client = new OkHttpClient.Builder()
                .build();

        CacheControl cc = new CacheControl.Builder()
                //不使用缓存,但是会保存缓存数据
                //.noCache()
                //不使用缓存,同时也不保存缓存数据
                // .noStore()
                //只使用缓存,(如果我们要加载的数据本身就是本地数据时,可以使用这个,不过目前尚未发现使用场景)
                //.onlyIfCached()
                //手机可以接收响应时间小于当前时间加上10s的响应
                  .minFresh(10,TimeUnit.SECONDS)
                //手机可以接收有效期不大于10s的响应
                  .maxAge(10,TimeUnit.SECONDS)
                //手机可以接收超出5s的响应
                .maxStale(5,TimeUnit.SECONDS)
                .build();

        Request request = new Request.Builder()
                .url("http://publicobject.com/helloworld.txt")
                .cacheControl(cc)
                .build();


        client.newCall(request).enqueue(new Callback() {
            @Override
            public void onFailure(Call call, IOException e) {
                Log.d("OkHttp", "获取数据失败了");
            }

            @Override
            public void onResponse(Call call, Response response) throws IOException {
                if (response.isSuccessful()) {//回调的方法执行在子线程。
                    Log.i(TAG, "testCache: response1 :"+response.body().string());
                    Log.i(TAG, "testCache: response1 cache :"+response.cacheResponse());
                    Log.i(TAG, "testCache: response1 network :"+response.networkResponse());
                }
            }
        });
    }
b.使用CacheControl中的常量
如果直接使用CacheControl中的常量,则不用调用上面那么多的方法,使用方式如下:
 public void getDataAsync() {
        OkHttpClient client = new OkHttpClient.Builder()
                .build();

        Request request = new Request.Builder()
                //强制使用网络
//                .cacheControl(CacheControl.FORCE_NETWORK)
                //强制使用缓存
                .cacheControl(CacheControl.FORCE_CACHE)
                .url("http://publicobject.com/helloworld.txt")
                .build();


        client.newCall(request).enqueue(new Callback() {
            @Override
            public void onFailure(Call call, IOException e) {
                Log.d("OkHttp", "获取数据失败了");
            }

            @Override
            public void onResponse(Call call, Response response) throws IOException {
                if (response.isSuccessful()) {//回调的方法执行在子线程。
                    Log.i(TAG, "testCache: response1 :"+response.body().string());
                    Log.i(TAG, "testCache: response1 cache :"+response.cacheResponse());
                    Log.i(TAG, "testCache: response1 network :"+response.networkResponse());
                }
            }
        });
    }
六.OkHttp的其他用法
1.提取响应头
典型的HTTP头是一个Map
  public void getDataAsync() {
        OkHttpClient client = new OkHttpClient();


        Request request = new Request.Builder()
                .url("https://api.github.com/repos/square/okhttp/issues")
                .header("User-Agent", "OkHttp Headers.java")
                .addHeader("Accept", "application/json; q=0.5").addHeader("Accept", "application/vnd.github.v3+json")
                .build();


        client.newCall(request).enqueue(new Callback() {
            @Override
            public void onFailure(Call call, IOException e) {
                Log.d("OkHttp", "获取数据失败了");
            }

            @Override
            public void onResponse(Call call, Response response) throws IOException {
                if (response.isSuccessful()) {//回调的方法执行在子线程。
                    Log.d("Server:", response.header("Server"));
                    Log.d("ODate", response.header("Date"));
                    Log.d("Vary: " , response.header("Vary"));
                }
            }
        });
    }

2.取消一个Call
使用Call.cancel可以理解停止一个正在执行的call,如果一个线程正在请求或者读响应,引发IOException,当没有必要的时候,这个api可以节约网络资源,例如当用户离开一个应用时,不管是同步还是异步都可以取消
你可以通过tags来同时取消多个请求. 当你构建一请求时, 使用RequestBuilder.tag(tag)来分配一个标签, 之后你就可以用OkHttpClient.cancel(tag)来取消所有带有这个tag的call.
public void getDataAsync()throws Exception  {
        OkHttpClient client = new OkHttpClient();

        Request request = new Request.Builder()
                .url("http://httpbin.org/delay/2")
                .build();

        final long startNanos = System.nanoTime();
        final Call call = client.newCall(request);


        // Schedule a job to cancel the call in 1 second.
        executor.schedule(new Runnable() {
            @Override
            public void run() {
                System.out.printf("%.2f Canceling call.%n", (System.nanoTime() - startNanos) / 1e9f);
                call.cancel();  //取消操作
                System.out.printf("%.2f Canceled call.%n", (System.nanoTime() - startNanos) / 1e9f);
            }
        }, 1, TimeUnit.SECONDS);

        try {
            System.out.printf("%.2f Executing call.%n", (System.nanoTime() - startNanos) / 1e9f);
            Response response = call.execute();
            System.out.printf("call is cancel:" + call.isCanceled() + "%n");
            System.out.printf("%.2f Call was expected to fail, but completed: %s%n",
                    (System.nanoTime() - startNanos) / 1e9f, response);
        } catch (IOException e) {
            System.out.printf("%.2f Call failed as expected: %s%n",
                    (System.nanoTime() - startNanos) / 1e9f, e);
        }
    }
取消成功

3.超时
没有响应时使用超时结束call. 没有响应的原因可能是客户点链接问题、服务器可用性问题或者这之间的其他东西. OkHttp支持连接超时, 读取超时和写入超时.
  public void getDataAsync()throws Exception  {
        OkHttpClient client =  new OkHttpClient.Builder()
                .connectTimeout(10, TimeUnit.SECONDS)
                .writeTimeout(10, TimeUnit.SECONDS)
                .readTimeout(30, TimeUnit.SECONDS)
                .build();

        Request request = new Request.Builder()
                .url("http://httpbin.org/delay/2")
                .build();

        client.newCall(request).enqueue(new Callback() {
            @Override
            public void onFailure(Call call, IOException e) {
            }
            @Override
            public void onResponse(Call call, Response response) throws IOException {
                if(response.isSuccessful()){//回调的方法执行在子线程。
                    Log.d("OkHttp","获取数据成功了");
                    Log.d("OkHttp","response.code()=="+response.code());
                    Log.d("OkHttp","response.body().string()=="+response.body().string());
                }
            }
        });
    }
4.处理验证
这部分和HTTP AUTH有关:
HTTP AUTH是一种基础的用户验证,原理是将用户名:密码base64加密后放在http的请求头部Authorization 发给服务器 .
a.HTTP AUTH
使用HTTP AUTH需要在server端配置http auth信息, 其过程如下:
- 客户端发送http请求
- 服务器发现配置了http auth,于是检查面有没有”Authorization”的http header
- 如果有,则判断Authorization里面的内容是否在用户列表,Authorization header的典型数据为”Authorization: Basic jdhaHY0=”, 其中Basic表示基础认证, jdhaHY0=是base64编码的”user:passwd”字符串. 如果没有,或者用户密码不对,则返回http code 401页面给客户端.
- 标准的http浏览器在收到401页面后,应该弹出一个对话框让用户输入账号密码,并在用户点确认的时候再次发出请求, 这次请求里面将带上Authorization header.
一次典型的访问场景
- 浏览器发送http请求(没有Authorization header)
- 服务器端返回401页面
- 浏览器弹出认证对话框
- 用户输入账户密码,并点确认
- 浏览器再次发出http请求(带着Authorization header)
- 服务器端认证通过,并返回页面
- 浏览器显示页面
b.OkHttp认证
OkHttp会自动重试未验证的请求,当响应的是401 Not Authorized时,Authenticator会被要求提供证书. Authenticator的实现中需要建立一个新的包含证书的请求. 如果没有证书可用, 返回null来跳过尝试.
使用Response.challenges()来获得任何authentication challenges的 schemes 和 realms. 当完成一个Basic challenge, 使用Credentials.basic(username, password)来解码请求头.
 public void getDataAsync() throws Exception {
        OkHttpClient client = new OkHttpClient.Builder().authenticator(new Authenticator() {

            @Override
            public Request authenticate(Route route, Response response) throws IOException {
                Log.d("for response: " ,""+ response);
                Log.d("Challenges: " ,""+  response.challenges());
                String credential = Credentials.basic("jesse", "password1");
                return response.request().newBuilder().header("Authorization", credential).build();
            }
        }).build();


        Request request = new Request.Builder()
                .url("http://publicobject.com/secrets/hellosecret.txt")
                .build();

        client.newCall(request).enqueue(new Callback() {
            @Override
            public void onFailure(Call call, IOException e) {
            }

            @Override
            public void onResponse(Call call, Response response) throws IOException {
                if (response.isSuccessful()) {//回调的方法执行在子线程。
                    Log.d("OkHttp", "获取数据成功了");
                    Log.d("OkHttp", "response.code()==" + response.code());
                    Log.d("OkHttp", "response.body().string()==" + response.body().string());
                }
            }
        });
    }
当认证无法工作时, 为了避免多次重试, 你可以返回空来放弃认证. 例如, 当exact credentials已经尝试过, 你可能会直接想跳过认证, 可以这样做:
 if (credential.equals(response.request().header("Authorization"))) {
     return null; }
当重试次数超过定义的次数, 你若想跳过认证, 可以这样做:
  OkHttpClient client = new OkHttpClient.Builder().authenticator(new Authenticator() {

            @Override
            public Request authenticate(Route route, Response response) throws IOException {
                Log.d("for response: ", "" + response);
                Log.d("Challenges: ", "" + response.challenges());
                String credential = Credentials.basic("jesse", "password1");
                if (responseCount(response) >= 3) {
                    return null;
                }
                return response.request().newBuilder().header("Authorization", credential).build();
            }

            private int responseCount (Response response){
                int result = 1;
                while ((response = response.priorResponse()) != null) {
                    result++;
                }
                return result;
            }
        }).build();