注意:观看本教程需要先设置好JAVA开发环境以及MySQL数据库,如果你还没有该环境,可以参考以下文章
1.Hibernate是什么?
下列是来自百度百科的解释:
- Hibernate (开放源代码的对象关系映射框架)
- Hibernate是一个开放源代码的对象关系映射框架,它对JDBC进行了非常轻量级的对象封装,它将POJO
与数据库表建立映射关系,是一个全自动的orm(对象关系映射)框架,hibernate可以自动生成SQL语句,自动执行,使得Java程序员可以随心所欲的使用对象编程思维来操纵数据库。 - Hibernate可以应用在任何使用JDBC的场合,既可以在Java的客户端程序使用,也可以在Servlet/JSP的
Web应用中使用,最具革命意义的是,Hibernate可以在应用EJB的J2EE架构中取代CMP,完成数据持久化的重任。
当然,对于初学者来说以上概念可能很难理解,不要紧,通俗的将我们可以将之理解为如下:
- 是用来帮我们完成数据库操作的
- Hibernate它是一个轻量级的jdbc封装,也就是说,我们可以使用hibernate来完成原来我们使用jdbc完成操
作,就是与数据库的交互操作(增删查改等)。 - 它是在dao层去使用的。
- 使用 hibernate的好处是:操作数据库的时候,可以以面向对象的方式来完成.不需要书写SQL语句,而是使用配置
文件如xml或者其他一些手段,将对象的信息和数据库中的表进行对应,完成操作 - 可以说Hibernate是完全面向对象操作数据库的
2.Hibernate的组成?
主要由三部分组成:
- 持久化类
- 映射文件:用来描述类与表之间的关系,数据库有多少张表,至少应该有多少个映射文件 xxx.hbm.xml
- 配置文件:完成数据库连接信息的填写,一般只有一个 hibernate.cfg.xml
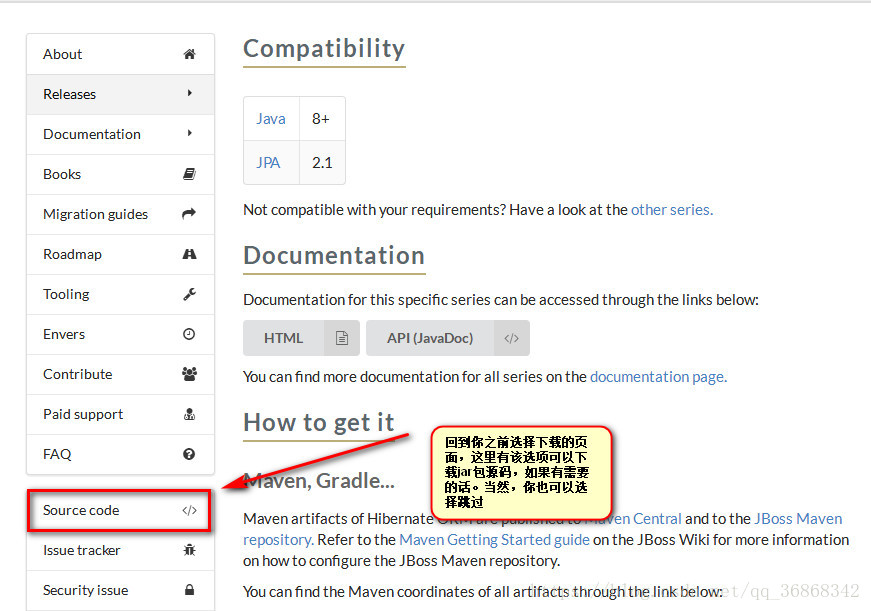
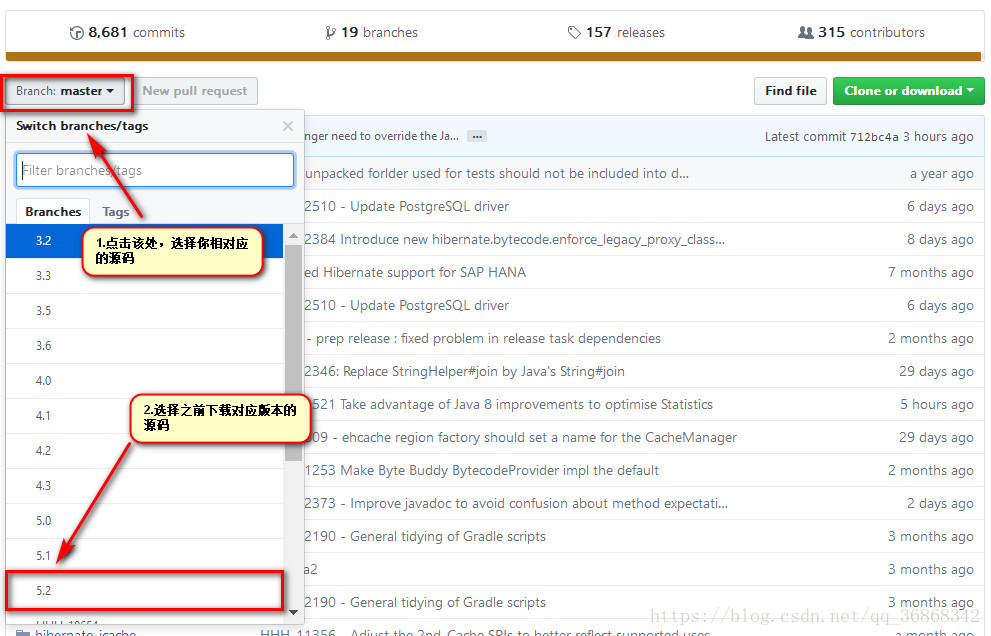
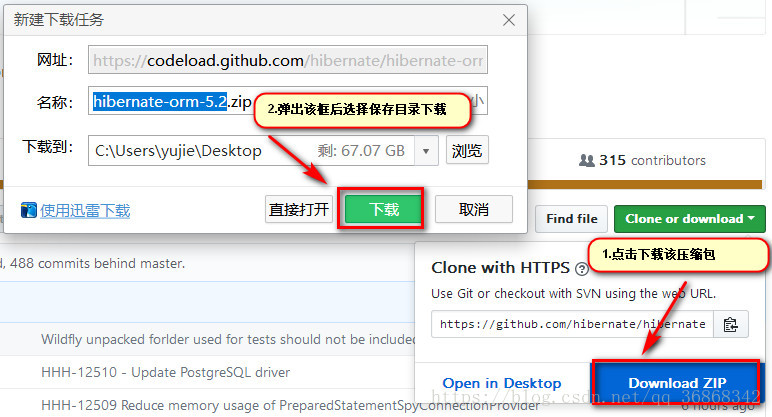
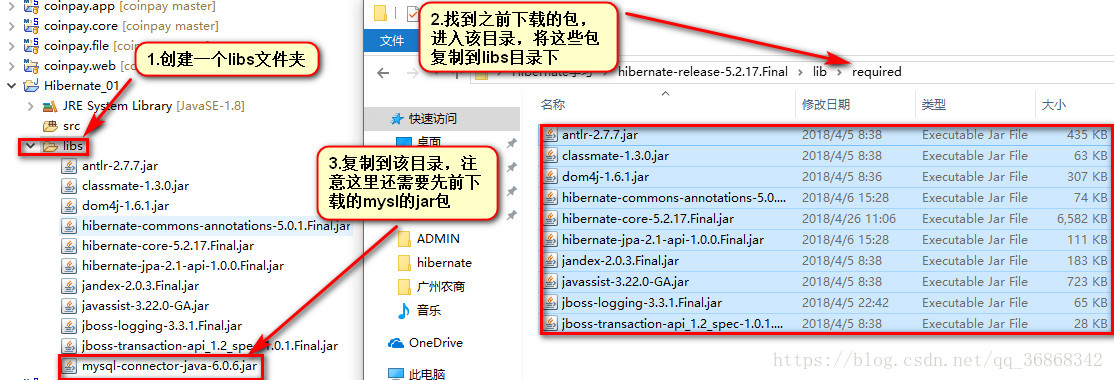
3.Hibernate框架下载

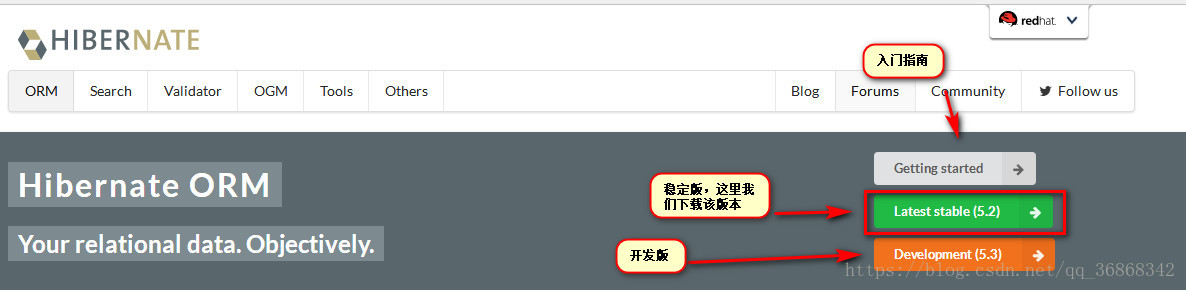
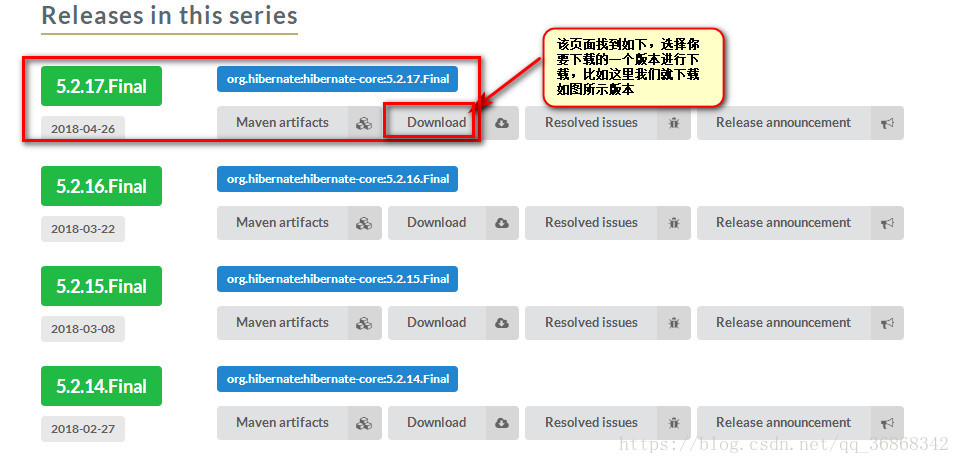
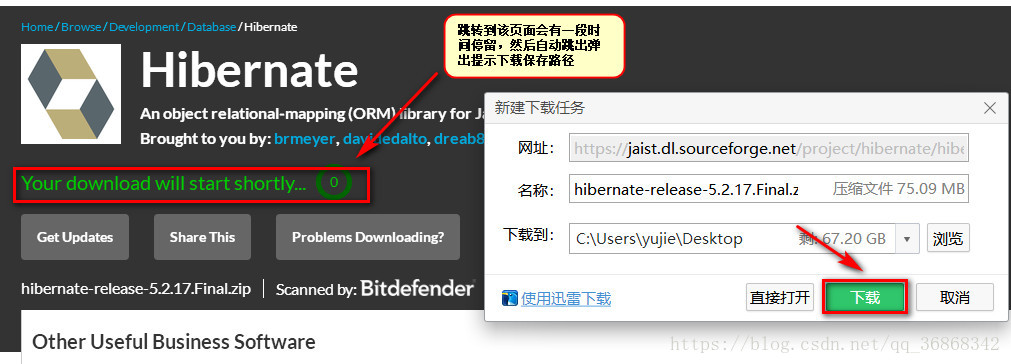
如果官网网络很慢可以点击该链接进行下载(旧版本)
链接:https://pan.baidu.com/s/1zNbyPCw-CyZTj6Tck0VoiQ 密码:hlf7
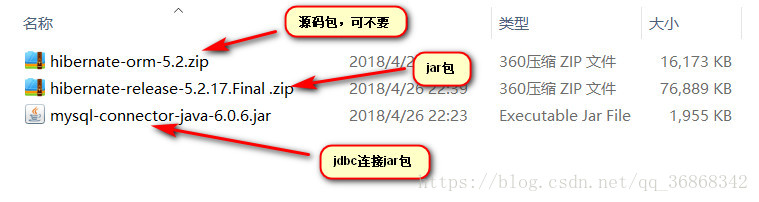
最后使用该框架我们还需要使用mysql的jar包,这里可以去官网下载,也可以点击该链接
链接:https://pan.baidu.com/s/1pSX-FnGr3GIk3BraeXB0_Q 密码:j9we
至此,我们应该下载了以下三个文件:
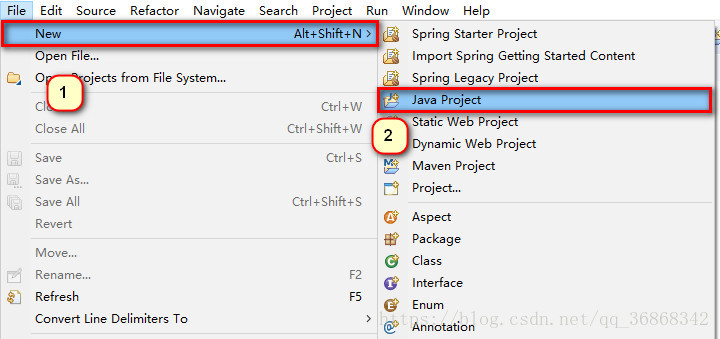
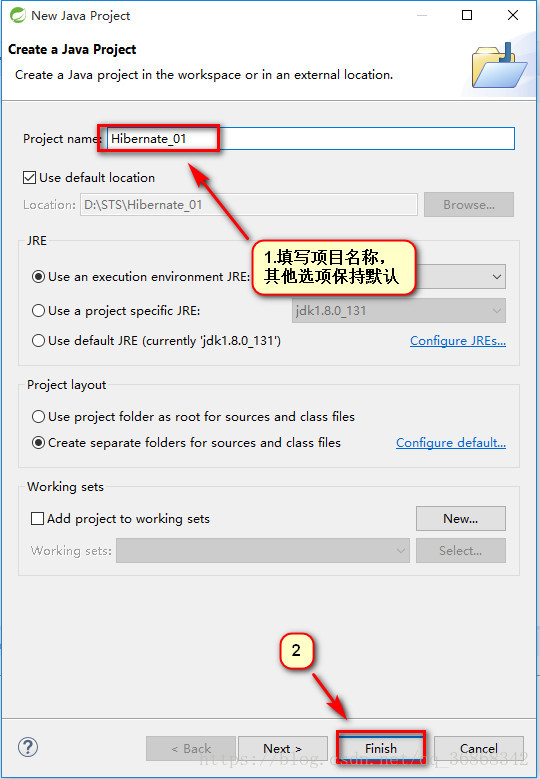
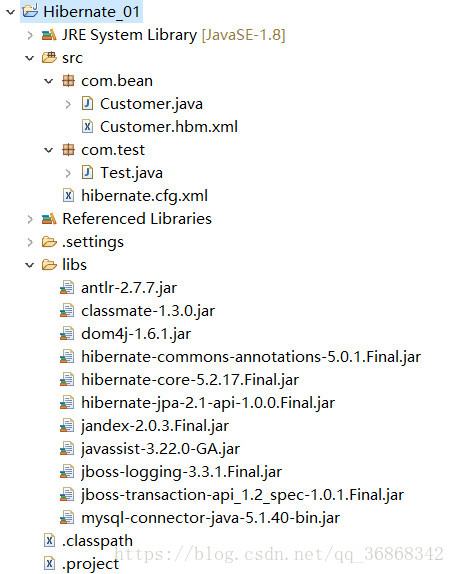
2.Hibernate的环境搭建与简单示例
这里我们先用普通java项目作为案例,具体步骤如下:

接下来我们需要创建一个数据库以及对应的表格,具体如下:

CREATE TABLE `cst_customer` (
  `cust_id` bigint(32) NOT NULL AUTO_INCREMENT COMMENT '客户编号(主键)',
  `cust_name` varchar(32) NOT NULL COMMENT '客户名称(公司名称)',
  `cust_user_id` bigint(32) DEFAULT NULL COMMENT '负责人id',
  `cust_create_id` bigint(32) DEFAULT NULL COMMENT '创建人id',
  `cust_source` varchar(32) DEFAULT NULL COMMENT '客户信息来源',
  `cust_industry` varchar(32) DEFAULT NULL COMMENT '客户所属行业',
  `cust_level` varchar(32) DEFAULT NULL COMMENT '客户级别',
  `cust_linkman` varchar(64) DEFAULT NULL COMMENT '联系人',
  `cust_phone` varchar(64) DEFAULT NULL COMMENT '固定电话',
  `cust_mobile` varchar(16) DEFAULT NULL COMMENT '移动电话',
  PRIMARY KEY (`cust_id`)
) ENGINE=InnoDB AUTO_INCREMENT=1 DEFAULT CHARSET=utf8;
继续回到我们的eclipse,来创建实体类:
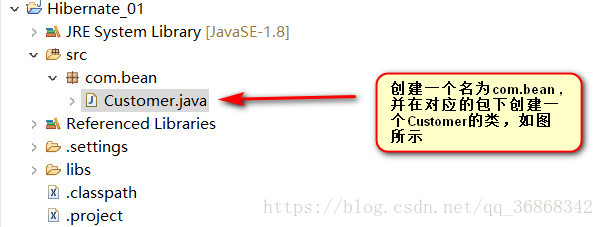
实体类代码如下:
package com.bean;

public class Customer {
    /** 客户编号(主键) */
    private long cust_id;
    /** 客户名称(公司名称) */
    private String cust_name;
    /** 负责人id */
    private long cust_user_id;
    /** 创建人id */
    private long cust_create_id;
    /** 客户信息来源 */
    private String cust_source;
    /** 客户所属行业 */
    private String cust_industry;
    /** 客户级别 */
    private String cust_level;
    /** 联系人 */
    private String cust_linkman;
    /** 固定电话 */
    private String cust_phone;
    /** 移动电话 */
    private String cust_mobile;

    public long getCust_id() {
        return cust_id;
    }

    public void setCust_id(long cust_id) {
        this.cust_id = cust_id;
    }

    public String getCust_name() {
        return cust_name;
    }

    public void setCust_name(String cust_name) {
        this.cust_name = cust_name;
    }

    public long getCust_user_id() {
        return cust_user_id;
    }

    public void setCust_user_id(long cust_user_id) {
        this.cust_user_id = cust_user_id;
    }

    public long getCust_create_id() {
        return cust_create_id;
    }

    public void setCust_create_id(long cust_create_id) {
        this.cust_create_id = cust_create_id;
    }

    public String getCust_source() {
        return cust_source;
    }

    public void setCust_source(String cust_source) {
        this.cust_source = cust_source;
    }

    public String getCust_industry() {
        return cust_industry;
    }

    public void setCust_industry(String cust_industry) {
        this.cust_industry = cust_industry;
    }

    public String getCust_level() {
        return cust_level;
    }

    public void setCust_level(String cust_level) {
        this.cust_level = cust_level;
    }

    public String getCust_linkman() {
        return cust_linkman;
    }

    public void setCust_linkman(String cust_linkman) {
        this.cust_linkman = cust_linkman;
    }

    public String getCust_phone() {
        return cust_phone;
    }

    public void setCust_phone(String cust_phone) {
        this.cust_phone = cust_phone;
    }

    public String getCust_mobile() {
        return cust_mobile;
    }

    public void setCust_mobile(String cust_mobile) {
        this.cust_mobile = cust_mobile;
    }

}
接下来书写orm元数据(对象与表的映射配置文件 - XML格式),其格式为—— 类名.hbm.xml
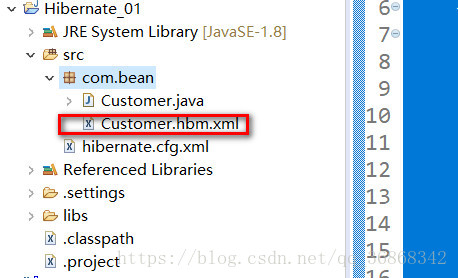
类名.hbm.xml文件内容如下:
<?xml version="1.0" encoding="UTF-8"?>
<!DOCTYPE hibernate-mapping PUBLIC
    "-//Hibernate/Hibernate Mapping DTD 3.0//EN"
    "http://www.hibernate.org/dtd/hibernate-mapping-3.0.dtd">
<hibernate-mapping>
    <class name="com.bean.Customer" table="cst_customer">
        <id name="cust_id" column="cust_id">
            <generator class="native"></generator>
        </id>
        <property name="cust_name"></property>
        <property name="cust_user_id"></property>
        <property name="cust_create_id"></property>
        <property name="cust_source"></property>
        <property name="cust_industry"></property>
        <property name="cust_level"></property>
        <property name="cust_linkman"></property>
        <property name="cust_phone"></property>
        <property name="cust_mobile"></property>
    </class>
</hibernate-mapping>
类名.hbm.xml文件属性解释:
<?xml version="1.0" encoding="UTF-8"?>
<!DOCTYPE hibernate-mapping PUBLIC
    "-//Hibernate/Hibernate Mapping DTD 3.0//EN"
    "http://www.hibernate.org/dtd/hibernate-mapping-3.0.dtd">
<!-- 配置表与实体的关系 -->
<!-- package属性:填写一个包名,在元素内部凡是需要书写完整类名的属性,就可以直接写简单类名 -->
<hibernate-mapping package="">
    <!--
        class元素:配置实体与表的关系
            name:完整类名
            table:数据库表名
     -->
    <class name="" table="">
        <!--
            id元素:配置主键映射的属性
                name:填写主键对应的属性名
                column(可选):填写表中的主键列名,默认值:属性名
                type(可选):填写列(属性)的类型,hibernate会自动检测属性类型
                    每个属性类型有三种写法:java|hibernate|sql|
                not-null(可选):配置该属性是否不能为空,默认值:fasle
                length(可选):配置数据库中列的长度,默认值使用的数据类型的最大长度
         -->
        <id name="" column="">
            <!-- generator:主键生成策略 -->
            <generator class="native"></generator>
        </id>

        <!--
            property:除了id之外的普通属性映射
         -->
        <property name="cust_name"></property>

    </class>

</hibernate-mapping>
接下来书写主配置文件,它是hibernate框架核心配置文件。[核心配置文件],其格式为——hibernate.cfg.xml
类名.hbm.xml文件内容与详解如下:
<?xml version="1.0" encoding="UTF-8"?>
<!DOCTYPE hibernate-configuration PUBLIC
    "-//Hibernate/Hibernate Configuration DTD 3.0//EN"
    "http://www.hibernate.org/dtd/hibernate-configuration-3.0.dtd">
<hibernate-configuration>
    <!--
    书写方式可以参照:hibernate-release-5.0.7.Final\project\etc\hibernate.properties
    -->
    <session-factory>
        <!-- 数据库驱动 -->
        <property name="hibernate.connection.driver_class">com.mysql.jdbc.Driver</property>
        <!-- 数据库url -->
        <property name="hibernate.connection.url">jdbc:mysql:///Hibernate</property>
        <!-- 数据库连接用户名 -->
        <property name="hibernate.connection.username">root</property>
        <!-- 数据库连接密码 -->
        <property name="hibernate.connection.password">183686</property>
        <!-- 数据库方言 -->
        <property name="hibernate.dialect">org.hibernate.dialect.MySQLDialect</property>

        <!-- 把hibernate执行sql语句打印到控制台 -->
        <property name="hibernate.show_sql">true</property>
        <!-- 把生成的sql格式化一下,方便阅读  -->
        <property name="hibernate.format_sql">true</property>


        <!--    自动建表
                #hibernate.hbm2ddl.auto create-drop     自动建表,每次框架运行会先删除之前的表,再建表,。最后会把表也删除
                #hibernate.hbm2ddl.auto create          自动建表,每次框架运行会先删除之前的表。最后数据会保留
                #hibernate.hbm2ddl.auto update          (推荐使用)不会建表,如果已存在才会进行操作,不存在也不会报错
                #hibernate.hbm2ddl.auto validate        验证,如果语法输入错误会报错!
         -->
        <property name="hibernate.hbm2ddl.auto">update</property>

        <!--
            引入ORM元数据配置,即加载映射文件
            路径填写:src目录下路径
         -->
        <mapping resource="com/bean/Customer.hbm.xml"/>
    </session-factory>
</hibernate-configuration>
请将结构改为如下:
书写代码测试:
package com.test;

import org.hibernate.Session;
import org.hibernate.SessionFactory;
import org.hibernate.Transaction;
import org.hibernate.cfg.Configuration;

import com.bean.Customer;

public class Test {
    public static void main(String[] args) {
        // 保存一个数据到数据库
        Configuration conf = new Configuration().configure();
        SessionFactory sessionFactory = conf.buildSessionFactory();
        Session session = sessionFactory.openSession();
        Transaction transaction = session.beginTransaction();
        // -------------------------------------------
        Customer customer = new Customer();
        customer.setCust_name("SanNian");
        session.save(customer);
        // -------------------------------------------
        transaction.commit();
        session.close();
        sessionFactory.close();
    }
}
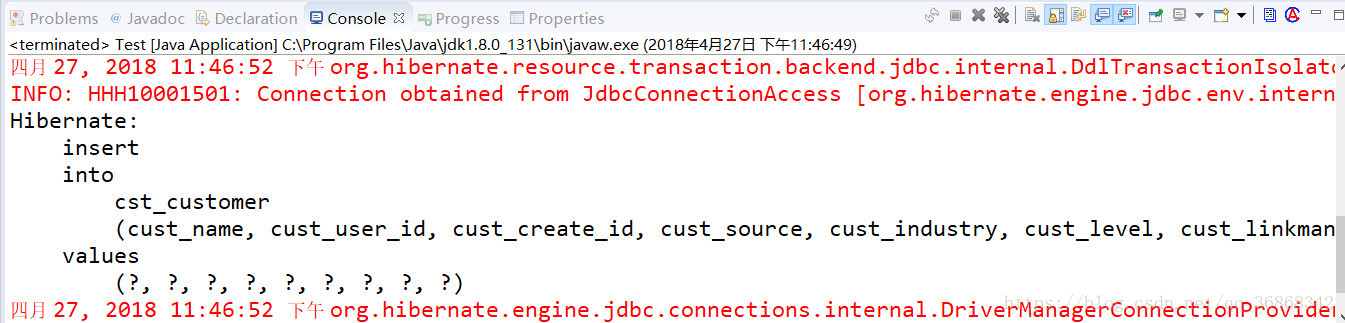
运行结果演示:

接下来继续看一下如何实现增删查改:
    public static void main(String[] args) {
        // 1.创建配置对象
        Configuration conf = new Configuration().configure();
        // 2.session工厂
        SessionFactory sessionFactory = conf.buildSessionFactory();
        // 3.获得session
        Session session = sessionFactory.openSession();

        // 获得事务
        // session.getTransaction();//获得一个事务对象
        Transaction transaction = session.beginTransaction();// 获得并启动一个事务(推荐)

        // --------------------------
        // 1.增加
        Customer customer = new Customer();
        customer.setCust_name("yujie");
        session.save(customer);

        //2.查
        Customer customer1 = session.load(Customer.class, 2l);
        System.out.println(customer1.getCust_name());
        //3.改
        Customer customer2 = session.load(Customer.class, 2l);
        customer2.setCust_name("temp");
        session.update(customer2);
        //4.删
        Customer customer3 = session.load(Customer.class, 2l);
        session.delete(customer3);

        // --------------------------
        transaction.commit(); // 事务提交
//      transaction.rollback(); // 事务回滚
        session.close();
        sessionFactory.close();
    }