一,前言
一早继续更新了,昨天vue-router的各种使用,今天继续
这篇要介绍的是vue-router-导航守卫

导航守卫就是在发生导航变化的各个阶段,一些能让开发者干预导航状态的方法(类似钩子)
有点儿像是vue-router生命周期这么个概念
例如:
    1)在导航刚刚开始变化,但此时页面还未变化时,预先将下个页面的数据拿到
    2)页面先跳转过去,再根据传递的id获取页面数据
    3)当路由组件被移除之前,提示用户,是否真的要离开吗?

vue-router提供了多种路由守卫,下面开始介绍
二,导航守卫介绍
“导航”表示路由正在发生改变。
vue-router提供的导航守卫主要用来通过跳转或取消方式守卫导航
有多种机会植入路由导航过程中:全局的, 单个路由独享的, 或者组件级的

注意:参数或查询的改变并不会触发进入/离开的导航守卫
可以通过观察$route对象的变化,或使用beforeRouteUpdate的组件内守卫
三,全局守卫
全局前置守卫: router.beforeEach

当一个导航触发时,全局前置守卫按照创建顺序调用。
守卫是异步解析执行,此时导航在所有守卫 resolve 完之前一直处于 等待中。
const router = new VueRouter({ ... })

router.beforeEach((to, from, next) => {
  // ...
})
每个守卫方法接收三个参数:
to: Route: 即将要进入的目标 路由对象
from: Route: 当前导航正要离开的路由
next: Function: 需要调用该方法resolve钩子。
      确保调用next方法,否则钩子不会被resolved
next方法不同参数对应的效果:
next():
    进行管道中的下一个钩子。
    如果全部钩子执行完了,则导航的状态就是 confirmed (确认的)。
next(false):
    中断当前的导航
    如果浏览器的URL改变了(可能是用户手动或者浏览器后退按钮),URL地址会重置到from路由对应地址
next('/') 或者 next({ path: '/' }):
    跳转到一个不同的地址。
    当前导航被中断,进行一个新的导航
    可向next传递任意位置对象,且允许设置诸如 replace: true、name: 'home' 等选项
    以及任何用在router-link的to prop或router.push中的选项
next(error): (2.4.0+)
    如果传入next的参数是一个Error实例,导航会被终止且错误被传递给router.onError()注册的回调
四,全局解析守卫
在2.5.0+可用router.beforeResolve注册一个全局守卫。
和router.beforeEach类似,区别是在导航被确认之前,
且在所有组件内守卫和异步路由组件被解析后,解析守卫被调用
五,全局后置钩子
全局后置钩子和守卫的区别是:不会接受next函数,也不会改变导航本身
router.afterEach((to, from) => {
  // ...
})
六,路由独享守卫
可在路由配置上直接定义beforeEnter守卫,
和全局前置守卫方法参数相同
const router = new VueRouter({
  routes: [
    {
      path: '/foo',
      component: Foo,
      beforeEnter: (to, from, next) => {
        // ...
      }
    }
  ]
})
六,组件内守卫
可以在路由组件内直接定义以下路由导航守卫:
beforeRouteEnter
beforeRouteUpdate (2.2 新增)
beforeRouteLeave
const Foo = {
  template: `...`,
  beforeRouteEnter (to, from, next) {
    // 在渲染该组件的对应路由被 confirm 前调用
    // 由于守卫执行前,组件实例未被创建,
    // 所以此时不能获取到组件实例this
  },
  beforeRouteUpdate (to, from, next) {
    // 在当前路由改变,但该组件被复用时调用
    // 例如:含有动态参数的路径 /foo/:id,在 /foo/1 和 /foo/2 跳转时
    // 由于会渲染同样的Foo组件,因此组件实例会被复用,钩子在这个情况下被调用。
    // 此时可以访问组件实例this
  },
  beforeRouteLeave (to, from, next) {
    // 导航离开该组件的对应路由时调用
    // 此时可以访问组件实例this
  }
}
注意:
beforeRouteEnter守卫不能访问this,由于守卫在导航确认前被调用,因此即将出现的新组件尚未被创建
// 可以通过传一个回调给next来访问组件实例,在导航被确认时执行回调,并把组件实例作为回调方法的参数
// beforeRouteEnter是支持给next传递回调的唯一守卫
// 在beforeRouteUpdate和beforeRouteLeave,this已经可用不支持传递回调
beforeRouteEnter (to, from, next) {
  next(vm => {
    // 通过 `vm` 访问组件实例
  })
}
七,导航解析流程
1,导航被触发
2,在失活的组件里调用离开守卫
3,调用全局的beforeEach守卫
4,在重用的组件中调用beforeRouteUpdate守卫 (2.2+)。
5,在路由配置中调用beforeEnter
6,解析异步路由组件
7,在被激活的组件中调用beforeRouteEnter。
8,调用全局的beforeResolve守卫 (2.5+)。
9,导航被确认
10,调用全局的afterEach钩子。
11,触发DOM更新。
12,用创建好的实例调用beforeRouteEnter守卫中传给next的回调函数。
八,导航守卫实例
还是在上一篇的demo基础进行修改,添加各种导航守卫
1,向路由器对象添加全局守卫
main.js入口文件添加全局导航守卫
import Vue from 'vue'
import App from './App'
import router from './router'

//全局前置守卫
router.beforeEach((to, from, next) => {
  console.log("导航守卫-全局守卫-前置");
  next();
})

//全局解析守卫
router.beforeResolve((to, from, next) => {
  console.log("导航守卫-全局解析守卫");
  next();
})

//全局后置守卫
router.afterEach((to, from) => {
  console.log("导航守卫-全局守卫-后置");
})

new Vue({
  el: '#app',
  router,
  components: { App },
  template: '<App/>'
})
2,在路由配置中为指定路由添加路由独享守卫
src/router/index.js中配置首页路由的独享守卫:
import Vue from 'vue'
import VueRouter from 'vue-router'

// 引入路由组件
import Product from '../pages/Product.vue'
import Home from '../pages/Home.vue'
import News from '../pages/News.vue'
import ProductList from '../pages/ProductList.vue'
import ProductDetail from '../pages/ProductDetail.vue'

Vue.use(VueRouter)

export default new VueRouter ({
  routes: [
    {
      path: '/home',
      component: Home,
      // 添加路由独享守卫
      beforeEnter: (to, from, next) => {
        console.log('路有独享守卫 from = ' + from.path);
        console.log('路有独享守卫 to = ' + to.path);
        next();
      }
    },
    {
      path: '/product',
      component: Product,
      children: [
        {
          path: '/product/news',
          component: News
        },
        {
          path: 'productList',
          component: ProductList,
          children: [
            {
              path:'detail/:id',
              component: ProductDetail
            }
          ]
        },
        {
          path: '',
          redirect: '/product/news'
        }
      ]
    },
    {
      path: '/',
      redirect: '/home'
    }
  ]
})
3,向指定组件添加组件内守卫
商品详情:ProductDetail.vue
<template>
  <div>
    <h2>商品详情</h2>
    <div>
      <ul>
        <li>id:{{$route.params.id}}</li>
        <li>书名:{{productDetail.name}}</li>
        <li>作者:{{productDetail.author}}</li>
        <li>售价:{{productDetail.price}}</li>
      </ul>
    </div>
  </div>
</template>

<script>

  var list = [
    {
      id:1,
      name: 'Vue实战',
      author:'梁灏',
      price:'¥79.00'
    },
    {
      id:2,
      name: 'Vue.js权威指南',
      author:'张耀春',
      price:'¥99.00'
    },
    {
      id:3,
      name: 'Vue.js前端开发',
      author:'陈陆扬',
      price:'¥45.00'
    },
    {
      id:4,
      name: 'Vue2实践揭秘',
      author:'梁睿坤',
      price:'¥79.00'
    },
    {
      id:5,
      name: 'Vue移动开发实战技巧',
      author:'李利德',
      price:'¥58.00'
    }
  ]

  export default {
    data: function () {
      return {
        productDetail:{}
      }
    },
    mounted: function () {
      const id = this.$route.params.id*1
      this.productDetail = list.find(detail => detail.id ===id)
    },
    watch:{
      $route: function () {
        const id = this.$route.params.id*1
        this.productDetail = list.find(detail => detail.id===id)
      }
    },
    // 添加组件内路由
    beforeRouteEnter (to, from, next) {
      next(vm => {
        // 通过 `vm` 访问组件实例
        console.log('beforeRouteEnter');
      })
    },
    beforeRouteUpdate (to, from, next) {
      // just use `this`
      var id = to.params.id
      console.log('beforeRouteUpdate id = ' + id);
      next()
    },
    beforeRouteLeave (to, from , next) {
      console.log('beforeRouteLeave to = ' + to.path);
      console.log('beforeRouteLeave from = ' + from.path);
      var id = from.params.id;
      console.log('beforeRouteLeave id = ' + id);
      const answer = window.confirm('确认要离开此页面吗?')
      if (answer) {
        next()
      } else {
        next(false)
      }
    }
  }
</script>

<style>

</style>
总结一下:
首先,添加了3个全局导航守卫:前置,解析,后置,这三个守卫只要导航发生变化就会触发
然后,添加了对/home的独享守卫
最后,添加了对商品详情路由组件的组件内守卫

在组件内守卫的三个导航中
    beforeRouteEnter无法获取this
    beforeRouteUpdate中当导航发生变化是重新获取参数
    beforeRouteLeave当导航即将离开时,弹出提示
运行结果:
1,默认显示首页地址:http://localhost:8080/#/home
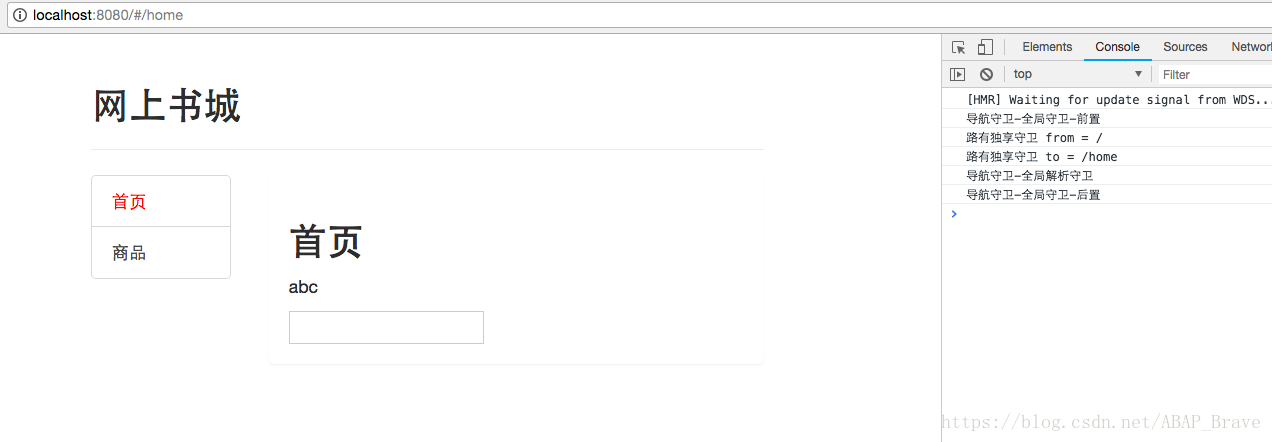
由于对home设置了路由独享守卫,所以首页不仅走了3个全局守卫,还走了路由独有守卫
2,切换到商品页面http://localhost:8080/#/product/news
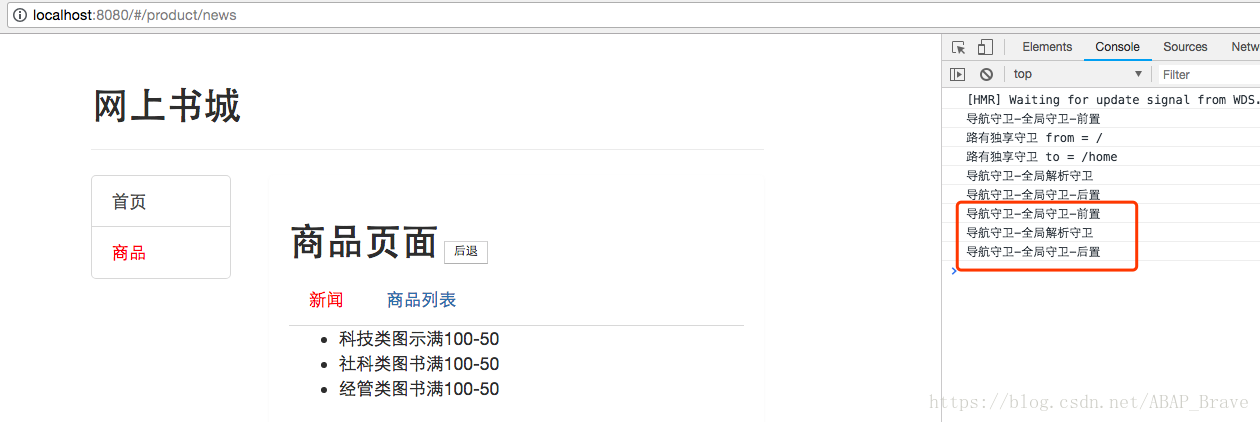
由于未对商品页面设置路由独享守卫,所以只走了三个全局守卫
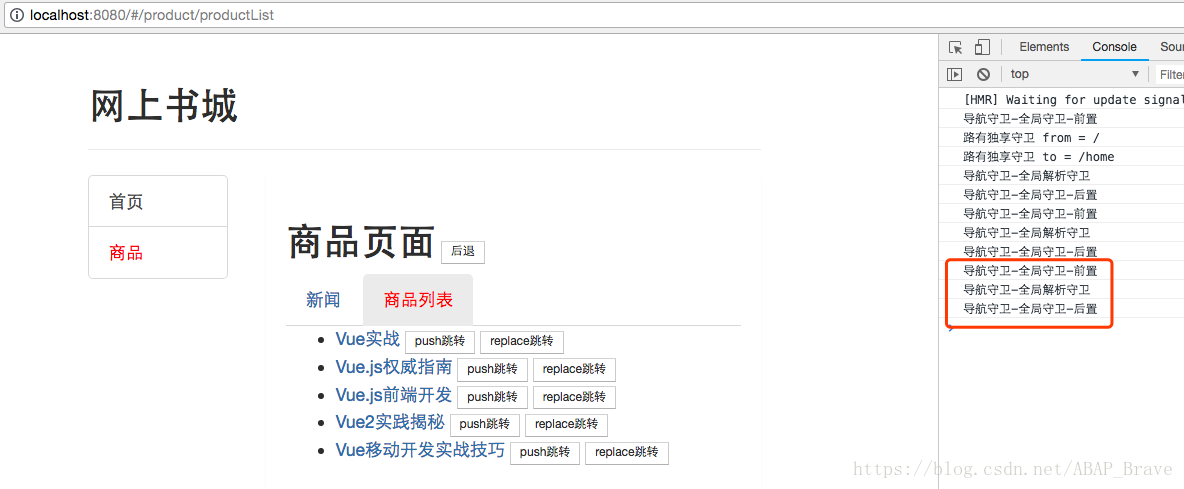
3,进入商品列表Tab:http://localhost:8080/#/product/productList
扫描二维码关注公众号,回复:
2898082 查看本文章

同上,由于未对商品页面设置路由独享守卫,所以只走了三个全局守卫
4,点击一个商品,进入商品详情路由组件http://localhost:8080/#/product/productList/detail/1
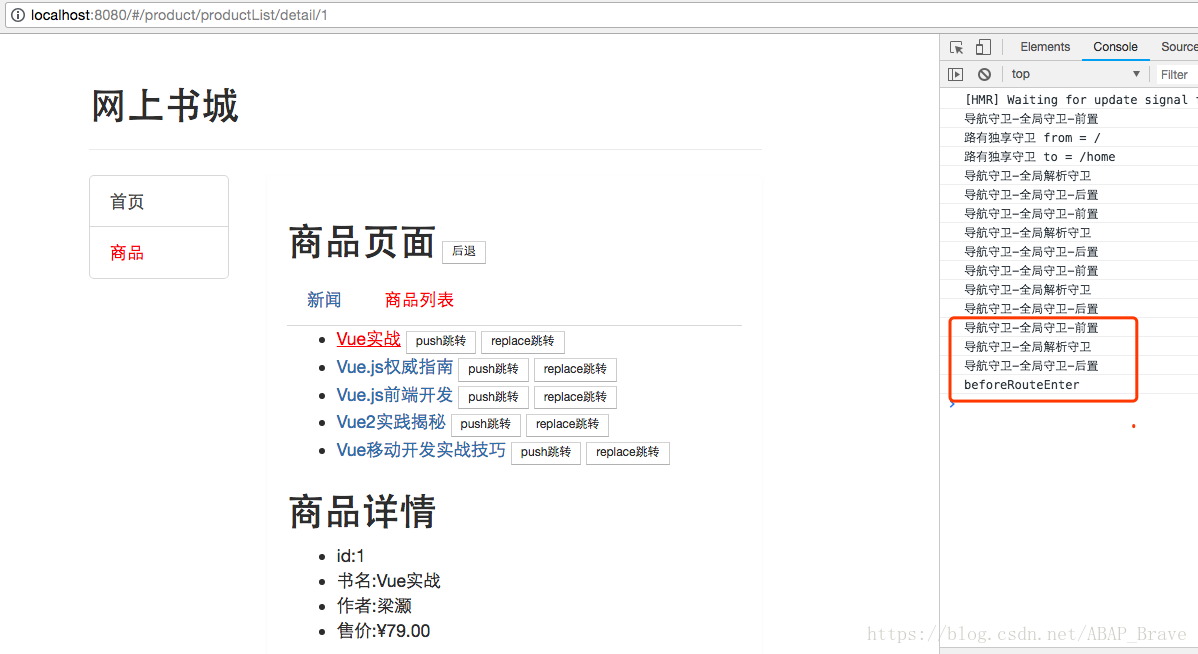
由于为商品详情设置了组件内守卫,所以在3个全局守卫之后,还走了beforeRouteEnter
5,切换商品详情http://localhost:8080/#/product/productList/detail/2
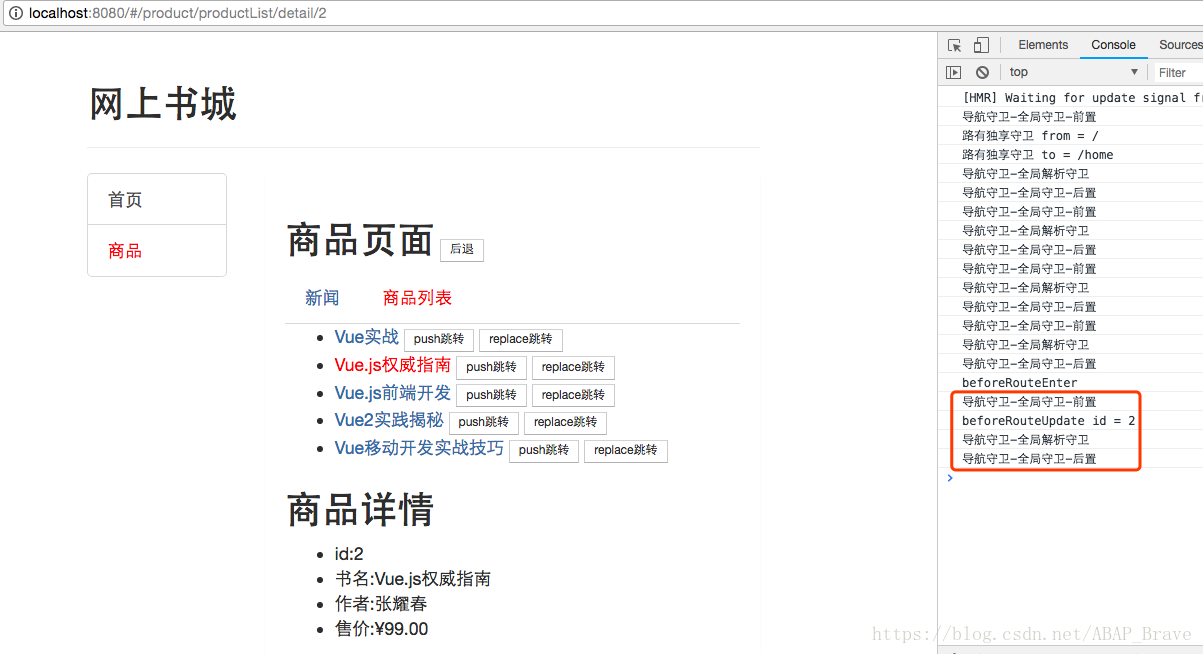
由于切换了商品详情,导致beforeRouteUpdate执行
注意beforeRouteUpdate执行的时机,
是在全局守卫-前置之前,在全局解析守卫和全局守卫-后置之后
6,点击新闻按钮Tab使商品详情移出
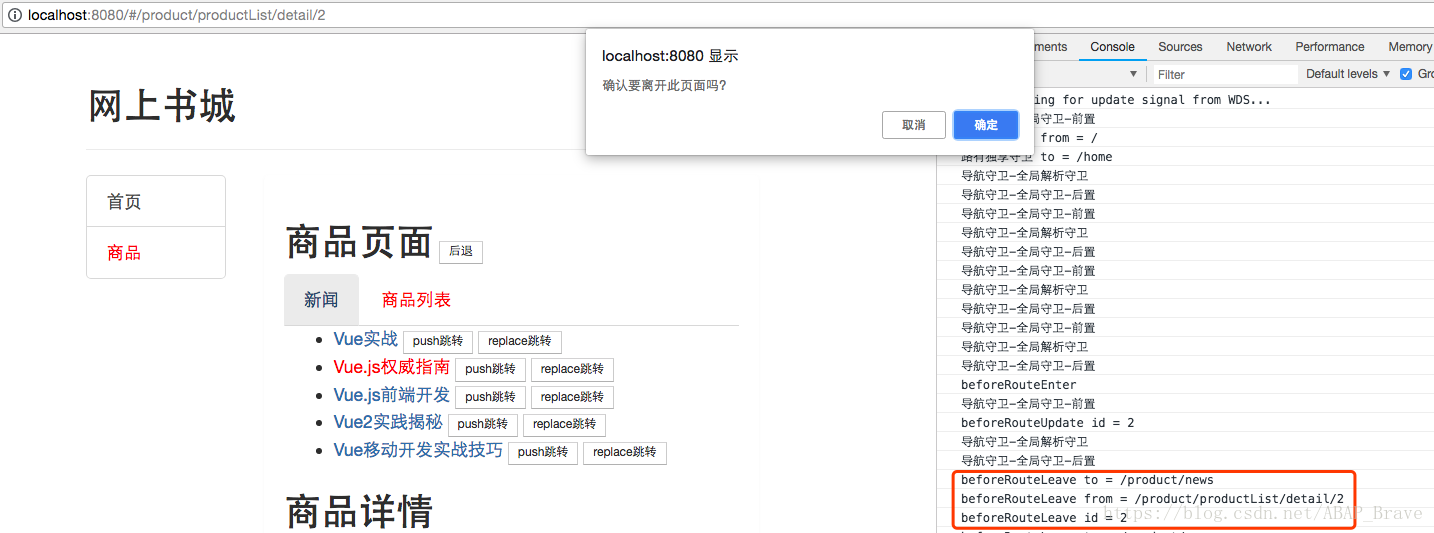
在组件将要被移出时,触发beforeRouteLeave,提示确认提出
最后在回顾一下导航守卫的整个流程:
1,导航被触发
2,在失活的组件里调用离开守卫
3,调用全局的beforeEach守卫
4,在重用的组件中调用beforeRouteUpdate守卫 (2.2+)。
5,在路由配置中调用beforeEnter
6,解析异步路由组件
7,在被激活的组件中调用beforeRouteEnter。
8,调用全局的beforeResolve守卫 (2.5+)。
9,导航被确认
10,调用全局的afterEach钩子。
11,触发DOM更新。
12,用创建好的实例调用beforeRouteEnter守卫中传给next的回调函数。
九结尾
导航守卫在有些时候还是非常有用的
例如:当需要采集用户使用习惯是,可以在导航守卫做一个记录
当切换页面时,需要做一些验证时等等