SSM框架
SSM框架,是spring+springMVC+MyBatis的缩写,这个是继SSH之后,目前比较主流的Java EE企业级框架,适用于搭建各种大型的企业级应用系统。
Spring
Spring是一个轻量级的控制反转(IoC)和面向切面(AOP)的容器框架,就像是整个项目中装配bean的大工厂,在配置文件中可以指定使用特定的参数去调用实体类的构造方法来实例化对象。Spring的核心就是IOC和AOP。
IOC是什么呢?简单理解就是如果不用spring,我们想用一个对象的时候,需要去new,用完了为了防止内存溢出,还的去处理。如果用了spring,我们就不用主动的去控制一个对象的实例化和销毁,我们只需要告诉IOC需要一个对象,然后就可以交给spring来控制了。这就是控制反转。
AOP是什么呢?简单理解就是我们可以将共同的内容抽取出来,不放到主流程里去,需要的时候,告诉spring你要把这段代码放到什么地方,spring就会帮你加过去。就像在上帝视角的高纬度空间,把你需要的步骤像切面般的插入到特定的时空里面。
Spring MVC
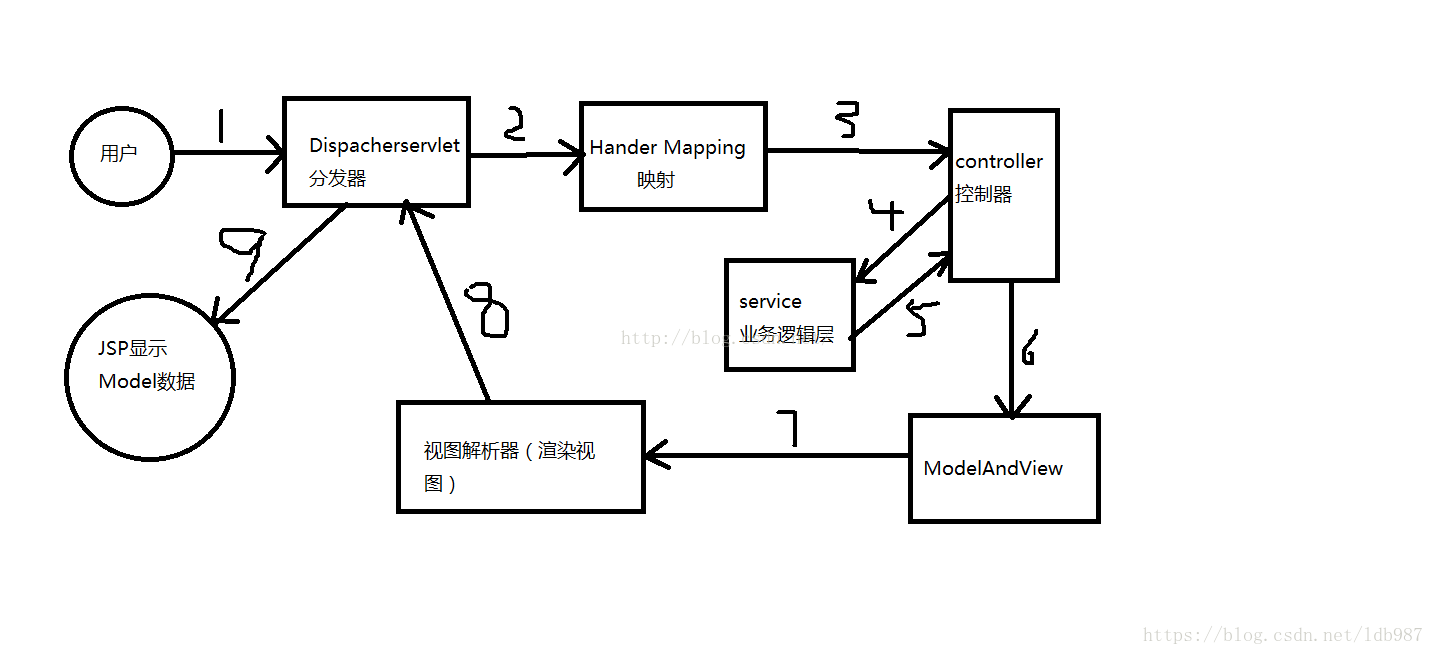
Spring MVC属于Spring Framework的后续产品,他的作用就是在项目中拦截用户请求,它的核心Servlet即DispatcherServlet承担中介或是前台这样的职责,将用户请求通过HandlerMapping去匹配Controller,Controller就是具体对应请求所执行的操作。
MyBatis
MyBatis是一个基于Java的持久层框架。MyBatis消除了几乎所有的JDBC代码和参数的手工设置以及结果集的检索。MyBatis使用简单的XML或注解用于配置和原始映射,将接口和Java的POJOs映射成数据库中的记录。可以这么理解,MyBatis是一个用来帮你管理数据增删改查的框架。
SSM框架整合
刚刚接触SSM,甚是头疼,写此博客,为了进一步的巩固,也为了方便自己日后回顾。
整合思路
一、Dao层
需要的jar包:
1、mybatis的jar包
2、Mysql数据库驱动
3、数据库连接池
4、Mybatis和spring的整合包。
5、Spring的jar包
配置文件:
Mybatis的配置文件:SqlMapConfig.xml,不需要配置任何内容,需要有文件头。文件必须存在。
Spring的配置文件:applicationContext-dao.xml,mybatis整合spring,通过由spring创建数据库连接池,spring管理SqlSessionFactory、mapper代理对象。需要mybatis和spring的整合包。
二、Service层
需要的jar包:spring的jar包。
配置文件:applicationContext-service.xml,配置一个包扫描器,扫描所有带@Service注解的类。
事务配置:配置文件,applicationContext-trans.xml
1、配置一个事务管理器
2、配置tx
3、配置切面
三、表现层
需要的jar包:使用springmvc,需要使用springmvc和spring的jar包。
配置文件:springmvc.xml
1、配置注解驱动
2、配置一个视图解析器。
3、包扫描器,@Controller注解
Web.xml
1、配置springmvc的前端控制器
2、Spring容器初始化的listener。
框架整合Dao层
上面简单分析了一下SSM这三大框架的整合思路,下面我们就来整合Dao层。taotao-manager-web工程中有一个文件夹——src/main/resources,我们应该把Spring和Mybatis的整合文件放到该目录下。
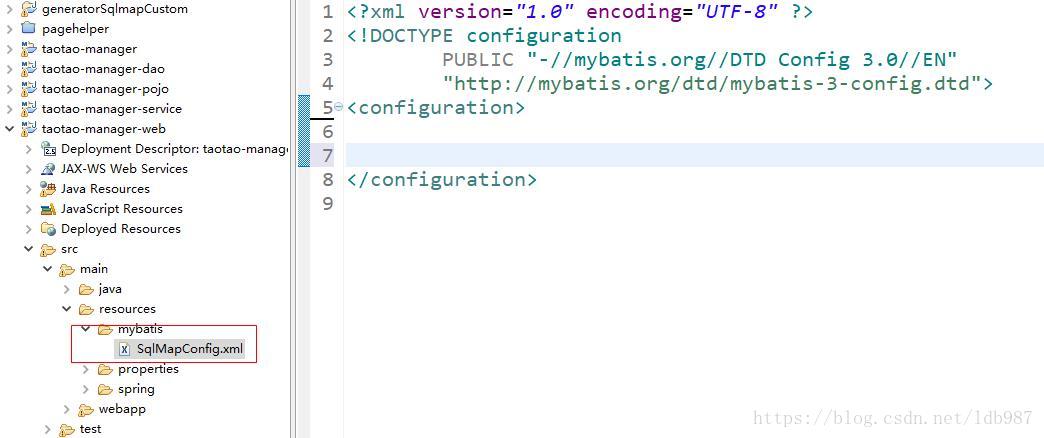
我们在src/main/resource目录下新建一个mybatis文件夹,然后在该文件夹下新建一个Mybatis的配置文件——SqlMapConfig.xml,如下图所示。
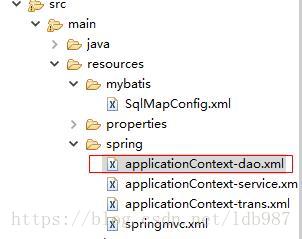
下面我们再在src/main/resources目录下新建一个spring文件夹,然后在该文件夹下新建一个applicationContext-dao.xml文件,如下图所示。
<?xml version="1.0" encoding="UTF-8"?>
<beans xmlns="http://www.springframework.org/schema/beans"
    xmlns:context="http://www.springframework.org/schema/context" xmlns:p="http://www.springframework.org/schema/p"
    xmlns:aop="http://www.springframework.org/schema/aop" xmlns:tx="http://www.springframework.org/schema/tx"
    xmlns:xsi="http://www.w3.org/2001/XMLSchema-instance"
    xsi:schemaLocation="http://www.springframework.org/schema/beans http://www.springframework.org/schema/beans/spring-beans-4.0.xsd
    http://www.springframework.org/schema/context http://www.springframework.org/schema/context/spring-context-4.0.xsd
    http://www.springframework.org/schema/aop http://www.springframework.org/schema/aop/spring-aop-4.0.xsd http://www.springframework.org/schema/tx http://www.springframework.org/schema/tx/spring-tx-4.0.xsd
    http://www.springframework.org/schema/util http://www.springframework.org/schema/util/spring-util-4.0.xsd">

    <!-- 数据库连接池 -->
    <!-- 加载配置文件 -->
    <context:property-placeholder location="classpath:properties/*.properties" />
    <!-- 数据库连接池 -->
    <bean id="dataSource" class="com.alibaba.druid.pool.DruidDataSource"
        destroy-method="close">
        <property name="url" value="${jdbc.url}" />
        <property name="username" value="${jdbc.username}" />
        <property name="password" value="${jdbc.password}" />
        <property name="driverClassName" value="${jdbc.driver}" />
        <property name="maxActive" value="10" />
        <property name="minIdle" value="5" />
    </bean>
    <!-- 让spring管理sqlsessionfactory 使用mybatis和spring整合包中的 -->
    <bean id="sqlSessionFactory" class="org.mybatis.spring.SqlSessionFactoryBean">
        <!-- 数据库连接池 -->
        <property name="dataSource" ref="dataSource" />
        <!-- 加载mybatis的全局配置文件 -->
        <property name="configLocation" value="classpath:mybatis/SqlMapConfig.xml" />
    </bean>
    <bean class="org.mybatis.spring.mapper.MapperScannerConfigurer">
        <property name="basePackage" value="com.taotao.mapper" />
    </bean>
</beans>
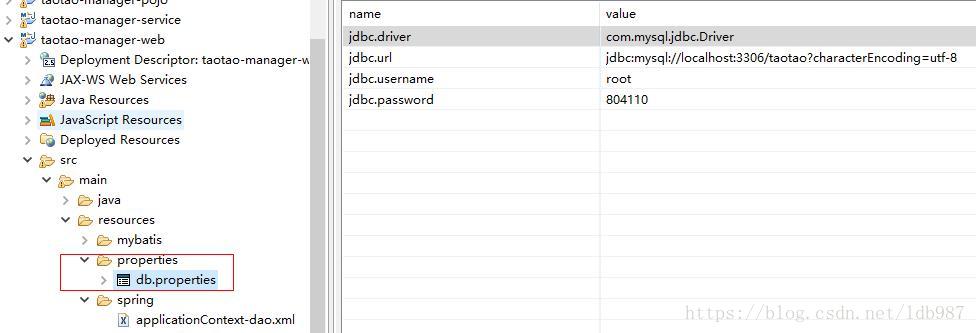
从applicationContext-dao.xml文件当中还可看出数据库的配置直接读取的是配置文件,因此我们需要在classpath(src/main/resource)目录下新建一个properties文件夹,然后在该目录下新建一个db.properties文件,如下图所示。
框架整合Service层
我们需要在taotao-manager-service工程的src/main/resources/spring目录下新建一个applicationContext-service.xml文件和applicationContext-trans.xml事务文件,如下图所示。
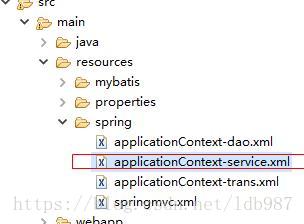
applicationContext-service.xml文件的内容如下所示
<?xml version="1.0" encoding="UTF-8"?>
<beans xmlns="http://www.springframework.org/schema/beans"
    xmlns:context="http://www.springframework.org/schema/context" xmlns:p="http://www.springframework.org/schema/p"
    xmlns:aop="http://www.springframework.org/schema/aop" xmlns:tx="http://www.springframework.org/schema/tx"
    xmlns:xsi="http://www.w3.org/2001/XMLSchema-instance"
    xsi:schemaLocation="http://www.springframework.org/schema/beans http://www.springframework.org/schema/beans/spring-beans-4.0.xsd
    http://www.springframework.org/schema/context http://www.springframework.org/schema/context/spring-context-4.0.xsd
    http://www.springframework.org/schema/aop http://www.springframework.org/schema/aop/spring-aop-4.0.xsd http://www.springframework.org/schema/tx http://www.springframework.org/schema/tx/spring-tx-4.0.xsd
    http://www.springframework.org/schema/util http://www.springframework.org/schema/util/spring-util-4.0.xsd">

    <!-- 包扫描器,扫描带@Service注解的类 -->
    <context:component-scan base-package="com.taotao.service"></context:component-scan>

</beans>
下面我们来配置事务,我们把事务单独提出来进行配置,我们在taotao-manager-service工程的src/main/resources/spring目录下新建一个applicationContext-trans.xml文件,如下所示。
<?xml version="1.0" encoding="UTF-8"?>
<beans xmlns="http://www.springframework.org/schema/beans"
    xmlns:context="http://www.springframework.org/schema/context" xmlns:p="http://www.springframework.org/schema/p"
    xmlns:aop="http://www.springframework.org/schema/aop" xmlns:tx="http://www.springframework.org/schema/tx"
    xmlns:xsi="http://www.w3.org/2001/XMLSchema-instance"
    xsi:schemaLocation="http://www.springframework.org/schema/beans http://www.springframework.org/schema/beans/spring-beans-4.0.xsd
    http://www.springframework.org/schema/context http://www.springframework.org/schema/context/spring-context-4.0.xsd
    http://www.springframework.org/schema/aop http://www.springframework.org/schema/aop/spring-aop-4.0.xsd http://www.springframework.org/schema/tx http://www.springframework.org/schema/tx/spring-tx-4.0.xsd
    http://www.springframework.org/schema/util http://www.springframework.org/schema/util/spring-util-4.0.xsd">
    <!-- 事务管理器 -->
    <bean id="transactionManager"
        class="org.springframework.jdbc.datasource.DataSourceTransactionManager">
        <!-- 数据源 -->
        <property name="dataSource" ref="dataSource" />
    </bean>
    <!-- 通知 -->
    <tx:advice id="txAdvice" transaction-manager="transactionManager">
        <tx:attributes>
            <!-- 传播行为 -->
            <tx:method name="save*" propagation="REQUIRED" />
            <tx:method name="insert*" propagation="REQUIRED" />
            <tx:method name="add*" propagation="REQUIRED" />
            <tx:method name="create*" propagation="REQUIRED" />
            <tx:method name="delete*" propagation="REQUIRED" />
            <tx:method name="update*" propagation="REQUIRED" />
            <tx:method name="find*" propagation="SUPPORTS" read-only="true" />
            <tx:method name="select*" propagation="SUPPORTS" read-only="true" />
            <tx:method name="get*" propagation="SUPPORTS" read-only="true" />
        </tx:attributes>
    </tx:advice>
    <!-- 切面 -->
    <aop:config>
        <aop:advisor advice-ref="txAdvice"
            pointcut="execution(* com.taotao.service.*.*(..))" />
    </aop:config>
</beans>
applicationContext-trans.xml文件的内容如上所示。其中事务的传播行为需要说明一下,当接口名以save、insert、add、create、delete、upate开头时spring会自动帮我们开启事务(前提是我们配置了事务传播行为),而find、select、get开头的接口是查询,不涉及更改数据库,因此不需要事务,spring不会为查询接口自动开启事务。下面再说说切面,也就是事务的作用范围,execution(* com.taotao.service..(..))的意思是,com.taotao.service包下的任意类的任意方法的任意参数及任意返回值都是事务的切入点。
框架整合Dao层
我们在taotao-manager-web工程的src/main/resource目录下新建一个spring文件夹,在该目录下新建一个springmvc.xml文件,如下图所示。
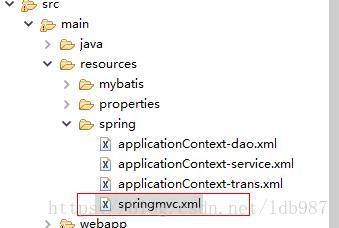
springmvc.xml文件的内容如下:
<?xml version="1.0" encoding="UTF-8"?>
<beans xmlns="http://www.springframework.org/schema/beans"
    xmlns:xsi="http://www.w3.org/2001/XMLSchema-instance" xmlns:p="http://www.springframework.org/schema/p"
    xmlns:context="http://www.springframework.org/schema/context"
    xmlns:mvc="http://www.springframework.org/schema/mvc"
    xsi:schemaLocation="http://www.springframework.org/schema/beans http://www.springframework.org/schema/beans/spring-beans.xsd
        http://www.springframework.org/schema/mvc http://www.springframework.org/schema/mvc/spring-mvc-4.0.xsd
        http://www.springframework.org/schema/context http://www.springframework.org/schema/context/spring-context.xsd">

    <!-- 配置包扫描器 -->
    <context:component-scan base-package="com.taotao.controller"></context:component-scan>
    <!-- 配置注解驱动 -->
    <mvc:annotation-driven/>
    <!-- 视图解析器 -->
    <bean
        class="org.springframework.web.servlet.view.InternalResourceViewResolver">
        <property name="prefix" value="/WEB-INF/jsp/" />
        <property name="suffix" value=".jsp" />
    </bean>
</beans>
下面我们需要在taotao-manager-web工程下的web.xml文件中配置一下编码和前端控制器,web.xml文件的配置内容如下:
<?xml version="1.0" encoding="UTF-8"?>
<web-app xmlns:xsi="http://www.w3.org/2001/XMLSchema-instance"
    xmlns="http://java.sun.com/xml/ns/javaee" xmlns:web="http://java.sun.com/xml/ns/javaee/web-app_2_5.xsd"
    xsi:schemaLocation="http://java.sun.com/xml/ns/javaee http://java.sun.com/xml/ns/javaee/web-app_2_5.xsd"
    id="taotao" version="2.5">
    <display-name>taotao-manager</display-name>
    <welcome-file-list>
        <welcome-file>index.html</welcome-file>
        <welcome-file>index.htm</welcome-file>
        <welcome-file>index.jsp</welcome-file>
        <welcome-file>default.html</welcome-file>
        <welcome-file>default.htm</welcome-file>
        <welcome-file>default.jsp</welcome-file>
    </welcome-file-list>
    <!-- 初始化spring容器 -->
    <context-param>
        <param-name>contextConfigLocation</param-name>
        <param-value>classpath:spring/applicationContext-*.xml</param-value>
    </context-param>
    <listener>
        <listener-class>org.springframework.web.context.ContextLoaderListener</listener-class>
    </listener>

    <!-- 解决post乱码 -->
    <filter>
        <filter-name>CharacterEncodingFilter</filter-name>
        <filter-class>org.springframework.web.filter.CharacterEncodingFilter</filter-class>
        <init-param>
            <param-name>encoding</param-name>
            <param-value>utf-8</param-value>
        </init-param>
    </filter>
    <filter-mapping>
        <filter-name>CharacterEncodingFilter</filter-name>
        <url-pattern>/*</url-pattern>
    </filter-mapping>


    <!-- springmvc的前端控制器 -->
    <servlet>
        <servlet-name>taotao-manager</servlet-name>
        <servlet-class>org.springframework.web.servlet.DispatcherServlet</servlet-class>
        <!-- contextConfigLocation不是必须的, 如果不配置contextConfigLocation, springmvc的配置文件默认在:WEB-INF/servlet的name+"-servlet.xml" -->
        <init-param>
            <param-name>contextConfigLocation</param-name>
            <param-value>classpath:spring/springmvc.xml</param-value>
        </init-param>
        <load-on-startup>1</load-on-startup>
    </servlet>
    <servlet-mapping>
        <servlet-name>taotao-manager</servlet-name>
        <url-pattern>/</url-pattern>
    </servlet-mapping>
</web-app>
到此,SSM框架整合就完成了,暂时的理解还不是很明晰,继续加油!