看了某人的攻略,有个蜘蛛网的view,自己也随便写了一个。
思路:1,绘制N个多边行,2,绘制多边行的连线。3,绘制文字,4,绘制每条线上的点。4,绘制全部点的路径颜色。
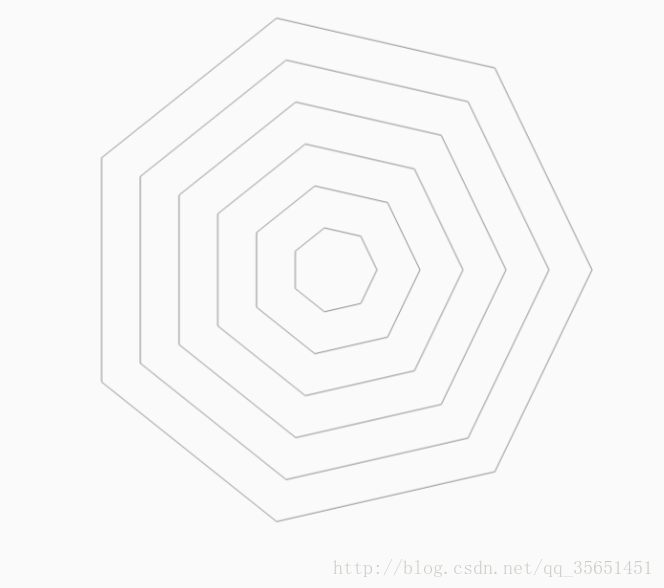
1.绘制N个多边行,要绘制多边行,多边行是从圆里面画出来的,所以我们先得计算出每个圆的半径。
初始化数据:代码如下
 @Override
    protected void onSizeChanged(int w, int h, int oldw, int oldh) {
          radius = Math.min(h, w) / 2 * 0.9f;//最外边贺半径
          centerX = w / 2;
          centerY = h / 2;
          Log.e("RadarView", "radius=" + radius + ",angle=" + angle + ",w=" + w);
          postInvalidate();
          super.onSizeChanged(w, h, oldw, oldh);
    }
Path path = new Path();
float r = radius / (N - 1);//N个多边行,中的一块是多长
for (int i = 1; i < N -; i++) {
float curR = r * i;//比如是第N个只刚好是radius
path.reset();//重围path
for (int j = 0; j < N -; j++) {
if (j == 0) {
path.moveTo(centerX + curR, centerY);
} else {
float x = (float) (centerX + curR * Math.cos(angle * j));
float y = (float) (centerY + curR * Math.sin(angle * j));
Log.e("RadarView", "x=" + x + ",y=" + y);
path.lineTo(x, y);
}
}
path.close();
canvas.drawPath(path, mainPaint);
}通过上面的代码就画出了N个多边行,效果:
接下来就是绘制直线,也简单
 Path path = new Path();
 for (int i = 0; i < count; i++) {
      path.reset();//清空所有已经画过的path至原始状态。
      path.moveTo(centerX, centerY);//将第一个点移动到中心位置
      float x = (float) (centerX + radius * Math.cos(angle * i));
      float y = (float) (centerY + radius * Math.sin(angle * i));
      path.lineTo(x, y);//连接最外部的点
      canvas.drawPath(path, mainPaint);
  }
画完之后的效果:
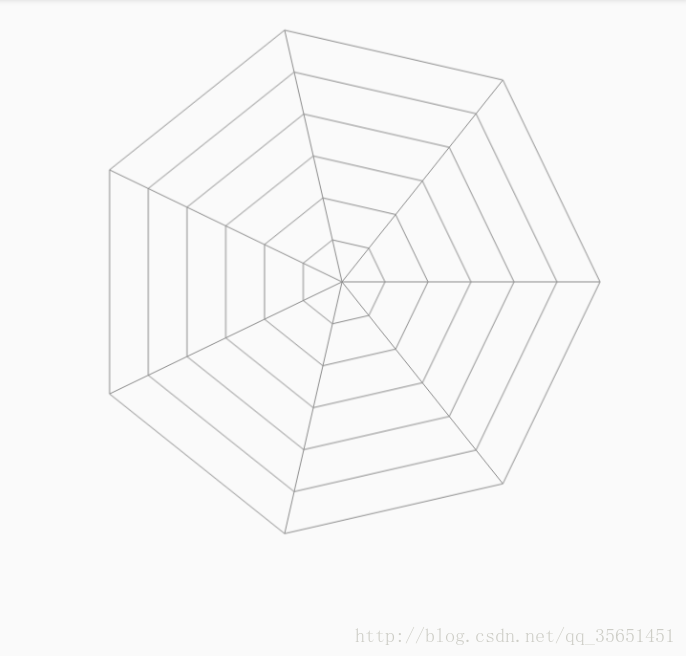
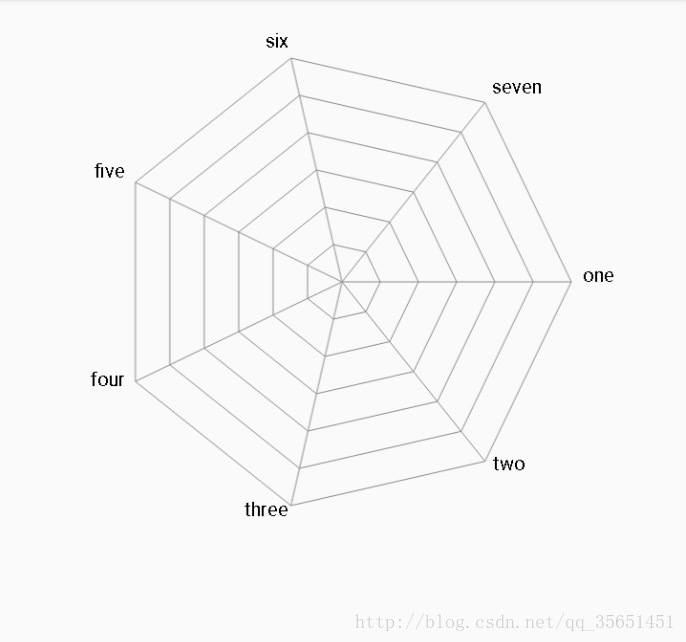
一个网状就绘制完了。接下来可以绘制的就是文字:
文字这里复杂一点。大家看代码 看下就知道
Paint.FontMetrics fontMetrics = textPaint.getFontMetrics();
float fontHeight = fontMetrics.descent - fontMetrics.ascent;
for (int i = 0; i < count; i++) {
    float x = (float) (centerX + (radius + fontHeight / 2) * Math.cos(angle * i));
    float y = (float) (centerY + (radius + fontHeight / 2) * Math.sin(angle * i));
    if (angle * i >= 0 && angle * i <= Math.PI / 2) {//第4象限
        canvas.drawText(titles[i], x, y, textPaint);
    } else if (angle * i >= 3 * Math.PI / 2 && angle * i <= Math.PI * 2) {//第3象限
        canvas.drawText(titles[i], x, y, textPaint);
    } else if (angle * i > Math.PI / 2 && angle * i <= Math.PI) {//第2象限
        float dis = textPaint.measureText(titles[i]);//文本长度
        canvas.drawText(titles[i], x - dis, y, textPaint);
    } else if (angle * i >= Math.PI && angle * i < 3 * Math.PI / 2) {//第1象限
        float dis = textPaint.measureText(titles[i]);//文本长度
        canvas.drawText(titles[i], x - dis, y, textPaint);
    }
}
效果如下:
最后要画的就是区域的路径
Path path = new Path();
Path path1 = new Path();
valuePaint.setAlpha(255);
for (int i = 0; i < count; i++) {
    double percent = data[i] / maxValue;//maxValue数据的最大值
    if (data[i] >= maxValue) {
        percent = 1;//如果是1,则就是最外层的点
    } else if (data[i] <= 0) {
        percent = 0;//如果是o则是最里层的一个点
    }
    float x = (float) (centerX + radius * Math.cos(angle * i) * percent);
    float y = (float) (centerY + radius * Math.sin(angle * i) * percent);
    if (i == 0) {
        path.moveTo(x, centerY);
    } else {
        path.lineTo(x, y);
    }
    //绘制小圆点
    path1.addCircle(x, y, 10, Path.Direction.CW);//画圆。添加一个以x,y为中心 10为半径的一个圆
    canvas.drawCircle(x, y, 10, valuePaint);
}
valuePaint.setStyle(Paint.Style.STROKE);
canvas.drawPath(path, valuePaint);
valuePaint.setAlpha(127);
//绘制填充区域
valuePaint.setStyle(Paint.Style.FILL_AND_STROKE);
canvas.drawPath(path, valuePaint);
效果如下:
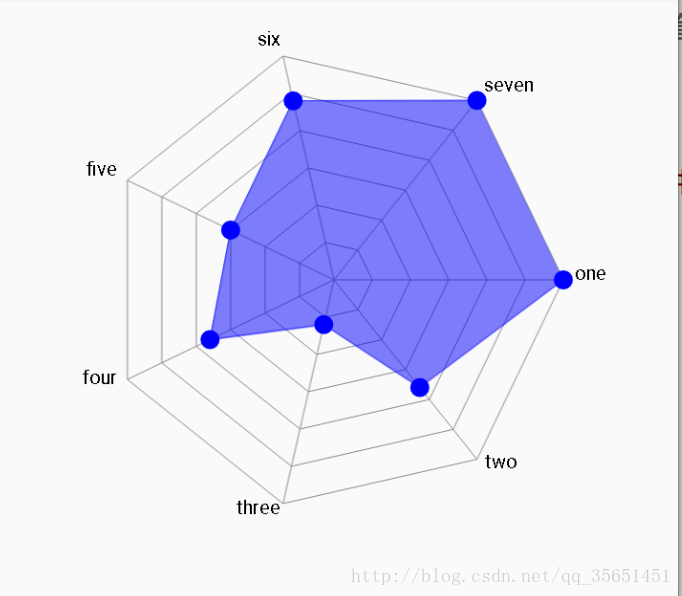
大功告成,这篇文章 只是为了加深自己印象,只作参考;