ssm整合
1)dao层
pojo和映射文件使用逆向工程实现
sqlMapConfig,xml mybatis核心配置文件
ApplicationContext-dao.xml 整合后Spring在dao层的配置
会话工厂
数据源
扫描Mapping
2)service层
事物 application-trans.xml
@Service注解扫描 application-service.xml
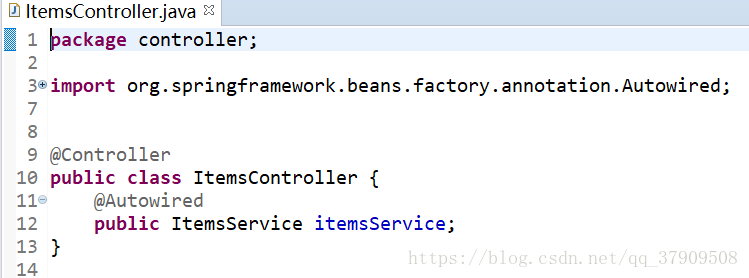
3)controller层
springMvc.xml
注解扫描:自动配置最新的适配器和映射器
注解驱动@Controller
视图解析器
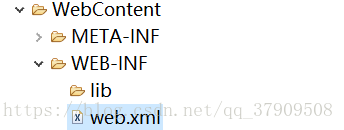
4)web.xml
spring前端控制器配置
监听器
1.创建ssm项目

2.导入jar包:mybatis、mybati-spring、spring、数据库驱动包

3.创建相应的数据库user、items


4.创建需要的package包,通过逆向工程生产需要的映射文件和pojo

修改逆向工程中的generatorConfig.xml文件内,然后执行

将生产的映射文件和mapping复制到ssm整合项目中

5.将之前mybatis-spring整合的配置文件复制过来(db.propreties、log4j.properties、sqlMapconfig.xml),创建applicationContext-dao.xml将application.xml的内容复制过来。
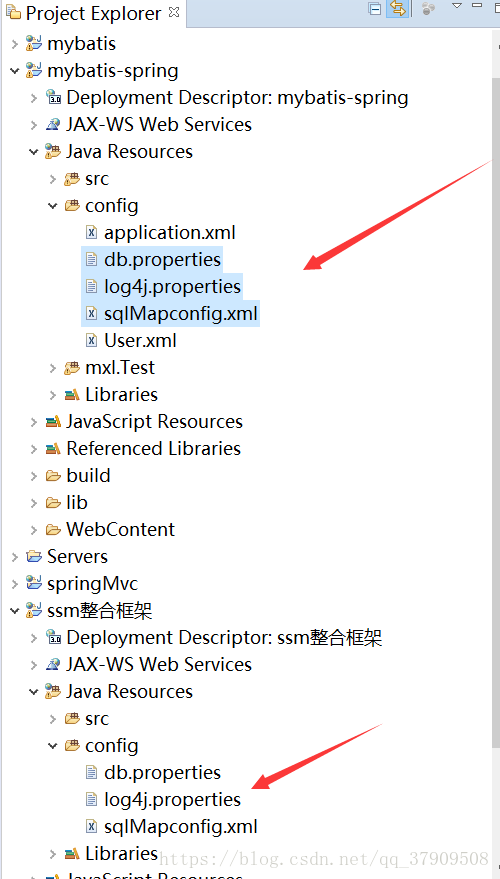

删除sqlMapConfig.xml中的配置

修改applicationContext.xml中位置配置

6、创建applicationContext-service.xml的@service扫描器、applicationcContext-trans.xml


<?xml version="1.0" encoding="UTF-8"?>
<beans xmlns="http://www.springframework.org/schema/beans"
	xmlns:context="http://www.springframework.org/schema/context" xmlns:p="http://www.springframework.org/schema/p"
	xmlns:aop="http://www.springframework.org/schema/aop" xmlns:tx="http://www.springframework.org/schema/tx"
	xmlns:xsi="http://www.w3.org/2001/XMLSchema-instance"
	xsi:schemaLocation="http://www.springframework.org/schema/beans http://www.springframework.org/schema/beans/spring-beans-4.0.xsd
	http://www.springframework.org/schema/context http://www.springframework.org/schema/context/spring-context-4.0.xsd
	http://www.springframework.org/schema/aop http://www.springframework.org/schema/aop/spring-aop-4.0.xsd http://www.springframework.org/schema/tx http://www.springframework.org/schema/tx/spring-tx-4.0.xsd
	http://www.springframework.org/schema/util http://www.springframework.org/schema/util/spring-util-4.0.xsd">
	<!-- 事务管理器 -->
	<bean id="transactionManager"
		class="org.springframework.jdbc.datasource.DataSourceTransactionManager">
		<!-- 数据源 -->
		<property name="dataSource" ref="dataSource"/>
	</bean>
	<!-- 通知 -->
	<tx:advice id="txAdvice" transaction-manager="transactionManager">
		<tx:attributes>
			<!-- 传播行为 -->
			<tx:method name="save*" propagation="REQUIRED"/>
			<tx:method name="insert*" propagation="REQUIRED"/>
			<tx:method name="delete*" propagation="REQUIRED"/>
			<tx:method name="update*" propagation="REQUIRED"/>
			<tx:method name="find*" propagation="SUPPORTS" read-only="true"/>
			<tx:method name="get*" propagation="SUPPORTS" read-only="true"/>
		</tx:attributes>
	</tx:advice>
	<!-- 切面 -->
	<aop:config>
		<aop:advisor advice-ref="txAdvice"
			pointcut="execution(* cn.itcast.springmvc.service.*.*(..))"/>
	</aop:config>
</beans>
7.创建SpringMvc.xml(配置注解扫描、最新的注解驱动、视图解析器)

<?xml version="1.0" encoding="UTF-8"?>
<beans xmlns="http://www.springframework.org/schema/beans"
    xmlns:xsi="http://www.w3.org/2001/XMLSchema-instance" xmlns:aop="http://www.springframework.org/schema/aop"
    xmlns:context="http://www.springframework.org/schema/context"
    xmlns:jpa="http://www.springframework.org/schema/data/jpa" xmlns:mvc="http://www.springframework.org/schema/mvc"
    xmlns:tx="http://www.springframework.org/schema/tx" xmlns:p="http://www.springframework.org/schema/p"
    xmlns:util="http://www.springframework.org/schema/util"
    xsi:schemaLocation="http://www.springframework.org/schema/beans http://www.springframework.org/schema/beans/spring-beans-4.0.xsd
    http://www.springframework.org/schema/aop http://www.springframework.org/schema/aop/spring-aop-4.0.xsd
    http://www.springframework.org/schema/context http://www.springframework.org/schema/context/spring-context-4.0.xsd
    http://www.springframework.org/schema/mvc http://www.springframework.org/schema/mvc/spring-mvc-4.0.xsd
    http://www.springframework.org/schema/tx http://www.springframework.org/schema/tx/spring-tx-4.0.xsd
    http://www.springframework.org/schema/util http://www.springframework.org/schema/util/spring-util-4.0.xsd">
    <!-- 配置注解扫描 -->
    <context:component-scan base-package="controller"></context:component-scan>

    <mvc:annotation-driven></mvc:annotation-driven>
    <bean class="org.springframework.web.servlet.view.DefaultRequestToViewNameTranslator">
      <property name="prefix" value="/WEB-INF/"></property>
      <property name="suffix" value=".jsp"></property>
    </bean>
    </beans>
8.配置web.xml(加载spring容器--监听器、springMvc前端控制器)
<?xml version="1.0" encoding="UTF-8"?>
<web-app xmlns:xsi="http://www.w3.org/2001/XMLSchema-instance" xmlns="http://java.sun.com/xml/ns/javaee" xsi:schemaLocation="http://java.sun.com/xml/ns/javaee http://java.sun.com/xml/ns/javaee/web-app_3_0.xsd" id="WebApp_ID" version="3.0">
  <display-name>springMvc</display-name>
  <welcome-file-list>
    <welcome-file>index.html</welcome-file>
    <welcome-file>index.htm</welcome-file>
    <welcome-file>index.jsp</welcome-file>
    <welcome-file>default.html</welcome-file>
    <welcome-file>default.htm</welcome-file>
    <welcome-file>default.jsp</welcome-file>
  </welcome-file-list>

   <!-- 加载spring容器 -->
	<context-param>
		<param-name>contextConfigLocation</param-name>
		<param-value>classpath:ApplicationContext-*.xml</param-value>
	</context-param>
	<listener>
		<listener-class>org.springframework.web.context.ContextLoaderListener</listener-class>
	</listener>

  <!-- springMvc前端控制器 -->
  <servlet>
     <servlet-name>springMvc</servlet-name>
     <servlet-class>org.springframework.web.servlet.DispatcherServlet</servlet-class>
     <!-- 指定springMvc核心文件配置位置 -->
       <init-param>
         <param-name>contextConfigLocation</param-name>
         <param-value>classpath:springMvc.xml</param-value>
       </init-param>
     <load-on-startup>1</load-on-startup>
  </servlet>
  <servlet-mapping>
    <servlet-name>springMvc</servlet-name>
    <url-pattern>*.action</url-pattern>
  </servlet-mapping>


</web-app>
到这里基本上所有需要的配置文件都在tomcat启动的时候通过web.xml加载进来,接下来我们就写controller来进行所需要的操作控制。
9.创建controller和service


现在基本上的ssm架构已经搭建完毕,接下来准备测试。