目录
1. 默认虚拟主机
2. Nginx 用户认证
3. Nginx 域名重定向
4. Nginx 访问日志
5. Nginx 日志切割
6. 静态文件不记录日志和过期时间
7. Nginx 防盗链
8. Nginx 访问控制
9. Nginx 解析 php 相关配置
10. Nginx 代理
1. 默认虚拟主机
1.1 配置
1.1.1 修改 nginx.conf,去掉 server 块,增加 include 语句
[root@LNMP ~]# vim /usr/local/nginx/conf/nginx.conf
user nobody nobody;
worker_processes 2;
error_log /usr/local/nginx/logs/nginx_error.log crit;
pid /usr/local/nginx/logs/nginx.pid;
worker_rlimit_nofile 51200;

events
{
    use epoll;
    worker_connections 6000;
}

http
{
    include mime.types;
    default_type application/octet-stream;
    server_names_hash_bucket_size 3526;
    server_names_hash_max_size 4096;
    log_format combined_realip '$remote_addr $http_x_forwarded_for [$time_local]'
    ' $host "$request_uri" $status'
    ' "$http_referer" "$http_user_agent"';
    sendfile on;
    tcp_nopush on;
    keepalive_timeout 30;
    client_header_timeout 3m;
    client_body_timeout 3m;
    send_timeout 3m;
    connection_pool_size 256;
    client_header_buffer_size 1k;
    large_client_header_buffers 8 4k;
    request_pool_size 4k;
    output_buffers 4 32k;
    postpone_output 1460;
    client_max_body_size 10m;
    client_body_buffer_size 256k;
    client_body_temp_path /usr/local/nginx/client_body_temp;
    proxy_temp_path /usr/local/nginx/proxy_temp;
    fastcgi_temp_path /usr/local/nginx/fastcgi_temp;
    fastcgi_intercept_errors on;
    tcp_nodelay on;
    gzip on;
    gzip_min_length 1k;
    gzip_buffers 4 8k;
    gzip_comp_level 5;
    gzip_http_version 1.1;
    gzip_types text/plain application/x-javascript text/css text/htm
    application/xml;
    include vhost/*.conf;   # 删掉 server 块后,增加这一句
}
1.1.2 在 conf 目录下生成 vhost 目录,并新建虚拟主机的配置文件
[root@LNMP ~]# mkdir /usr/local/nginx/conf/vhost

[root@LNMP ~]# vim /usr/local/nginx/conf/vhost/default.conf
server
{
    listen 80 default_server;  # 指定监听端口,且指定该虚拟主机为这个监听端口上的默认虚拟主机
    server_name aaa.com;   # 设置主机名
    index index.html index.htm index.php;   # 指定索引页
    root /data/wwwroot/default;    # 指定站点根目录
}
1.1.3 建立对应的目录及索引页
[root@LNMP ~]# mkdir -p /data/wwwroot/default/
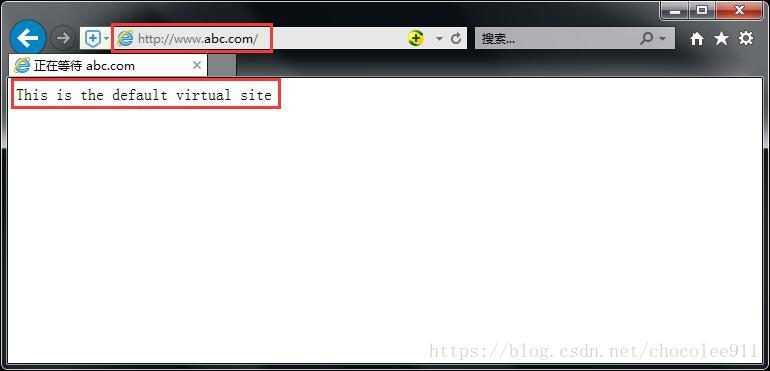
[root@LNMP ~]# echo "This is the default virtual site" > /data/wwwroot/default/index.html1.1.4 语法检查、刷新配置
我已提前将
/usr/local/nginx/sbin加入到PATH变量中,所以可以直接使用nginx命令
[root@LNMP ~]# nginx -t
nginx: the configuration file /usr/local/nginx/conf/nginx.conf syntax is ok
nginx: configuration file /usr/local/nginx/conf/nginx.conf test is successful


[root@LNMP ~]# nginx -s reload
1.2 验证
1.2.1 curl 验证
[root@LNMP ~]# curl localhost
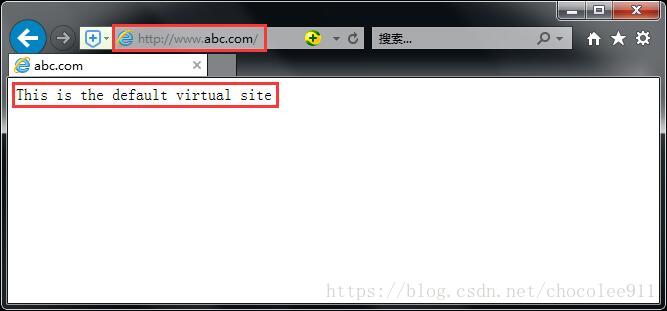
This is the default virtual site
[root@LNMP ~]# curl -x 192.168.1.100:80 asdfgahalsdfj.com
This is the default virtual site
1.2.2 浏览器验证
提前修改 hosts 文件,将测试服务器的IP 与 你希望输入的域名对应上
2. Nginx 用户认证
2.1 配置
2.1.1 修改默认虚拟主机的配置文件 default.conf,在 server 块中增加 location 块
[root@LNMP vhost]# vim default.conf
server
{
listen 80 default_server;
server_name aaa.com;
index index.html index.htm index.php;
root /data/wwwroot/default;
location / # 指定配置应用的目录(相对于站点根目录而言)
{
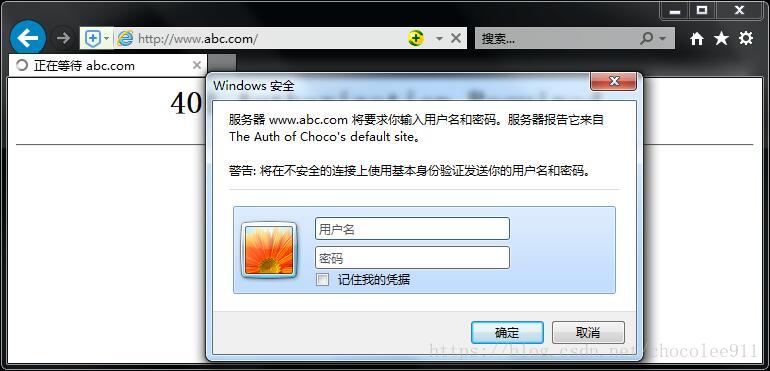
auth_basic "The Auth of Choco's default site"; # 认证的提示信息
auth_basic_user_file /data/.htpasswd; # 认证用的账号/密码文件
}
}2.1.2 在 default.conf 中指定的位置,生成账号/密码文件
可通过使用
htpasswd命令生成,但需提前安装httpd-tools
[root@LNMP ~]# yum -y install httpd-tools

[root@LNMP ~]# !htpasswd -c -m /data/.htpasswd chocolee911
New password:
Re-type new password:
2.1.3 语法检查、刷新配置
[root@LNMP ~]# nginx -t
nginx: the configuration file /usr/local/nginx/conf/nginx.conf syntax is ok
nginx: configuration file /usr/local/nginx/conf/nginx.conf test is successful


[root@LNMP ~]# nginx -s reload
2.2 验证
2.2.1 curl 验证
## 不指定账户,HTTP 报 401
[root@LNMP ~]# curl -x 192.168.1.100:80 www.abc.com -I
HTTP/1.1 401 Unauthorized
Server: nginx/1.12.2
Date: Thu, 05 Jul 2018 04:06:09 GMT
Content-Type: text/html
Content-Length: 195
Connection: keep-alive
WWW-Authenticate: Basic realm="The Auth of Choco's default site"

## 指定账户,并输入密码后,HTTP 报 200
[root@LNMP ~]# curl -x 192.168.1.100:80 www.abc.com -u chocolee911 -I
Enter host password for user 'chocolee911':
HTTP/1.1 200 OK
Server: nginx/1.12.2
Date: Thu, 05 Jul 2018 04:06:33 GMT
Content-Type: text/html
Content-Length: 33
Last-Modified: Thu, 05 Jul 2018 03:45:26 GMT
Connection: keep-alive
ETag: "5b3d9456-21"
Accept-Ranges: bytes

## 你也可以显式地在命令中直接输入密码,也能正常访问
[root@LNMP ~]# curl -x 192.168.1.100:80 www.abc.com -u chocolee911:123123 -I
HTTP/1.1 200 OK
Server: nginx/1.12.2
Date: Thu, 05 Jul 2018 04:07:56 GMT
Content-Type: text/html
Content-Length: 33
Last-Modified: Thu, 05 Jul 2018 03:45:26 GMT
Connection: keep-alive
ETag: "5b3d9456-21"
Accept-Ranges: bytes
2.2.2 浏览器验证
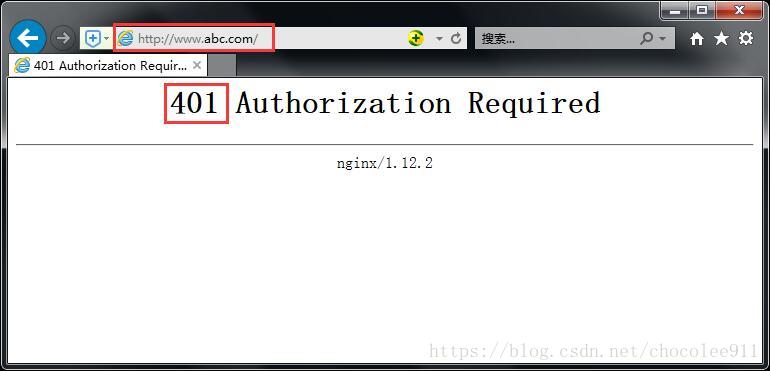
访问站点时会提示输入密码
如果不输入或输错,会报401
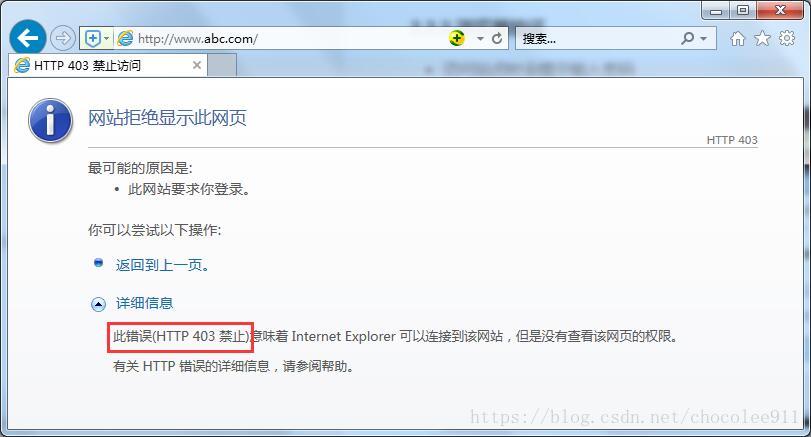
如果服务器端的账户/密码文件未正确建立,不论输入密码正确与否,都会报403
正确输入后可正常访问
3. Nginx 域名重定向
3.1 配置
3.1.1 在 vhost 目录中新建配置文件 test.com.conf
[root@LNMP ~]# vim /usr/local/nginx/conf/vhost/test.com.conf

server
{
        listen 80;
        server_name test.com test1.com test2.com;
        index index.html;
        root /data/wwwroot/test.com;

        if ($host != 'test.com')
        {
                rewrite ^/(.*)$ http://test.com/$1 permanent;
        }
}
3.1.2 建立新的访问目录及文件
[root@LNMP ~]# mkdir -p /data/wwwroot/test.com/1/

[root@LNMP ~]# echo "This file is in the 2nd directory of the root-directoy of site test.com" > /data/wwwroot/test.com/1/test.html
3.1.2 语法检查、刷新配置
[root@LNMP ~]# nginx -t
nginx: the configuration file /usr/local/nginx/conf/nginx.conf syntax is ok
nginx: configuration file /usr/local/nginx/conf/nginx.conf test is successful

[root@LNMP ~]# nginx -s reload
3.2 验证
3.2.1 curl 验证
- 直接用
test.com域名进行访问,报200
[root@LNMP ~]# curl -x 192.168.1.100:80 test.com/1/test.html -I
HTTP/1.1 200 OK
Server: nginx/1.12.2
Date: Thu, 05 Jul 2018 06:33:14 GMT
Content-Type: text/html
Content-Length: 72
Last-Modified: Thu, 05 Jul 2018 06:31:20 GMT
Connection: keep-alive
ETag: "5b3dbb38-48"
Accept-Ranges: bytes- 用
test1.com域名进行访问,能够正确访问到所需的文件,但是报301
[root@LNMP ~]# curl -x 192.168.1.100:80 test1.com/1/test.html -I
HTTP/1.1 301 Moved Permanently
Server: nginx/1.12.2
Date: Thu, 05 Jul 2018 06:33:23 GMT
Content-Type: text/html
Content-Length: 185
Connection: keep-alive
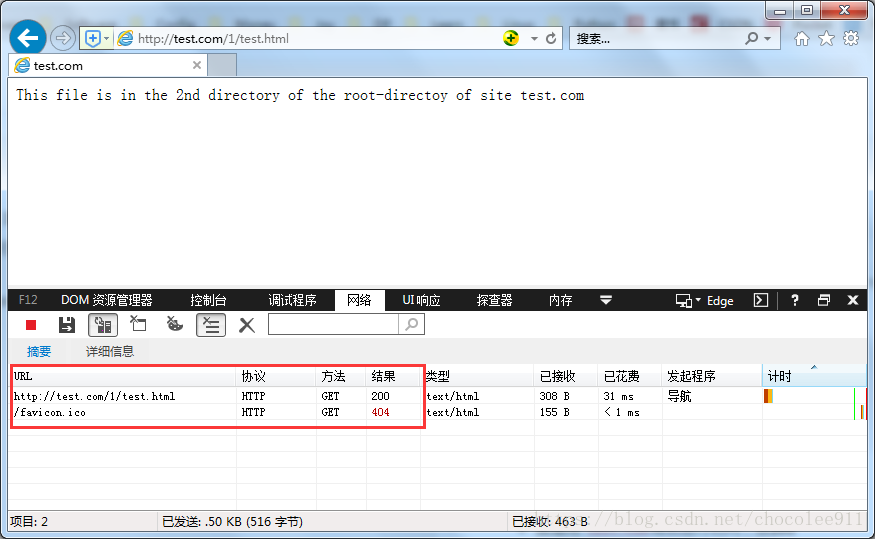
Location: http://test.com/1/test.html3.2.2 浏览器验证(需修改hosts文件)
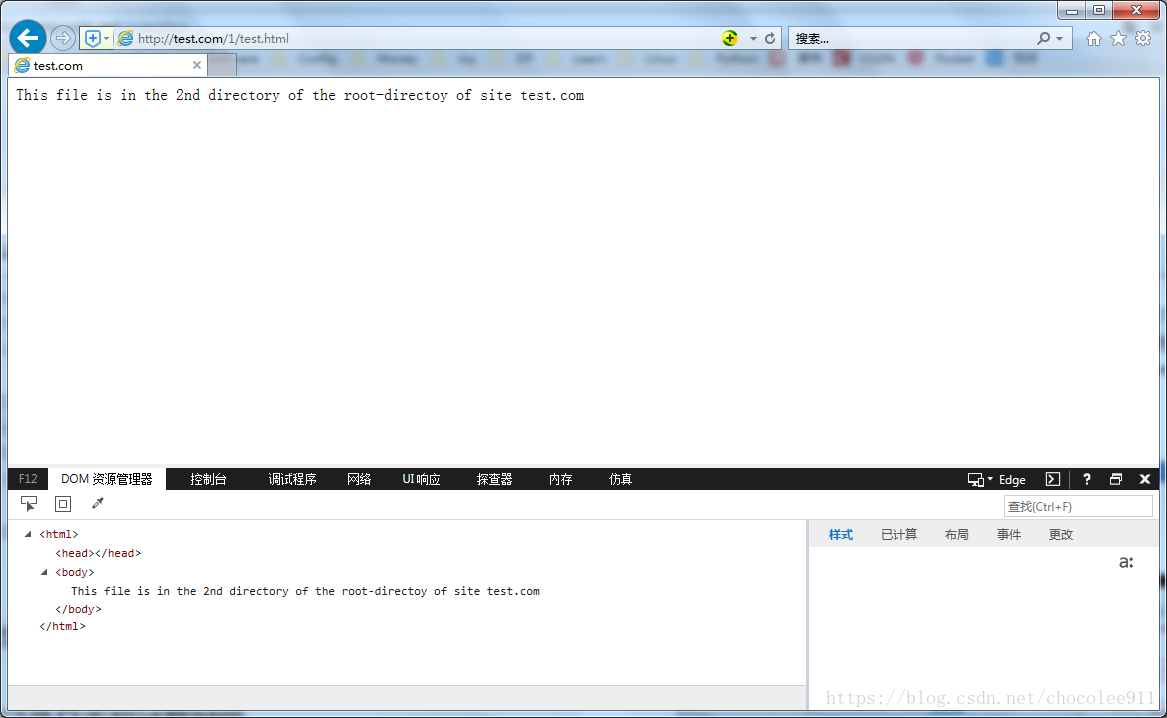
- 直接用
test.com域名进行访问,报200
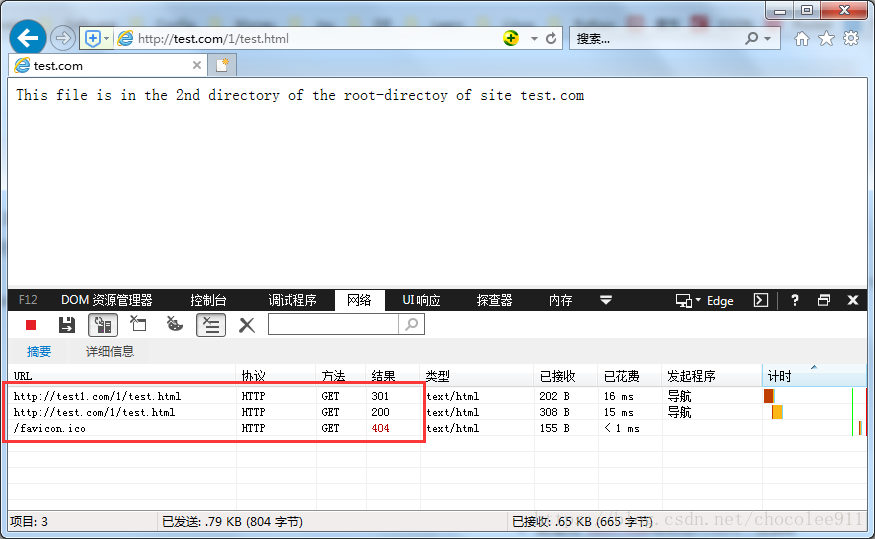
- 用
test1.com域名进行访问,能够正确访问到所需的文件,但是报301
4. Nginx 访问日志
4.1 日志格式
| 变量 | 含义 |
|---|---|
| $remote_addr | 客户端IP(公网IP) |
| $http_x_forwarded_for | 代理服务器的IP |
| $time_local | 服务器本地时间 |
| $host | 访问主机名(域名) |
| $request_uri | 访问的url地址 |
| $status | 状态码 |
| $http_referer | referer |
| $http_user_agent | user_agent |
4.2 配置
4.2.1 查看 nginx.conf 中设置了哪些日志格式
## 可以看到有一种日志格式叫做“combined_realip”
[root@LNMP ~]# grep -A2 "log_format" /usr/local/nginx/conf/nginx.conf
    log_format combined_realip '$remote_addr $http_x_forwarded_for [$time_local]'
    ' $host "$request_uri" $status'
    ' "$http_referer" "$http_user_agent"';
4.2.2 在 vhost 的配置文件中去采用这种日志格式
[root@LNMP ~]# vim /usr/local/nginx/conf/vhost/test.com.conf

server
{
        listen 80;
        server_name test.com test1.com test2.com;
        index index.html;
        root /data/wwwroot/test.com;

        ## 加入下行,指定日志种类、日志位置及文件名、日志格式
        access_log /tmp/nginx_access.log combined_realip;

        if ($host != 'test.com')
        {
                rewrite ^/(.*)$ http://test.com/$1 permanent;
        }
}
4.2.3 语法检查、刷新配置
[root@LNMP ~]# nginx -t
nginx: the configuration file /usr/local/nginx/conf/nginx.conf syntax is ok
nginx: configuration file /usr/local/nginx/conf/nginx.conf test is successful

[root@LNMP ~]# nginx -s reload
4.3 验证
4.3.1 curl 验证
- 使用 curl 进行访问
[root@LNMP ~]# curl -x 192.168.1.100:80 test1.com/1/test.html
<html>
<head><title>301 Moved Permanently</title></head>
<body bgcolor="white">
<center><h1>301 Moved Permanently</h1></center>
<hr><center>nginx/1.12.2</center>
</body>
</html>- 查看日志
[root@LNMP ~]# tail -1 /tmp/nginx_access.log
192.168.1.100 - [05/Jul/2018:15:52:59 +0800] test1.com "/1/test.html" 301 "-" "curl/7.29.0"
4.3.2 浏览器验证
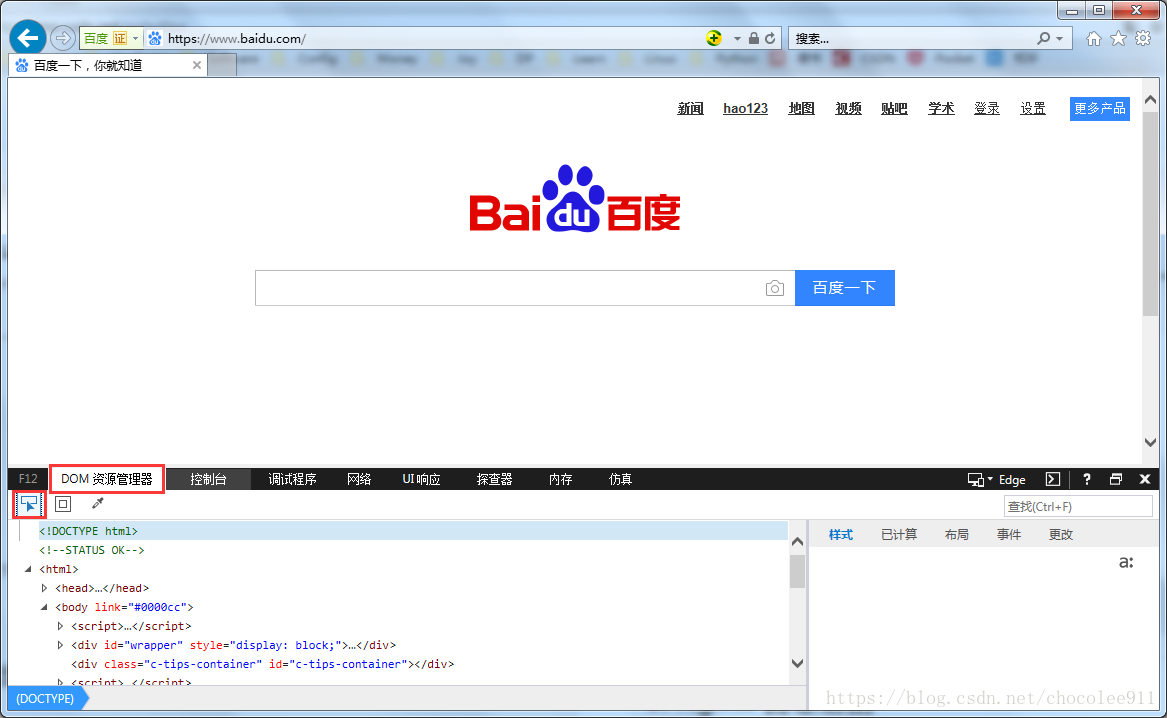
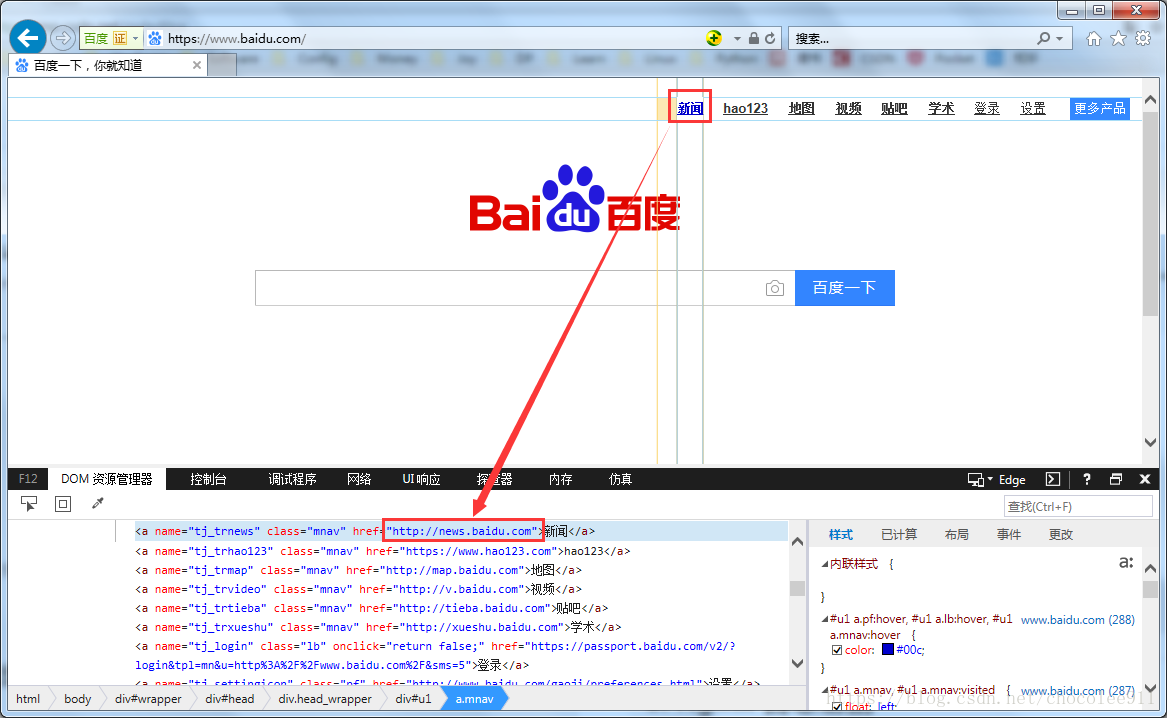
为了能够看到 referer ,我们可以采取修改网页源码的方式
用IE打开百度首页,按【F12】键,选择【DOM资源管理器】,选择【选择元素】(鼠标图案)
点击一个网页上的元素(比如【新闻】),DOM资源管理器将定位到该元素的源码
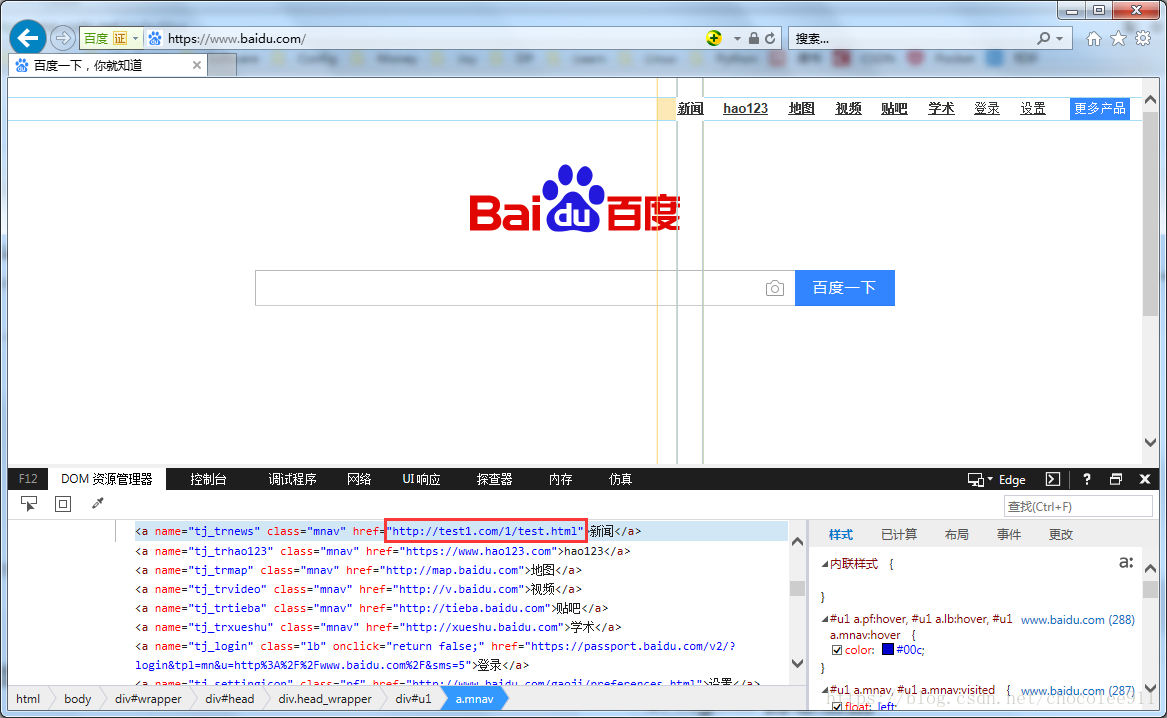
修改该元素源码的 href 为我们测试的域名
鼠标点击已经修改过的元素(【新闻】),此时将跳转到我们的测试域名,且 referer 为百度
查看日志
[root@LNMP ~]# tail -2 /tmp/nginx_access.log
192.168.1.1 - [05/Jul/2018:15:49:40 +0800] test1.com "/1/test.html" 301 "https://www.baidu.com/" "Mozilla/5.0 (Windows NT 6.1; WOW64; Trident/7.0; rv:11.0) like Gecko"
192.168.1.1 - [05/Jul/2018:15:49:40 +0800] test.com "/1/test.html" 200 "https://www.baidu.com/" "Mozilla/5.0 (Windows NT 6.1; WOW64; Trident/7.0; rv:11.0) like Gecko"
5. Nginx 日志切割
默认情况下,日志是存在一个文件内的,该日志文件会不断变大,且会存放所有历史的日志。后期会很难定位日志中某一日期的日志,且较难删除费日志。所以我们需要采取手段,让日志文件按照时间自行拆分成一个一个的小文件
5.1 编辑脚本
[root@LNMP ~]# vim /usr/local/bin/nginx_log_rotate.sh

#! /bin/bash
d=`date -d "-1 day" +%Y%m%d`   #设定日志文件的后缀
logdir="/tmp/"      #指定日志所在目录
nginx_pid="/usr/local/nginx/logs/nginx.pid"  #指定nginx_pid,与nginx.conf中的保持一致
cd $logdir
for log in `ls *.log`
do
mv $log $log-$d  #将以 .log 结尾的文件,重命名为以日期结尾
done
/bin/kill -HUP `cat $nginx_pid`
5.2 设置 cron 任务
[root@LNMP ~]# crontab -e

0 0 * * * /bin/bash /usr/local/sbin/nginx_log_rotate.sh
6. 静态文件不记录日志和过期时间
~每个页面的加载都会访问大量的文件,每个文件的访问都会记录一条日志,这样会使日志量急剧增加。所以需要采取方法,让对某些特定类型的文件的访问不产生日志;
~浏览器浏览网页时,会缓存网站的静态文件,那缓存下来的文件能保留多久,在 Apache 上可以定义
6.1 配置
6.1.1 修改 vhost 配置文件
[root@LNMP ~]# vim /usr/local/nginx/conf/vhost/test.com.conf

server
{
        listen 80;
        server_name test.com test1.com test2.com;
        index index.html;
        root /data/wwwroot/test.com;
        access_log /tmp/nginx_access.log combined_realip;

        if ($host != 'test.com')
        {
                rewrite ^/(.*)$ http://test.com/$1 permanent;
        }


        ## 加入如下两块代码
        location ~ .*\.(gif|jpg|jpeg|png|bmp|swf)$  #匹配以图片后缀结尾的文件
        {
                expires 7d;                         # 设置过期时间
                access_log off;                     # 设置不记录日志
        }

        location ~ .*\.(js|css)$                    # 匹配以 js、css 为后缀的文件
        {
                expires 12h;                        # 设置过期时间
                access_log off;                     # 设置不记录日志
        }
}
6.1.2 语法检查、刷新配置
[root@LNMP ~]# nginx -t
nginx: the configuration file /usr/local/nginx/conf/nginx.conf syntax is ok
nginx: configuration file /usr/local/nginx/conf/nginx.conf test is successful

[root@LNMP ~]# nginx -s reload
6.2 验证
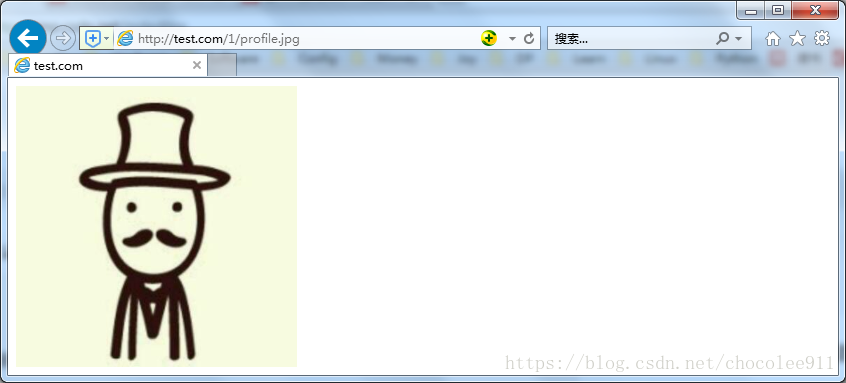
先装个 lrzsz,传个图片到站点
使用浏览器访问 test.html
使用浏览器访问图片
查看日志(不会有访问图片的相关日志)

## 仅有访问 html 文件的日志
[root@LNMP 1]# tail /tmp/nginx_access.log
192.168.1.1 - [05/Jul/2018:16:30:07 +0800] test.com "/1/test.html" 200 "-" "Mozilla/5.0 (Windows NT 6.1; WOW64; Trident/7.0; rv:11.0) like Gecko"
7. Nginx 防盗链
7.1 修改 vhost 配置文件
[root@LNMP ~]# vim /usr/local/nginx/conf/vhost/test.com.conf

        ## 在 server 块中,增加如下 location 子块,同时也做到对图片的 expire 及 不记录日志的设置
        location ~* ^.+\.(gif|jpg|png|swf|flv|rar|zip|doc|pdf|gz|bz2|jpeg|bmp|xls)$
        {
                expires 7d;
                valid_referers none blocked server_names*.test.com;
                if ($invalid_referer)
                {
                        return 403;
                }
                access_logoff;
        }

        ## 注释掉先前配置的对于图片的 expire 及 不记录日志的相关配置
#       location ~ .*\.(gif|jpg|jpeg|png|bmp|swf|ico)$
#       {
#               expires 7d;
#               access_log off;
#       }
7.2 语法检查、刷新配置
[root@LNMP ~]# nginx -t
nginx: the configuration file /usr/local/nginx/conf/nginx.conf syntax is ok
nginx: configuration file /usr/local/nginx/conf/nginx.conf test is successful

[root@LNMP ~]# nginx -s reload
8. Nginx 访问控制
8.1 根据目录进行访问控制
8.1.1修改 vhost 配置文件
[root@LNMP ~]# vim /usr/local/nginx/conf/vhost/test.com.conf

        ## 在 server 块中,增加如下 location 子块
        location /admin/
        {
                allow 192.168.1.100;
                allow 127.0.0.1;
                deny all;
        }
8.1.2 创建测试目录及文件
[root@LNMP ~]# mkdir /data/wwwroot/test.com/admin/
[root@LNMP ~]# echo "test" > /data/wwwroot/test.com/admin/1.html
8.1.3 语法检查、刷新配置
[root@LNMP ~]# nginx -t
nginx: the configuration file /usr/local/nginx/conf/nginx.conf syntax is ok
nginx: configuration file /usr/local/nginx/conf/nginx.conf test is successful

[root@LNMP ~]# nginx -s reload
8.1.4 验证
- 在本机上访问 admin 目录
[root@LNMP ~]# ip add | grep 1.100
    inet 192.168.1.100/24 brd 192.168.1.255 scope global noprefixroute ens33
[root@LNMP ~]# curl -x 192.168.1.100:80 test.com/admin/1.html
test- 在另一台 IP 为 192.168.1.3 的主机上访问 admin 目录
[root@VMware01 ~]# ip add | grep 192
    inet 192.168.1.3/24 brd 192.168.1.255 scope global noprefixroute ens33
## 访问其他目录,返回200
[root@VMware01 ~]# curl -x 192.168.1.100:80 test.com/index.html -I
HTTP/1.1 200 OK
Server: nginx/1.12.2
Date: Fri, 06 Jul 2018 03:04:18 GMT
Content-Type: text/html
Content-Length: 77
Last-Modified: Thu, 05 Jul 2018 06:13:14 GMT
Connection: keep-alive
ETag: "5b3db6fa-4d"
Accept-Ranges: bytes

## 访问 admin 目录,返回 403
[root@VMware01 ~]# curl -x 192.168.1.100:80 test.com/admin/1.html -I
HTTP/1.1 403 Forbidden
Server: nginx/1.12.2
Date: Fri, 06 Jul 2018 03:04:21 GMT
Content-Type: text/html
Content-Length: 169
Connection: keep-alive
8.2 根据正则进行访问控制
8.2.1 修改 vhost 配置文件
[root@LNMP ~]# vim /usr/local/nginx/conf/vhost/test.com.conf


        ## 在 server 块中,增加如下 location 子块
        location ~ .*(abc|image)/.*\.html$  # 匹配  ***abc/****.html 文件
        {
            deny all;   # 拒绝所有人访问
        }
8.2.2 创建测试目录及文件
[root@LNMP ~]# mkdir /data/wwwroot/test.com/abc/


[root@LNMP ~]# vim /data/wwwroot/test.com/abc/aaa.html

This is aaa.html which is in the abc directory
8.2.3 语法检查、刷新配置
[root@LNMP ~]# nginx -t
nginx: the configuration file /usr/local/nginx/conf/nginx.conf syntax is ok
nginx: configuration file /usr/local/nginx/conf/nginx.conf test is successful

[root@LNMP ~]# nginx -s reload
8.2.4 验证
## 访问其他目录的文件
[root@LNMP ~]# curl -x 192.168.1.100:80 test.com/index.html -I
HTTP/1.1 200 OK
Server: nginx/1.12.2
Date: Fri, 06 Jul 2018 03:13:40 GMT
Content-Type: text/html
Content-Length: 77
Last-Modified: Thu, 05 Jul 2018 06:13:14 GMT
Connection: keep-alive
ETag: "5b3db6fa-4d"
Accept-Ranges: bytes

## 访问 abc 目录下的文件
[root@LNMP ~]# curl -x 192.168.1.100:80 test.com/abc/aaa.html -I
HTTP/1.1 403 Forbidden
Server: nginx/1.12.2
Date: Fri, 06 Jul 2018 03:13:47 GMT
Content-Type: text/html
Content-Length: 169
Connection: keep-alive
8.3 对 user_agent 进行访问控制
8.3.1 修改 vhost 配置文件
[root@LNMP ~]# vim /usr/local/nginx/conf/vhost/test.com.conf

        ## 在 server 块中,增加以下 if 语句
        if ($http_user_agent ~ 'Spider/3.0|YoudaoBot|chocolee')
        {
                return 403;
        }
8.3.2 语法检查、刷新配置
[root@LNMP ~]# nginx -t
nginx: the configuration file /usr/local/nginx/conf/nginx.conf syntax is ok
nginx: configuration file /usr/local/nginx/conf/nginx.conf test is successful

[root@LNMP ~]# nginx -s reload
8.3.3 验证
- 使用 chocolee 作为 user_agnet 进行访问,返回 403
[root@LNMP ~]# curl -A "chocolee" -x 192.168.1.100:80 test.com -I
HTTP/1.1 403 Forbidden
Server: nginx/1.12.2
Date: Fri, 06 Jul 2018 05:43:32 GMT
Content-Type: text/html
Content-Length: 169
Connection: keep-alive- 将 chocolee 去掉一个 e 再试一次,返回 200
[root@LNMP ~]# curl -A "chocole" -x 192.168.1.100:80 test.com -I
HTTP/1.1 200 OK
Server: nginx/1.12.2
Date: Fri, 06 Jul 2018 05:43:38 GMT
Content-Type: text/html; charset=UTF-8
Connection: keep-alive
X-Powered-By: PHP/5.6.30
9. Nginx 开启 php 解析
9.1 测试
9.1.1 在 vhost 站点下放置 php 测试文件
[root@LNMP ~]# vim /data/wwwroot/test.com/index.php

<?php
phpinfo();
?>
9.1.2 curl 访问测试(直接显示源码)
[root@LNMP ~]# curl -x 192.168.1.100:80 test.com/index.php
<?php
phpinfo();
?>
9.1.3 浏览器访问测试(直接要求下载文件)
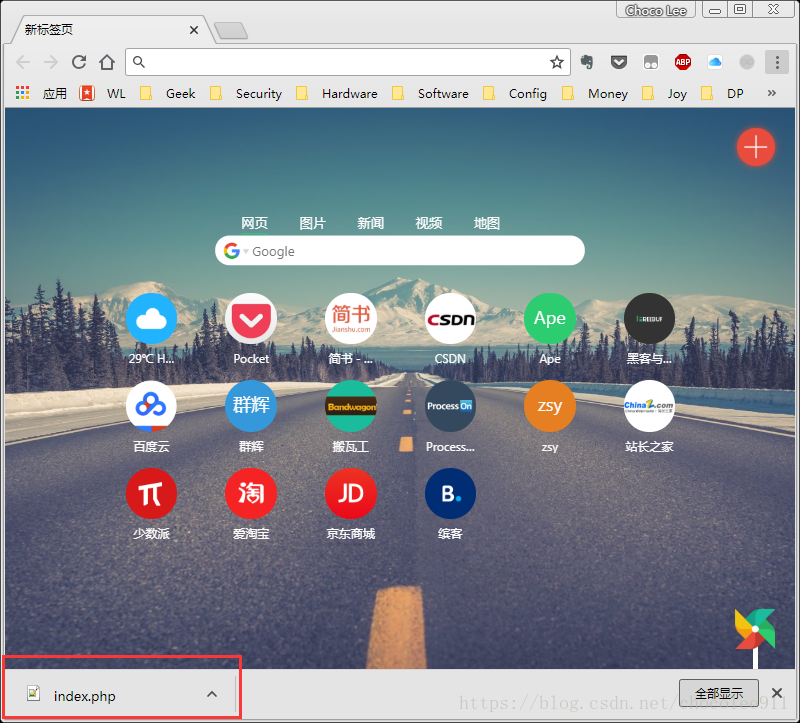
9.2 配置
9.2.1 编辑 vhost 配置文件
[root@LNMP ~]# vim /usr/local/nginx/conf/vhost/test.com.conf

        ## 在 server 块中,加入以下 location 代码子块
        location ~ \.php$
        {
                include fastcgi_params;
                fastcgi_pass unix:/tmp/php-fcgi.sock;
                fastcgi_index index.php;
                fastcgi_param SCRIPT_FILENAME /data/wwwroot/test.com$fastcgi_script_name;
        }
9.2.2 语法检查、刷新配置
[root@LNMP ~]# nginx -t
nginx: the configuration file /usr/local/nginx/conf/nginx.conf syntax is ok
nginx: configuration file /usr/local/nginx/conf/nginx.conf test is successful
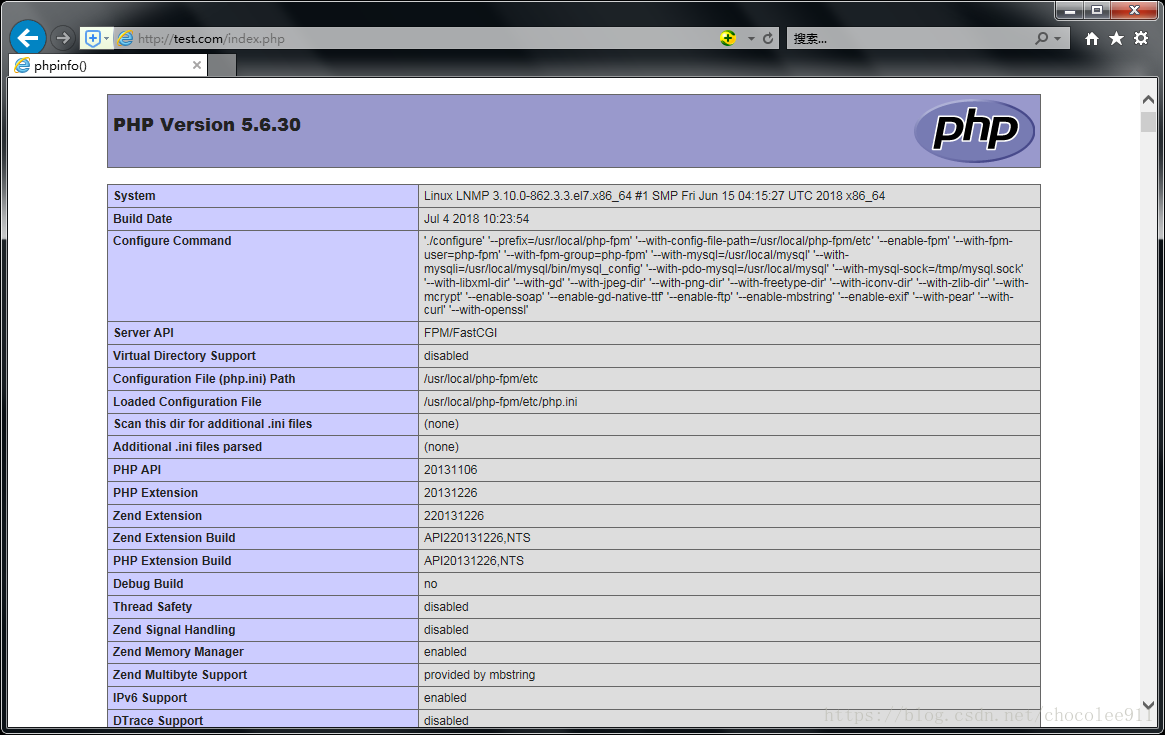
[root@LNMP ~]# nginx -s reload9.3 验证
9.3.1 curl 验证
[root@LNMP ~]# curl -x 192.168.1.100:80 test.com/index.php
<?php
phpinfo();
?>
9.3.2 浏览器访问 php 文件,能够正常解析
10. Nginx 代理
代理服务器的功能是可以代理局域网络的个人计算机来向因特网取得网页或其他数据的一种服务, 由于代理取得的数据可以保存一份在代理服务器上,因此以往有类似『假象加速』的功能!不过,目前网络带宽已经比以前好很多, 因此代理服务器倒是很少使用在这方面。取而代之的是局域网络『高阶防火墙』的角色!这里的『高阶』指的是 OSI 七层协议里面的高层,因为代理服务器是用在应用层上的一种防火墙方式,不像 iptables 是用在网络、传输层。
10.1 配置
10.1.1 编辑单独的 proxy.conf 文件
[root@LNMP tmp]# vim /usr/local/nginx/conf/vhost/proxy.conf

server
{
        listen 8080;
        server_name www.pc6.com;
        access_log /tmp/proxy.log;

        location /
        {
                proxy_pass http://27.159.76.229/;
                proxy_set_header Host $host;
                proxy_set_header X-Real-IP $remote_addr;
                proxy_set_header X-Forwarded-For $proxy_add_x_forwarded_for;
        }
}
10.1.2 语法检查、刷新配置
[root@LNMP ~]# nginx -t
nginx: the configuration file /usr/local/nginx/conf/nginx.conf syntax is ok
nginx: configuration file /usr/local/nginx/conf/nginx.conf test is successful

[root@LNMP ~]# nginx -s reload
10.2 验证
10.2.1 curl 验证
## 不通过代理进行访问
[root@LNMP tmp]# curl www.pc6.com/robots.txt
User-agent:*
Disallow:/*.asp
Disallow:/*.php
Disallow:/file/dl*
Disallow:/js/jf/
Disallow:/comment*
## 通过代理服务器 192.168.1.100 的 8080 端口,访问 www.pc6.com
[root@LNMP tmp]# curl -x 192.168.1.100:8080 www.pc6.com/robots.txt ; date
User-agent:*
Disallow:/*.asp
Disallow:/*.php
Disallow:/file/dl*
Disallow:/js/jf/
Disallow:/comment*
Fri Jul 6 15:16:00 CST 2018
## 查看是否产生日志
[root@LNMP tmp]# tail /tmp/proxy.log
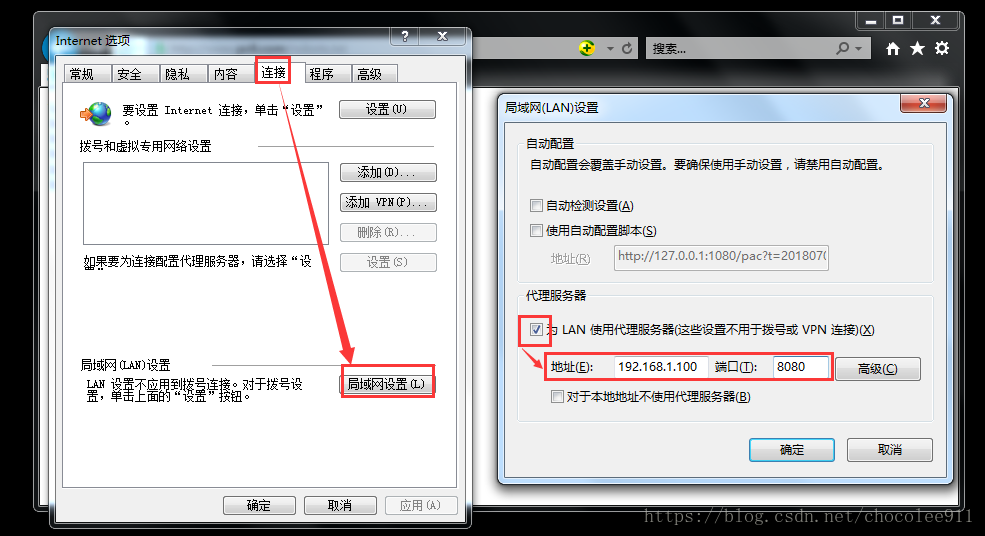
192.168.1.100 - - [06/Jul/2018:15:16:00 +0800] "GET HTTP://www.pc6.com/robots.txt HTTP/1.1" 200 104 "-" "curl/7.29.0"10.2.2 浏览器验证
IE 设置代理
访问 www.pc6.com
代理服务器上查看日志
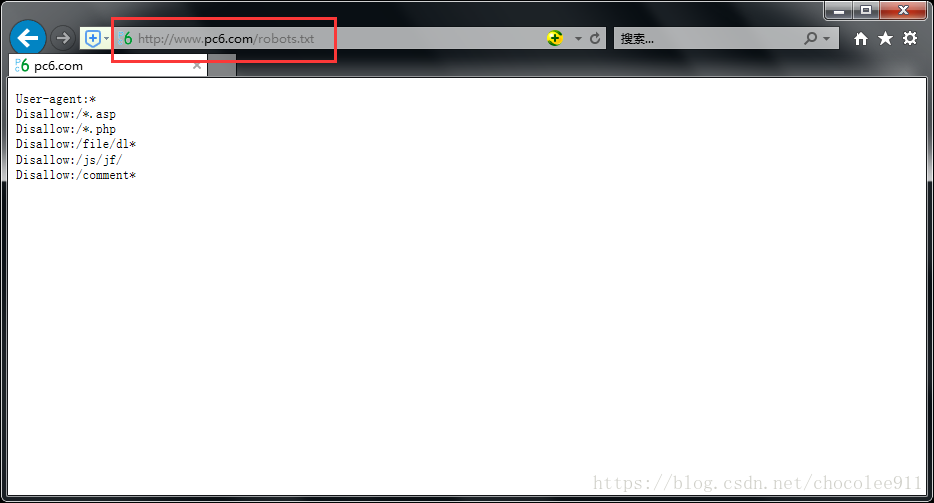
[root@LNMP ~]# tail /tmp/proxy.log | grep pc6 | grep robots
192.168.1.1 - - [06/Jul/2018:15:23:03 +0800] "GET http://www.pc6.com/robots.txt HTTP/1.1" 304 0 "-" "Mozilla/5.0 (Windows NT 6.1; WOW64; Trident/7.0; rv:11.0) like Gecko"
(The End)