Scroll-view
一、使用方法
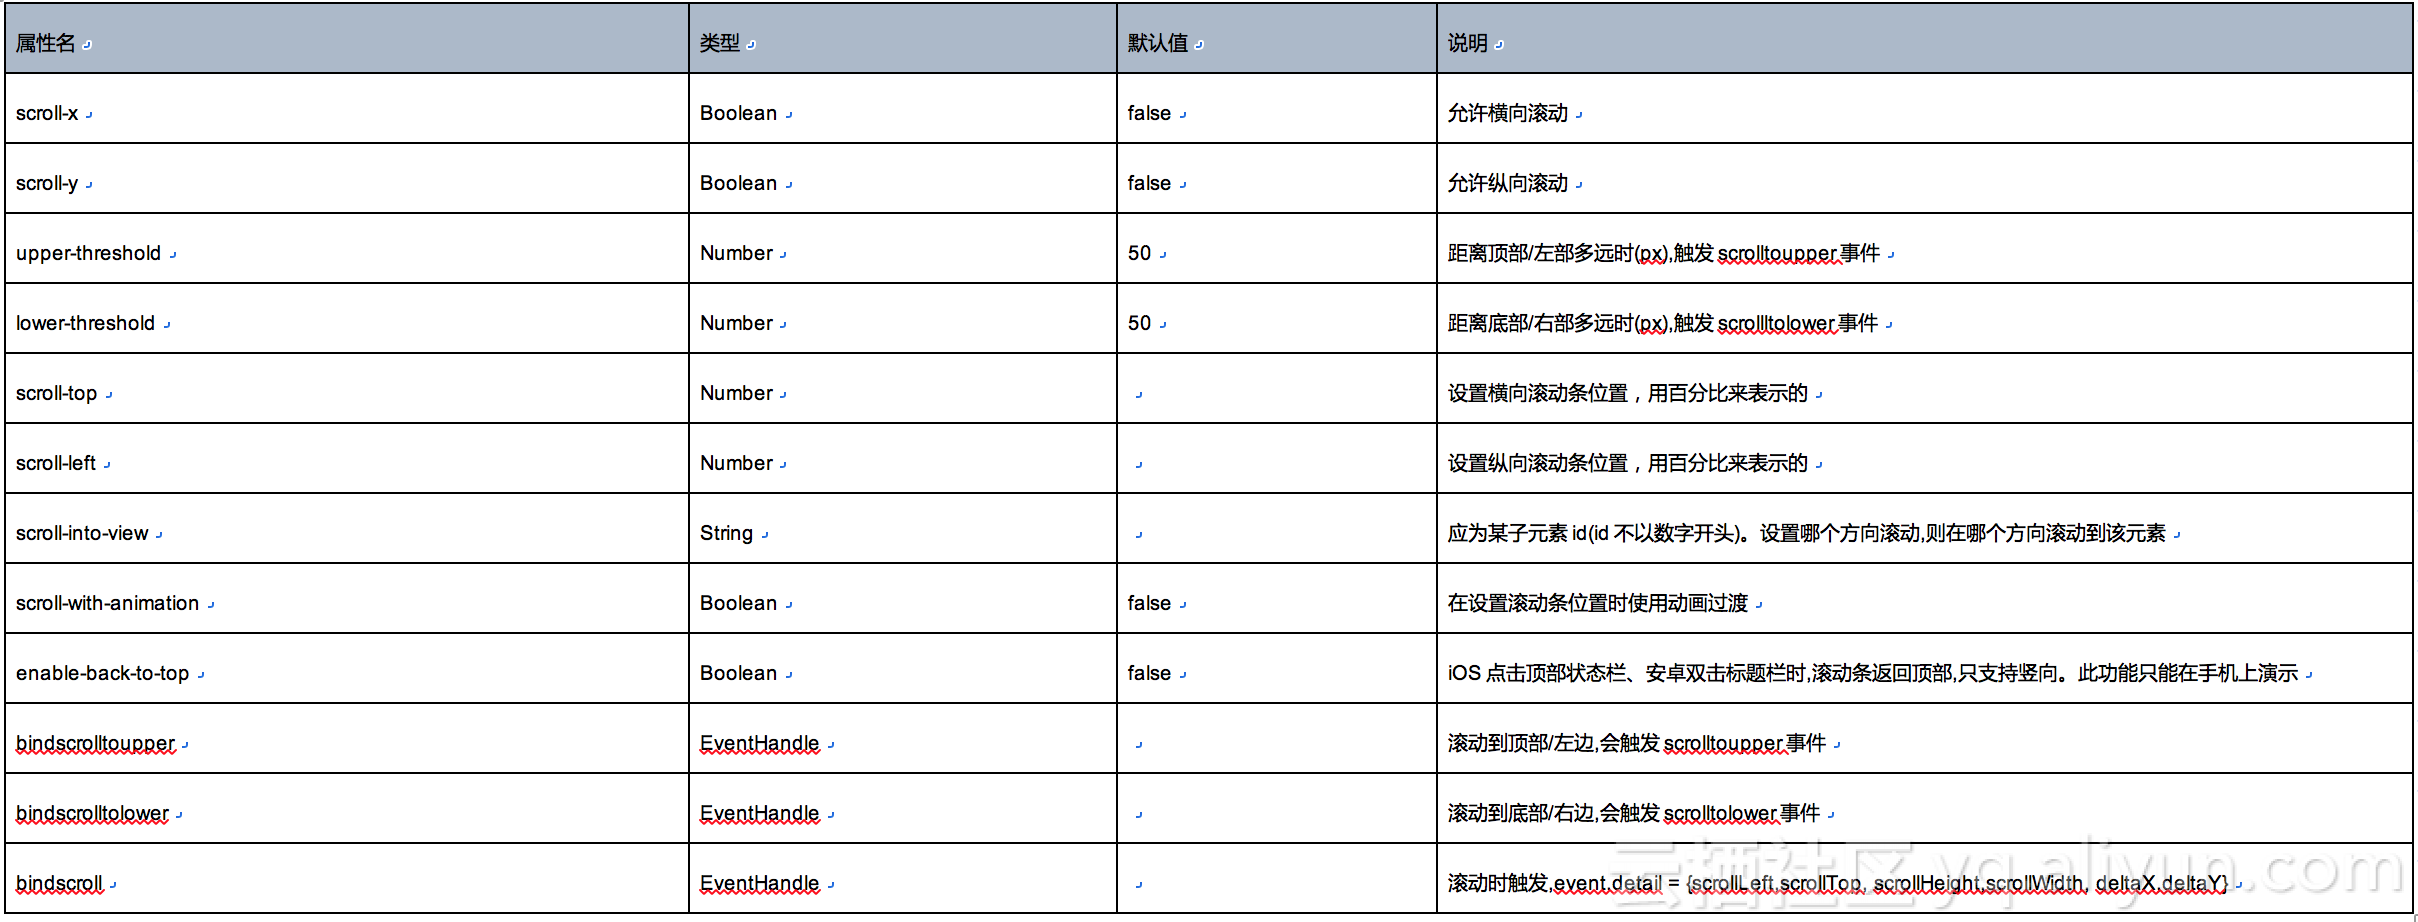
当在容器内放置一个很大的组件时,我们期望容器具有滚动的功能,例如我们在浏览网页的时候,必须滚动才可以看到全部内容。小程序提供了scroll-view组件,可以实现横向、纵向滚动,它的自定义属性如下:
默认的情况下,scrollview没有滚动效果,也可以同时设置横向和纵向滚动。在使用过程中,经常会用到scroll-into-view来设置当前滚动条的位置,注意在滚动视图中的子控件id不能用数字开头。
二、案例
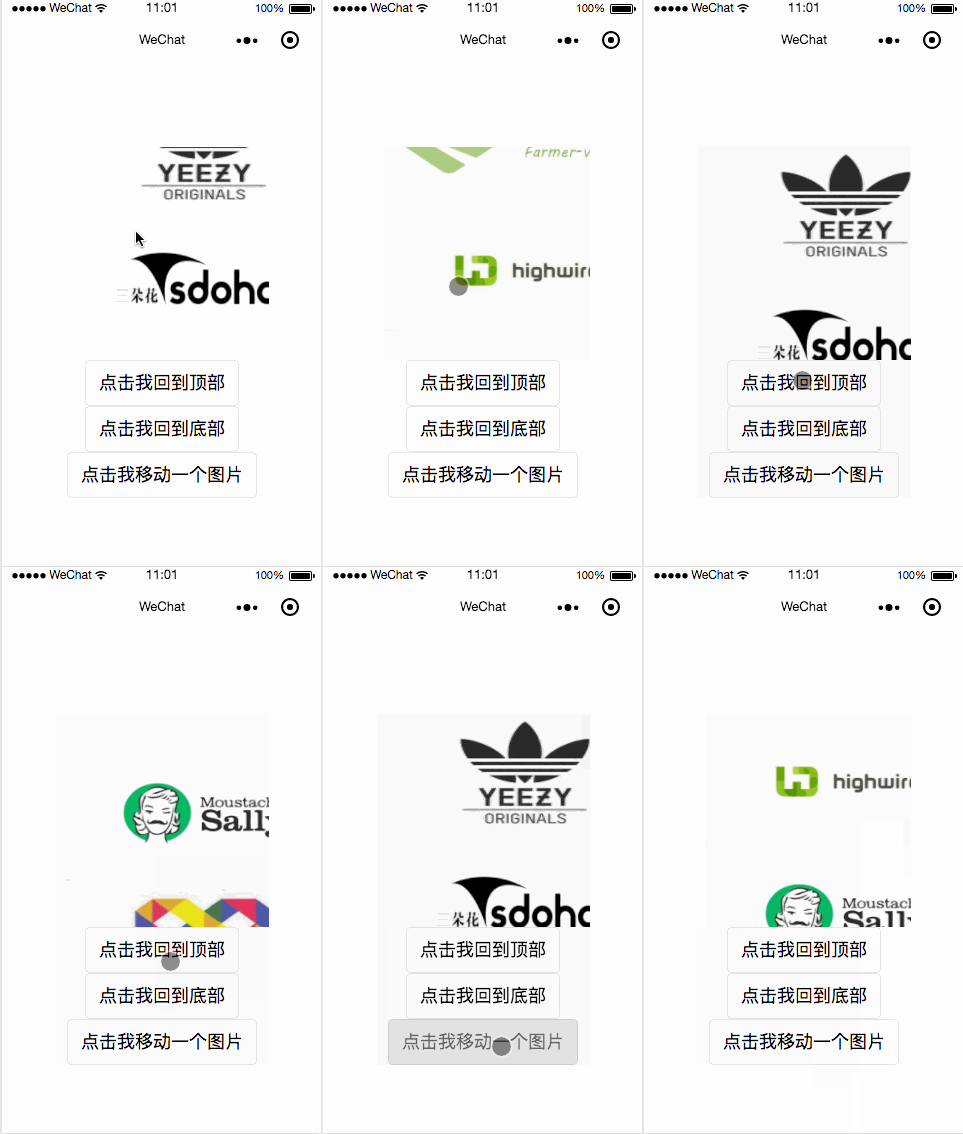
下面的案例演示纵向滚动:在scrollview中放置6张图片,点击按钮可以滚动到顶部、底部,或者滚动到某个图片。同时监听滚动视图的事件
1、wxml
    <view class="container">
        <scroll-view class='scroll1' scroll-x='{{false}}' scroll-y='{{true}}' upper-threshold='50' lower-threshold='50' scroll-top='{{scrollTop}}' scroll-into-view='{{scrollIntoView}}' scroll-with-animation='{{true}}' bindscrolltoupper='toUpper' bindscrolltolower='toLower'
            bindscroll='scroll'>
            <block wx:for='{{img}}'>
                <image src='{{item}}' class='img' id='img{{index}}'></image>
            </block>
        </scroll-view>
        <button class='btn' bindtap='onClick' id='btn1'>点击我回到顶部</button>
        <button class='btn' bindtap='onClick' id='btn2'>点击我回到底部</button>
        <button class='btn' bindtap='onClick' id='btn3'>点击我移动一个图片</button>

        <view class="container">
            <scroll-view class='scroll2' scroll-x='{{true}}' scroll-y='{{false}}' upper-threshold='50' lower-threshold='50' scroll-left='{{scrollLeft}}' scroll-into-view='{{scrollIntoView}}' scroll-with-animation='{{true}}' bindscrolltoupper='toUpper' bindscrolltolower='toLower'
                bindscroll='scroll'>
                <block wx:for='{{img}}'>
                    <image src='{{item}}' class='img' id='img{{index}}'></image>
                </block>
            </scroll-view>
            <button class='btn' bindtap='onClick' id='btn1'>点击我回到顶部</button>
            <button class='btn' bindtap='onClick' id='btn2'>点击我回到底部</button>
            <button class='btn' bindtap='onClick' id='btn3'>点击我移动一个图片</button>
        </view>
    </view>


    2、wxss
    .container{
        display: flex;
        flex-direction: column;
        width: 100%;
    }

    .scroll1{
        width: 500rpx;
        height: 500rpx;
    }
    .scroll2{
        width: 500rpx;
        height: 500rpx;
        white-space: nowrap;
    }
    .img{
        width: 700rpx;
        height: 300rpx;
    }


    3、js
    //index.js
    var i=0;

    Page({
        data: {
            img: [
                '/images/img1.jpg',
                '/images/img2.jpg',
                '/images/img3.jpg',
                '/images/img4.jpg',
                '/images/img5.jpg',
                '/images/img6.jpg'
            ],
            scrollTop: 0,
            scrollLeft: 0,
            scrollIntoView: 'img0'
        },

        onLoad: function() {

        },
        //滚动到顶部事件监听
        toUpper: function(){
            console.log("滚动到顶部");
        },
        //滚动到底部事件监听
        toLower: function(){
            console.log("滚动到底部");
        },
        //滚动事件监听
        scroll: function(){
            console.log("正在滚动");
        },
        //按钮处理
        onClick: function(e){
            switch(e.currentTarget.id){
                case 'btn1':
                    //将滚动条的位置归0
                    this.setData({scrollTop: 0})
                    this.setData({scrollLeft: 0 })
                    break;
                case 'btn2':
                    //将滚动条的位置设置在最底部
                    this.setData({ scrollTop: 500 })
                    this.setData({ scrollLeft: 500 })
                    break;
                case 'btn3':
                    //设置scrollintoview为子元素id,注意此id不能以数字开头
                    i++;
                    var id='img'+i;
                    this.setData({scrollIntoView: id});
                    break;
                default:break;
            }
        }

    })
三、效果
四、百度网盘源码
链接: https://pan.baidu.com/s/1N7noj2fr0qiQg4s9-drXYw密码: 4yxm