Hibernate是把以前的jdbc连接数据库的操作进行了一系列友好的封装,最好只用调用save即可,即将sql语句的这部分操作转化为面向对象的
Hibernate资源准备:
文档目录结构:

1.网址:http://hibernate.org/
2.所需资源
友情地址:https://pan.baidu.com/share/link?shareid=3410977257&uk=2971977658
3.下载好之后新建项目
选择windows - preference - user - Build path - User Libraries 建立自己的目录
选择 ADD EXTERNMAL JARS
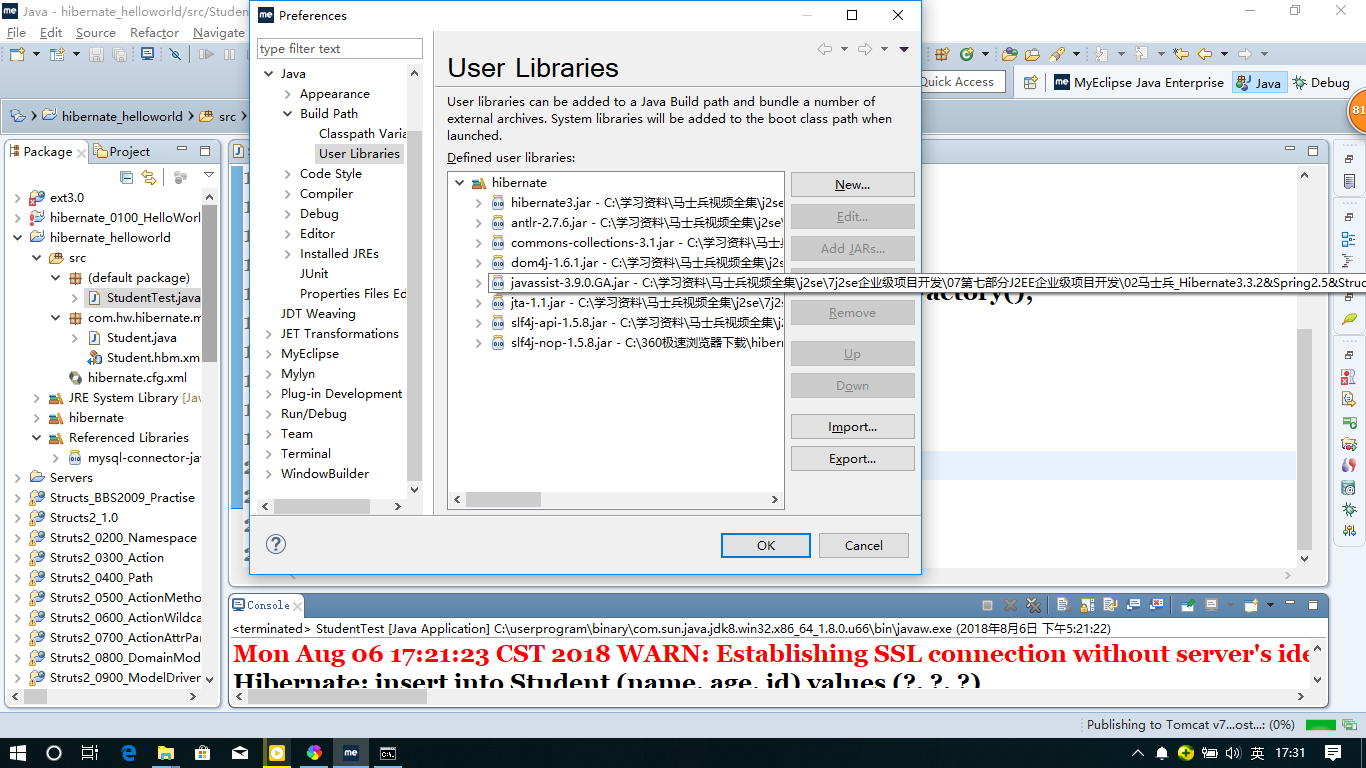
然后到自己新建的heibernate项目 目录下 build path 选择user library 然后就引入了所需要的资源
4.建立modle以及数据库
Student.java
package com.hw.hibernate.model;

public class Student {
     private int id;
     private String name;
     private String age;
    public int getId() {
        return id;
    }
    public void setId(int id) {
        this.id = id;
    }
    public String getName() {
        return name;
    }
    public void setName(String name) {
        this.name = name;
    }
    public String getAge() {
        return age;
    }
    public void setAge(String age) {
        this.age = age;
    }

}
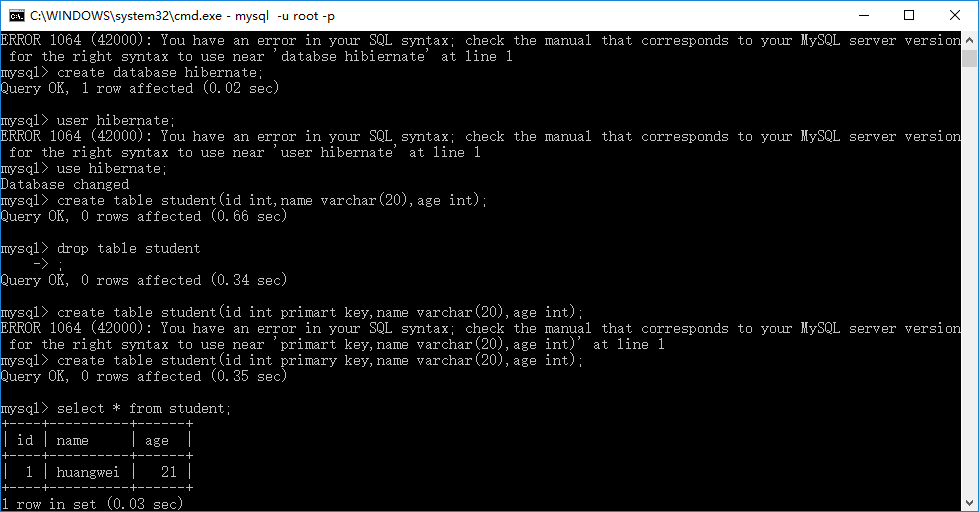
建立数据库
create database hibernate;
use hibernate;
create table student(id int primary key,name varchar(20),age int);
建立关系映射文件 hibernate.cfg.xml
从官方文档上copy改
<?xml version='1.0' encoding='utf-8'?>
<!DOCTYPE hibernate-configuration PUBLIC
        "-//Hibernate/Hibernate Configuration DTD 3.0//EN"
        "http://hibernate.sourceforge.net/hibernate-configuration-3.0.dtd">

<hibernate-configuration>

    <session-factory>

        <!-- Database connection settings -->
        <property name="connection.driver_class">com.mysql.jdbc.Driver</property>
        <property name="connection.url">jdbc:mysql://localhost/hibernate</property>
        <property name="connection.username">root</property>
        <property name="connection.password"></property>

        <!-- JDBC connection pool (use the built-in) -->
        <property name="connection.pool_size">1</property>

        <!-- SQL dialect -->
        <property name="dialect">org.hibernate.dialect.MySQLDialect</property>

        <!-- Enable Hibernate's automatic session context management -->
        <property name="current_session_context_class">thread</property>

        <!-- Disable the second-level cache  -->
        <property name="cache.provider_class">org.hibernate.cache.NoCacheProvider</property>

        <!-- Echo all executed SQL to stdout -->
        <property name="show_sql">true</property>

        <!-- Drop and re-create the database schema on startup -->
        <property name="hbm2ddl.auto">update</property>

        <mapping resource="com/hw/hibernate/model/Student.hbm.xml"/>
        <!-- <mapping class="com.bjsxt.hibernate.Teacher"/> -->
    </session-factory>

</hibernate-configuration>
建立model元素和表的关系 Student.hbm.xml
<?xml version="1.0"?>
<!DOCTYPE hibernate-mapping PUBLIC
        "-//Hibernate/Hibernate Mapping DTD 3.0//EN"
        "http://hibernate.sourceforge.net/hibernate-mapping-3.0.dtd">

<hibernate-mapping>
    <class name="com.hw.hibernate.model.Student">
        <id name="id" />
        <property name="name" />
        <property name="age" />
    </class>

</hibernate-mapping>
建立测试 StudentTest.java
import org.hibernate.Session;
import org.hibernate.SessionFactory;
import org.hibernate.cfg.Configuration;

import com.hw.hibernate.model.Student;

public class StudentTest {
   public static void main(String args[]){
       Student s = new Student();
       s.setId(1);
       s.setName("huangwei");
       s.setAge("21");
       Configuration cf = new Configuration();
       SessionFactory sf = cf.configure().buildSessionFactory();
       Session ss = sf.openSession();
       ss.beginTransaction();
       ss.save(s);
       ss.getTransaction().commit();
       ss.close();
       sf.close();
   }
}
运行StudentTest.java 数据成功插入