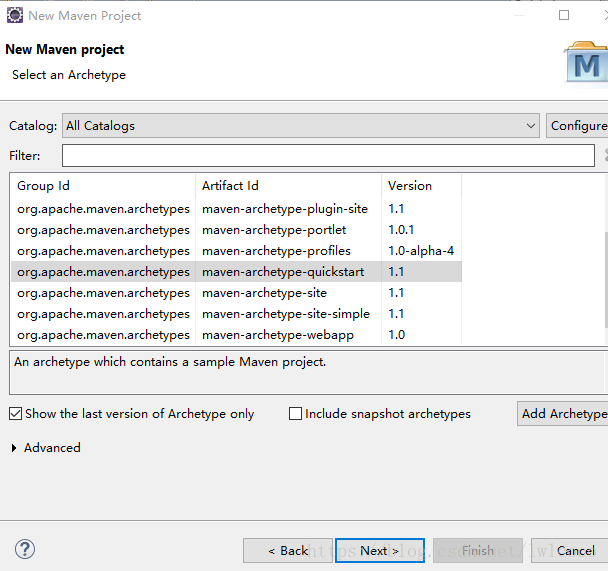
1.创建maven项目,catalogs选择maven- archetype-quickstart
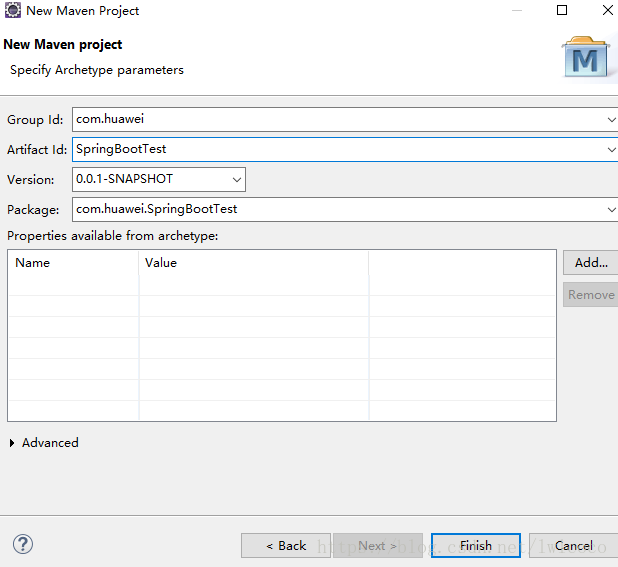
2.GroupID是项目组织唯一的标识符,实际对应JAVA的包的结构,是main目录里java的目录结构。
ArtifactID就是项目的唯一的标识符,实际对应项目的名称,就是项目根目录的名称。
.
3.添加pom文件
<project xmlns="http://maven.apache.org/POM/4.0.0" xmlns:xsi="http://www.w3.org/2001/XMLSchema-instance"
xsi:schemaLocation="http://maven.apache.org/POM/4.0.0 http://maven.apache.org/xsd/maven-4.0.0.xsd">
<modelVersion>4.0.0</modelVersion>
<groupId>com.huawei</groupId>
<artifactId>SpringBootTest</artifactId>
<version>0.0.1-SNAPSHOT</version>
<packaging>jar</packaging>
<parent>
<groupId>org.springframework.boot</groupId>
<artifactId>spring-boot-starter-parent</artifactId>
<version>1.5.9.RELEASE</version>
</parent>
<name>SpringBootTest</name>
<url>http://maven.apache.org</url>
<properties>
<project.build.sourceEncoding>UTF-8</project.build.sourceEncoding>
</properties>
<dependencies>
<dependency>
<groupId>junit</groupId>
<artifactId>junit</artifactId>
<version>3.8.1</version>
<scope>test</scope>
</dependency>
<dependency>
<groupId>org.springframework.boot</groupId>
<artifactId>spring-boot-starter</artifactId>
</dependency>
<dependency>
<groupId>org.springframework.boot</groupId>
<artifactId>spring-boot-starter-web</artifactId>
</dependency>
</dependencies>
<build>
<plugins>
<plugin>
<groupId>org.springframework.boot</groupId>
<artifactId>spring-boot-maven-plugin</artifactId>
</plugin>
</plugins>
</build>
</project>
4.创建实体类
public class User {
private String id;
private String name;
private String password;
public String getId() {
return id;
}
public void setId(String id) {
this.id = id;
}
public String getName() {
return name;
}
public void setName(String name) {
this.name = name;
}
public String getPassword() {
return password;
}
public void setPassword(String password) {
this.password = password;
}
}

5.创建controller ,使用restful风格
import org.springframework.web.bind.annotation.PathVariable;
import org.springframework.web.bind.annotation.RequestMapping;
import org.springframework.web.bind.annotation.RestController;
@RestController
@RequestMapping("/user")
public class UserController {
@RequestMapping("/{id}")
public User getUserById(@PathVariable(value="id")String id) {
User user = new User();
user.setId(id);
user.setName("coco");
user.setPassword("1234");
System.out.println("123");
return user;
}
}
6.创建启动类
import org.springframework.boot.SpringApplication;
import org.springframework.boot.autoconfigure.SpringBootApplication;
@SpringBootApplication
public class App implements EmbeddedServletContainerCustomizer{
public static void main( String[] args )
{
SpringApplication.run(App.class, args);
}
访问url 为http://localhost:8088/user/1
返回结果为
{"id":"1","name":"coco","password":"1234"}