Spring Cloud Config : 配置管理工具包,让你可以把配置放到远程服务器,集中化管理集群配置,目前支持本地存储、Git以及Subversion。
配置中心也区分为服务端和客户端,本次体验以实现配置中心为主,更多高级功能未实现(比如 动态刷新配置)
服务端推荐作为独立的服务
Spring Cloud Config 服务端 配置:
1、初始化一个SpringBoot的配置中心服务端应用
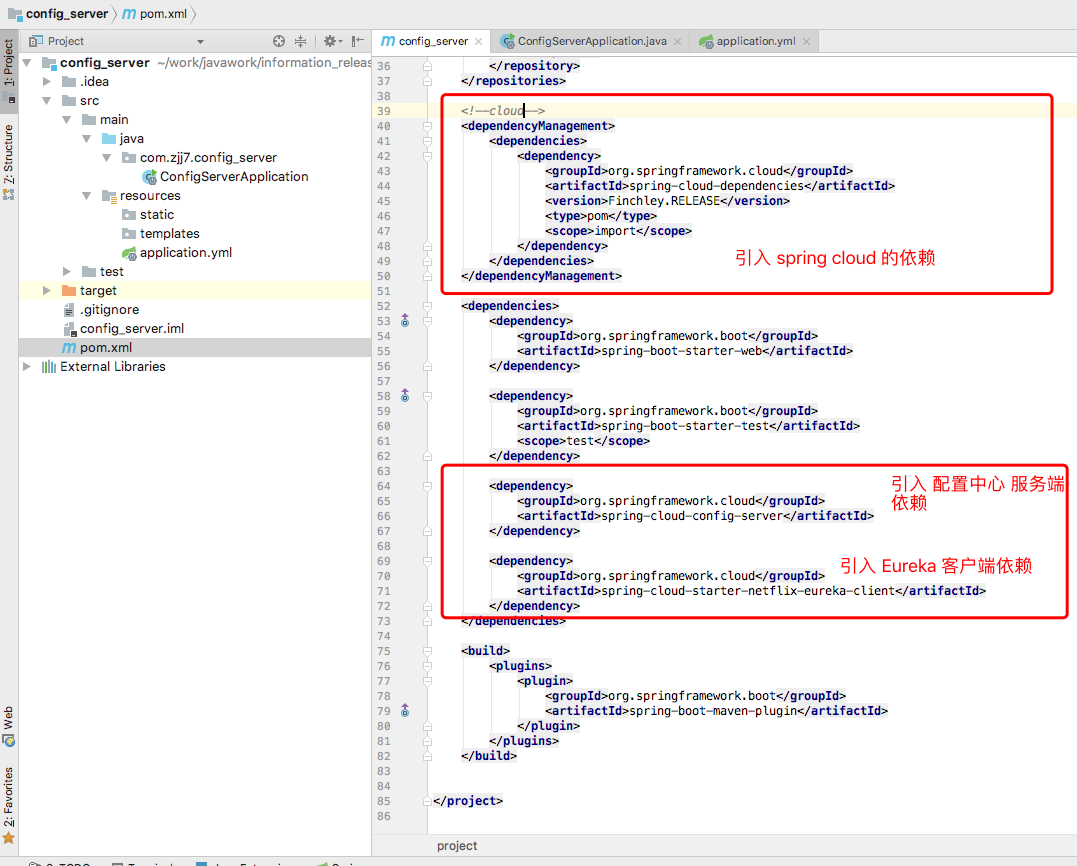
2、引入配置中心的依赖
 View Code
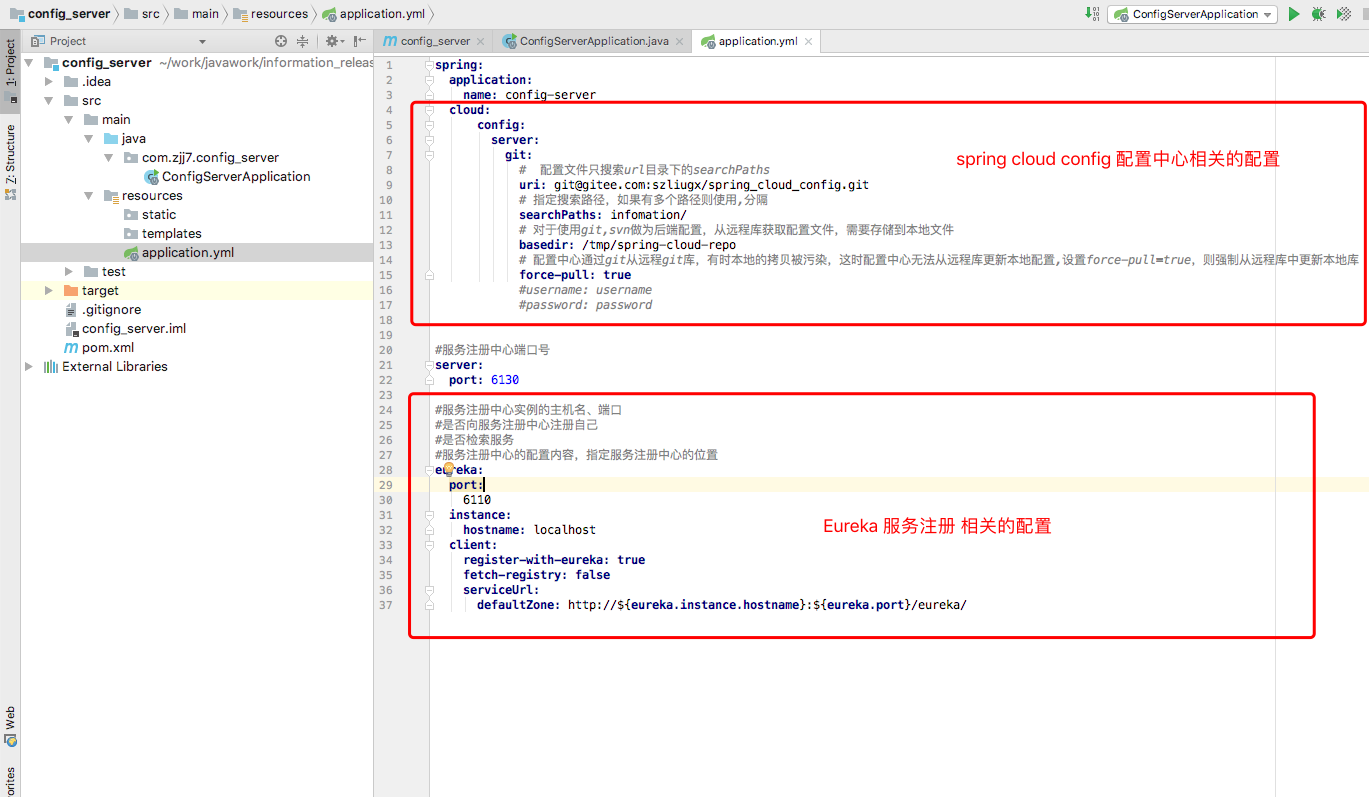
3、修改配置文件 application.yml ,此处把配置放在了开源中国的码云上面

spring:
  application:
    name: config-server
  cloud:
      config:
        server:
          git:
            #  配置文件只搜索url目录下的searchPaths
            uri: [email protected]:szliugx/spring_cloud_config.git
            # 指定搜索路径,如果有多个路径则使用,分隔
            searchPaths: infomation/
            # 对于使用git,svn做为后端配置,从远程库获取配置文件,需要存储到本地文件
            basedir: /tmp/spring-cloud-repo
            # 配置中心通过git从远程git库,有时本地的拷贝被污染,这时配置中心无法从远程库更新本地配置,设置force-pull=true,则强制从远程库中更新本地库
            force-pull: true
            #username: username
            #password: password


#服务注册中心端口号
server:
  port: 6130

#服务注册中心实例的主机名、端口
#是否向服务注册中心注册自己
#是否检索服务
#服务注册中心的配置内容,指定服务注册中心的位置
eureka:
  port:
    6110
  instance:
    hostname: localhost
  client:
    register-with-eureka: true
    fetch-registry: false
    serviceUrl:
      defaultZone: http://${eureka.instance.hostname}:${eureka.port}/eureka/
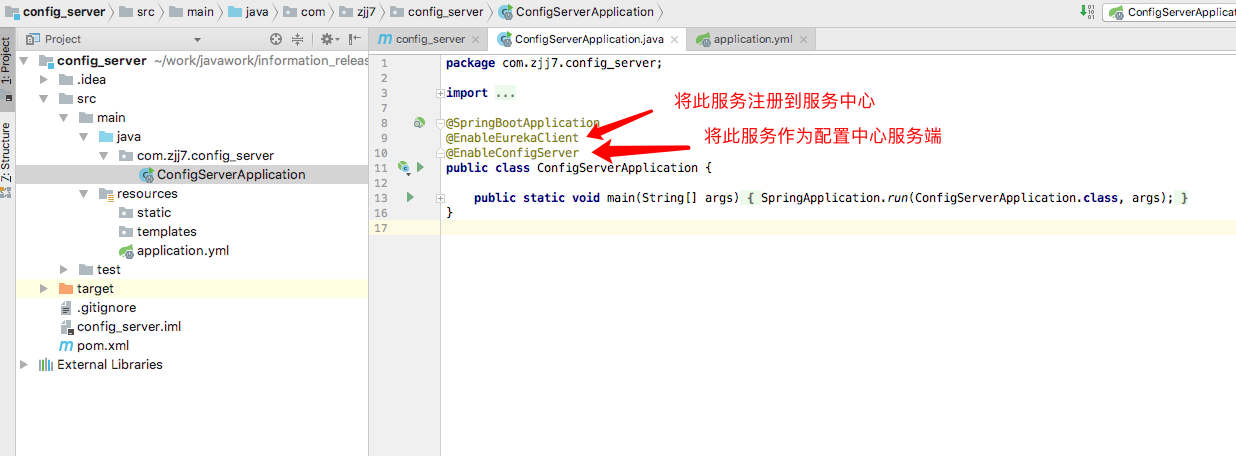
4、启动类上添加注释 @EnableConfigServer 和 @EnableEurekaClient
Spring Cloud Config 客户端 配置:
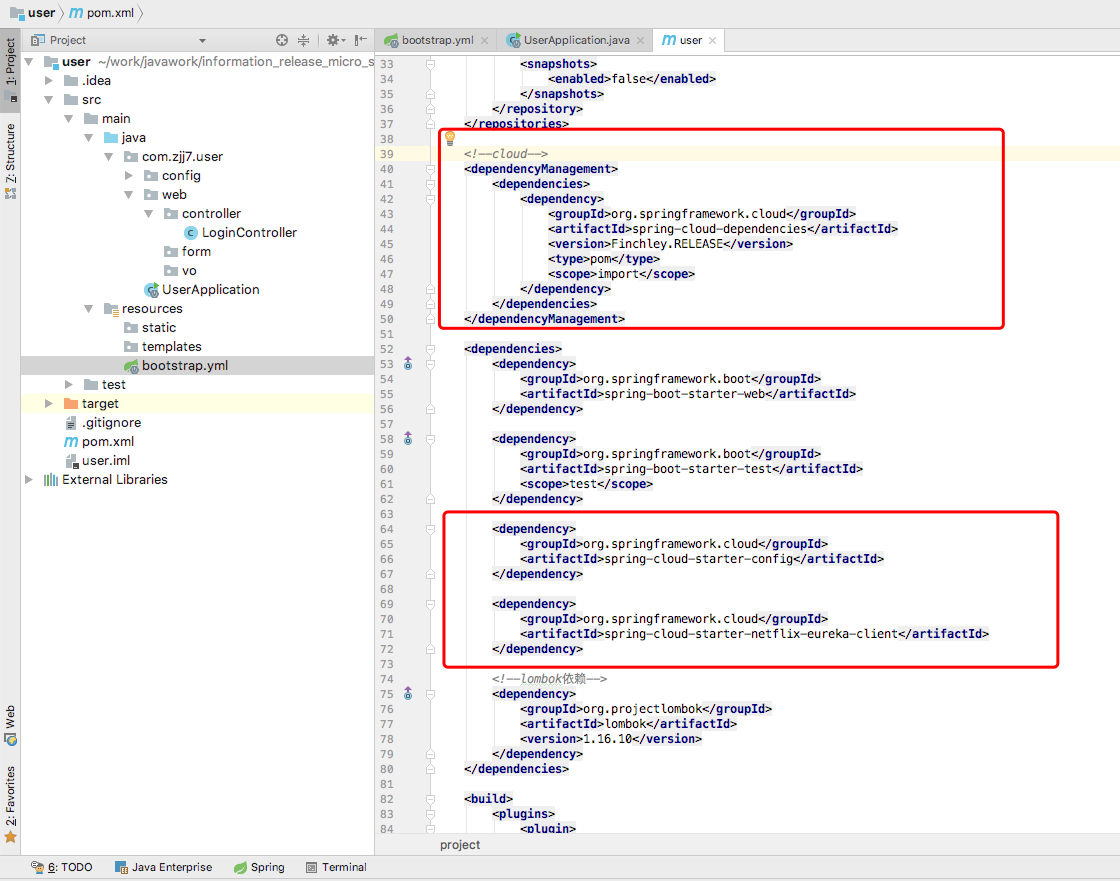
1、引入配置中心的依赖
<?xml version="1.0" encoding="UTF-8"?>
<project xmlns="http://maven.apache.org/POM/4.0.0" xmlns:xsi="http://www.w3.org/2001/XMLSchema-instance"
    xsi:schemaLocation="http://maven.apache.org/POM/4.0.0 http://maven.apache.org/xsd/maven-4.0.0.xsd">
    <modelVersion>4.0.0</modelVersion>

    <groupId>com.zjj7</groupId>
    <artifactId>user</artifactId>
    <version>0.0.1-SNAPSHOT</version>
    <packaging>jar</packaging>

    <name>user</name>
    <description>Demo project for Spring Boot</description>

    <parent>
        <groupId>org.springframework.boot</groupId>
        <artifactId>spring-boot-starter-parent</artifactId>
        <version>2.0.4.RELEASE</version>
        <relativePath/> <!-- lookup parent from repository -->
    </parent>

    <properties>
        <project.build.sourceEncoding>UTF-8</project.build.sourceEncoding>
        <project.reporting.outputEncoding>UTF-8</project.reporting.outputEncoding>
        <java.version>1.8</java.version>
    </properties>

    <!--配置仓库-->
    <repositories>
        <repository>
            <id>aliRepository</id>
            <name>aliRepository</name>
            <url>http://maven.aliyun.com/nexus/content/groups/public/</url>
            <snapshots>
                <enabled>false</enabled>
            </snapshots>
        </repository>
    </repositories>

    <!--cloud-->
    <dependencyManagement>
        <dependencies>
            <dependency>
                <groupId>org.springframework.cloud</groupId>
                <artifactId>spring-cloud-dependencies</artifactId>
                <version>Finchley.RELEASE</version>
                <type>pom</type>
                <scope>import</scope>
            </dependency>
        </dependencies>
    </dependencyManagement>

    <dependencies>
        <dependency>
            <groupId>org.springframework.boot</groupId>
            <artifactId>spring-boot-starter-web</artifactId>
        </dependency>

        <dependency>
            <groupId>org.springframework.boot</groupId>
            <artifactId>spring-boot-starter-test</artifactId>
            <scope>test</scope>
        </dependency>

        <dependency>
            <groupId>org.springframework.cloud</groupId>
            <artifactId>spring-cloud-starter-config</artifactId>
        </dependency>

        <dependency>
            <groupId>org.springframework.cloud</groupId>
            <artifactId>spring-cloud-starter-netflix-eureka-client</artifactId>
        </dependency>

        <!--lombok依赖-->
        <dependency>
            <groupId>org.projectlombok</groupId>
            <artifactId>lombok</artifactId>
            <version>1.16.10</version>
        </dependency>
    </dependencies>

    <build>
        <plugins>
            <plugin>
                <groupId>org.springframework.boot</groupId>
                <artifactId>spring-boot-maven-plugin</artifactId>
            </plugin>
        </plugins>
    </build>


</project>
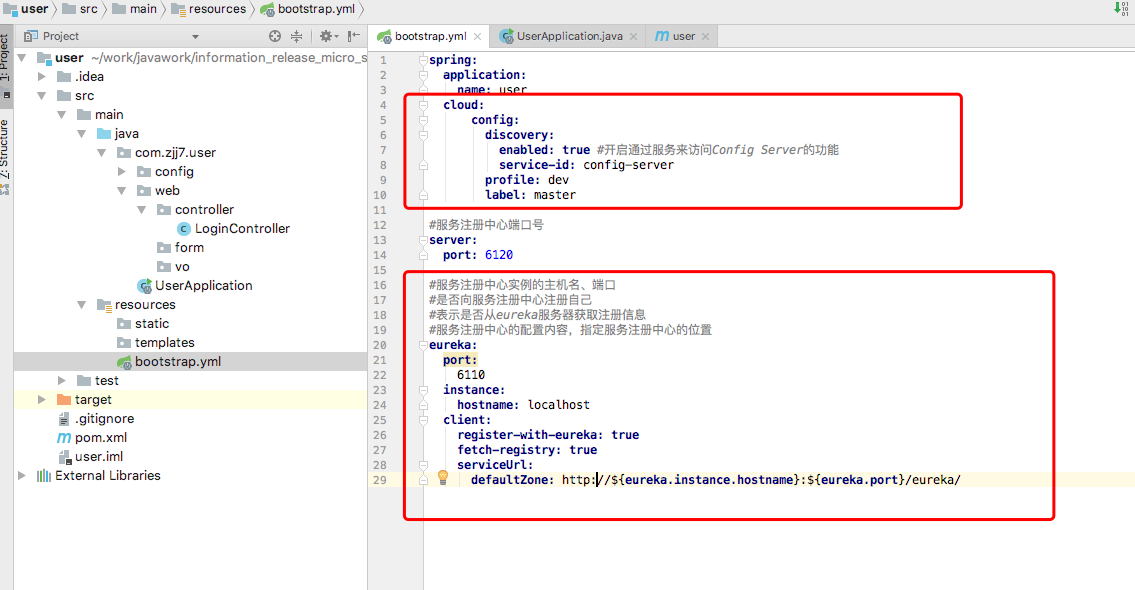
2、添加配置文件 bootstrap.yml
spring:
  application:
    name: user
  cloud:
      config:
        discovery:
          enabled: true #开启通过服务来访问Config Server的功能
          service-id: config-server
        profile: dev
        label: master

#服务注册中心端口号
server:
  port: 6120

#服务注册中心实例的主机名、端口
#是否向服务注册中心注册自己
#表示是否从eureka服务器获取注册信息
#服务注册中心的配置内容,指定服务注册中心的位置
eureka:
  port:
    6110
  instance:
    hostname: localhost
  client:
    register-with-eureka: true
    fetch-registry: true
    serviceUrl:
      defaultZone: http://${eureka.instance.hostname}:${eureka.port}/eureka/
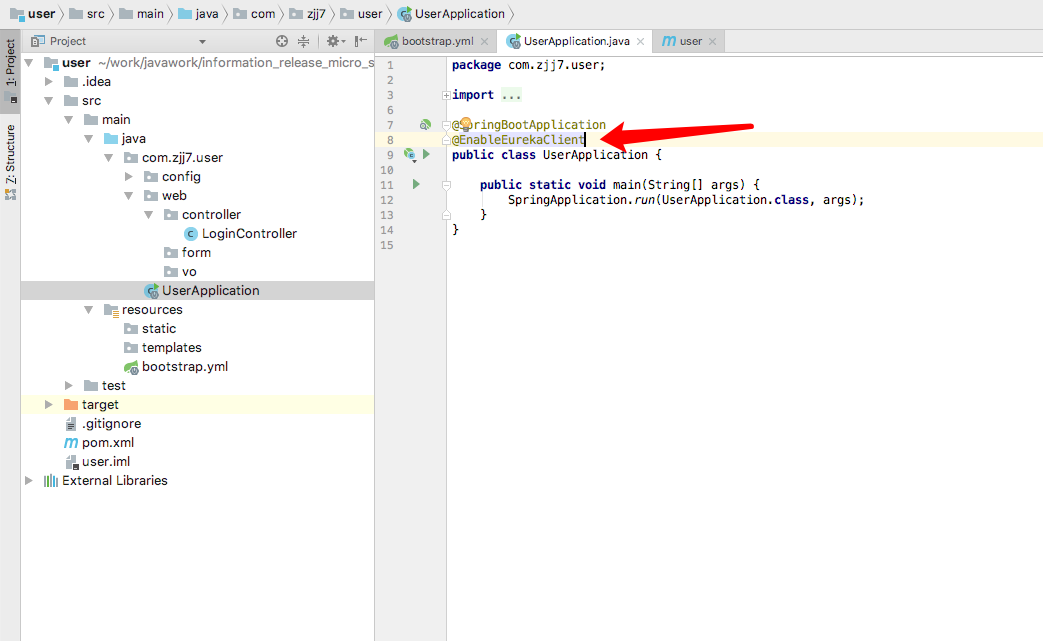
3、启动类上添加注释 @EnableEurekaClient
好了,统一配置中心也完成了,启动配置中心服务端,重启使用统一配置的客户端即可生效