CentOS 7.0默认使用的是firewall作为防火墙,这里改为iptables防火墙。
#停止firewall服务
systemctl stop firewalld.service
#禁止firewall开机启动
systemctl disable firewalld.service
#安装
yum
install
iptables-
services
#编辑防火墙配置文件
vi
/etc/sysconfig/
iptables
加入红色的两行代码,请注意位置一定要对应。
# Firewall configuration written by system
-config-
firewall
# Manual customization of this
file
is not recommended.
*
filter
:INPUT ACCEPT [
0
:
0
]
:FORWARD ACCEPT [
0
:
0
]
:OUTPUT ACCEPT [
0
:
0
]
-A INPUT -m state --state ESTABLISHED,RELATED -
j ACCEPT
-A INPUT -p icmp -
j ACCEPT
-A INPUT -i lo -
j ACCEPT
-A INPUT -m state --state NEW -m tcp -p tcp --dport
22
-
j ACCEPT
-A INPUT -m state --state NEW -m tcp -p tcp --dport 80 -j ACCEPT
-A INPUT -m state --state NEW -m tcp -p tcp --dport 3306 -j ACCEPT
-A INPUT -j REJECT --reject-with icmp-host-
prohibited
-A FORWARD -j REJECT --reject-with icmp-host-
prohibited
COMMIT
:wq
!
#保存退出
#最后重启防火墙使配置生效
systemctl restart iptables.service
#设置防火墙开机启动
systemctl enable iptables.service
3. 关闭seinux
#修改配置文件
vi
/etc/selinux/
config
#SELINUX
=
enforcing #注释掉
#SELINUXTYPE
=
targeted #注释掉
SELINUX
=
disabled #增加
:wq
!
#保存退出
#使配置立即生效
setenforce
0
[root@nmserver-
7
html]#
cat
/etc/redhat-
release
CentOS release
7.3
.
1611
(AltArch)
[root@nmserver
-
7
html]#
uname
-
a
Linux nmserver-7.
test.com
3.10
.
0
-
514
.el7.centos.plus.i686 #
1
SMP Wed Jan
25
12
:
55
:
04
UTC
2017
i686 i686 i386 GNU/Linux
1、安装apache
1.1 安装apache
[root@nmserver-
7
~]#
yum
install
httpd httpd-
devel
1.2 启动apache服务
[root@nmserver-
7
~]# systemctl start httpd
1.3 设置httpd服务开机启动
[root@nmserver-
7
~
]# systemctl enable httpd
Created symlink from
/etc/systemd/system/multi-user.target.wants/httpd.service to /usr/lib/systemd/system/httpd.service.
1.4 查看服务状态

[root@nmserver-
7
~
]# systemctl status httpd
● httpd.service
-
The Apache HTTP Server
Loaded: loaded (
/usr/lib/systemd/system/
httpd.service; enabled; vendor preset: disabled)
Active: active (running) since 五
2017
-
07
-
21
17
:
21
:
37
CST; 6min ago
Docs:
man
:httpd(
8
)
man
:apachectl(
8
)
Main PID:
2449
(httpd)
Status:
"
Total requests: 11; Current requests/sec: 0; Current traffic: 0 B/sec
"
CGroup:
/system.slice/
httpd.service
├─
2449
/usr/sbin/httpd -
DFOREGROUND
├─
2450
/usr/sbin/httpd -
DFOREGROUND
├─
2451
/usr/sbin/httpd -
DFOREGROUND
├─
2452
/usr/sbin/httpd -
DFOREGROUND
├─
2453
/usr/sbin/httpd -
DFOREGROUND
├─
2454
/usr/sbin/httpd -
DFOREGROUND
├─
2493
/usr/sbin/httpd -
DFOREGROUND
├─
2494
/usr/sbin/httpd -
DFOREGROUND
└─
2495
/usr/sbin/httpd -
DFOREGROUND
7月
21
17
:
21
:
36
nmserver-
7
.
test.com
httpd[
2449
]: AH00558: httpd: Could not reliably determine the server
'
s fully q...ssage
Hint: Some lines were ellipsized, use
-l to show
in
full.
1.5 防火墙设置开启80端口
[root@nmserver-
7
~]# firewall-cmd --permanent --zone=public --add-service=
http
success
[root@nmserver
-
7
~]# firewall-cmd --permanent --zone=public --add-service=
https
success
[root@nmserver
-
7
~]# firewall-cmd --
reload
success
1.6确认80端口监听中
[root@nmserver-
7
~]# netstat -
tulp
Active Internet connections (only servers)
Proto Recv
-Q Send-Q Local Address Foreign Address State PID/
Program name
tcp
0
0
0.0
.
0.0
:
ssh
0.0
.
0.0
:* LISTEN
1084
/
sshd
tcp
0
0
localhost:smtp
0.0
.
0.0
:* LISTEN
1486
/
master
tcp6
0
0
[::]:
ssh
[::]:* LISTEN
1084
/
sshd
tcp6
0
0
localhost:smtp [::]:* LISTEN
1486
/
master
tcp6
0
0
[::]:http [::]:* LISTEN
2449
/
httpd
udp
0
0
localhost:
323
0.0
.
0.0
:*
592
/
chronyd
udp6
0
0
localhost:
323
[::]:*
592
/chronyd
1.8 查服务器IP
[root@nmserver-
7
~
]# ip addr
1
: lo: <LOOPBACK,UP,LOWER_UP> mtu
65536
qdisc noqueue state UNKNOWN qlen
1
link
/loopback
00
:
00
:
00
:
00
:
00
:
00
brd
00
:
00
:
00
:
00
:
00
:
00
inet
127.0
.
0.1
/
8
scope host lo
valid_lft forever preferred_lft forever
inet6 ::
1
/
128
scope host
valid_lft forever preferred_lft forever
2
: ens33: <BROADCAST,MULTICAST,UP,LOWER_UP> mtu
1500
qdisc pfifo_fast state UP qlen
1000
link
/ether
00
:0c:
29
:
56
:bc:cf brd ff:ff:ff:ff:ff:ff
inet
192.168
.
8.9
/
24
brd
192.168
.
8.255
scope global ens33
valid_lft forever preferred_lft forever
inet6 fe80::20c:29ff:fe56:bccf
/
64
scope link
valid_lft forever preferred_lft forever
3
: bridge0: <NO-CARRIER,BROADCAST,MULTICAST,UP> mtu
1500
qdisc noqueue state DOWN qlen
1000
link
/ether ea:
89
:d5:c7:
32
:
73
brd ff:ff:ff:ff:ff:ff
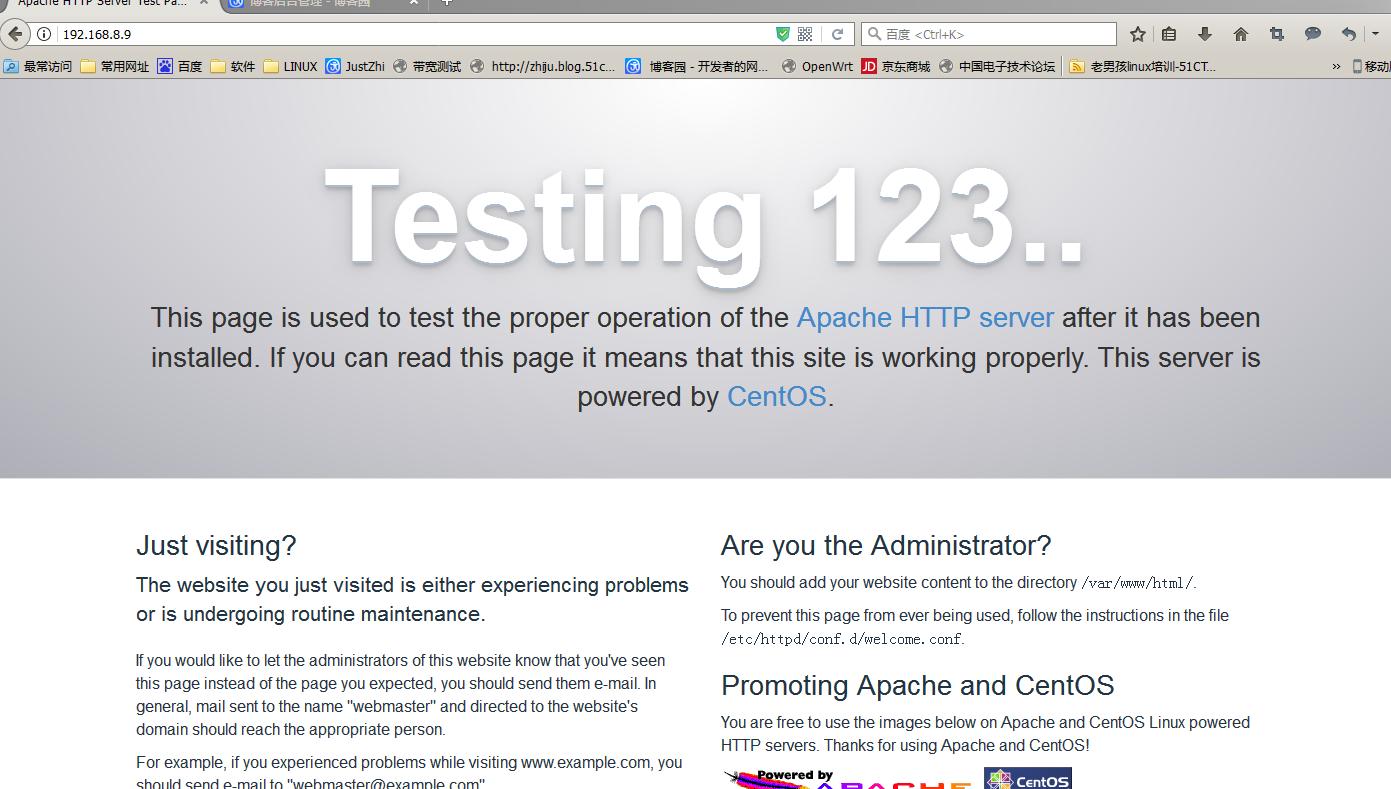
1.9 浏览器登陆
2、安装mysql
2.1安装mysql
[root@nmserver-
7
~]#
yum
install
mariadb mariadb-server mariadb-libs mariadb-devel
root@nmserver-
7
~]# rpm -qa |
grep
maria
mariadb
-libs-
5.5
.
52
-
1
.el7.i686
mariadb
-
5.5
.
52
-
1
.el7.i686
mariadb
-server-
5.5
.
52
-
1
.el7.i686
mariadb
-devel-
5.5
.
52
-
1
.el7.i686
2.2 开启mysql服务,并设置开机启动,检查mysql状态
[root@nmserver-
7
~
]# systemctl start mariadb
[root@nmserver
-
7
~
]# systemctl enable mariadb
Created symlink from
/etc/systemd/system/multi-user.target.wants/mariadb.service to /usr/lib/systemd/system/
mariadb.service.
[root@nmserver
-
7
~
]# systemctl status mariadb
● mariadb.service
-
MariaDB database server
Loaded: loaded (
/usr/lib/systemd/system/
mariadb.service; enabled; vendor preset: disabled)
Active: active (running) since 六
2017
-
07
-
22
21
:
19
:
20
CST; 21s ago
Main PID:
9603
(mysqld_safe)
CGroup:
/system.slice/
mariadb.service
├─
9603
/bin/
sh
/usr/bin/mysqld_safe --basedir=/
usr
└─
9760
/usr/libexec/mysqld --basedir=/usr --datadir=/
v...
[root@nmserver-
7
~]# netstat -
tulp
Active Internet connections (only servers)
Proto Recv
-Q Send-Q Local Address Foreign Address State PID/
Program name
tcp
0
0
0.0
.
0.0
:
ssh
0.0
.
0.0
:* LISTEN
1084
/
sshd
tcp
0 0 0.0.0.0:mysql 0.0.0.0:* LISTEN 9760/
mysqld
tcp6
0
0
[::]:
ssh
[::]:* LISTEN
1084
/
sshd
tcp6
0
0
[::]:http [::]:* LISTEN
2449
/
httpd
udp
0
0
localhost:
323
0.0
.
0.0
:*
592
/
chronyd
udp6
0
0
localhost:
323
[::]:*
592
/chronyd
2.3 数据库安全设置
[root@nmserver-
7
~
]# mysql_secure_installation
NOTE: RUNNING ALL PARTS OF THIS SCRIPT IS RECOMMENDED FOR ALL MariaDB
SERVERS IN PRODUCTION USE
! PLEASE READ EACH STEP CAREFULLY!
In order to log into MariaDB to secure it, we
'
ll need the current
password
for
the root user. If you
'
ve just installed MariaDB, and
you haven
'
t set the root password yet, the password will be blank,
so you should just press enter here.
Enter current password
for
root (enter
for
none):
OK, successfully used password, moving on...
Setting the root password ensures that nobody can log into the MariaDB
root user without the proper authorisation.
Set root password
? [Y/
n] y
New password:
Re
-
enter new password:
Password updated successfully
!
Reloading privilege tables..
... Success
!
By default, a MariaDB installation has an anonymous user, allowing anyone
to log into MariaDB without having to have a user account created
for
them. This is intended only
for
testing, and to
make
the installation
go a bit smoother. You should remove them before moving into a
production environment.
Remove anonymous users
? [Y/
n] y
... Success
!
Normally, root should only be allowed to connect from
'
localhost
'
. This
ensures that someone cannot guess at the root password from the network.
Disallow root
login
remotely? [Y/
n] n
... skipping.
By default, MariaDB comes with a database named
'
test
'
that anyone can
access. This is also intended only
for
testing, and should be removed
before moving into a production environment.
Remove test database and access to it
? [Y/
n] y
-
Dropping test database...
... Success
!
-
Removing privileges on test database...
... Success
!
Reloading the privilege tables will ensure that all changes made so far
will take effect immediately.
Reload privilege tables now
? [Y/
n] y
... Success
!
Cleaning up...
All
done
! If you
'
ve completed all of the above steps, your MariaDB
installation should now be secure.
Thanks
for
using MariaDB!
2.4 登陆数据库测试
[root@nmserver-
7
~]# mysql -uroot -
p
Enter password:
Welcome to the MariaDB monitor. Commands end with ; or \g.
Your MariaDB connection
id
is
11
Server version:
5.5
.
52
-
MariaDB MariaDB Server
Copyright (c)
2000
,
2016
, Oracle, MariaDB Corporation Ab and others.
Type
'
help;
'
or
'
\h
'
for
help. Type
'
\c
'
to
clear
the current input statement.
MariaDB [(none)]
>
show databases;
+--------------------+
| Database |
+--------------------+
| information_schema |
| mysql |
| performance_schema |
+--------------------+
3
rows
in
set (
0.02
sec)
MariaDB [(none)]
>
3、安装PHP
3.1 安装php
[root@nmserver-
7
~]#
yum
-y
install
php
[root@nmserver-
7
~]# rpm -
ql php
/etc/httpd/conf.d/
php.conf
/etc/httpd/conf.modules.d/
10
-
php.conf
/usr/lib/httpd/modules/
libphp5.so
/usr/share/httpd/icons/
php.gif
/var/lib/php/session
3.2 将php与mysql关联起来
[root@nmserver-
7
~]#
yum
install
php-
mysql
[root@nmserver
-
7
~]# rpm -ql php-
mysql
/etc/php.d/
mysql.ini
/etc/php.d/
mysqli.ini
/etc/php.d/
pdo_mysql.ini
/usr/lib/php/modules/
mysql.so
/usr/lib/php/modules/
mysqli.so
/usr/lib/php/modules/pdo_mysql.so
3.3 安装常用PHP模块
[root@nmserver-
7
~]#
yum
install
-y php-gd php-ldap php-odbc php-pear php-xml php-xmlrpc php-mbstring php-snmp php-soap curl curl-devel php-bcmath
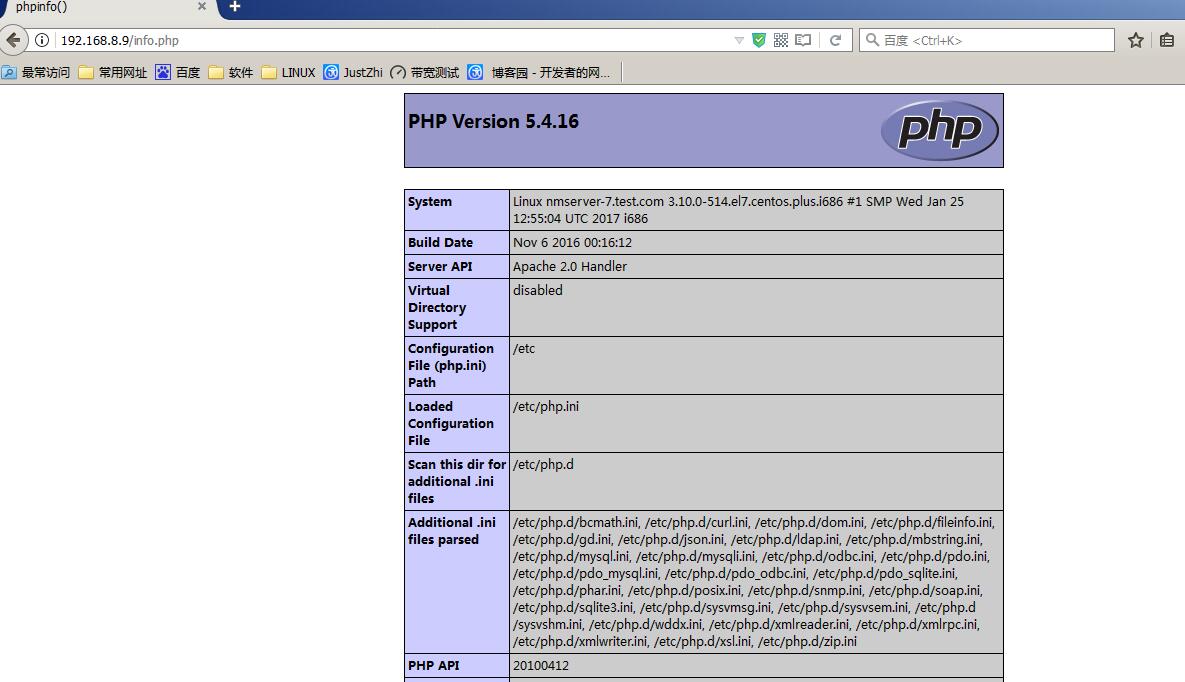
3.4 测试PHP
[root@nmserver-7 ~]# cd /var/www/html/
[root@nmserver-7 html]# ls
[root@nmserver-7 html]# pwd
/var/www/html
[root@nmserver-7 html]# vi info.php
<?php
phpinfo();
?>
~
~
~
~
~
~
~
~
:wq
3.5重启apache服务器
[root@nmserver-
7
html]# systemctl restart http
3.6测试PHP
在自己电脑浏览器输入 192.168.8.9/
info.php
,你可以看到已经安装的模块;