七层负载均衡
设置环境:
1、关闭防火墙,selinux
2、域名解析
vim /etc/hosts
一台客户机:client
不用做任何操作,但要保证网络能通
在网页中输入代理的ip,若测试动态页面,在ip后面加上index.php
一台代理:nginx-dr
1、安装nginx
2、修改nginx配置文件
[root@nginx-dr ~]# vim /etc/nginx/nginx.conf
注:在http中加入upstream,在server中location正则匹配动静态网页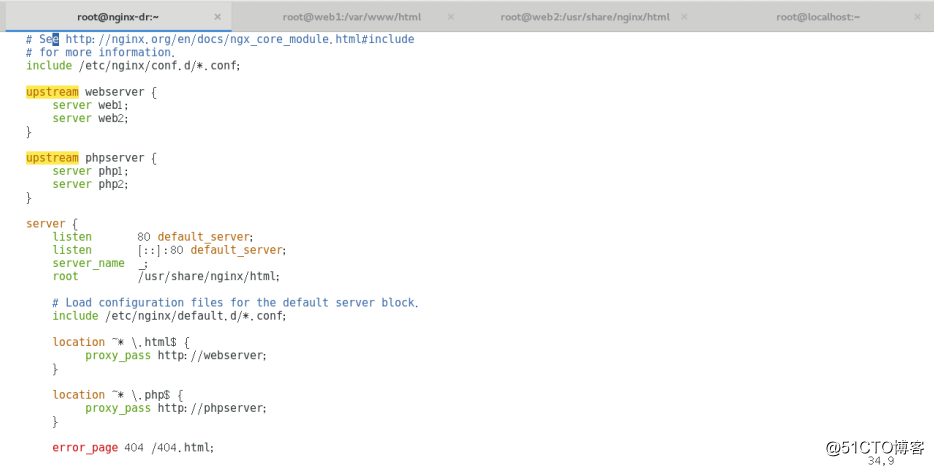
3、重启nginx
systemctl restart nginx
两台做静态网页:web1,web2
web1:
1、下载apache
yum -y install httpd
2、进入网页配置文件,添加apache静态网页
[root@web1 ~]# cd /var/www/html/
[root@web1 html]# vim index.html
web1 apache
3、启动apache
web2:
1、下载nginx
[root@web2 ~]# yum -y install nginx
2、进入网页配置文件,添加nginx静态网页
[root@web2 ~]# cd /usr/share/nginx/html/
[root@web2 html]# vim index.html
web2 nginx
3、启动nginx
两台做动态网页:php1,php2
php1:
1、下载apache、php
[root@php1 ~]# yum -y install httpd php
2、进入网页配置文件,添加apache动态网页
[root@php1 ~]# cd /var/www/html/
[root@php1 html]# vim index.php 
3、启动apache
[root@php1 ~]# systemctl restart httpd
php2:
1、下载nginx、php、php-fpm
[root@php2 ~]# yum -y install nginx php php-fpm
2、进入网页配置文件,添加nginx动态网页
[root@php2 ~]# cd /usr/share/nginx/html/
[root@php2 html]# vim index.php 
3、进入php-fpm的配置文件
[root@php2 ~]# vim /etc/nginx/nginx.conf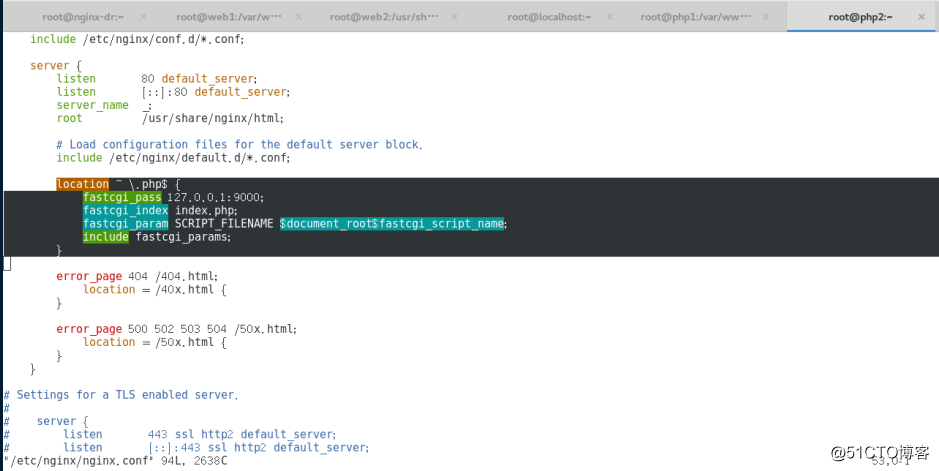
4、进入nginx的配置文件
[root@php2 ~]# vim /etc/php-fpm.d/www.conf 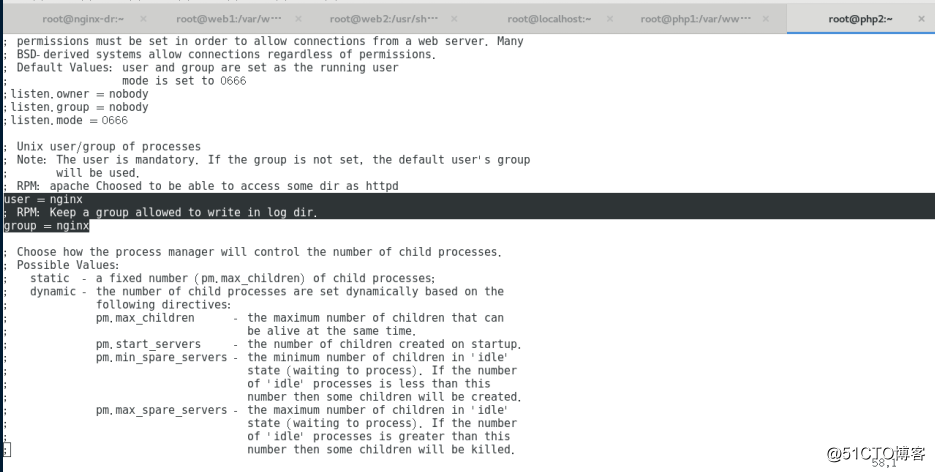
5、启动nginx、php-fpm
[root@php2 ~]# systemctl restart nginx
[root@php2 ~]# systemctl restart php-fpm
测试:
直接在页面中输入代理机的ip,就可以了
<不太完整请见谅!>