一、Nginx负载均衡概述
web服务器,直接面向用户,往往要承载大量并发请求,单台服务器难以负荷,我使用多台web服务器组成集群,前端使用Nginx负载均衡,将请求分散的转发到我们后端服务器集群中,实现负载的分发,那么会大大提升系统的吞吐率、请求性能、高容灾之前在负载均衡调度器这里采用lvs的比较多,由于lvs只能实现对四层传输层的负载均衡,也就是说只能基于ip和端口号进行转发,假如有很多集群,比如01集群、02集群,端口号都是80,无法进行区分,lvs无法基于这种应用名称来转发进行负载均衡,因此就有了Nginx负载均衡,Nginx负载均衡既可以实现对四层的负载又可以实现对七层的负载,可以根据ip端口也可以根据应用名称来转发。
1.负载均衡原理
在之前一直认为负载均衡是当第一个用户连接过来就转发给web01,第二个用户连接过来就转发给web02,其实这是错误的,虽然有2个用户在连接,但是只会产生一个TCP连接,因为负载均衡池是一个整体,负载均衡是根据http请求来转发进行负载的,比如一个页面共有10个http请求,第一个http请求会转发给web01,第二个http请求转发给web02,也就是web01承担1,3,5,7,9的http请求,web02承担2,4,6,8,10的http请求,分工合作,当负载均衡服务器池的节点越多,页面访问的速度就会越快。
2.Nginx常用的云平台介绍
阿里云 SLB
腾讯云 CLB
青云 QLB
ucloud ULB
3.Nginx四层与七层的区别
- Nginx负载均衡按层划分
- 二层:基于mac地址
- 三层:基于ip地址
- 四层:基于ip和端口号
- 七层:基于应用协议
四层负载均衡:IP地址、TCP/UDP、端口号
七层负载均衡:HTTP、HTTPS、FTP、SMTP
下图为企业较为常用的负载拓步架构
首先用户发送请求首先会被转发到四层负载均衡上,因为访问网站都是基于域名加端口的,四层就满足了访问条件,然后在根据请求的内容转发到七层负载上,七层负载再根据请求的类型转发到不同的后端web集群,四层和七层也可以在一台服务器上,使用Nginx就可以实现这种架构
 扫描二维码关注公众号,回复: 14780531 查看本文章
二、nginx源码下载及配置
1.nginx官网下载地址
官方地址:https://bitbucket.org/nginx-goodies/nginx-sticky-module-ng/src
下载地址:wget https://bitbucket.org/nginx-goodies/nginx-sticky-module-ng/get/master.tar.gz
[root@server1 ~]# tar zxf master.tar.gz
[root@server1 ~]# ls
master.tar.gz nginx-goodies-nginx-sticky-module-ng-08a395c66e42
[root@server1 ~]# rm -fr *
[root@server1 ~]# ls
nginx-1.20.1.tar.gz
[root@server1 ~]# tar zxf nginx-1.20.1.tar.gz
[root@server1 ~]# ls
nginx-1.20.1 nginx-1.20.1.tar.gz
[root@server1 ~]# cd nginx-1.20.1
[root@server1 nginx-1.20.1]# ls
auto CHANGES CHANGES.ru conf configure contrib html LICENSE man README src
[root@server1 nginx-1.20.1]# ./configure --help ##可以看到可用参数

2. 进入nginx源码目录进行编译
[root@server1 nginx-1.20.1]# ./configure --prefix=/usr/local/nginx --with-http_stub_status_module --with-http_ssl_module
checking for OS
+ Linux 3.10.0-957.el7.x86_64 x86_64
checking for C compiler ... not found
./configure: error: C compiler cc is not found ##显示gcc没有编辑器
[root@server1 nginx-1.20.1]# yum install -y gcc

[root@server1 nginx-1.20.1]# ./configure --prefix=/usr/local/nginx --with-http_stub_status_module --with-http_ssl_module
./configure: error: the HTTP rewrite module requires the PCRE library. 显示缺少PERC库,下载PCRE
[root@server1 nginx-1.20.1]# yum install -y pcre-devel 下载通常为库名+devel

[root@server1 nginx-1.20.1]# ./configure --prefix=/usr/local/nginx --with-http_stub_status_module --with-http_ssl_module
./configure: error: SSL modules require the OpenSSL library. 提示缺少OpenSSL库,下载OpenSSL
[root@server1 nginx-1.20.1]# yum install -y openssl-devel

[root@server1 nginx-1.20.1]# ./configure --prefix=/usr/local/nginx --with-http_stub_status_module --with-http_ssl_module ##安装模块
安装好模块之后,会生成Makefile文件,然后使用make指令
make指令,是在安装有GNU Make的计算机上的可执行指令。该指令是读入一个名为 ’Makefile’的文件,然后执行这个文件中指定的指令。
make完成之后,使用
make install命令将可执行文件、第三方依赖包和文档复制到正确的路径

安装完成后,可以看到objs目录下有nginx,conf/中放有配置文件

创建软链接到/usr/local/sbin/(这样在开启nginx服务的时候就不需要进到目录下开启,软连接的方式可以方便开启全局nginx)
[root@server1 nginx]# /usr/local/nginx/sbin/nginx -t ## 检测语法
[root@server1 nginx]# ln -s /usr/local/nginx/conf/nginx.conf /usr/local/bin
[root@server1 nginx]# which nginx 查询当前位置
[root@server1 nginx]# nginx ##开启nginx
[root@server1 nginx]# nginx -s reload ##刷新
[root@server1 nginx]# nginx -s stop ##停止
[root@server1 nginx]# nginx[root@server1 nginx]# curl localhost


访问http://172.25.10.1 会出现

若是想使用systemctl 命令需要添加脚本,将nginx放进指定文件中
[root@server1 ~]# cd /usr/lib/systemd/system
[root@server1 system]# vim nginx.service
[root@server1 system]# cat nginx.service
[Unit]
Description=The NGINX HTTP and reverse proxy server
After=syslog.target network.target remote-fs.target nss-lookup.target[Service]
Type=forking
PIDFile=/usr/local/nginx/logs/nginx.pid
ExecStartPre=/usr/local/nginx/sbin/nginx -t
ExecStart=/usr/local/nginx/sbin/nginx
ExecReload=/usr/local/nginx/sbin/nginx -s reload
ExecStop=/bin/kill -s QUIT $MAINPID
PrivateTmp=true[root@server1 system]# cd /usr/local/nginx/logs/
[root@server1 logs]# ls
access.log error.log nginx.pid
[root@server1 logs]# cd /usr/local/nginx/
[root@server1 nginx]# cd sbin/
[root@server1 sbin]# ls
nginx
[root@server1 sbin]# cd /usr/lib/systemd/system
[root@server1 system]# systemctl daemon-reload ##刷新服务列表

[root@server1 system]# systemctl start nginx.service ##如果启动失败,kill所有nginx的进程
[root@server1 system]# ps ax| grep nginx[root@server1 system]# ps ax | grep nginx
8544 ? Ss 0:00 nginx: master process nginx
8545 ? S 0:00 nginx: worker process
8546 ? S 0:00 nginx: worker process
8636 pts/0 S+ 0:00 grep --color=auto nginx
[root@server1 system]# kill -9 8544
[root@server1 system]# kill -9 8545
[root@server1 system]# kill -9 8546
[root@server1 system]# ps ax | grep nginx
8638 pts/0 S+ 0:00 grep --color=auto nginx[root@server1 system]# systemctl start nginx.service
[root@server1 system]# systemctl status nginx.service

二、优化配置
编辑主配置文件,优化nginx的工作效率
修改进程数
root@server1 system]# nginx -s stop
[root@server1 system]# cd /usr/local/nginx/conf/
[root@server1 conf]# ls
[root@server1 conf]# vim nginx.conf
user nginx;
worker_processes 2; ##worker进程的数量
worker_cpu_affinity 01 10; 将worker进程绑定到指定cpu上,可以提高缓存命中率
[root@server1 conf]# ps ax

控制nginx的最大连接数(修改open files值)
单个进程允许的最大连接数需要根据服务器性能和内存使用量作相应的调整。进程的最大连接数又受到linux系统进程的最大打开文件数限制。所以nginx的最大总并发连接数=worker 数量 * 单个进程最大连接数
可以看到此时的open files数为1024
一个应用程序能开启的最大连接数是受到限制的,内核限制>系统限制>应用软件限制。
[root@server1 conf]# sysctl -a | grep file ##查看内核支持的最大文件打开数
[root@server1 conf]# ulimit -a ##查看系统支持的最大文件打开数

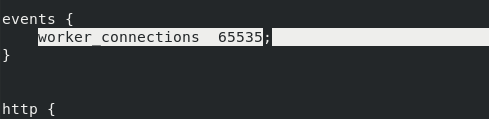
想将open files值改为65535,需要两步:
1、修改主配置文件/usr/lical/nginx/conf/nginx.confvim /usr/lical/nginx/conf/nginx.conf
worker_connections 65535;
2、修改文件/etc/security/limits.conf 修改linux系统所限制的最大连接数,数量一般应大于所申请数。
vim /etc/security/limits.confnginx - nofile 65536


[root@server1 conf]# useradd nginx
[root@server1 conf]# usermod -s /sbin/nologin nginx
[root@server1 conf]# id nginx
uid=1000(nginx) gid=1000(nginx) groups=1000(nginx)
[root@server1 conf]# nginx
[root@server1 conf]# ps axu


切换用户 查询可看到open files 值更改为65535

三、 第三方模块sticky
sticky模块与Ip_hash都是与负载均衡算法相关,但又有差别,差别是:
1.ip hash,根据客户端的IP,将请求分配到不同的服务器上
2.sticky,根据服务器给客户端的cookie,客户端再次请求时会带上此cookie,nginx会把有此cookie的请求转发到颁发cookie的服务器上
注意:在一个局域网内有3台电脑,他们有3个内网IP,但是他们发起请求时,却只有一个外网IP,是电信运营商分配在他们连接那个路由器上的,如果使用 ip_hash 方式,则Nginx会将请求分配到不同上游服务器,如果使用 sticky 模块,则会把请求分配到办法cookie的服务器上,实现:内网nat用户的均衡。这是iphash无法做到的。
工作原理:
Sticky是基于cookie的一种负载均衡解决方案,通过分发和识别cookie,使来自同一个客户端的请求落在同一台服务器上,默认cookie标识名为route :
1.客户端首次发起访问请求,nginx接收后,发现请求头没有cookie,则以轮询方式将请求分发给后端服务器。
2.后端服务器处理完请求,将响应数据返回给nginx。
3.此时nginx生成带route的cookie,返回给客户端。route的值与后端服务器对应,可能是明文,也可能是md5、sha1等Hash值
4.客户端接收请求,并保存带route的cookie。
5.当客户端下一次发送请求时,会带上route,nginx根据接收到的cookie中的route值,转发给对应的后端服务器。
[root@server1 ~]# ls
nginx-1.20.1 nginx-1.20.1.tar.gz nginx-goodies-nginx-sticky-module-ng-08a395c66e42.zip
[root@server1 ~]# yum install -y unzip

[root@server1 ~]# unzip nginx-goodies-nginx-sticky-module-ng-08a395c66e42.zip

1.关闭debug
[root@server1 ~]# cd nginx-1.20.1/
[root@server1 nginx-1.20.1]# vim auto/cc/gcc
172 #CFLAGS="$CFLAGS -g" ##注释


2.隐藏版本号
[root@server1 nginx-1.20.1]# vim src/core/nginx.h
#define NGINX_VER "nginx" ##将后面的版本号删除

3.停止nginx
[root@server1 nginx-1.20.1]# nginx -s stop
[root@server1 nginx-1.20.1]# ps aux | grep nginx
[root@server1 nginx-1.20.1]# cd objs/
[root@server1 objs]# du -h nginx

4.加入模块
[root@server1 nginx-1.20.1]# make clean
rm -rf Makefile objs
[root@server1 nginx-1.20.1]# ./configure --prefix=/usr/local/nginx --with-http_stub_status_module --with-http_ssl_module --add-module=/root/nginx-goodies-nginx-sticky-module-ng-08a395c66e42 ##添加模块

[root@server1 nginx-1.20.1]# make
[root@server1 nginx-1.20.1]# cd objs/
[root@server1 objs]# ls[root@server1 objs]# du -h nginx
936K nginx
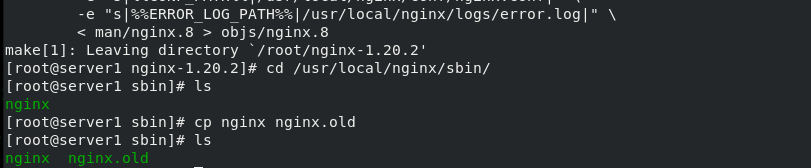
[root@server1 objs]# cd /usr/local/nginx/sbin/
[root@server1 sbin]# lsnginx
[root@server1 sbin]# mv nginx nginx.old
[root@server1 sbin]# ls
nginx.old
[root@server1 sbin]# cd -
/root/nginx-1.20.1/objs
[root@server1 objs]# cp nginx /usr/local/nginx/sbin/
[root@server1 objs]# nginx
[root@server1 objs]# nginx -t
nginx: the configuration file /usr/local/nginx/conf/nginx.conf syntax is ok
nginx: configuration file /usr/local/nginx/conf/nginx.conf test is successful


[root@server1 objs]# cd /usr/local/nginx/conf/
[root@server1 conf]# vim nginx.confhttp {
upstream westos{
sticky; ##添加 sticky
server 172.25.10.2:80;
server 172.25.10.3:80;
#server 172.25.10.1:8080 backup; ##注释(不注释语法会出错)
}include mime.types;
default_type application/octet-stream;[root@server1 conf]# nginx -t
[root@server1 conf]# nginx -s reload
[root@server1 conf]# curl localhost -I


[root@server1 conf]# vim nginx.conf
22 #sticky; ##注释
23 server 172.25.10.2:80 weight=2; ##server2加权重[root@server1 conf]# nginx -s reload

在客户端访问查看:
[root@westos_student73 Desktop]#for i in {1..10}; do curl www.westos.org;done ##server2是3的两倍

[root@server1 conf]# vim nginx.conf
21 upstream westos{
22 ip_hash; ##固定ip,固定负载
23 #sticky;
24 server 172.25.10.2:80 weight=2;
25 server 172.25.10.3:80;
26 #server 172.25.10.1:8080 backup;[root@server1 conf]# nginx -s reload
[root@westos_student73 Desktop]# for i in {1..10}; do curl www.westos.org;done

四.平滑升级
平滑升级就是在不影响当前程序运行的情况下,对Nginx版本进行升级、添加/删除服务器模块。
步骤:
下载nginx新版本软件,正常执行./configure 和make 但不要执行make install
备份原程序
拷贝新程序
获取当前nginx主进程pid
升级新程序
关闭原worker进程但保留主进程:为了回退
建立链接:真实主机(下载不需要进行scp)
[root@foundation52 kiosk]# iptables -t nat -I POSTROUTING -s 172.25.52.250/24 -j MASQUERADE
[root@server1 ~]# tar zxf nginx-1.20.2.tar.gz
[root@server1 ~]# ls[root@server1 ~]# cd nginx-1.20.2
[root@server1 nginx-1.20.2]# ls
auto CHANGES CHANGES.ru conf configure contrib html LICENSE man README src
[root@server1 nginx-1.20.2]# ./configure --prefix=/usr/local/nginx --with-http_stub_status_module --with-http_ssl_module[root@server1 nginx-1.20.2]# make
[root@server1 nginx-1.20.2]# cd /usr/local/nginx/sbin/
[root@server1 sbin]# ls
nginx
[root@server1 sbin]# cp nginx nginx.old ###将2.1版本的复制为nginx.old[root@server1 sbin]# ls
nginx nginx.old


[root@server1 ~]# cd nginx-1.20.2
[root@server1 nginx-1.20.2]# cd objs/
[root@server1 objs]# ls[root@server1 objs]# \cp -f nginx /usr/local/nginx/sbin/
[root@server1 objs]# cd /usr/local/nginx/sbin/
[root@server1 sbin]# ll
total 11772
-rwxr-xr-x 1 root root 6025432 Apr 16 16:23 nginx
-rwxr-xr-x 1 root root 6023720 Apr 16 16:19 nginx.old
[root@server1 sbin]# date
Sat Apr 16 16:24:10 CST 2022

[root@server1 sbin]# ps ax | grep nginx
[root@server1 sbin]# kill -USR2 19300
[root@server1 sbin]# ps ax | grep nginx
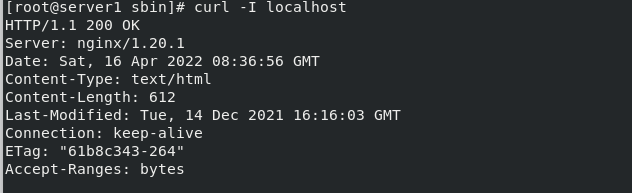
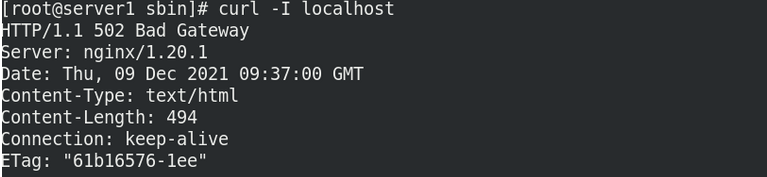
[root@server1 sbin]# curl -I localhost

[root@server1 sbin]# kill -WINCH 19300
[root@server1 sbin]# curl -I localhost ##已经换成显示1.20.2的版本

五、版本平滑回退
[root@server1 sbin]# ls
nginx nginx.old
[root@server1 sbin]# cp nginx nginx.new
[root@server1 sbin]# \cp -f nginx.old nginx
[root@server1 sbin]# ll
[root@server1 sbin]# ps ax | grep nginx
[root@server1 sbin]# kill -HUP 19300 ##打开旧版本
[root@server1 sbin]# kill -WINCH 24808 ##关闭新版本
[root@server1 sbin]# curl -I localhost ##显示旧版本