整合方式一:
starter 自动处理以btl结尾的视图,模板根目录是Spring Boot默认的templates目录。如下配置可以修改beetl部分属性
- beetl-beetlsql.dev,默认为true,即自动检查模板变化
- beetl.enabled 默认为true,集成beetl。
- beetl.suffix 默认为btl,表示只处理视图后缀为btl的模板,比如controller里代码是“return /common/index.btl”,则能被Beetl处理,你写成"return /common/index",或者"/common/index.html",都会出现404错误。
Starter可以实现BeetlTemplateCustomize来定制Beetl
@Configuration
public MyConfig{
  @Bean
  public BeetlTemplateCustomize beetlTemplateCustomize(){
    return new BeetlTemplateCustomize(){
      public void customize(GroupTemplate groupTemplate){

      }
    };
  }
}
整合方式二:
使用Starter来配置已经够用,如果你想自己配置模板引擎, 通过java config来配置 beetl需要的BeetlGroupUtilConfiguration,和 BeetlSpringViewResolver,参考代码如下
@Configuration
public class BeetlConf {

        @Value("${beetl.templatesPath}") String templatesPath;//模板根目录 ,比如 "templates"
        @Bean(name = "beetlConfig")
        public BeetlGroupUtilConfiguration getBeetlGroupUtilConfiguration() {
                BeetlGroupUtilConfiguration beetlGroupUtilConfiguration = new BeetlGroupUtilConfiguration();
               //获取Spring Boot 的ClassLoader
           ClassLoader loader = Thread.currentThread().getContextClassLoader();
        if(loader==null){
            loader = BeetlConf.class.getClassLoader();
        }
        beetlGroupUtilConfiguration.setConfigProperties(extProperties);//额外的配置,可以覆盖默认配置,一般不需要
        ClasspathResourceLoader cploder = new ClasspathResourceLoader(loader,
                templatesPath);
        beetlGroupUtilConfiguration.setResourceLoader(cploder);
        beetlGroupUtilConfiguration.init();
        //如果使用了优化编译器,涉及到字节码操作,需要添加ClassLoader
        beetlGroupUtilConfiguration.getGroupTemplate().setClassLoader(loader);
        return beetlGroupUtilConfiguration;

        }

        @Bean(name = "beetlViewResolver")
        public BeetlSpringViewResolver getBeetlSpringViewResolver(@Qualifier("beetlConfig") BeetlGroupUtilConfiguration beetlGroupUtilConfiguration) {
                BeetlSpringViewResolver beetlSpringViewResolver = new BeetlSpringViewResolver();
                beetlSpringViewResolver.setContentType("text/html;charset=UTF-8");
                beetlSpringViewResolver.setOrder(0);
                beetlSpringViewResolver.setConfig(beetlGroupUtilConfiguration);
                return beetlSpringViewResolver;
        }

 }
注意:这里并没有配置后缀,因此controller代码里必须显式的加上后缀
    //return "/hello" 错误用法
    return "hello.html"
这里用第二种方式整合:
第一步:
添加依赖
添加beetl依赖后的pom文件
<?xml version="1.0" encoding="UTF-8"?>
<project xmlns="http://maven.apache.org/POM/4.0.0"
         xmlns:xsi="http://www.w3.org/2001/XMLSchema-instance"
         xsi:schemaLocation="http://maven.apache.org/POM/4.0.0 http://maven.apache.org/xsd/maven-4.0.0.xsd">
    <modelVersion>4.0.0</modelVersion>

    <groupId>com.xslde</groupId>
    <artifactId>springboot-example</artifactId>
    <version>1.0-SNAPSHOT</version>


    <parent>
        <groupId>org.springframework.boot</groupId>
        <artifactId>spring-boot-starter-parent</artifactId>
        <version>2.0.3.RELEASE</version>
    </parent>

    <properties>
        <beetl.version>1.1.55.RELEASE</beetl.version>
    </properties>

    <dependencies>
        <dependency>
            <groupId>org.springframework.boot</groupId>
            <artifactId>spring-boot-starter-web</artifactId>
        </dependency>
        <!--beetl模板引擎依赖-->
        <dependency>
            <groupId>com.ibeetl</groupId>
            <artifactId>beetl-framework-starter</artifactId>
            <version>${beetl.version}</version>
        </dependency>
    </dependencies>

    <!--Maven插件-->
    <build>
        <plugins>
            <plugin>
                <groupId>org.springframework.boot</groupId>
                <artifactId>spring-boot-maven-plugin</artifactId>
            </plugin>
        </plugins>
    </build>

</project>
第二步:
创建beetl配置文件:BeetlConf.class
package com.xslde.configurer;

import org.beetl.core.resource.ClasspathResourceLoader;
import org.beetl.ext.spring.BeetlGroupUtilConfiguration;
import org.beetl.ext.spring.BeetlSpringViewResolver;
import org.springframework.beans.factory.annotation.Qualifier;
import org.springframework.beans.factory.annotation.Value;
import org.springframework.context.annotation.Bean;
import org.springframework.context.annotation.Configuration;

/**
 * @Author xslde
 * @Description
 * @Date 2018/7/20 15:17
 */
@Configuration //加载配置文件
public class BeetlConf {

    @Value("${beetl.templatesPath}") String templatesPath;//模板根目录 ,比如 "templates"
    @Bean(name = "beetlConfig")
    public BeetlGroupUtilConfiguration getBeetlGroupUtilConfiguration() {
        BeetlGroupUtilConfiguration beetlGroupUtilConfiguration = new BeetlGroupUtilConfiguration();
        //获取Spring Boot 的ClassLoader
        ClassLoader loader = Thread.currentThread().getContextClassLoader();
        if(loader==null){
            loader = BeetlConf.class.getClassLoader();
        }
        //beetlGroupUtilConfiguration.setConfigProperties(extProperties);//额外的配置,可以覆盖默认配置,一般不需要
        ClasspathResourceLoader cploder = new ClasspathResourceLoader(loader,
                templatesPath);
        beetlGroupUtilConfiguration.setResourceLoader(cploder);
        beetlGroupUtilConfiguration.init();
        //如果使用了优化编译器,涉及到字节码操作,需要添加ClassLoader
        beetlGroupUtilConfiguration.getGroupTemplate().setClassLoader(loader);
        return beetlGroupUtilConfiguration;

    }

    @Bean(name = "beetlViewResolver")
    public BeetlSpringViewResolver getBeetlSpringViewResolver(@Qualifier("beetlConfig") BeetlGroupUtilConfiguration beetlGroupUtilConfiguration) {
        BeetlSpringViewResolver beetlSpringViewResolver = new BeetlSpringViewResolver();
        beetlSpringViewResolver.setContentType("text/html;charset=UTF-8");
        beetlSpringViewResolver.setOrder(0);
        beetlSpringViewResolver.setConfig(beetlGroupUtilConfiguration);
        return beetlSpringViewResolver;
    }

}
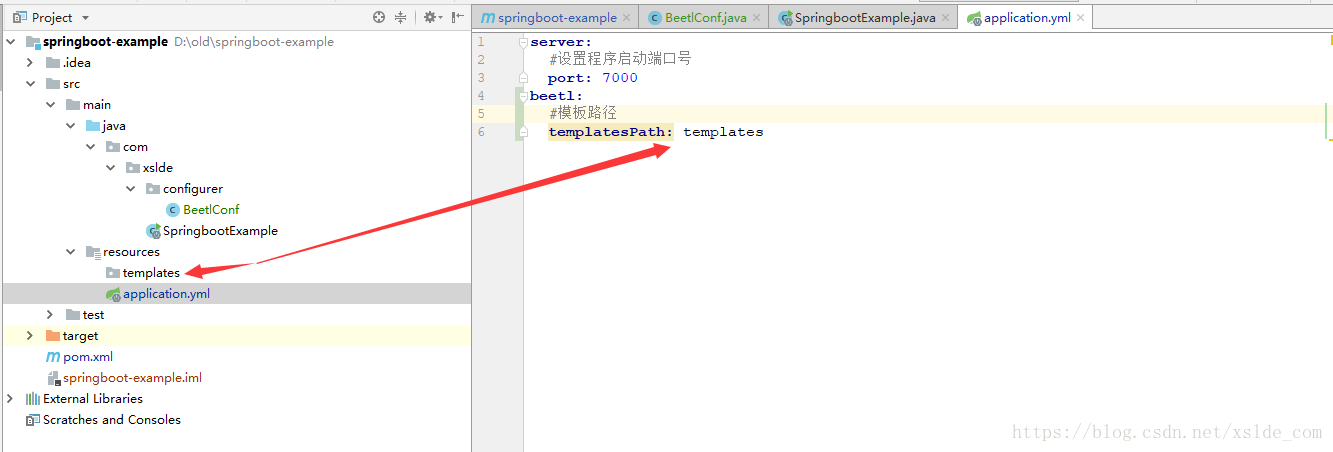
在application.yml中配置模板引擎路径:
创建一个 BeetlAction.class
package com.xslde.action;

import org.springframework.stereotype.Controller;
import org.springframework.ui.Model;
import org.springframework.web.bind.annotation.GetMapping;

/**
 * @Author xslde
 * @Description
 * @Date 2018/7/20 15:22
 */
@Controller
public class BeetlAction {

    @GetMapping({"/","/index","/beetl"})
    public String beetl(Model model){
        model.addAttribute("beetl","测试一下通过模板引擎传递参数!");
        return "index.html";
    }

}
在templates文件夹下创建一个html文件
index.html
<!DOCTYPE html>
<html lang="en">
<head>
    <meta charset="UTF-8">
    <title>测试页面</title>
</head>
<body>
<span>通过beetl取值</span>
<h1>${beetl!}</h1>
</body>
</html>
第三步:
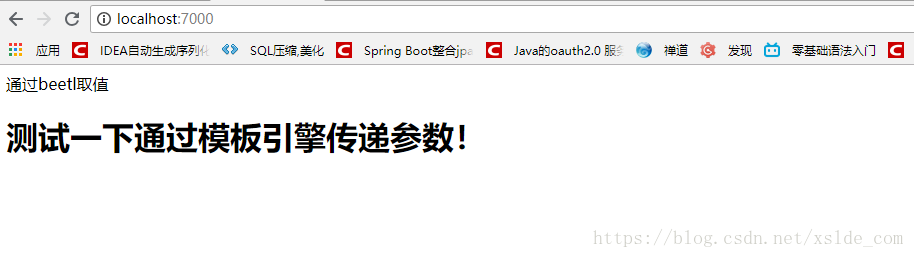
运行 SpringbootExample.class 中的main方法,运行成功后,访问 http://localhost:7000/beetl,页面显示如下,说明整合成功
如果需要更复杂的操作,见官网教程:点我
项目地址:springboot-example02