首先介绍一下点云的使用方法,ubuntu.04安装好pcl库之后,在安装目录pcl1.8/doc/tutorials有许多相关基本操作的使用教程,使用方法(在ubuntu14.04环境下编译运行方法):
    cd catkin_ws/src/
    catkin_create_pkg demo std_msgs rospy roscpp
    cloud_viewer.cpp文件拷贝到demo文件下,同时用cloud_viewer文件夹下的CmakeList.txt代替demo文件夹下的CmakeList.txt文件
    sudo cmake .
    sudo make
    ./cloud_viewer
1. 点云加载显示
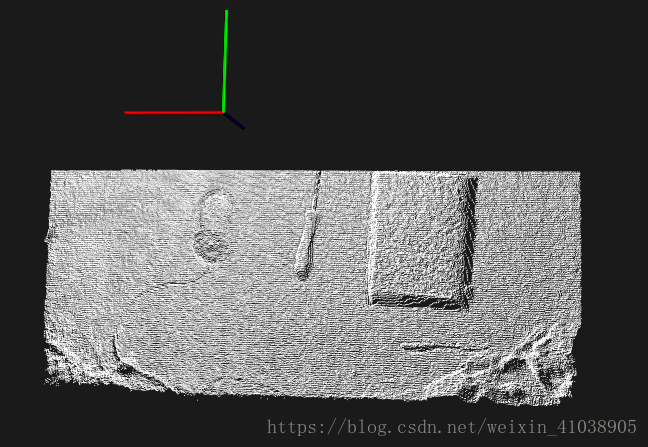
首先加载显示我使用kinect2随手所拍摄的一副点云图像:
#include <pcl/visualization/cloud_viewer.h>
#include <iostream>
#include <pcl/io/io.h>
#include <pcl/io/pcd_io.h>
int main ()
{
    pcl::PointCloud<pcl::PointXYZRGBA>::Ptr cloud (new pcl::PointCloud<pcl::PointXYZRGBA>);
    pcl::io::loadPCDFile ("0000_cloud.pcd", *cloud);

    pcl::visualization::CloudViewer viewer("Cloud Viewer");
    viewer.showCloud(cloud);
    while(!viewer.wasStopped())
    {
     viewer.spinOnce();
    }
    return (0);
}
linux下屏幕截图命令 : gnome-screenshot -a

2.点云直通滤波
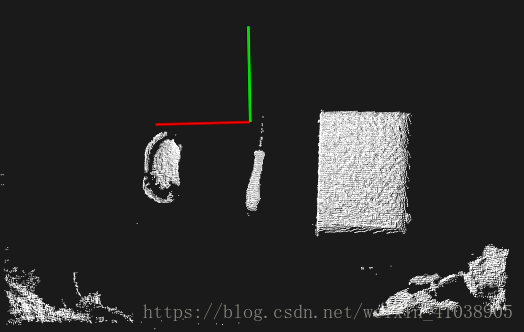
我们只关注桌面区域,采用直通滤波过滤掉桌面意外的部分,这里需要注意我们加载点云类型需要定义为:
pcl::PointCloud::Ptr cloud (new pcl::PointCloud);
定义为PointXYZRGBA后总会有报错,个人感觉二者应该会自动转化,这块暂时未能搞清楚.
pcl::PointCloud<pcl::PointXYZ>::Ptr cloud_filtered (new pcl::PointCloud<pcl::PointXYZ>);
// Create the filtering object
pcl::PassThrough<pcl::PointXYZ> pass;

pass.setInputCloud(cloud);
pass.setFilterFieldName("z");
pass.setFilterLimits(50, 400.0);
pass.setFilterFieldName("x");
pass.setFilterLimits(-100,100);
pass.setFilterFieldName("y");
pass.setFilterLimits(-150.0, 0.01);
pass.setFilterLimitsNegative (false);   //移去平面局内点,提取剩余点云
pass.filter(*cloud_filtered);
再次显示我的图像
3.点云平面分割
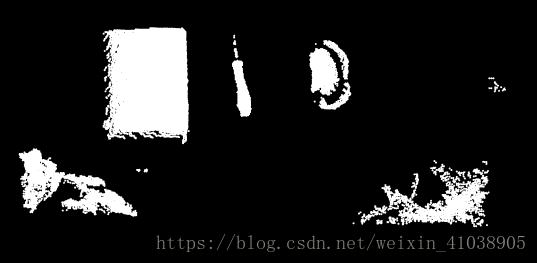
我们这里只保留了桌面部分,现在我想去掉桌面部分,只保留桌面上的物体,就要用到ransac平面分割了:
pcl::ModelCoefficients::Ptr coefficients (new pcl::ModelCoefficients); //存储输出模型系数
pcl::PointIndices::Ptr inliers (new pcl::PointIndices); //存储内点,使用的点
pcl::SACSegmentation<pcl::PointXYZ> seg;

seg.setOptimizeCoefficients (true);      //设置对估计的模型参数进行优化处理
seg.setModelType (pcl::SACMODEL_PLANE); //设置模型类型,检测平面
seg.setMethodType (pcl::SAC_RANSAC);      //设置方法【聚类或随机样本一致性】
seg.setDistanceThreshold (0.01);    //阈值不要设置太大
seg.setInputCloud (cloud_filtered);
seg.segment (*inliers, *coefficients);    //分割操作

// Extract the planar inliers from the input cloud
pcl::ExtractIndices<pcl::PointXYZ>  extract;
extract.setInputCloud(cloud_filtered);
extract.setIndices(inliers);
//除去平面之外的数据
extract.setNegative(true);
extract.filter(*cloud_filtered);
再次显示下这步操作之后的图片:
桌角边缘部分没有被去掉,先不要在乎这个细节,让我继续探索吧!!!去除利群点:
4.点云离群点去除
pcl::RadiusOutlierRemoval<pcl::PointXYZ> outrem;  // 创建滤波器
outrem.setInputCloud(cloud);
outrem.setRadiusSearch(0.3);          //设置在0.8半径的范围内找邻近点
outrem.setMinNeighborsInRadius(2);   //设置查询点的邻近点集数小于2的删除
outrem.filter(*cloud_filtered);     //执行条件滤波,存储结果到cloud_filtered
去除离群点之后的效果图:
5.点云法向量
 //创建法线的对象
     pcl::PointCloud<pcl::Normal>::Ptr normals(new pcl::PointCloud<pcl::Normal>);
    //创建法线估计的对象
     pcl::NormalEstimation<pcl::PointXYZ,pcl::Normal> normalEstimation;
     normalEstimation.setInputCloud(cloud_filtered);

    //Kd_tree是一种数据结构便于管理点云以及搜索点云,法线估计对象会使用这种结构来找到最近邻点
     pcl::search::KdTree<pcl::PointXYZ>::Ptr kdtree(new pcl::search::KdTree<pcl::PointXYZ>);
     normalEstimation.setSearchMethod(kdtree);
    //对于每一个点都用半径为3cm的近邻搜索方式
     normalEstimation.setRadiusSearch(0.02);
    //计算法线
     normalEstimation.compute(*normals);
显示法向量:
     pcl::visualization::PCLVisualizer viewer("PCL viewer");
     viewer.setBackgroundColor(0.0, 0.0, 0.0);
     viewer.addPointCloud<pcl::PointXYZ> (cloud_filtered, "sample cloud");
     viewer.setPointCloudRenderingProperties (pcl::visualization::PCL_VISUALIZER_POINT_SIZE,2 , "sample cloud");
viewer.addPointCloudNormals<pcl::PointXYZ, pcl::Normal> (cloud_filtered, normals); 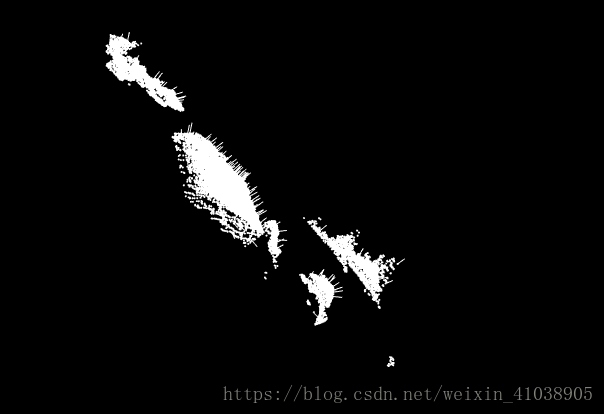
接下来研究聚类分割,待续….