一、nfs文件系统的安装和启用
nfs服务:(network file system)linux或unix系统之间实现资源的共享
本是思想:linuxA下/share文件夹,linuxB可以利用挂载(mount)机制将linuxA系统中的/share文件夹挂在到linuxB中,从而实现资源的共享。
[root@server ~]# yum install nfs-utils -y
[root@server ~]# systemctl start nfs
[root@server ~]# systemctl stop firewalld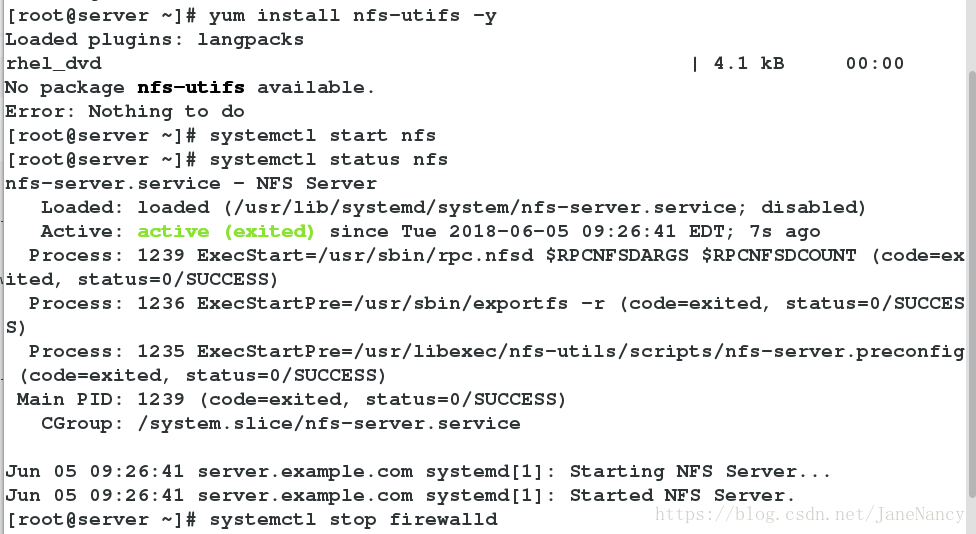
[root@client ~]# yum install nfs-utils -y
[root@client ~]# showmount -e 172.25.254.229    ##查看nfs共享状态
Export list for 172.25.254.229: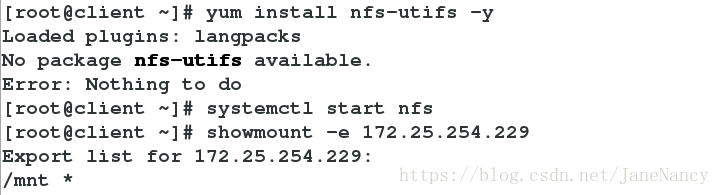
二、配置共享
1.只读权限
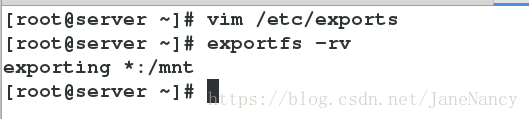
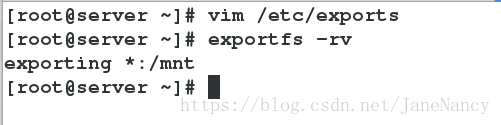
[root@server ~]# vim /etc/exports
写入:
  1 /mnt   *(sync,ro)    ##只读
[root@server ~]# exportfs -rv   ##刷新
exporting *:/mnt

[root@client ~]# umount /mnt/
[root@client ~]# mount 172.25.254.229:/mnt/ /mnt/
[root@client ~]# df
Filesystem          1K-blocks    Used Available Use% Mounted on
/dev/vda1            10473900 3182752   7291148  31% /
devtmpfs               469344       0    469344   0% /dev
tmpfs                  484932      80    484852   1% /dev/shm
tmpfs                  484932   12776    472156   3% /run
tmpfs                  484932       0    484932   0% /sys/fs/cgroup
/dev/mapper/vg0-vo     483670    2357    451822   1% /home
172.25.254.229:/mnt  10473984 3158400   7315584  31% /mnt
[root@client ~]# cd /mnt/
[root@client mnt]# ls
fiel1
[root@client mnt]# ll
total 0
-rw-r--r-- 1 root root 0 Jun  2 02:52 fiel1    ##只读
[root@client mnt]# 
2.读写权限
[root@server ~]# vim /etc/exports
写入:
  1 /mnt   *(sync,rw)    ##读写

[root@server ~]# exportfs -rv
exporting *:/mnt
[root@client ~]# mount 172.25.254.229:/mnt/ /mnt/
[root@client ~]# cd /mnt/
[root@client mnt]# ls
fiel1
[root@client mnt]# touch file2
touch: cannot touch ‘file2’: Permission denied 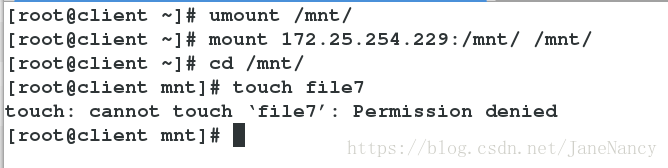
在server: chmod 777 /mnt/

[root@client mnt]# touch file2
[root@client mnt]# ll
total 0
-rw-r--r-- 1 root      root      0 Jun  2 02:52 fiel1
-rw-r--r-- 1 nfsnobody nfsnobody 0 Jun  2 04:51 file2
[root@client mnt]# 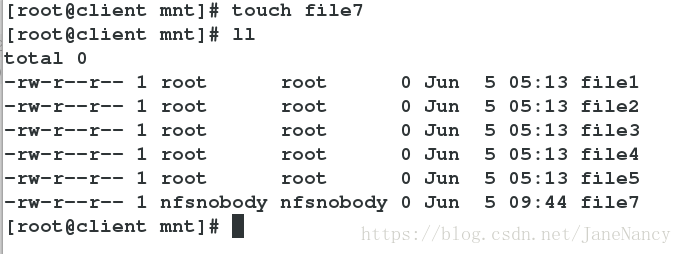
3.不改变身份建立文件
(这句话表示在客户端你用什么用户创建文件就属于谁)
[root@server ~]# vim /etc/exports
写入:
  1 /mnt   *(sync,rw,no_root_squash)    ##挂载建立文件依然保留root权限,不改变root身份
[root@server ~]# exportfs -rv
exporting *:/mnt
[root@client ~]# umount /mnt/
[root@client ~]# mount 172.25.254.229:/mnt/ /mnt/
[root@client ~]# cd /mnt/
[root@client mnt]# touch file3
[root@client mnt]# ll
total 0
-rw-r--r-- 1 root      root      0 Jun  2 02:52 fiel1
-rw-r--r-- 1 nfsnobody nfsnobody 0 Jun  2 04:51 file2
-rw-r--r-- 1 root      root      0 Jun  2 04:55 file3
[root@client mnt]# 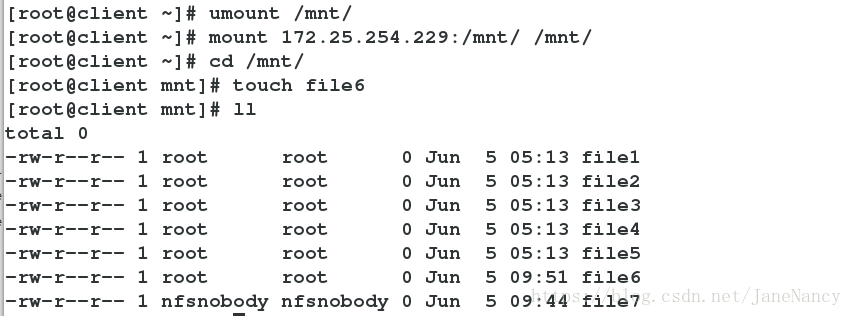
4.指定用户身份
[root@server ~]# vim /etc/exports
写入:
  1 /mnt   *(sync,rw,anonuid=1000,anongid=1000)    ##指定用户身份
[root@server ~]# exportfs -rv
exporting *:/mnt

[root@client ~]# umount /mnt/
[root@client ~]# umount /mnt/
umount: /mnt/: not mounted
[root@client ~]# mount 172.25.254.229:/mnt/ /mnt/
[root@client ~]# cd /mnt/
[root@client mnt]# touch file4
[root@client mnt]# ll
total 0
-rw-r--r-- 1 root      root      0 Jun  2 02:52 fiel1
-rw-r--r-- 1 nfsnobody nfsnobody 0 Jun  2 04:51 file2
-rw-r--r-- 1 root      root      0 Jun  2 04:55 file3
-rw-r--r-- 1 student   student   0 Jun  2 05:01 file4     ##就是student
5.指定IP
[root@server ~]# vim /etc/exports
写入:
2 /westos  172.25.254.129(sync,ro) 172.25.254.66(sync,rw)    ##129只读,66读写
[root@server ~]# exportfs -rv
exporting 172.25.254.129:/westos
exporting 172.25.254.66:/westos
exporting *:/mnt

[root@client ~]# umount /mnt/
[root@client ~]# mount 172.25.254.229:/westos/ /mnt/
[root@client ~]# cd /mnt/
[root@client mnt]# touch file10
touch: cannot touch ‘file10’: Read-only file system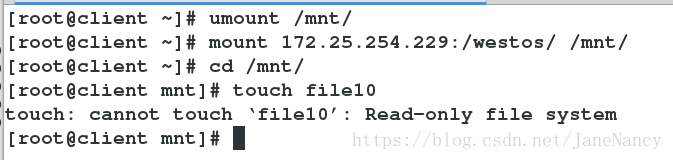
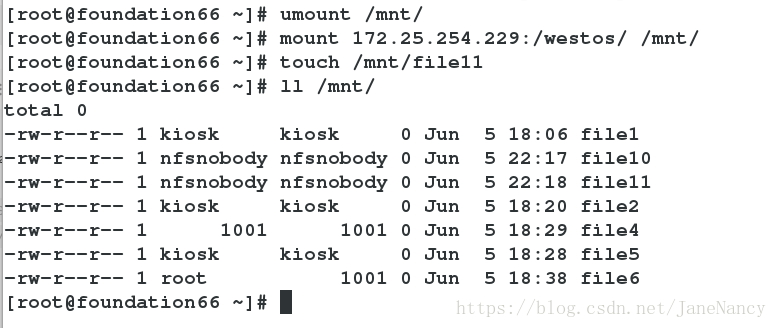
[root@foundation66 ~]# umount /mnt/
[root@foundation66 ~]# mount 172.25.254.229:/westos/ /mnt/
[root@foundation66 ~]# touch /mnt/file11
[root@foundation66 ~]# ll /mnt/
total 0
-rw-r--r-- 1 kiosk     kiosk     0 Jun  5 18:06 file1
-rw-r--r-- 1 nfsnobody nfsnobody 0 Jun  5 22:17 file10
-rw-r--r-- 1 nfsnobody nfsnobody 0 Jun  5 22:18 file11
-rw-r--r-- 1 kiosk     kiosk     0 Jun  5 18:20 file2
-rw-r--r-- 1      1001      1001 0 Jun  5 18:29 file4
-rw-r--r-- 1 kiosk     kiosk     0 Jun  5 18:28 file5
-rw-r--r-- 1 root           1001 0 Jun  5 18:38 file6
三、即用即挂载
[root@server ~]# vim /etc/exports
写入:
  1 /westos  172.25.254.0/24(sync,rw,no_root_squash)     ##读写,且不转换用户身份

[root@server ~]# exportfs -rv
exporting 172.25.254.0/24:/westos
[root@server ~]# systemctl start nfs

[root@client ~]# yum install autofs -y  安装autofs,用户就不再需要手动完成文件系统的挂载和卸载
[root@client ~]# systemctl start autofs
[root@client ~]# systemctl enable autofs
[root@client ~]# ls -ld /net             ##再没有下载autofs这个服务之前不存在/net目录
drwxr-xr-x 2 root root 0 Jun  6 06:06 /net
[root@client ~]# cd /net/
[root@client net]# cd 172.25.254.229
[root@client 172.25.254.229]# ls
westos
[root@client 172.25.254.229]# cd westos/
[root@client westos]# ls
file1  file10  file11  file2  file4  file5  file6
[root@client westos]# cd     ##要退出程序,是程序不被一直使用
[root@client 172.25.254.229]# df    ##查看可以看到实现自动挂载
Filesystem               1K-blocks    Used Available Use% Mounted on
/dev/vda1                 10473900 3187864   7286036  31% /
devtmpfs                    469344       0    469344   0% /dev
tmpfs                       484932      80    484852   1% /dev/shm
tmpfs                       484932   12788    472144   3% /run
tmpfs                       484932       0    484932   0% /sys/fs/cgroup
/dev/mapper/vg0-vo          483670    2355    451824   1% /home
//172.25.254.229/student  10473900 3159220   7314680  31% /mnt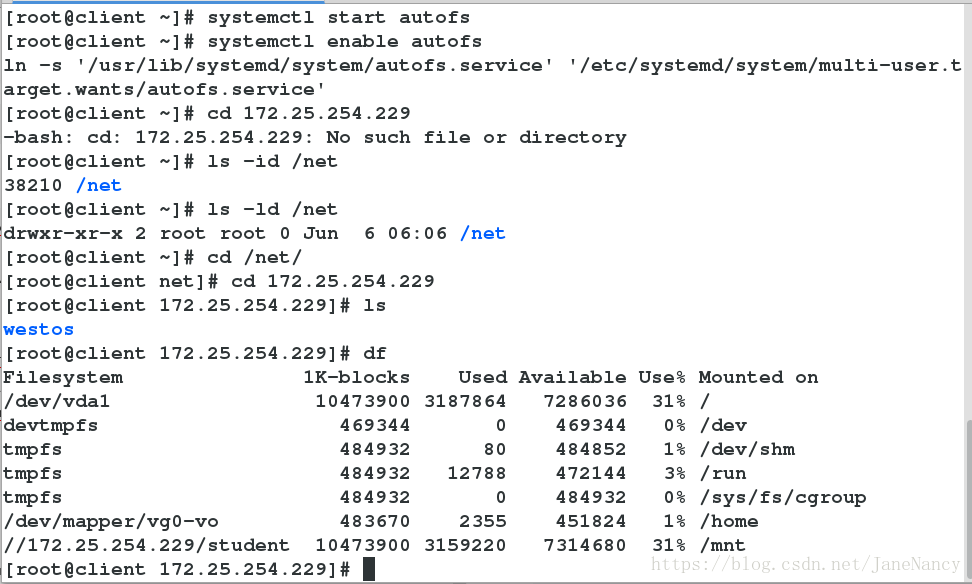

[root@client ~]# vim /etc/sysconfig/autofs
改为:
 13 TIMEOUT=5             ##给予自动卸载的时间(秒)

[root@client ~]# systemctl restart autofs.service              ##切记,不可以重复多次df会使时间一直被刷新
[root@client ~]# df                                            ##5秒钟后自动卸载
Filesystem         1K-blocks    Used Available Use% Mounted on
/dev/vda1           10473900 3187084   7286816  31% /
devtmpfs              469344       0    469344   0% /dev
tmpfs                 484932      80    484852   1% /dev/shm
tmpfs                 484932   12776    472156   3% /run
tmpfs                 484932       0    484932   0% /sys/fs/cgroup
/dev/mapper/vg0-vo 483670 2357 451822 1% /home 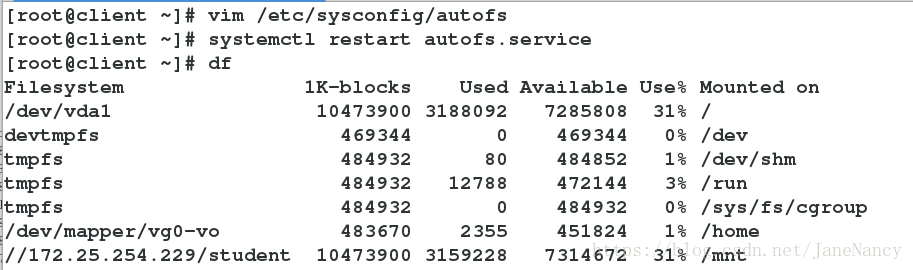
四、自动设置挂载点(设置默认挂载点为/nfs/westos)
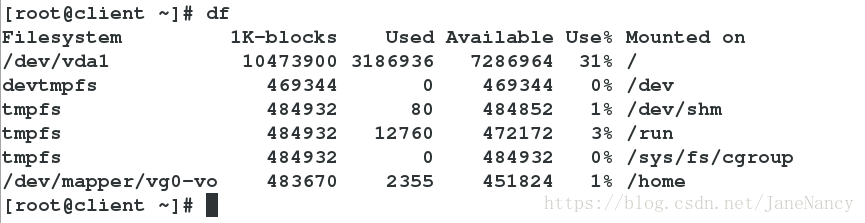
[root@client ~]# df
Filesystem             1K-blocks    Used Available Use% Mounted on
/dev/vda1               10473900 3187064   7286836  31% /
devtmpfs                  469344       0    469344   0% /dev
tmpfs                     484932      80    484852   1% /dev/shm
tmpfs                     484932   12776    472156   3% /run
tmpfs                     484932       0    484932   0% /sys/fs/cgroup
/dev/mapper/vg0-vo        483670    2357    451822   1% /home
172.25.254.229:/westos  10473984 3157248   7316736  31% /net/172.25.254.229/westos   ##最开始的时候的挂载点
[root@client ~]# vim /etc/auto.master    ##写进去的是最终挂载点的上层目录
写入:
 8 /nfs    /etc/auto.westos

[root@client ~]# vim /etc/auto.westos ##最终挂载点、挂载设备、挂载参数(ro,rw 等)
写入:
1 westos -ro 172.25.254.229:/westos
[root@client ~]# systemctl restart autofs.service
[root@client ~]# cd /nfs/
[root@client nfs]# ls
[root@client nfs]# cd westos
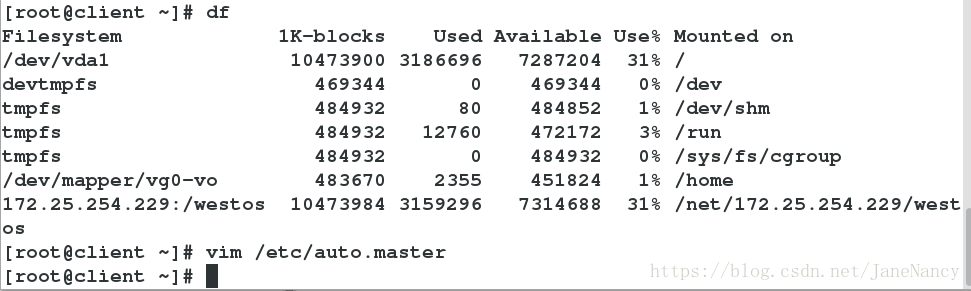
[root@client westos]# df
Filesystem 1K-blocks Used Available Use% Mounted on
/dev/vda1 10473900 3187088 7286812 31% /
devtmpfs 469344 0 469344 0% /dev
tmpfs 484932 80 484852 1% /dev/shm
tmpfs 484932 12776 472156 3% /run
tmpfs 484932 0 484932 0% /sys/fs/cgroup
/dev/mapper/vg0-vo 483670 2357 451822 1% /home
172.25.254.229:/westos 10473984 3157120 7316864 31% /nfs/westos ##修改成功 
