NFS
(Network File System)
即网络文件系统,是FreeBSD支持的文件系统中的一种,它允许网络中的计算机之间通过TCP/IP网络共享资源。在NFS的应用中,本地NFS的客户端应用可以透明地读写位于远端NFS服务器上的文件,就像访问本地文件一样。
做实验前需要将两台虚拟机desktop、server
设置ip、配置yum源
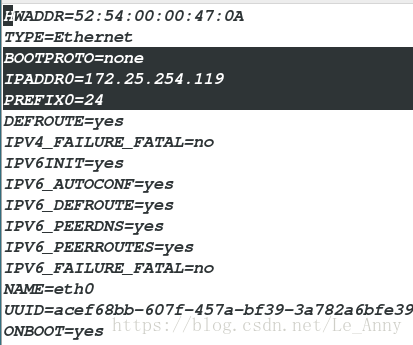
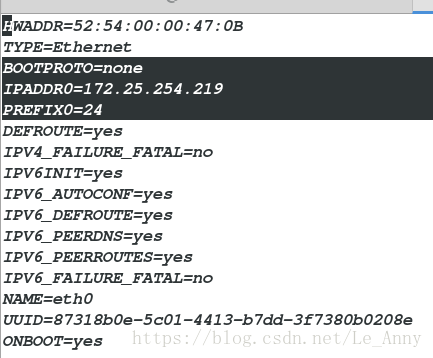
[root@localhost ~]# vim /etc/sysconfig/network-scripts/ifcfg-eth0 ##设置ip
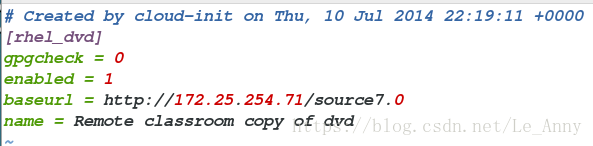
[root@localhost ~]# vim /etc/yum.repos.d/rhel_dvd.repo ##配置yum源
[root@localhost ~]# yum clean all ##清空缓存
[root@localhost ~]# hostnamectl set-hostname client.example.com ##服务端
[root@localhost ~]# hostnamectl set-hostname server.example.com ##客户端服务端desktop:
设置ip
配置yum源

客户端server:
设置ip
配置yum源
一·安装服务配置以及共享文件
1、安装服务配置
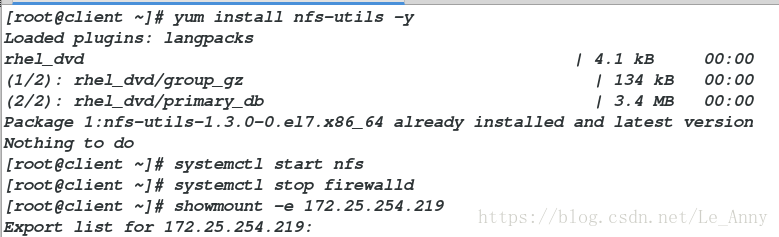
[root@server ~]# yum install nfs-utils -y
[root@server ~]# systemctl start nfs
[root@server ~]# systemctl stop firewalld
[root@localhost ~]# yum install nfs-utils -y
[root@client ~]# showmount -e 172.25.254.219    ##查看nfs共享状态
服务端:
客户端:

2、共享文件
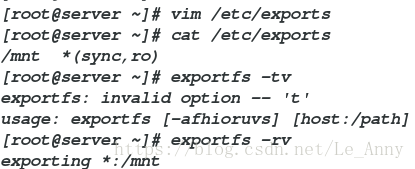
(1)仅读
服务端:
[root@server ~]# vim /etc/exports ##配置文件
[root@server ~]# cat /etc/exports
/mnt *(sync,ro) ##编辑内容(在/mnt下,仅读权限)
[root@server ~]# exportfs -rv ##刷新
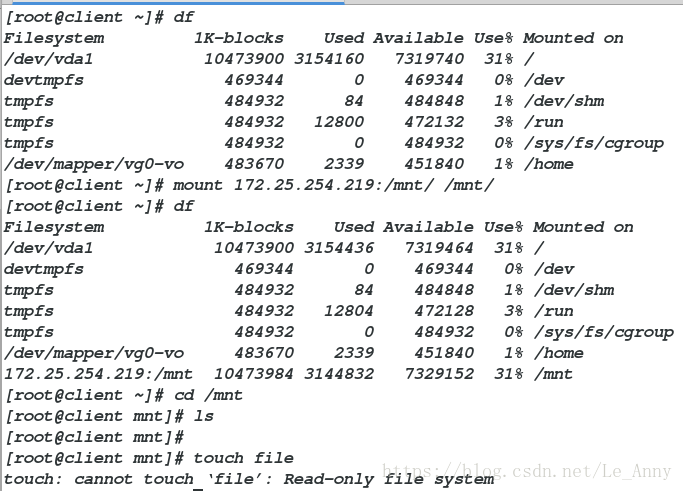
客户端:
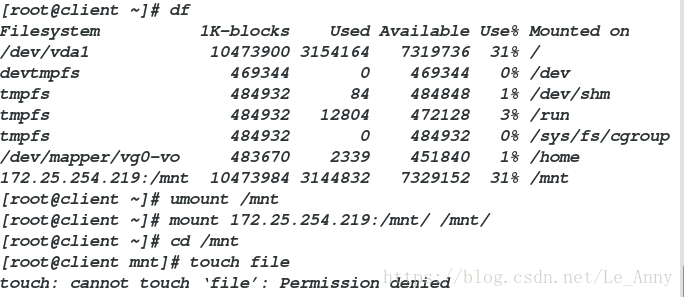
[root@client ~]# df
[root@client ~]# mount 172.25.254.219:/mnt/ /mnt/ ##挂载
[root@client ~]# df
[root@client ~]# cd /mnt
[root@client mnt]# ls
[root@client mnt]# touch file ##建立文件
touch: cannot touch ‘file’: Read-only file system ##报错(仅读权限,不能建立文件)服务端:
/etc/exports 配置文件中编辑内容:

客户端:
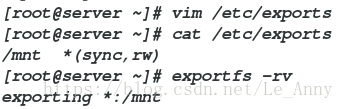
(2)读写
服务端:
[root@server ~]# vim /etc/exports
[root@server ~]# cat /etc/exports
/mnt *(sync,rw) ##编辑读写权限
[root@server ~]# exportfs -rv ##刷新
客户端:
[root@client ~]# df
[root@client ~]# umount /mnt ##卸载
[root@client ~]# mount 172.25.254.219:/mnt/ /mnt/ ##挂载
[root@client ~]# cd /mnt
[root@client mnt]# touch file ##不能建立
touch: cannot touch ‘file’: Permission denied ##报错,没有权限
服务端:
[root@server ~]# chmod 777 /mnt
客户端:
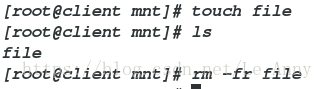
[root@client mnt]# touch file ##可以建立
[root@client mnt]# ls
file
[root@client mnt]# rm -fr file ##可以删除服务端:
编辑读写权限

客户端:
赋予权限后:
(3)不转换root身份
服务端:
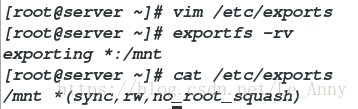
[root@server ~]# vim /etc/exports
/mnt *(sync,rw,no_root_squash) ##依然保留root权限,不改变root身份
[root@server ~]# exportfs -rv
客户端:
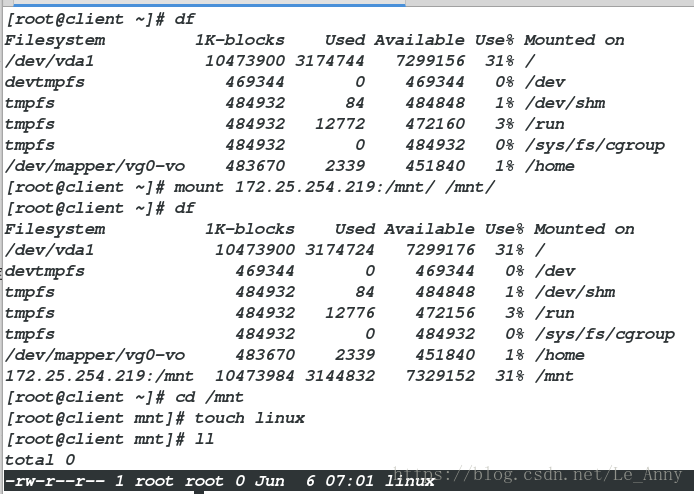
[root@client ~]# mount 172.25.254.219:/mnt/ /mnt/ ##挂载
[root@client ~]# cd /mnt/
[root@client mnt]# touch linux ##建立文件
[root@client mnt]# ll
-rw-r--r-- 1 root root 0 Jun 2 04:53 linux服务端:
编辑文件

客户端:
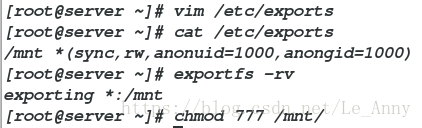
(4)指定用户身份
[root@server ~]# vim /etc/exports
[root@server ~]# cat /etc/exports
/mnt *(sync,rw,anonuid=1000,anongid=1000)    ##指定用户身份(student)
[root@server ~]# exportfs -rv   ##刷新
[root@client ~]# umount /mnt
[root@client ~]# mount 172.25.254.219:/mnt/ /mnt/    ##挂载
[root@client ~]# df
[root@client ~]# cd /mnt/
[root@client mnt]# touch file
touch: cannot touch ‘file’: Permission denied    ##没有权限
[root@client mnt]# touch file
[root@client mnt]# ll
服务端:
编辑文件

客户端:
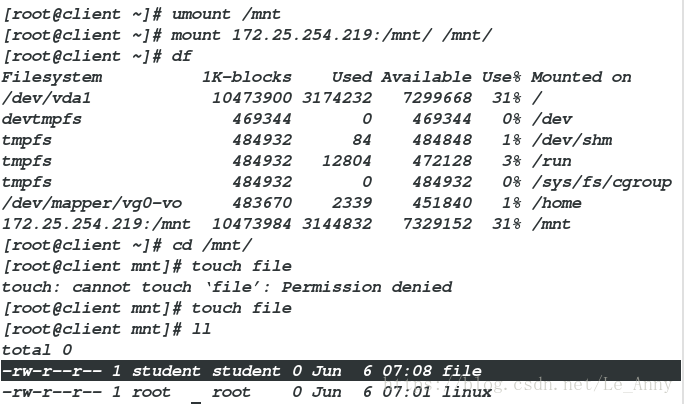
注意:在建立文件时报错,要在服务端赋予权限( chmod 777 /mnt/ )
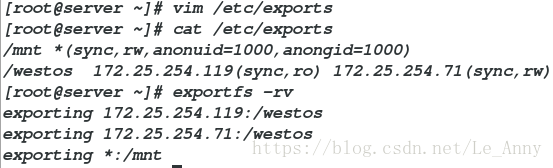
(5)指定ip权限
服务端:
[root@server ~]# vim /etc/exports
/westos 172.25.254.119(sync,ro) 172.25.254.71(sync,rw) ##测试端(1)仅读,测试端(2)读写
[root@server ~]# exportfs -rv ##刷新
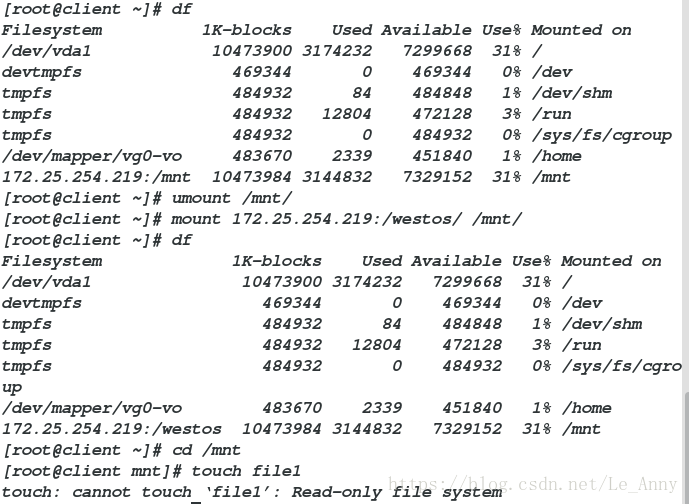
在测试端(1)172.25.254.119中:
[root@client ~]# mount 172.25.254.219:/westos/ /mnt/ ##挂载
[root@client ~]# df
[root@client mnt]# touch file1
touch: cannot touch ‘file1’: Read-only file system ##建立不了
在测试端(2)172.25.254.71中:
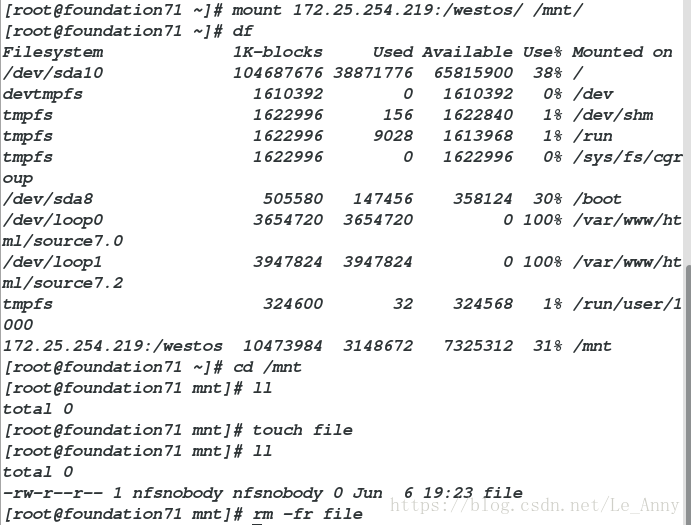
[root@foundation71 ~]# mount 172.25.254.219:/westos/ /mnt/ ##挂载
[root@foundation71 ~]# df
[root@foundation71 ~]# cd /mnt
[root@foundation71 mnt]# ll
[root@foundation71 mnt]# touch file ##可以建立
[root@foundation71 mnt]# ll
total 0
-rw-r--r-- 1 nfsnobody nfsnobody 0 Jun 6 19:23 file
[root@foundation71 mnt]# rm -fr file ##可以删除服务端:
编辑内容

测试端(1):
测试端(2):
二·自动挂载、卸载
作用:自动挂载、卸载所操作的网络系统
[root@client ~]# yum install autofs -y ##安装
[root@client ~]# systemctl start autofs ##重启
[root@client ~]# cd /net
[root@client net]# cd 172.25.254.219
[root@client 172.25.254.219]# ls
mnt westos
[root@client 172.25.254.219]# cd westos
[root@client westos]# ls
file1 file2
[root@client westos]# df
172.25.254.219:/westos 10473984 3156992 7316992 31% /net/172.25.254.219/westos ##自动挂载
[root@client westos]# cd
[root@client ~]# df
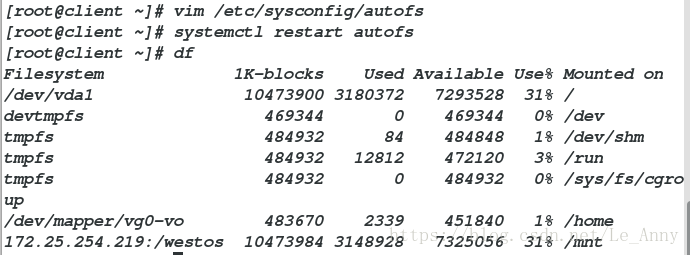
[root@client westos]# vim /etc/sysconfig/autofs
TIMEOUT=5 ##默认是300s后自动卸载,可以改为5s
[root@client westos]# systemctl restart autofs
[root@client ~]# df ##再次查看,5s后自动卸载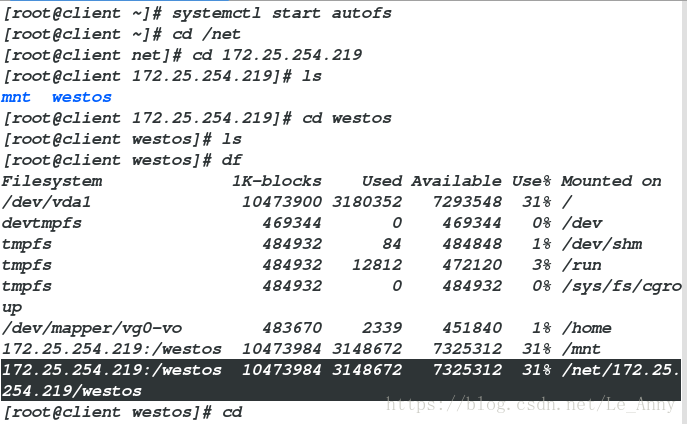
编辑内容:

三·指定挂载点
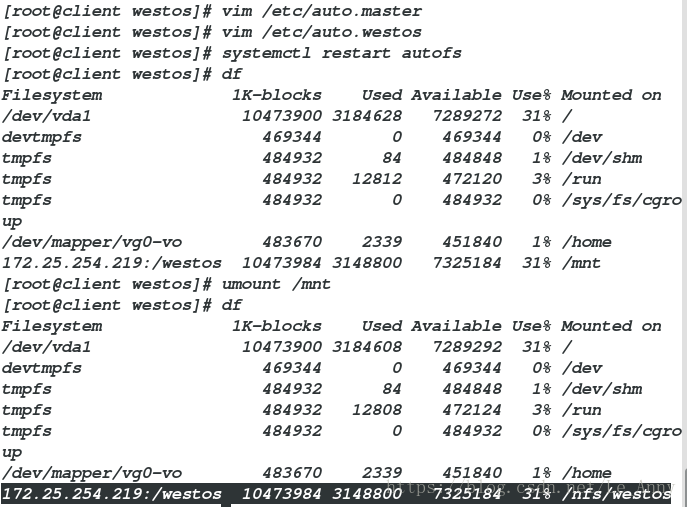
[root@client ~]# vim /etc/auto.master   ##主策略文件
8 /nfs    /etc/auto.westos
[root@client ~]# vim /etc/auto.westos   ##次策略文件
1 westos -ro 172.25.254.219:/westos
westos:挂载点
-ro:参数
172.25.254.219:/westos:最终挂载点的位置
[root@client ~]# systemctl restart autofs
[root@client ~]# cd /nfs/
[root@client nfs]# ls
[root@client nfs]# cd westos
[root@client westos]# ls
[root@client westos]# df
172.25.254.219:/westos  10473984 3156608   7317376  31% /nfs/westos   ##自动挂载结果