开始时感觉集成是非常麻烦的,但是在和前端对接的时候就非常容易了,只需要把访问地址给他即可。
1.导入swagger-ui的依赖:
  <dependency>
    <groupId>io.springfox</groupId>
    <artifactId>springfox-swagger2</artifactId>
    <version>2.2.2</version>
  </dependency>
  <dependency>
    <groupId>io.springfox</groupId>
    <artifactId>springfox-swagger-ui</artifactId>
    <version>2.2.2</version>
  </dependency>
2.然后要配置一个类,这个类的目的就是对扫描接口和对接口做一些操作:
@Configuration   //让Spring来加载该类配置
@EnableSwagger2 //启用Swagger2
@ComponentScan("cc.alibaba.ligh.controller")
public class SwaggerConfig {
    @Bean
    public Docket api() {
        List<Parameter> pars = new ArrayList<Parameter>();
        return new Docket(DocumentationType.SWAGGER_2)
                .select()
                .apis(RequestHandlerSelectors.any())
                .paths(Predicates.not(PathSelectors.regex("/error")))
                .build()
                .globalOperationParameters(pars)
                .apiInfo(apiInfo());
    }
    private ApiInfo apiInfo(){
        return new ApiInfoBuilder()
                .title("测试swagger的demo")
                .description("该项目是测试合同模板的模块")
                .termsOfServiceUrl("http://localhost:8080")
                .contact("李国辉")
                .version("1.0")
                .build();
    }
}
3.在controller接口中进行配置,做最后的界面显示配置,为了在前台对接时可以轻松的对接
//用户传过来的模板文件 存储字符串 返回仍旧为字符串
    @RequestMapping(value = "saveText",method = RequestMethod.POST,
                    produces = {"application/json"})
    @ResponseStatus(HttpStatus.OK)
    @ApiOperation(value = "前台上传的模板文件",
                notes = "前台转换模板成字符串")
    @ApiImplicitParam(name = "text",value = "前台模板转换之后的字符串",required = true,dataType = "String")
    public String saveText( @RequestParam("text") String text){
        RespInfo respInfo = new RespInfo();
        ContractModel contractModel = new ContractModel();
        contractModel.setContracttext(text);
        int num = contractModelService.insertContractModel(contractModel);
        if(num>0){
            respInfo.setMessage("模板字符串存储成功!");
            respInfo.setStatus(InfoCode.SUCCESS);
            return JSON.toJSONString(respInfo);
        }else{
            respInfo.setMessage("模板字符串存储失败!");
            respInfo.setStatus(InfoCode.ERROR);
            return JSON.toJSONString(respInfo);
        }
}4.然后输入项目的ip地址(http://127.0.0.1:8080/swagger-ui.html)即可访问:
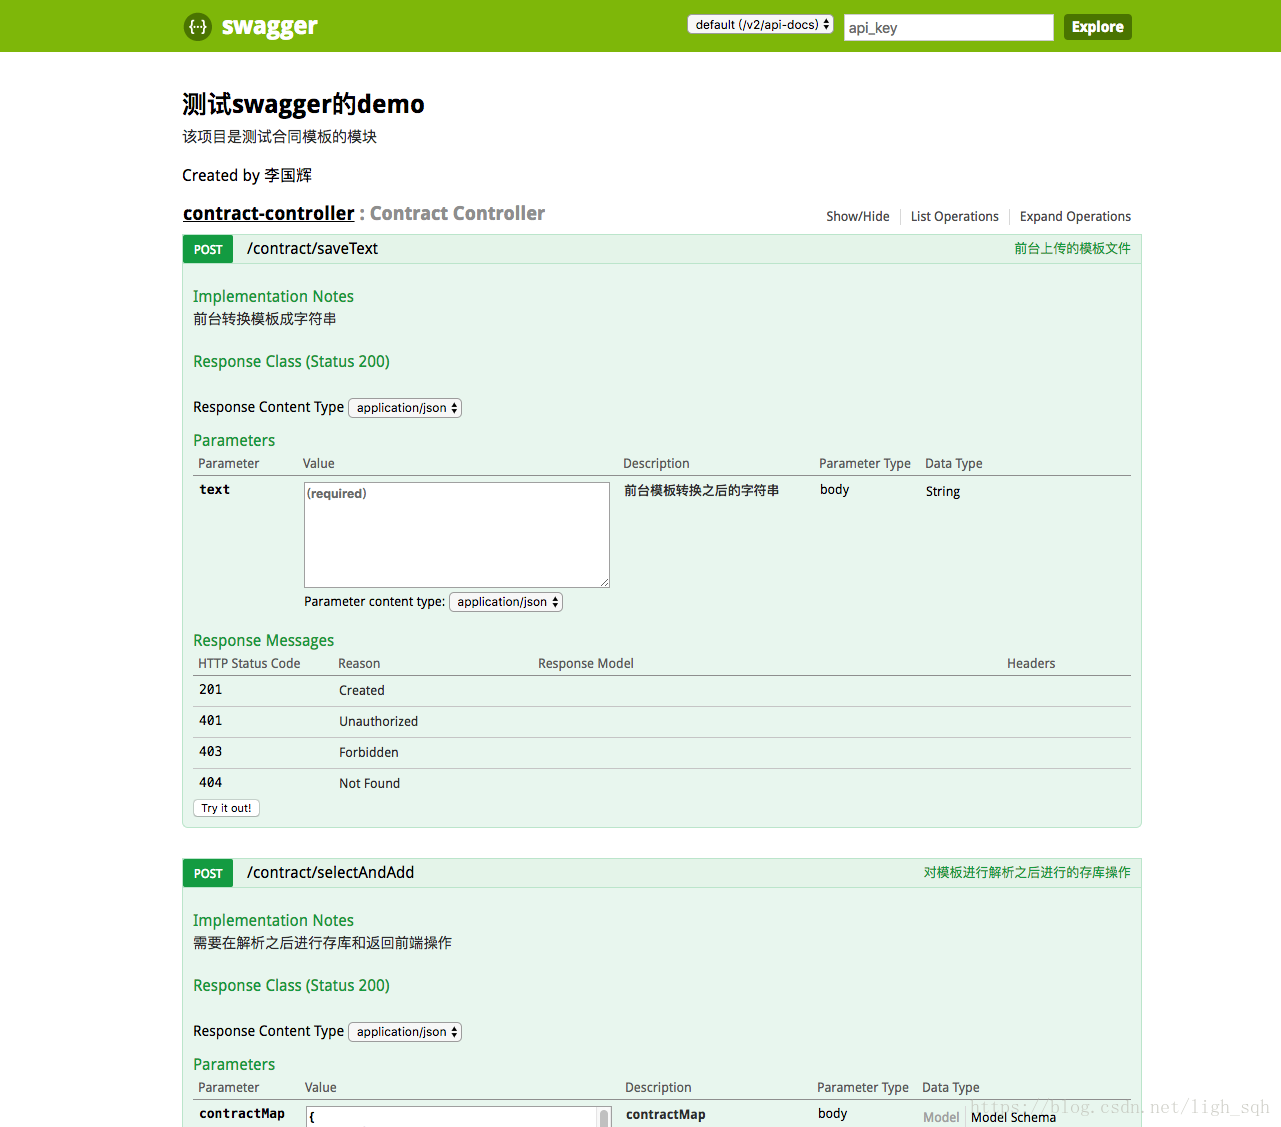
分享结束,下面具体的讲解一下注解:
swagger2使用说明:
@Api:用在类上,说明该类的作用
@ApiOperation:用在方法上,说明方法的作用
@ApiIgnore:使用该注解忽略这个API
@ApiImplicitParams:用在方法上包含一组参数说明
@ApiImplicitParam:用在@ApiImplicitParams注解中,指定一个请求参数的各个方面
paramType:参数放在哪个地方
header–>请求参数的获取:@RequestHeader
query–>请求参数的获取:@RequestParam
path(用于restful接口)–>请求参数的获取:@PathVariable
body(不常用)
form(不常用)
name:参数名
dataType:参数类型
required:参数是否必须传
value:参数的意思
defaultValue:参数的默认值
@ApiResponses:用于表示一组响应
@ApiResponse:用在@ApiResponses中,一般用于表达一个错误的响应信息
code:数字,例如400
message:信息,例如”请求参数没填好”
response:抛出异常的类
@ApiModel:描述一个Model的信息(这种一般用在post创建的时候,使用@RequestBody这样的场景,请求参数无法使用@ApiImplicitParam注解进行描述的时候)
@ApiModelProperty:描述一个model的属性