在对python有了一定的了解之后,就开始来学习鼎鼎有名的Tensorflow吧,这里将主要介绍如何在Windows系统下使用anaconda安装Tensorflow,如何在spyder和jupyter中使用Tensorflow。
电脑配置:普通CPU版本+Win7系统+64位+anaconda3+python3
1. 使用anaconda安装Tensorflow
Tensorflow的安装方法貌似有很多种,由于电脑中前期就一直安装的是anaconda,这里就直接在anaconda中来安装它了,感觉这样操作也是比较省事的。首先打开cmd命令行,进入conda环境,接着输入命令行
conda create -n tensorflow python=3.6系统会显示需要下载安装的包,确认安装后,它就开始自动安装了。接着激活这个conda环境,输入命令行:
activate tensorflow并安装cpu版本的tensorflow
pip install --ignore-installed --upgrade测试是否安装成功,在tensorflow环境中进入python,输入以下代码:
>>>import tensorflow as tf
>>>hello = tf.constant("hello, tensorflow!")
>>>sess = tf.Session()
>>>print(sess.run(hello))
如果安装成功了,会显示如下结果:
b'hello,tensorflow'使用tensorflow后,要记得关闭环境:
deactivate tensorflow2. 在spyder中启动Tensorflow
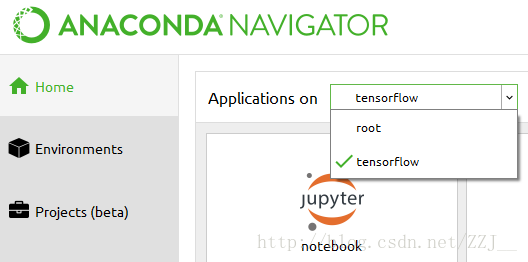
我们在安装好tensorflow后,打开anaconda nagavitor可以发现,除了原本的root环境外,已经有了一个新的tensorflow环境。
在新的tensorflow环境下,我们再次安装spyder和jupyter notebook。原来的anaconda目录下又多了几个带有tensorflow的图标。
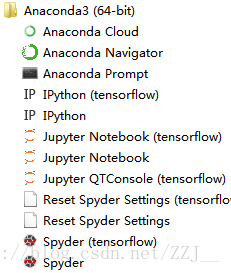
此时打开带有tensorflow的spyder图标,就可以在spyder中使用tensorflow了~
3. 在jupyter notebook 中启动Tensorflow
jupyter notebook中启动tensorflow要比上面的spyder麻烦一些。虽然我们已经安装了带有tensorflow的jupyter,但是当我们打开jupyter,输入
import tensorflow as tf发现系统还是会报错

其实还是要接着在cmd中的tensorflow下输入以下:
ipython kernelspec install-self --user如果运行正常的话,会给出这样的结果:
Installed kernelspec python3此时再去jupyter中新建文件,输入以下测试代码:
import tensorflow as tf
hello = tf.constant("hello, tensorflow!")
sess = tf.Session()
print(sess.run(hello))
会得到正确结果;
b'hello, tensorflow!'这样就成功在jupyter中使用tensorflow了~