上一讲小木我讲解了图片的读取,保存。视频的读取、保存、以及如何调用摄像头。这节课我们要将这些东西给合而为一。怎么合而为一呢,美国的天才,也就是《OPENCV3 计算机视觉 PYTHON语言实现》这本书的作者,他做了一个程序叫做Cameo。这个程序集合了所有的方法。那么这个程序包括两个文件,分别是cameo.py和manager.py,接下来我展示一下:
# cameo.py
# cameo.py
import cv2

from1 managers import WindowManager, CaptureManager


class Cameo(object):


    def __init__(self):

        self._windowManager = WindowManager('Cameo',

                                            self.onKeypress)

        self._captureManager = CaptureManager(

            cv2.VideoCapture(0), self._windowManager, True)


    def run(self):

        """Run the main loop."""

        self._windowManager.createWindow()

        while self._windowManager.isWindowCreated:

            self._captureManager.enterFrame()

            frame = self._captureManager.frame


            if frame is not None:

                # TODO: Filter the frame (Chapter 3).

                pass


            self._captureManager.exitFrame()

            self._windowManager.processEvents()


    def onKeypress(self, keycode):

        """Handle a keypress.


        space  -> Take a screenshot.

        tab    -> Start/stop recording a screencast.

        escape -> Quit.


        """

        if keycode == 32: # space

            self._captureManager.writeImage('screenshot.png')

        elif keycode == 9: # tab

            if not self._captureManager.isWritingVideo:

                self._captureManager.startWritingVideo(

                    'screencast.avi')

            else:

                self._captureManager.stopWritingVideo()

        elif keycode == 27: # escape

            self._windowManager.destroyWindow()


if __name__=="__main__":

    Cameo().run()

#---------------------------------------
#manager.py
import cv2

import numpy

import time


class CaptureManager(object):


    def __init__(self, capture, previewWindowManager = None,

                 shouldMirrorPreview = False):


        self.previewWindowManager = previewWindowManager

        self.shouldMirrorPreview = shouldMirrorPreview


        self._capture = capture

        self._channel = 0

        self._enteredFrame = False

        self._frame = None

        self._imageFilename = None

        self._videoFilename = None

        self._videoEncoding = None

        self._videoWriter = None


        self._startTime = None

        self._framesElapsed = int(0)

        self._fpsEstimate = None


    @property

    def channel(self):

        return self._channel


    @channel.setter

    def channel(self, value):

        if self._channel != value:

            self._channel = value

            self._frame = None


    @property

    def frame(self):

        if self._enteredFrame and self._frame is None:

            # As of OpenCV 3.0, VideoCapture.retrieve() no longer supports

            # the channel argument.

            # _, self._frame = self._capture.retrieve(channel = self.channel)

            _, self._frame = self._capture.retrieve()

        return self._frame


    @property

    def isWritingImage(self):

        return self._imageFilename is not None


    @property

    def isWritingVideo(self):

        return self._videoFilename is not None


    def enterFrame(self):

        """Capture the next frame, if any."""


        # But first, check that any previous frame was exited.

        assert not self._enteredFrame, \

            'previous enterFrame() had no matching exitFrame()'


        if self._capture is not None:

            self._enteredFrame = self._capture.grab()


    def exitFrame(self):

        """Draw to the window. Write to files. Release the frame."""


        # Check whether any grabbed frame is retrievable.

        # The getter may retrieve and cache the frame.

        if self.frame is None:

            self._enteredFrame = False

            return


        # Update the FPS estimate and related variables.

        if self._framesElapsed == 0:

            self._startTime = time.time()

        else:

            timeElapsed = time.time() - self._startTime

            self._fpsEstimate =  self._framesElapsed / timeElapsed

        self._framesElapsed += 1


        # Draw to the window, if any.

        if self.previewWindowManager is not None:

            if self.shouldMirrorPreview:

                mirroredFrame = numpy.fliplr(self._frame).copy()

                self.previewWindowManager.show(mirroredFrame)

            else:

                self.previewWindowManager.show(self._frame)


        # Write to the image file, if any.

        if self.isWritingImage:

            cv2.imwrite(self._imageFilename, self._frame)

            self._imageFilename = None


        # Write to the video file, if any.

        self._writeVideoFrame()


        # Release the frame.

        self._frame = None

        self._enteredFrame = False


    def writeImage(self, filename):

        """Write the next exited frame to an image file."""

        self._imageFilename = filename


    def startWritingVideo(

            self, filename,

            encoding = cv2.VideoWriter_fourcc('M','J','P','G')):

        """Start writing exited frames to a video file."""

        self._videoFilename = filename

        self._videoEncoding = encoding


    def stopWritingVideo(self):

        """Stop writing exited frames to a video file."""

        self._videoFilename = None

        self._videoEncoding = None

        self._videoWriter = None


    def _writeVideoFrame(self):


        if not self.isWritingVideo:

            return


        if self._videoWriter is None:

            fps = self._capture.get(cv2.CAP_PROP_FPS)

            if fps <= 0.0:

                # The capture's FPS is unknown so use an estimate.

                if self._framesElapsed < 20:

                    # Wait until more frames elapse so that the

                    # estimate is more stable.

                    return

                else:

                    fps = self._fpsEstimate

            size = (int(self._capture.get(

                        cv2.CAP_PROP_FRAME_WIDTH)),

                    int(self._capture.get(

                        cv2.CAP_PROP_FRAME_HEIGHT)))

            self._videoWriter = cv2.VideoWriter(

                self._videoFilename, self._videoEncoding,

                fps, size)


        self._videoWriter.write(self._frame)


class WindowManager(object):


    def __init__(self, windowName, keypressCallback = None):

        self.keypressCallback = keypressCallback


        self._windowName = windowName

        self._isWindowCreated = False


    @property

    def isWindowCreated(self):

        return self._isWindowCreated


    def createWindow(self):

        cv2.namedWindow(self._windowName)

        self._isWindowCreated = True


    def show(self, frame):

        cv2.imshow(self._windowName, frame)


    def destroyWindow(self):

        cv2.destroyWindow(self._windowName)

        self._isWindowCreated = False


    def processEvents(self):

        keycode = cv2.waitKey(1)

        if self.keypressCallback is not None and keycode != -1:

            # Discard any non-ASCII info encoded by GTK.

            keycode &= 0xFF

            self.keypressCallback(keycode)

#---------------------------------------我们这样乍眼一看,太特么的长了吧,看不懂呀。其实你们不是看不懂,而是太长了看着头痛罢了。如果大家对这个程序没兴趣的话,直接复制粘贴用就行了,根本没什么必要读懂。那么怎么用呢,我们把这两者py文件放到一块,然后执行cameo.py即可,执行后,打开笔记本的摄像头,并且在屏幕上显示。如果我们想退出,按ESC键、我们想抓取一帧摄像头的截图,那么我们按空格键即可,它会图片保存在同PY文件的目录下,名字叫screenshot.png。如果我们想录像,我们按一下TAB就会开始录像,再按一下TAB就会结束录像,并且把录像保存在同PY文件的目录下,名字叫screencast.avi。
我给大家展示一下效果:
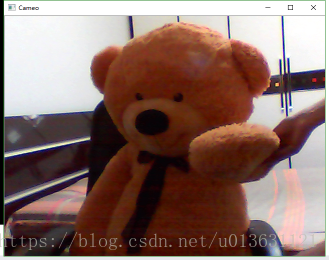
很棒吧,截图就按空格,录像就按TAB即可。
然而,我们既然有程序,而且是开源的,我们为啥不看?直接用倒是可以,但是了解一下程序木有坏处吧?恩恩,下面小木我就来讲解一下这个程序吧!
首先我们来到cameo.py这个文件中,我们看45-47行(若大家行数找不到或者对不上,直接复制代码到notepad,然后搜索一下相关字就行),也就是最后两行:
if __name__=="__main__":

Cameo().run()我们按一下运行,就会执行这条语句,执行之后,我们首先初始化Cameo这个类,然后执行run方法。
我们初始化这个方法是执行6-10行:
    def __init__(self):

        self._windowManager = WindowManager('Cameo',

                                            self.onKeypress)

        self._captureManager = CaptureManager(

cv2.VideoCapture(0), self._windowManager, True)我们初始化时候,第一步,创建一个WindowManager的实例,这个窗口名字叫Cameo,接受键盘按键(也就是录像或截图)的监控的函数叫做onKeypress,这个函数后面讲解。
第二步,我们创建一个CaptureManager的实例,这个实例中,第一个参数是获取摄像头设备,如果只有一个摄像头括号里面就为0,如果多个,就输入第几个摄像头的标号数字即可。第二个参数是把上面的WindowsManager实例_windowManager传给CaptureManager的实例_captureManager。第三个参数是是否镜像,如果True就是镜像,因为我们照镜子,镜子里面的人是相反的,所以我们应该水平翻转一下,给它变正。
初始化完成之后,我们就要执行Run语句了,也就是cameo.py中的12-24行:
def run(self):

        """Run the main loop."""

        self._windowManager.createWindow()

        while self._windowManager.isWindowCreated:

            self._captureManager.enterFrame()

            frame = self._captureManager.frame


            if frame is not None:

                # TODO: Filter the frame (Chapter 3).

                pass


            self._captureManager.exitFrame()

self._windowManager.processEvents()下面我把run函数中的语句用()表示,便于区分是这个函数的内容还是其它函数的内容
(1)我们首先用WindowsManager的实例_windowManager创建一个窗口,用来在屏幕上面显示我们的摄像头内容。我们先判断一下是否窗口创建完毕。
createWindow()函数如下,也就是manager.py中的156-158行:
    def createWindow(self):

        cv2.namedWindow(self._windowName)

self._isWindowCreated = True我们把_windowName中传入的名称,也就是cameo写入,然后把_isWindowCreated属性改为True。
(2)如果创建完毕的话进入循环,如果没建立好窗口的话,直接就退出程序运行。我们按照创建完毕继续来说。创建完毕后我们进入循环,并且执行CaptureManager的实例_captureManager的enterFrame函数。
也就是manager.py中的54-62行:
  def enterFrame(self):

        """Capture the next frame, if any."""


        # But first, check that any previous frame was exited.

        assert not self._enteredFrame, \

            'previous enterFrame() had no matching exitFrame()'


        if self._capture is not None:

self._enteredFrame = self._capture.grab()这些语句的意思是如果_capture不为空的话,抓取摄像头中的一帧。_capture指的是我们当初CaptureManager类实例_captureManager打开的摄像头capture。
(3)抓取之后我们执行循环中的frame = self._captureManager.frame,把上面捕获的帧的图像传入到变量frame中。
(4)执行CaptureManager中的exitFrame()函数,这个函数的用途是计算摄像头每秒钟的帧数,并且把摄像头捕获的帧放入窗口cameo中显示。
exitFrame()这个函数在manager.py的64-99行:
  def exitFrame(self):

        """Draw to the window. Write to files. Release the frame."""


        # Check whether any grabbed frame is retrievable.

        # The getter may retrieve and cache the frame.

        if self.frame is None:

            self._enteredFrame = False

return这个函数首先先判断一下,是否刚才在enterFrame中真的抓取到一帧了,如果抓取到继续,没抓取到,退出函数,执行循环中的下一句 self._windowManager.processEvents()。我们按照抓取到的算,那么就继续往下执行exitFrame。但是有一点要说的是判断语句中frame是一个函数:
  def frame(self):

        if self._enteredFrame and self._frame is None:

            # As of OpenCV 3.0, VideoCapture.retrieve() no longer supports

            # the channel argument.

            # _, self._frame = self._capture.retrieve(channel = self.channel)

            _, self._frame = self._capture.retrieve()

return self._frame在这个函数中,我们首先判断一下是否抓取图片成功,如果成功的话,把成功的图片的数据导入到_frame这个变量中,使用的方法是retrieve()。
我们把_frame添加东西后,它就不为none了,那么就继续往下执行exitFrame:
  # Update the FPS estimate and related variables.

        if self._framesElapsed == 0:

            self._startTime = time.time()

        else:

            timeElapsed = time.time() - self._startTime

            self._fpsEstimate =  self._framesElapsed / timeElapsed

self._framesElapsed += 1到这里了,我们做的是计算每秒钟的帧数,我们第一次的话,framesElapsed为0,那么我们就记录一下这个时候的时间。当我们第二次执行这一部分的时候,也就是抓取完成第二帧后,我们用这两帧的时间相减,然后除以一个2,第三次执行这部分时候,我们用第三次时间与第一次相减,然后除以一个3,以此类推,我们就估算出了FPS(每秒帧数),而且这个估算是实时更新的。这个时间我们记录到_fpsEstimate里面。我们假设我们是第一次执行这个语句,执行完毕后,我们进入下面:
   # Draw to the window, if any.

        if self.previewWindowManager is not None:

            if self.shouldMirrorPreview:

                mirroredFrame = numpy.fliplr(self._frame).copy()

                self.previewWindowManager.show(mirroredFrame)

            else:

                self.previewWindowManager.show(self._frame)
这一部分是把我们捕获的帧的图像显示到屏幕窗口上面,如果我们当初选择镜像一下的话,那么我们首先翻转一下图片,然后再显示到窗口上。我们每一次循环都更新一下窗口,这样我们就相当于一帧帧地放图片,速度会很快,快的话就达到了视频的效果。我们继续往下执行:
 # Write to the image file, if any.

        if self.isWritingImage:

            cv2.imwrite(self._imageFilename, self._frame)

self._imageFilename = None这部分是判断是否按下了空格键,如果按下了,就把我们按下时候刚好_enterFrame捕获的那一帧数据保存到硬盘中。如果没有截图,就跳过。
        # Write to the video file, if any.

self._writeVideoFrame()这部分是判断是否按下了TAB,如果按下了,就把我们按下时候刚好_enterFrame捕获的那一帧数据保存到硬盘中,然后每一次循环的时候都把_enterFrame保存起来,直到我们又按了一下TAB键,我们就不再保存了。这样好多帧的图片会放到一个为avi格式的文件当中,说白了就是一个视频。
        # Release the frame.

        self._frame = None

        self._enteredFrame = False
最后我们把当前帧的图像给全部变为空,结束这个语句。
(5)回到主函数的循环,执行self._windowManager.processEvents()。这个函数如下:
    def processEvents(self):

        keycode = cv2.waitKey(1)

        if self.keypressCallback is not None and keycode != -1:

            # Discard any non-ASCII info encoded by GTK.

            keycode &= 0xFF

            self.keypressCallback(keycode)
它的作用是监控键盘,看看它按下我们之前说的那些按键没有,如果按下的话,就执行相应的操作。
(6)当我们执行完毕之后,我们返回循环的头部,然后继续执行循环,直到我们按下ESC键为止。
到此为止,我们的cameo类库就讲完了。我们还要额外补充几点:
(1)如何监控键盘的:
监控键盘在循环语句的最后一句,当我们执行这句话的时候,我们要是键盘按下键或者没有按下键,都会产生一个数据,没按下是-1,按下了就是一个ASCII码,我们然后把这个码转换为GTK格式,然后传入keypressCallback中,也就是我们传入Windowsmanager类中的函数:
   def onKeypress(self, keycode):

        """Handle a keypress.


        space  -> Take a screenshot.

        tab    -> Start/stop recording a screencast.

        escape -> Quit.


        """

        if keycode == 32: # space

            self._captureManager.writeImage('screenshot.png')

        elif keycode == 9: # tab

            if not self._captureManager.isWritingVideo:

                self._captureManager.startWritingVideo(

                    'screencast.avi')

            else:

                self._captureManager.stopWritingVideo()

        elif keycode == 27: # escape

self._windowManager.destroyWindow()我们在这里判断一下是否键入了ESC、TAB、空格其中之一,然后执行相应的方法。
(3)这个函数中还有什么其它的方法:
    def show(self, frame):

cv2.imshow(self._windowName, frame)我们刚才讲的全是摄像头摄像,但是这里面类似上面的方法,也可以用于打开图片,可以打开视频,但是没啥用,因为我们直接用OPENCV自带的类实现要比它方便。
好了,这样我们的cameo的类库就讲完了,其实我们这里面忽略的很多方法没有讲,我想我根本没有必要讲解了吧,自己看看应该可以看懂,要是真心看不懂,欢迎大家发评论提问我,我会为大家一一解答。
我们OPENCV的基础部分全部都讲完了,之后我们要学习一些过滤的方法,比如腐蚀膨胀啥的,大家可以继续跟进我的讲座!
————————————————
如果对我的课程感兴趣的话,欢迎关注小木希望学园-微信公众号:
mutianwei521
也可以扫描二维码哦!