Colaboratory 是一个 Google 研究项目,旨在帮助传播机器学习培训和研究成果。它是一个 Jupyter 笔记本环境,不需要进行任何设置就可以使用,并且完全在云端运行。Colaboratory 笔记本存储在 Google 云端硬盘中,并且可以共享,就如同您使用 Google 文档或表格一样。Colaboratory 可免费使用。其实就是薅谷歌的羊毛。
本文主要介绍如何通过Colaboratory连接Google云端硬盘,并使用免费的Tesla K80 GPU执行Google driver中的机器学习程序。
Colaboratory介绍
首先,访问 CoLaboratory 网站,注册后接受使用该工具的邀请。注册成功后可以打开Colaboratory 简介,会出现一个「Hello, Colaboratory」文件,包含一些基本示例。

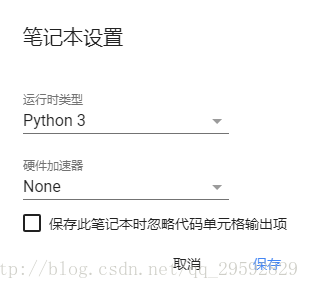
注意右上角的连接按钮,如果没有连接是红色的。Colaboratory现在已全面支持python2和python3两个版本,可以在 代码执行程序→更改运行时类型 选择python版本,并在 硬件加速器 中选择是否使用GPU加速。
连接Google driver
先注册Google云端硬盘,注册后便会有免费的15G空间,日常跑个学习的程序,无论是保存程序还是数据集都足够用了,然后通过Colaboratory连接云端硬盘。
这里以Cifar-10 GPU版本程序为例:
首先连接到Google硬盘,因为我的程序都上传在Google硬盘中,新建一个一个python记事本,将下列代码复制到记事本中。
这段代码执行后会安装很多东西
# Install a Drive FUSE wrapper.
# https://github.com/astrada/google-drive-ocamlfuse
!apt-get install -y -qq software-properties-common python-software-properties module-init-tools
!add-apt-repository -y ppa:alessandro-strada/ppa 2>&1 > /dev/null
!apt-get update -qq 2>&1 > /dev/null
!apt-get -y install -qq google-drive-ocamlfuse fuse6
执行下面代码,打开链接,将链接中授权的代码复制到框格中回车执行
# Generate auth tokens for Colab
from google.colab import auth
auth.authenticate_user()
安装PyTorch:
!pip install -q http://download.pytorch.org/whl/cu75/torch-0.2.0.post3-cp27-cp27mu-manylinux1_x86_64.whl torchvision
import torch1安装OpenCV:
!apt-get -qq install -y libsm6 libxext6 && pip install -q -U opencv-python
import cv22
安装其他库:
用!pip install或者!apt-get install命令。
总结
Colaboratory是一个在线Jupyter 笔记本环境,并且可以免费使用Google提供的GPU,对于机器配置较差或者没有GPU的小伙伴确实是一个不小的福利,更多玩法,自己去发掘吧。