一 新建项目microservice-simple-provider-user-trace-zipkin
二 为项目添加以下依赖
  <dependencies>
    <dependency>
      <groupId>org.springframework.boot</groupId>
      <artifactId>spring-boot-starter-web</artifactId>
    </dependency>
    <dependency>
      <groupId>org.springframework.boot</groupId>
      <artifactId>spring-boot-starter-data-jpa</artifactId>
    </dependency>
    <dependency>
      <groupId>com.h2database</groupId>
      <artifactId>h2</artifactId>
    </dependency>
    <dependency>
      <groupId>org.springframework.boot</groupId>
      <artifactId>spring-boot-starter-actuator</artifactId>
    </dependency>
    <dependency>
      <groupId>org.springframework.cloud</groupId>
      <artifactId>spring-cloud-starter-sleuth</artifactId>
    </dependency>
    <dependency>
      <groupId>org.springframework.cloud</groupId>
      <artifactId>spring-cloud-sleuth-zipkin</artifactId>
    </dependency>
  </dependencies>
三 在配置文件application.yml中添加如下内容
server:
  port: 8000
spring:
  jpa:
    generate-ddl: false
    show-sql: true
    hibernate:
      ddl-auto: none
  datasource:                           # 指定数据源
    platform: h2                        # 指定数据源类型
    schema: classpath:schema.sql        # 指定h2数据库的建表脚本
    data: classpath:data.sql            # 指定h2数据库的数据脚本
  application:
    name: microservice-provider-user
  zipkin:
    base-url:http://localhost:9411
  sleuth:
    sampler:
      percentage: 1.0
其中:
spring.zipkin.base-url:指定Zipkin的地址。
spring.sleuth.sampler.percentage:指定需采样的请求百分比,默认为0.1,即10%。这是因为在分布式系统中,数据量可能非常大,因此采样非常重要。
这样就为项目整合了Zipkin。
四 按照同样的方法新建项目microservice-simple-consumer-movie-trace-zipkin
五 测试
1 启动microservice-trace-zipkin-server
2 启动microservice-simple-provider-user-trace-zipkin
3 启动microservice-simple-consumer-movie-trace-zipkin
4 访问http://localhost:8010/user/1,可正常获得结果。
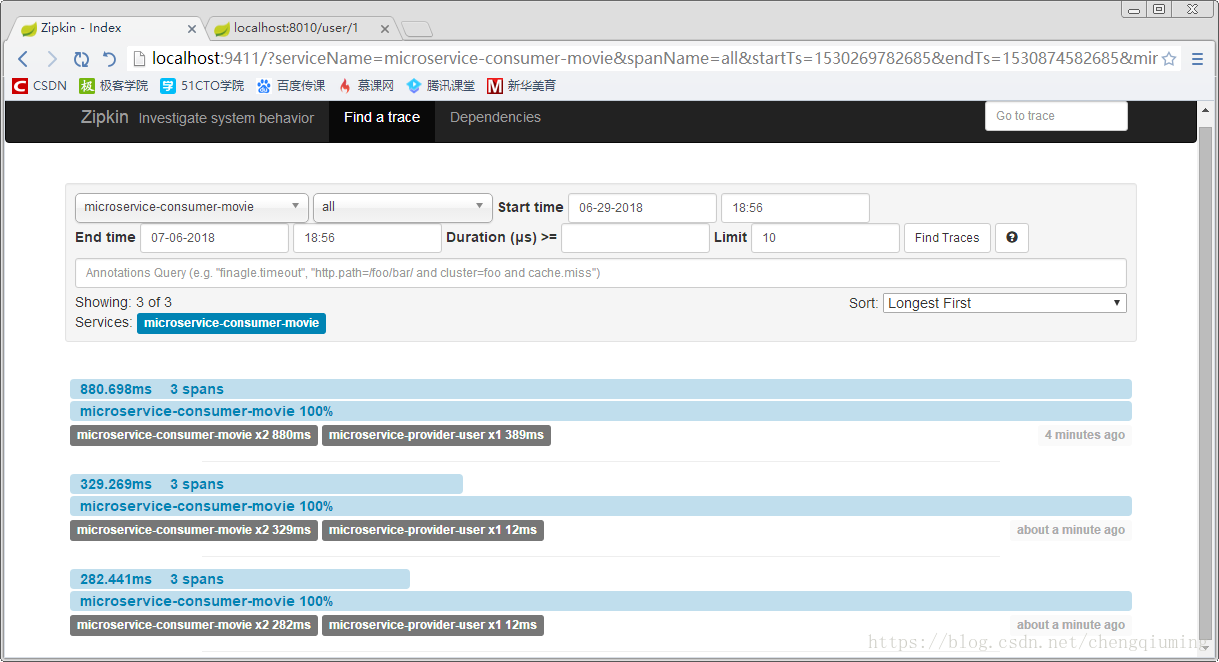
5 访问Zipkin Server首页http://localhost:9411/,填入起始时间、结束时间等筛选条件后,单击Find a trace按钮,可看到trace列表,如下图:
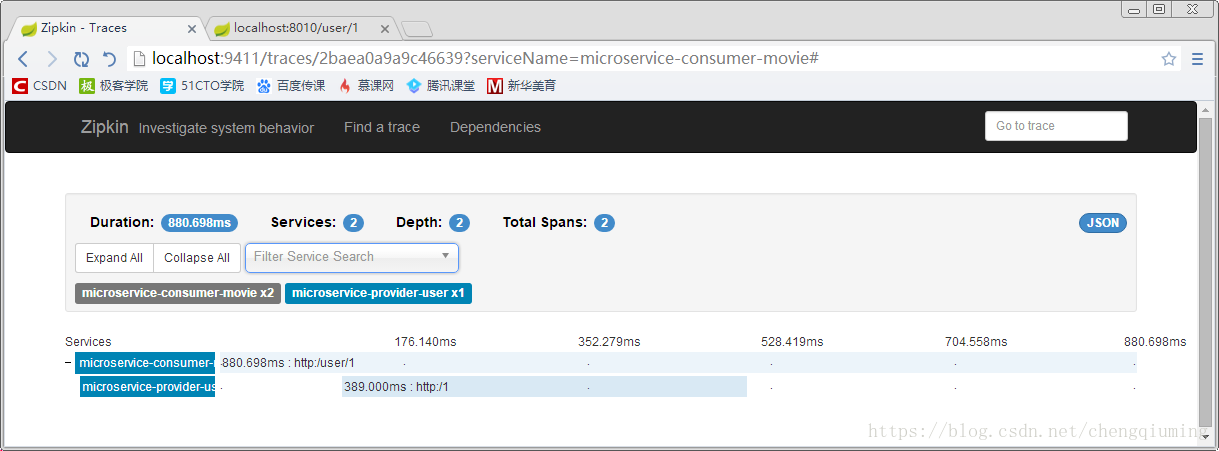
6 单击trace,可看到下图所示:
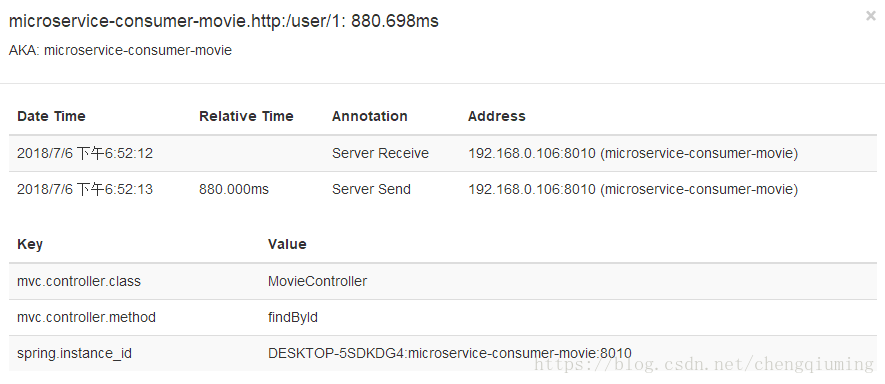
7 单击span,可获得span的详细信息,如下图
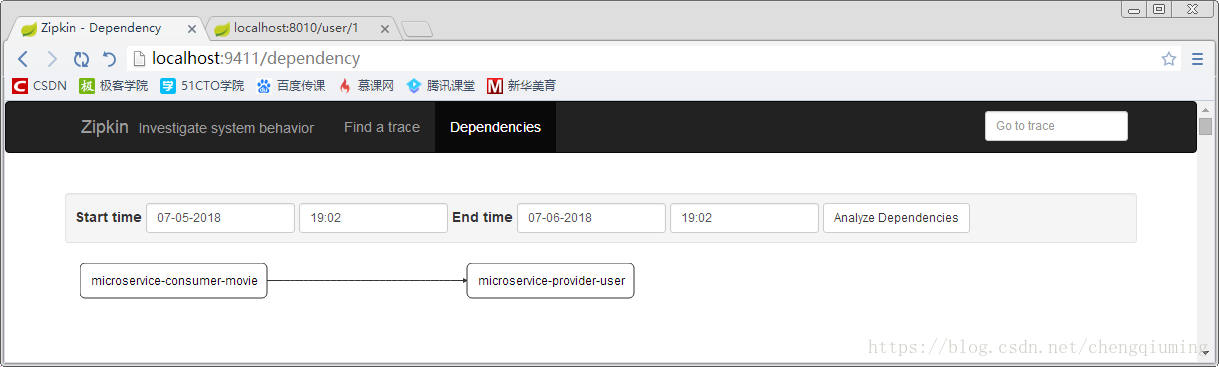
8 查看微服务间的关系