iOS9引入了NSLayoutAnchor来固定视图的约束。NSLayoutAnchor是工厂类可以快速创建布局对象,它的出现可以让代码变得更加简洁,而且可以有静态检查能力,并提供了额外的约束正确保证。并且Apple推荐使用NSLayoutAnchor进行布局而不是使用NSLayoutConstraint。
NSLayoutAnchor
NSLayoutAnchor有3个子类:NSLayoutXAxisAnchor(X轴)水平方向约束、NSLayoutYAxisAnchor(Y轴)垂直方向约束、NSLayoutDimension(尺寸)宽和高,在实际的开发中我们经常使用子类而不是NSLayoutAnchor,添加约束设置参数时将使用他们。对于view可以使用的类型如下:
extension UIView {
    /* Constraint creation conveniences. See NSLayoutAnchor.h for details.
     */
    @available(iOS 9.0, *)
    open var leadingAnchor: NSLayoutXAxisAnchor { get }

    @available(iOS 9.0, *)
    open var trailingAnchor: NSLayoutXAxisAnchor { get }

    @available(iOS 9.0, *)
    open var leftAnchor: NSLayoutXAxisAnchor { get }

    @available(iOS 9.0, *)
    open var rightAnchor: NSLayoutXAxisAnchor { get }

    @available(iOS 9.0, *)
    open var topAnchor: NSLayoutYAxisAnchor { get }

    @available(iOS 9.0, *)
    open var bottomAnchor: NSLayoutYAxisAnchor { get }

    @available(iOS 9.0, *)
    open var widthAnchor: NSLayoutDimension { get }

    @available(iOS 9.0, *)
    open var heightAnchor: NSLayoutDimension { get }

    @available(iOS 9.0, *)
    open var centerXAnchor: NSLayoutXAxisAnchor { get }

    @available(iOS 9.0, *)
    open var centerYAnchor: NSLayoutYAxisAnchor { get }

    @available(iOS 9.0, *)
    open var firstBaselineAnchor: NSLayoutYAxisAnchor { get }

    @available(iOS 9.0, *)
    open var lastBaselineAnchor: NSLayoutYAxisAnchor { get }
}
当你创建一个view相对于另外一个view的Anchor时,需要保证Anchor是相同的子类,即一种类型的Anchor只允许绑定到另外一个相同类型的Anchor上。因为在添加约束设置参数时,会对参数进行检查,这样能够保证避免无效的约束。例如:编译器将拒绝把NSLayoutXAxisAnchor类的leadingAnchor的约束添加到NSLayoutYAxisAnchor类的topAnchor,因为类型不一样。
注意:约束leading/trailing anchors到left/right anchors在运行时是会崩溃的,Autolayout并不允许你混合leading与left anchors或者trailing和right anchors。
有了NSLayoutAnchor我们将不在需要像以前那样创建
NSLayoutConstraint(item: avatarView, attribute: .top, relatedBy: .equal, toItem: view, attribute: .top, multiplier: 1.0, constant: 0)仅仅只需要直接使用,代码简洁了很多,添加约束方法会自动为我们返回NSLayoutConstraint对象。
avatarView.topAnchor.constraint(equalTo: view.topAnchor).isActive = trueUIView的layoutMarginsGuide属性布局边距约束
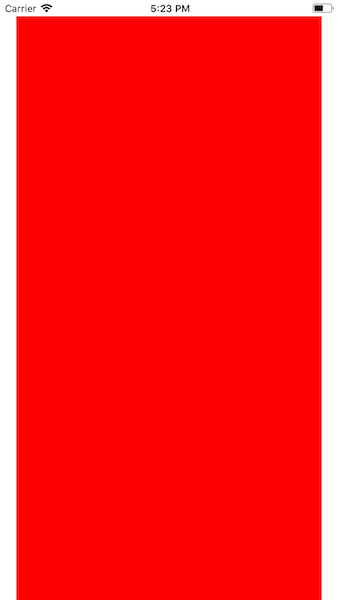
UIView并没有提供anchor属性用于布局margin,相反我们可以使用UILayoutGuide提供的layoutMarginsGuide属性进行布局,如:
view.addSubview(redView)
redView.translatesAutoresizingMaskIntoConstraints = false

redView.leadingAnchor.constraint(equalTo: view.layoutMarginsGuide.leadingAnchor).isActive = true
redView.trailingAnchor.constraint(equalTo: view.layoutMarginsGuide.trailingAnchor).isActive = true
redView.topAnchor.constraint(equalTo: view.layoutMarginsGuide.topAnchor).isActive = true
redView.bottomAnchor.constraint(equalTo: view.layoutMarginsGuide.bottomAnchor).isActive = true
效果如下:
UILayoutGuide
UILayoutGuide可以理解为布局参展,一个矩形区域用于和AutoLayout进行交互,其相关功能依赖于NSLayoutAnchor来实现。UILayoutGuide也包含了一组NSLayoutAnchor属性,与UIView基本上差不多,二者布局方式也差不多,并且可以混合使用:即一个约束中的两个元素,一个来自视图,一个来自布局参照。
使用UILayoutGuide来取代占位视图(dummy view)也可以用做容器视图,封装视图,一个占位视图是一个空视图(empty view)并不包含任意的可见元素,仅仅是用于定义一个矩形区域,例如:如果你想在两个视图之间约束一个大小,那么可以使用占位视图来代表间距。占位视图也与缺点:1)需要创建对象和维护 2)大量的占位视图存在于视图结构中会影响性能 3)占位视图可能拦截触摸事件
创建LayoutGuide
1)初始化UILayoutGuide对象
2)调用view的addLayoutGuide方法添加layout guide对象
3)使用AutoLayout定义layout guide对象的位置和大小
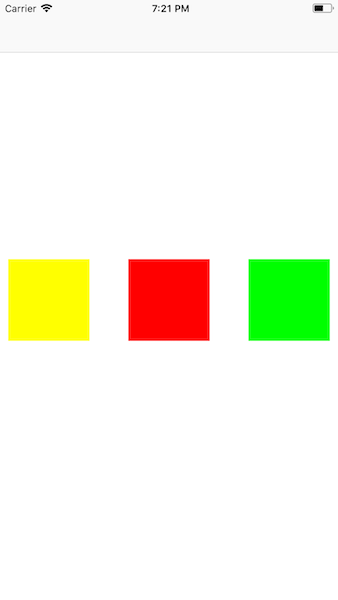
创建3个等间距的视图
 func setupConstraints() {
        let space1 = UILayoutGuide()
        view.addLayoutGuide(space1)

        let space2 = UILayoutGuide()
        view.addLayoutGuide(space2)

        space1.widthAnchor.constraint(equalTo: space2.widthAnchor).isActive = true
        yellowView.trailingAnchor.constraint(equalTo: space1.leadingAnchor).isActive = true
        redView.leadingAnchor.constraint(equalTo: space1.trailingAnchor).isActive = true
        redView.trailingAnchor.constraint(equalTo: space2.leadingAnchor).isActive = true
        greenView.leadingAnchor.constraint(equalTo: space2.trailingAnchor).isActive = true

        yellowView.translatesAutoresizingMaskIntoConstraints = false

        let yellowViewLeading = yellowView.leadingAnchor.constraint(equalTo: view.leadingAnchor, constant: 10)
        let yellowViewCenterY = yellowView.centerYAnchor.constraint(equalTo: view.centerYAnchor)
        let yellowViewWidth = yellowView.widthAnchor.constraint(equalToConstant: 100)
        let yellowViewHeight = yellowView.heightAnchor.constraint(equalToConstant: 100)
        NSLayoutConstraint.activate([yellowViewLeading, yellowViewCenterY, yellowViewWidth, yellowViewHeight])

        redView.translatesAutoresizingMaskIntoConstraints = false
        let redViewCenterY = redView.centerYAnchor.constraint(equalTo: yellowView.centerYAnchor)
        let redViewWidth =  redView.widthAnchor.constraint(equalTo: yellowView.widthAnchor)
        let redViewHight = redView.heightAnchor.constraint(equalTo: yellowView.heightAnchor)
        NSLayoutConstraint.activate([redViewCenterY, redViewWidth, redViewHight])

        greenView.translatesAutoresizingMaskIntoConstraints = false
        let greenViewTrailing = greenView.trailingAnchor.constraint(equalTo: view.trailingAnchor, constant: -10)
        let greenViewCenterY = greenView.centerYAnchor.constraint(equalTo: redView.centerYAnchor)
        let greenViewWidth =  greenView.widthAnchor.constraint(equalTo: redView.widthAnchor)
        let greenViewHight = greenView.heightAnchor.constraint(equalTo: redView.heightAnchor)
        NSLayoutConstraint.activate([greenViewTrailing, greenViewCenterY, greenViewWidth, greenViewHight])
    }
效果如下:
Demo简单添加两个视图并添加相应的约束
class ViewController: UIViewController {
    lazy var yellowView: UIView = {
        let view = UIView()
        view.backgroundColor = UIColor.yellow
        return view
    }()
    lazy var redView: UIView = {
        let view = UIView()
        view.backgroundColor = UIColor.red
        return view
    }()

    override func viewDidLoad() {
        super.viewDidLoad()
        setupView()
        setupConstraints()
    }

    func setupView() {
        view.addSubview(yellowView)
        view.addSubview(redView)
    }

    func setupConstraints() {
        // 告诉系统使用auto layout而不是使用frame
        yellowView.translatesAutoresizingMaskIntoConstraints = false

        // isActive为true表示立马生效约束
        yellowView.leadingAnchor.constraint(equalTo: view.leadingAnchor, constant: 50).isActive = true
        yellowView.centerYAnchor.constraint(equalTo: view.centerYAnchor).isActive = true
        yellowView.widthAnchor.constraint(equalToConstant: 100).isActive = true
        yellowView.heightAnchor.constraint(equalToConstant: 100).isActive = true

        redView.translatesAutoresizingMaskIntoConstraints = false
        redView.trailingAnchor.constraint(equalTo: view.trailingAnchor, constant: -50).isActive = true
        redView.centerYAnchor.constraint(equalTo: yellowView.centerYAnchor).isActive = true
        redView.widthAnchor.constraint(equalTo: yellowView.widthAnchor).isActive = true
        redView.heightAnchor.constraint(equalTo: yellowView.heightAnchor).isActive = true
    }
}
代码非常简单:
1)添加子视图到父视图
2)设置子视图的translateAutoresizingMaskIntoConstraints为false,禁止自动缩放,并使用AutoLayout布局,默认为true,在IB中自动设置为false
3)添加约束,并且调用isActive方法生效约束,因为默认情况下使用constraint方法添加的约束是没有使用的。当然如果不使用isActive方法可以,可以整体生效约束,也可以父视图的addConstraints方法即可,使用跟NSLayoutConstraint类一样,因为返回的就是NSLayoutConstraint对象。如下:
  func setupConstraints() {
        // 告诉系统使用auto layout而不是使用frame
        yellowView.translatesAutoresizingMaskIntoConstraints = false
        let yellowViewLeading = yellowView.leadingAnchor.constraint(equalTo: view.leadingAnchor, constant: 50)
        let yellowViewCenterY = yellowView.centerYAnchor.constraint(equalTo: view.centerYAnchor)
        let yellowViewWidth = yellowView.widthAnchor.constraint(equalToConstant: 100)
        let yellowViewHeight = yellowView.heightAnchor.constraint(equalToConstant: 100)

        NSLayoutConstraint.activate([yellowViewLeading, yellowViewCenterY, yellowViewWidth, yellowViewHeight])
        //view.addConstraints([yellowViewLeading, yellowViewCenterY, yellowViewWidth, yellowViewHeight])

        redView.translatesAutoresizingMaskIntoConstraints = false
        let redViewTrailing = redView.trailingAnchor.constraint(equalTo: view.trailingAnchor, constant: -50)
        let redViewCenterY = redView.centerYAnchor.constraint(equalTo: yellowView.centerYAnchor)
        let redViewWidth =  redView.widthAnchor.constraint(equalTo: yellowView.widthAnchor)
        let redViewHeight = redView.heightAnchor.constraint(equalTo: yellowView.heightAnchor)

         NSLayoutConstraint.activate([redViewTrailing, redViewCenterY, redViewWidth, redViewHeight])
        //view.addConstraints([redViewTrailing, redViewCenterY, redViewWidth, redViewHeight])
    }
效果如下:
参考:


