以下封装方法仅供mpvue+koa开发小程序入门参考,具体应用请根据实际更改。
config.js
// 配置项

const host = 'http://localhost:5757'

const config = {
  host
}
export default config
util.js
// 工具函数,以下只介绍get请求,post传入data即可。
import config from './config'

export function get (url) {
  return new Promise((resolve, reject) => {
    wx.request({
      url: config.host + url,
      success: function (res) {
        if (res.data.code === 0) {
          resolve(res.data.data)
        } else {
          reject(res.data)
        }
      }
    })
  })
}
App.vue
<script>
import {get} from './util'
export default {
  async created () {
    const res = await get('/weapp/demo')
    console.log(res)
    console.log('小程序启动了!!')
  }
}
</script>

<style>
</style>
运行
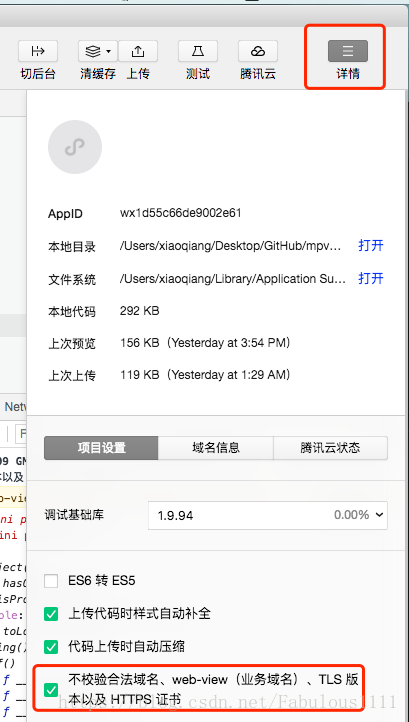
进入server,启动后端服务;新建命令行,进入项目主目录, npm run dev。第一次运行可能会被拦截,因为微信开发者工具校验了https,可在微信开发者工具详情里边关闭https校验,如图:
两个服务都运行后,微信开发者工具里可看到:
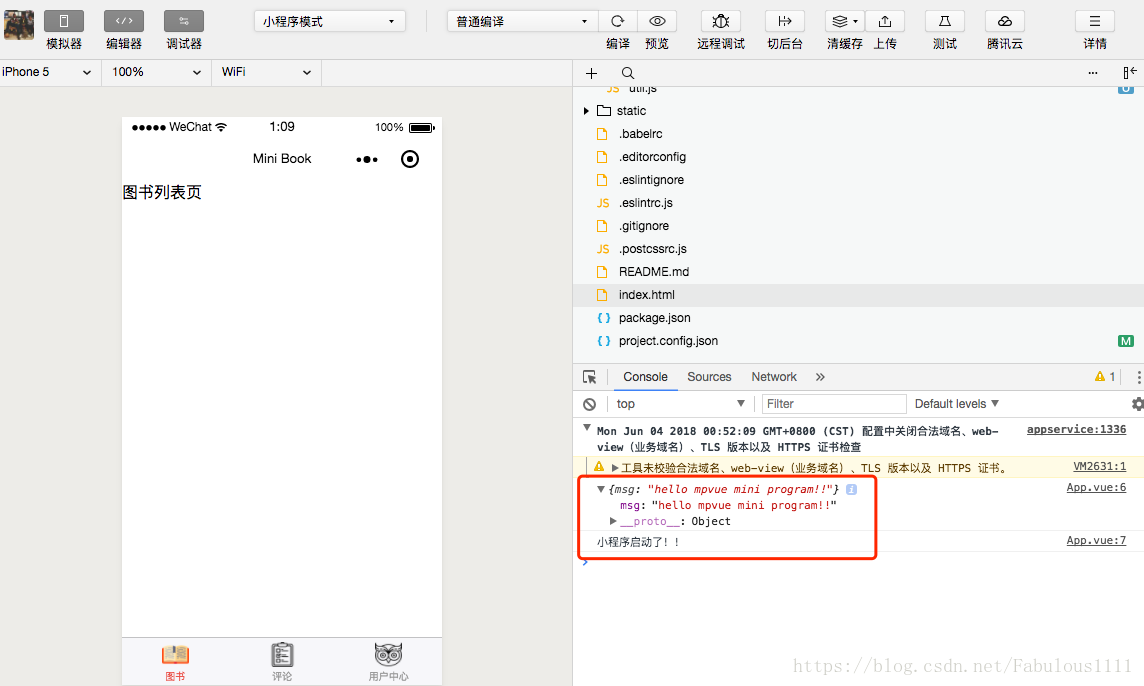
证明请求函数封装并应用成功。
注:
以上App.vue中,请求的地址实际是:http://localhost:5757/weapp/demo,这个接口为我们上一篇文章介绍搭建腾讯云本地开发环境时写的接口,有兴趣有需要可点击此进入本人上一篇文章:使用mpvue+koa开发小程序——上传测试代码到腾讯云以及腾讯云后台本地开发环境的搭建。
原方法请参考微信小程序API文档:
https://developers.weixin.qq.com/miniprogram/dev/api/network-request.html#wxrequestobject