之前略微研究了下前端的e2e测试,现在轮到单元测试了。
1. 所需工具
karma,Karma是由Google团队开发的一套前端测试运行框架。
mocha,mocha是一个javascript测试框架。
chai,chai是一个断言库。
2. package.json
由于以上库/框架都是基于node的,自然要安装相应的node模块。

{
  ...
  "scripts": {
    "test": "karma start my.conf.js"
  },
  ...
"devDependencies": {
    "babel-core": "^6.26.0",
    "babel-istanbul": "^0.12.2",
    "babel-loader": "^7.1.2",
    "babel-plugin-transform-runtime": "^6.23.0",
    "babel-polyfill": "^6.26.0",
    "babel-preset-env": "^1.6.1",
    "babel-preset-es2015": "^6.24.1",
    "babel-preset-stage-2": "^6.24.1",
    "chai": "^4.1.2",
    "karma": "^1.7.1",
    "karma-chai": "^0.1.0",
    "karma-chrome-launcher": "^2.2.0",
    "karma-ie-launcher": "^1.0.0",
    "karma-mocha": "^1.3.0",
    "karma-webpack": "^2.0.5",
    "mocha": "^4.0.1",
    "webpack": "^3.8.1"
  }
}
需要安装的有karma相关,chai,webpack和babel相关(使用了es6)。
记得还要添加babel的配置文件.babelrc
{
  "presets": [
    ["env", {
      "modules": false,
      "targets": {
        "browsers": ["> 1%", "last 2 versions", "not ie <= 8"]
      }
    }],
    "stage-2"
  ],
  "plugins": ["transform-runtime"],
  "env": {
    "test": {
      "presets": ["env", "stage-2"],
      "plugins": ["istanbul"]
    }
  }
}
3. 初始化karma
如果是在windows中,需要全局安装karma-cli,否则karma无法正常使用
npm i -g karma-cli
接下来使用 karma init my.conf.js 命令来进行karma的初始化,安装时需按照指示一步步进行:
Which testing framework do you want to use ? Press tab to list possible options. Enter to move to the next question.
> mocha
Do you want to use Require.js ? This will add Require.js plugin. Press tab to list possible options. Enter to move to the next question.
> no
Do you want to capture any browsers automatically ? Press tab to list possible options. Enter empty string to move to the next question.
> Chrome
中间两个问题直接略过...
Do you want Karma to watch all the files and run the tests on change ? Press tab to list possible options.
> yes
这里不需要使用require.js,因为模块化的部分直接使用es6。
安装完成后会生成my.conf.js,改js为karma的配置项。
4. karma配置项
module.exports = function (config) {
    config.set({

        // base path that will be used to resolve all patterns (eg. files, exclude)
        basePath: '',

        // frameworks to use
        // available frameworks: https://npmjs.org/browse/keyword/karma-adapter
        frameworks: ['mocha', 'chai'],

        // list of files / patterns to load in the browser
        files: [
            'tests/*.test.js'
        ],

        preprocessors: {
            'tests/*.test.js': ['webpack'],
            'src/*.js': ['webpack']
        },

        // list of files to exclude
        exclude: [],

        webpack: {
            module: {
                rules: [{
                    test: /\.js$/,
                    exclude: [/node_modules/, __dirname + "xxx/xxx/lib"],
                    loader: "babel-loader",
                    query: {
                        compact: false,
                        presets: ["es2015"]
                    }
                }]
            }
        },

        // test results reporter to use
        // possible values: 'dots', 'progress'
        // available reporters: https://npmjs.org/browse/keyword/karma-reporter
        reporters: ['progress'],

        // web server port
        port: 9876,

        // enable / disable colors in the output (reporters and logs)
        colors: true,

        // level of logging
        // possible values: config.LOG_DISABLE || config.LOG_ERROR || config.LOG_WARN || config.LOG_INFO || config.LOG_DEBUG
        logLevel: config.LOG_INFO,

        // enable / disable watching file and executing tests whenever any file changes
        autoWatch: true,

        // start these browsers
        // available browser launchers: https://npmjs.org/browse/keyword/karma-launcher
        browsers: ['Chrome', 'IE'],

        // Continuous Integration mode
        // if true, Karma captures browsers, runs the tests and exits
        singleRun: false,

        // Concurrency level
        // how many browser should be started simultaneous
        concurrency: Infinity
    })
}
把自动生成的js修改成这样,主要增加了webpack的配置,webpack配置了主要是使用es6。
files中为测试用例的路径,preprocessors中为需要预处理的代码的目录。
5. 测试用例
在写测试用例之前肯定要有一个需要测试的方法,我们就用一个最简单的加法来进行测试(src/add.js)
export default function add(x, y) {
    return x + y;
}
测试用例(tests/add.test.js):
import add from '../src/add.js'
import {assert} from 'chai'

describe('加法函数的测试', function () {
    it('1 加 1 应该等于 2', function () {
        assert.equal(add(1, 1), 2)
    });
    it('2 加 2 应该等于 4', function () {
        assert.equal(add(2, 2), 5)
    });
});
然后我们就可以用 npm run test命令来执行单元测试了。
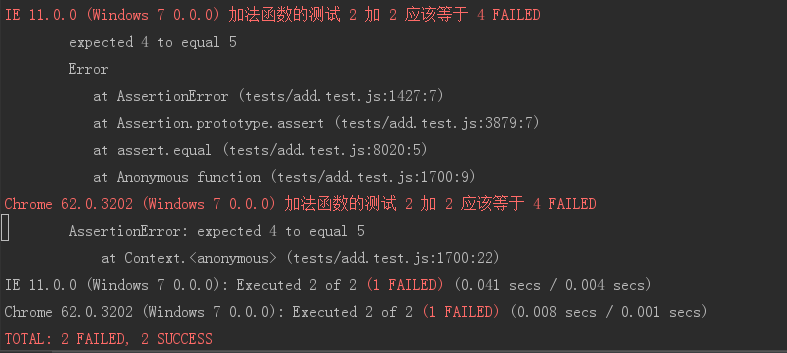
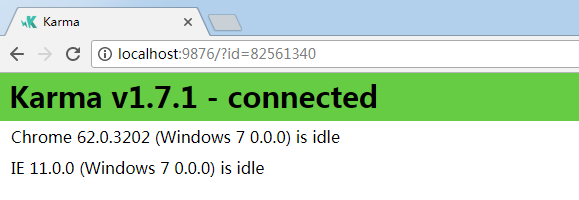
karma会帮助我们同时启动Chrome与IE进行测试,可以看到结果是2个失败2个成功,失败就是2+2的结果应该是4,但是测试用例中写的是5,自然是不相等了,所以我们的测试成功了!
以下是浏览器运行的结果:
可以看到整个过程中除了安装mocha及将mocha配置入karma的配置项以外,就没有出现过mocha,这是因为我们用了karma,karma自动帮我们进行了操作。
6. 关于chai
除了assert,chai里面还有两种断言方式expect和should,由于should不支持ie那就不介绍了。
直接上expect的例子吧
import add from '../src/add.js'
import {expect} from 'chai'

describe('加法函数的测试', function () {
    it('1 加 1 应该等于 2', function () {
        expect(add(1,1)).to.equal(2)
    });
    it('2 加 2 应该等于 4', function () {
        expect(add(2,2)).to.equal(4)
    });
});
expect的语义化感觉会更好。
总结:
其实没有什么特别麻烦的地方,无非就是前人栽树后人乘凉,比起e2e测试来也没有用到jdk,还是相对好配置一些的。
当然mocha也支持异步测试,比如await/async等。还有钩子函数等等,功能是非常齐全的,具体可以上官网了解。