zabbix 2.4的安装方法
安装zabbix server
CentOS系统版本:

[root@linux-node1 ~]# cat /etc/redhat-release

CentOS release 6.7 (Final)

[root@linux-node1 ~]# uname -r

2.6.32-573.el6.x86_64

[root@linux-node1 ~]# uname -m

x86_64

[root@linux-node1 ~]# tail -2 /etc/hosts

10.0.0.7 linux-node1.oldboyedu.com linux-node1

10.0.0.8 linux-node2.oldboyedu.com linux-node2

[root@linux-node1 ~]# ping www.baidu.com

PING www.a.shifen.com (220.181.112.244) 56(84) bytes of data.

64 bytes from 220.181.112.244: icmp_seq=1 ttl=128 time=7.91 ms

确保服务器可以上网。
安装zabbix服务器端
官方安装参考:https://www.zabbix.com/documentation/2.4/manual/installation/install_from_packages
linux的基础优化必须要做,时间同步、防火墙配置、selinux配置等。
下面是2.4的安装方法
安装zabbix-release包
[root@linux-node1 ~]# mkdir -p /home/oldboy/tools

[root@linux-node1 ~]# cd /home/oldboy/tools

[root@linux-node1 tools]# wget -q http://repo.zabbix.com/zabbix/2.4/rhel/6/x86_64/zabbix-release-2.4-1.el6.noarch.rpm

[root@linux-node1 tools]# ls -lh zabbix-release-2.4-1.el6.noarch.rpm

-rw-r–r– 1 root root 12K 9月 11 2014 zabbix-release-2.4-1.el6.noarch.rpm

[root@linux-node1 tools]# rpm -ivh zabbix-release-2.4-1.el6.noarch.rpm

warning: zabbix-release-2.4-1.el6.noarch.rpm: Header V4 DSA/SHA1 Signature, key ID 79ea5ed4: NOKEY

Preparing… (1########################################### [100%]

1:zabbix-release ( ########################################### [100%]

zabbix-release包安装结果

[root@linux-node1 tools]# rpm -ql zabbix-release

/etc/pki/rpm-gpg/RPM-GPG-KEY-ZABBIX

/etc/yum.repos.d/zabbix.repo

/usr/share/doc/zabbix-release-2.4

/usr/share/doc/zabbix-release-2.4/GPL

[root@linux-node1 tools]# ll /etc/yum.repos.d/zabbix.repo

-rw-r–r– 1 root root 401 9月 11 2014 /etc/yum.repos.d/zabbix.repo
开始安装zabbix
1)保留yum安装的rpm包

[root@linux-node1 tools]# sed -i 's#keepcache=1#keepcache=0#g' /etc/yum.conf

[root@linux-node1 tools]# grep keepcache /etc/yum.conf

keepcache=0
开始安装zabbix
yum -y install zabbix zabbix-server zabbix-server-mysql #<==ZABBIX SERVER相关

yum -y install zabbix-web zabbix-web-mysql #<==Apache、Php Web界面环境

yum -y install zabbix-agent #<== ZABBIX客户端

yum -y install mysql-server mysql #<==MySQL客户端与服务端

yum -y install zabbix-get #<==zabbix命令行工具
配置zabbix服务相关
配置并启动MySQL

[root@linux-node1 tools]# \cp /usr/share/mysql/my-medium.cnf /etc/my.cnf

[root@linux-node1 tools]# vi /etc/my.cnf

然后在[mysqld](第26行)标签下增加如下三行后保存

[mysqld]

character-set-server = utf8

init-connect = 'SET NAMES utf8'

collation-server = utf8_general_ci

2)启动zabbix存储数据的数据库MySQL

[root@linux-node1 tools]# /etc/init.d/mysqld start

……

Please report any problems with the /usr/bin/mysqlbug script!


[确定]

正在启动 mysqld:
[确定]

[root@linux-node1 tools]# netstat -lntup|grep mysql

tcp 0 0 0.0.0.0:3306 0.0.0.0:* LISTEN 26982/mysqld

[root@linux-node1 tools]# mysql

Welcome to the MySQL monitor. Commands end with ; or \g.

Your MySQL connection id is 2

Server version: 5.1.73-log Source distribution

……

Type ‘help;’ or ‘\h’ for help. Type ‘\c’ to clear the current input statement.

mysql>
初始化zabbix存储数据的数据库MySQL
[root@linux-node1 ~]# mysql -e "create database zabbix character set utf8 collate utf8_bin;"

[root@linux-node1 ~]# mysql -e "grant all on zabbix.* to zabbix@localhost identified by 'zabbix';"

[root@linux-node1 ~]# cd /usr/share/doc/zabbix-server-mysql-2.4.8/create/

[root@linux-node1 create]# mysql zabbix<schema.sql

[root@linux-node1 create]# mysql zabbix<images.sql

[root@linux-node1 create]# mysql zabbix<data.sql

[root@linux-node1 create]# mysqladmin -uroot password oldboy

4)初始化apache服务的zabbix配置

[root@linux-node1 create]# sed -i 's#\# php_value date.timezone Europe/Riga#php_value date.timezone Asia/Shanghai#g' /etc/httpd/conf.d/zabbix.conf

[root@linux-node1 create]# grep Shanghai /etc/httpd/conf.d/zabbix.conf
php_value date.timezone Asia/Shanghai
初始化zabbix server配置
[root@linux-node1 create]# cp /etc/zabbix/zabbix_server.conf /etc/zabbix/zabbix_server.conf.oldboy.ori

[root@linux-node1 create]# sed -i 's@# DBPassword=@DBPassword=zabbix@g' /etc/zabbix/zabbix_server.conf

[root@linux-node1 create]# grep DBPassword= /etc/zabbix/zabbix_server.conf

DBPassword=zabbix

[root@linux-node1 create]# sed -i 's@# DBHost=localhost@DBHost=localhost@g' /etc/zabbix/zabbix_server.conf

[root@linux-node1 create]# grep DBHost= /etc/zabbix/zabbix_server.conf DBHost=localhost

修改前后对比:

[root@linux-node1 create]# diff /etc/zabbix/zabbix_server.conf /etc/zabbix/zabbix_server.conf.oldboy.ori

65d64

< ### Option: DBHost

72,73c71

< DBHost=localhost

<

—

> # DBHost=localhost

106c104

< DBPassword=zabbix

—

> # DBPassword=
启动zabbix server及web服务
[root@linux-node1 create]# /etc/init.d/zabbix-server start

Starting Zabbix server: [确定]

[root@linux-node1 create]# lsof -i :10051|wc -l

55

[root@linux-node1 create]# /etc/init.d/httpd start

正在启动 httpd:httpd: apr_sockaddr_info_get() failed for linux-node1.example.com

httpd: Could not reliably determine the server’s fully qualified domain name, using 127.0.0.1 for ServerName

[确定]

[root@linux-node1 create]# lsof -i :80|wc -l

10
到此,zabbix server端的命令行配置告一段落了,接下来就是Web界面里管理了,使用Web管理对我这样老鸟实在不习惯,还是喜欢Nagios批量自动化脚本管理,更快,更舒服。


安装zabbix Client
客户端CentOS系统版本
CentOS系统版本:

[root@linux-node2 ~]# cat /etc/redhat-release

CentOS release 6.7 (Final)

[root@linux-node2 ~]# uname -r

2.6.32-573.el6.x86_64

[root@linux-node2 ~]# uname -m

x86_64

[root@linux-node2 ~]# ping www.baidu.com

PING www.a.shifen.com (220.181.112.244) 56(84) bytes of data.

64 bytes from 220.181.112.244: icmp_seq=1 ttl=128 time=7.91 ms

确保服务器可以上网。
安装zabbix agent端
官方安装参考:https://www.zabbix.com/documentation/2.4/manual/installation/install_from_packages
linux的基础优化必须要做,时间同步、防火墙配置、selinux配置等。
安装zabbix-release包
[root@linux-node2 ~]# mkdir -p /home/oldboy/tools

[root@linux-node2 ~]# cd /home/oldboy/tools

[root@linux-node2 tools]# wget -q http://repo.zabbix.com/zabbix/2.4/rhel/6/x86_64/zabbix-release-2.4-1.el6.noarch.rpm

[root@linux-node2 tools]# ls -lh zabbix-release-2.4-1.el6.noarch.rpm

-rw-r–r– 1 root root 12K 9月 11 2014 zabbix-release-2.4-1.el6.noarch.rpm

[root@linux-node2 tools]# rpm -ivh zabbix-release-2.4-1.el6.noarch.rpm

warning: zabbix-release-2.4-1.el6.noarch.rpm: Header V4 DSA/SHA1 Signature, key ID 79ea5ed4: NOKEY

Preparing… ########################################### [100%]

1:zabbix-release ########################################### [100%]

zabbix-release包安装结果

[root@linux-node2 tools]# rpm -ql zabbix-release

/etc/pki/rpm-gpg/RPM-GPG-KEY-ZABBIX

/etc/yum.repos.d/zabbix.repo

/usr/share/doc/zabbix-release-2.4

/usr/share/doc/zabbix-release-2.4/GPL

[root@linux-node2 tools]# ll /etc/yum.repos.d/zabbix.repo

-rw-r–r– 1 root root 401 9月 11 2014 /etc/yum.repos.d/zabbix.repo
开始安装zabbix
1)保留yum安装的rpm包

[root@linux-node2 tools]# sed -i ‘s#keepcache=1#keepcache=0#g’ /etc/yum.conf

[root@linux-node2 tools]# grep keepcache /etc/yum.conf

keepcache=0

2)开始安装zabbix agent

yum -y install zabbix-agent #<== ZABBIX客户端

yum -y install zabbix-get #<==zabbix命令行工具

提示:也可以去官方下载rpm http://repo.zabbix.com/zabbix/2.4/rhel/

3、配置zabbix agent服务相关

[root@linux-node2 tools]# grep Server= /etc/zabbix/zabbix_agentd.conf

# Server=

Server=127.0.0.1

[root@linux-node2 tools]# sed -i ‘s#Server=127.0.0.1#Server=10.0.0.7#g’ /etc/zabbix/zabbix_agentd.conf

[root@linux-node2 tools]# grep Server= /etc/zabbix/zabbix_agentd.conf

# Server=

Server=10.0.0.7

4、启动zabbix agent

[root@linux-node2 tools]# /etc/init.d/zabbix-agent start

Starting Zabbix agent: [确定]

[root@linux-node2 tools]# netstat -tunlp|grep 10050

tcp 0 0 0.0.0.0:10050 0.0.0.0:* LISTEN 26560/zabbix_agentd

tcp 0 0 :::10050 :::* LISTEN 26560/zabbix_agentd

[root@linux-node2 tools]# tailf /var/log/zabbix/zabbix_agentd.log

26560:20151028:185412.799 Starting Zabbix Agent [Zabbix server]. Zabbix 2.4.6 (revision 54796).

26560:20151028:185412.799 using configuration file: /etc/zabbix/zabbix_agentd.conf

26560:20151028:185412.799 agent #0 started [main process]

26564:20151028:185412.800 agent #4 started [listener #3]

26563:20151028:185412.800 agent #3 started [listener #2]

26565:20151028:185412.800 agent #5 started [active checks #1]

26562:20151028:185412.801 agent #2 started [listener #1]
至此,linux下zabbix客户端安装完毕。
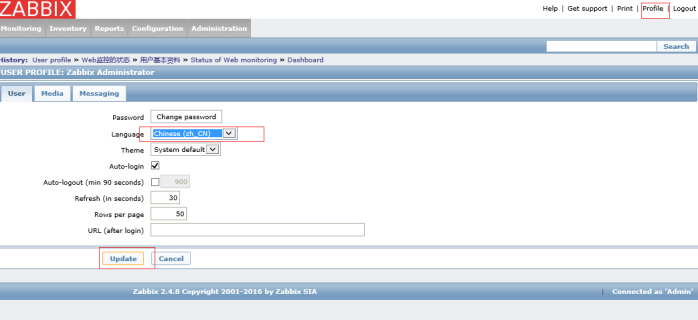
1.2 设置zabbix的中文界面