第一章讲了ActiveMQ的安装,本章讲解springboot集成ActiveMQ。
首先在pom中导入对ActiveMQ的依赖
		<!--ActiveMQ支持-->
		<dependency>
			<groupId>org.springframework.boot</groupId>
			<artifactId>spring-boot-starter-activemq</artifactId>
		</dependency>
然后在application.yml中配置ActiveMQ(默认只支持发送和接收queue消息)
spring:
  activemq:
    broker-url: tcp://localhost:61616
    user: admin
    password: admin
创建消息生产者,类上要加@Service或者@Component,交给spring管理
import org.springframework.beans.factory.annotation.Autowired;
import org.springframework.jms.core.JmsMessagingTemplate;
import org.springframework.stereotype.Service;

import javax.jms.Destination;

@Service("producer")
public class Producer {
    @Autowired
    private JmsMessagingTemplate jmsMessagingTemplate;

    public void sendMessage(Destination destination, String message) {
        jmsMessagingTemplate.convertAndSend(destination,message);
    }
}
创建消息消费者
import org.slf4j.Logger;
import org.slf4j.LoggerFactory;
import org.springframework.jms.annotation.JmsListener;
import org.springframework.stereotype.Component;

@Component
public class Consumer {
    private final static Logger logger = LoggerFactory.getLogger(Consumer.class);
    @JmsListener(destination = "springboot.queue.test")
    public void receiveQueue(String text){
        logger.info("Consumer接受的消息:"+text);
    }
}
测试类
import com.springboot.first.task.Producer;
import org.apache.activemq.command.ActiveMQQueue;
import org.junit.Test;
import org.junit.runner.RunWith;
import org.springframework.beans.factory.annotation.Autowired;
import org.springframework.boot.test.context.SpringBootTest;
import org.springframework.test.context.junit4.SpringRunner;

import javax.jms.Destination;

@RunWith(SpringRunner.class)
@SpringBootTest
public class ActiveMqTest {
    @Autowired
    private Producer producer;

    @Test
    public void test() throws InterruptedException {
        Destination destination = new ActiveMQQueue("springboot.queue.test");
        for (int i = 0; i < 10; i++) {
            producer.sendMessage(destination, "你好,我是:" + i);
        }
    }
}
测试结果:

若要支持ActiveMQ连接池,则在pom中还要添加依赖:
		<dependency>
			<groupId>org.apache.activemq</groupId>
			<artifactId>activemq-pool</artifactId>
		</dependency>
application.yml
spring:
  activemq:
    broker-url: tcp://localhost:61616
    user: admin
    password: admin
    #指定是否为内存模式,默认true
    in-memory: true
    pool:
      #是否使用PooledConnectionFactory,默认false(默认使用ConnectionFactory),若要设为true,则需添加activemq-pool依赖
      enabled: true
      #最大连接数
      max-connections: 50
      #连接超时时间
      expiry-timeout: 10000
      #空闲时间
      idle-timeout: 30000
实现双向队列
创建一个新的消息消费者Consumer2.java
扫描二维码关注公众号,回复:
1840721 查看本文章

import org.slf4j.Logger;
import org.slf4j.LoggerFactory;
import org.springframework.jms.annotation.JmsListener;
import org.springframework.messaging.handler.annotation.SendTo;
import org.springframework.stereotype.Component;

@Component
public class Consumer2 {
    private final static Logger logger = LoggerFactory.getLogger(Consumer2.class);
    @JmsListener(destination = "springboot.queue")
    @SendTo("out.queue")//将return返回的值再添加到out.queue队列中
    public String receiveQueue(String text){
        logger.info("Consumer2接受的消息:"+text);
        return "返回的信息"+text;
    }
}
在Producer.java中添加一个方法,使其既能产生报文,又能消费队列中的报文。
import org.springframework.beans.factory.annotation.Autowired;
import org.springframework.jms.annotation.JmsListener;
import org.springframework.jms.core.JmsMessagingTemplate;
import org.springframework.stereotype.Component;

import javax.jms.Destination;

@Component("producer")
public class Producer {
    @Autowired
    private JmsMessagingTemplate jmsMessagingTemplate;

    public void sendMessage(Destination destination, String message) {
        jmsMessagingTemplate.convertAndSend(destination, message);
    }
    //监听out.queue
    @JmsListener(destination = "out.queue")
    public void consumerMessage(String text) {
        System.out.println("从out.queue收到的回复报文为:" + text);
    }
}
再运行测试代码,结果如下:

支持同时发送和接收queue和topic消息
默认是只发送和接收queue消息,如要支持topic,则application.yml中要添加如下配置,但是添加了以下配置就无法发送和接收queue消息了,也就是两者只能选择一种。
spring:
  jms:
    #发送和接受topic消息,默认false
    pub-sub-domain: false
怎么能够让两者共存呢?
新建一个JMS的配置类
import org.apache.activemq.command.ActiveMQQueue;
import org.apache.activemq.command.ActiveMQTopic;
import org.springframework.context.annotation.Bean;
import org.springframework.context.annotation.Configuration;
import org.springframework.jms.config.DefaultJmsListenerContainerFactory;
import org.springframework.jms.config.JmsListenerContainerFactory;

import javax.jms.ConnectionFactory;
import javax.jms.Queue;
import javax.jms.Topic;

@Configuration
public class JMSConfig {
    public final static String QUEUE = "springboot.queue";
    public final static String TOPIC = "springboot.topic";

    @Bean
    public Queue queue() {
        return new ActiveMQQueue(QUEUE);
    }

    @Bean
    public Topic topic() {
        return new ActiveMQTopic(TOPIC);
    }

    @Bean
    public JmsListenerContainerFactory<?> jmsListenerContainerQueue(ConnectionFactory activeMQConnectionFactory) {
        DefaultJmsListenerContainerFactory bean = new DefaultJmsListenerContainerFactory();
        bean.setConnectionFactory(activeMQConnectionFactory);
        return bean;
    }

    @Bean
    public JmsListenerContainerFactory<?> jmsListenerContainerTopic(ConnectionFactory activeMQConnectionFactory) {
        DefaultJmsListenerContainerFactory bean = new DefaultJmsListenerContainerFactory();
        bean.setPubSubDomain(true);
        bean.setConnectionFactory(activeMQConnectionFactory);
        return bean;
    }

}
生产者代码不变,消费者代码如下:
import com.springboot.first.config.JMSConfig;
import org.slf4j.Logger;
import org.slf4j.LoggerFactory;
import org.springframework.jms.annotation.JmsListener;
import org.springframework.messaging.handler.annotation.SendTo;
import org.springframework.stereotype.Component;

@Component
public class Consumer2 {
    private final static Logger logger = LoggerFactory.getLogger(Consumer2.class);

    //    @JmsListener(destination = "springboot.queue")
//    @SendTo("out.queue")
//    public String receiveQueue(String text){
//        logger.info("Consumer2接受的消息:"+text);
//        return "返回的信息"+text;
//    }
    @JmsListener(destination = JMSConfig.QUEUE, containerFactory = "jmsListenerContainerQueue")
    public void receiveQueue(String text) {
        logger.info("接收到的queue消息:" + text);
    }

    @JmsListener(destination = JMSConfig.TOPIC, containerFactory = "jmsListenerContainerTopic")
    public void receiveTopic(String text) {
        logger.info("接收到的topic消息:" + text);
    }
}
测试类:
import com.springboot.first.task.Producer;
import org.apache.activemq.command.ActiveMQQueue;
import org.apache.activemq.command.ActiveMQTopic;
import org.junit.Test;
import org.junit.runner.RunWith;
import org.springframework.beans.factory.annotation.Autowired;
import org.springframework.boot.test.context.SpringBootTest;
import org.springframework.test.context.junit4.SpringRunner;

import javax.jms.Destination;
import javax.jms.Queue;
import javax.jms.Topic;

@RunWith(SpringRunner.class)
@SpringBootTest
public class ActiveMqTest {
    @Autowired
    private Producer producer;
    @Autowired
    private Queue queue;
    @Autowired
    private Topic topic;

    @Test
    public void test() {
        for (int i = 0; i < 10; i++) {
            producer.sendMessage(queue, "你好,我是:" + i);
            producer.sendMessage(topic, "你好,我是:" + i);
        }
    }
}
测试结果如下图所示:
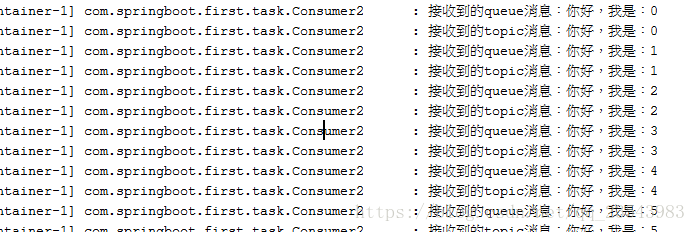
queue消息和topic消息可以同时发送接收了。