参考:https://blog.csdn.net/maoyeqiu/article/details/54573294
参考:http://www.cnblogs.com/Brake/p/create_maven_multi_module_project_via_intellij_idea.html
参考:https://blog.csdn.net/u012129558/article/details/78423511
通过一个简单的demo,练习一下idea多模块聚合开发,将项目分为简单的三层架构:web,service,dao
一、创建项目
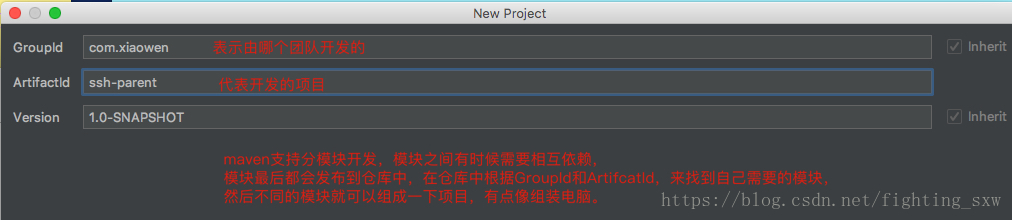
创建项目,建立父模块(这个模块的主要作用是管理依赖,用来被子模块继承用的)
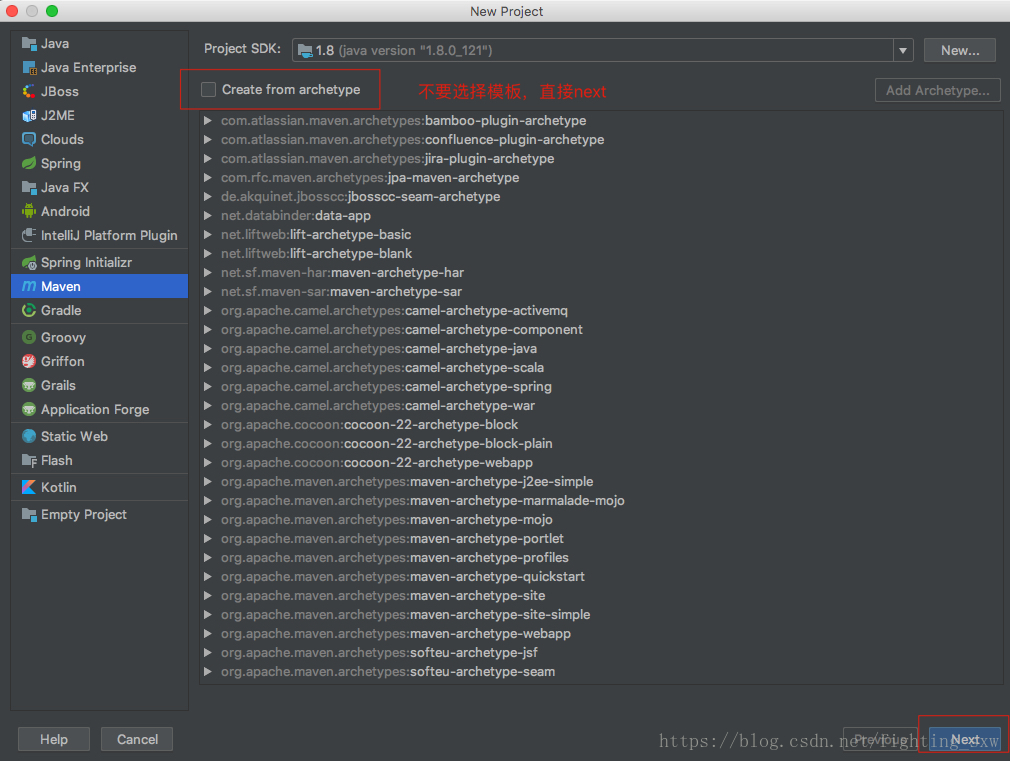
maven的project和eclipse的workspace的对比
1、maven的project下有多个module,eclipse的workspace下有多个project
2、module之间可以相互独立,也可以相互依赖,所有的maven组成一个完整的项目
3、eclipse中的project之间没有啥关系,各自都是独立的完整项目。
然后 直接 next->finish
建好之后的目录:
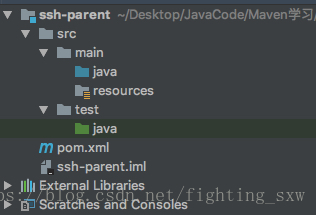
父模块没有任何代码逻辑,src可以直接删除掉
在pom.xml中引入SSH需要的所有依赖:
<?xml version="1.0" encoding="UTF-8"?>
<project xmlns="http://maven.apache.org/POM/4.0.0"
         xmlns:xsi="http://www.w3.org/2001/XMLSchema-instance"
         xsi:schemaLocation="http://maven.apache.org/POM/4.0.0 http://maven.apache.org/xsd/maven-4.0.0.xsd">
    <modelVersion>4.0.0</modelVersion>

    <groupId>com.xiaowen.webproject</groupId>
    <artifactId>ssh</artifactId>
    <packaging>pom</packaging>
    <version>1.0-SNAPSHOT</version>


    <!-- 属性 -->
    <properties>
        <spring.version>4.2.4.RELEASE</spring.version>
        <hibernate.version>5.0.7.Final</hibernate.version>
        <struts.version>2.3.24</struts.version>
    </properties>

    <!-- 锁定版本,struts2-2.3.24、spring4.2.4、hibernate5.0.7 -->
    <dependencyManagement>
        <dependencies>
            <dependency>
                <groupId>org.springframework</groupId>
                <artifactId>spring-context</artifactId>
                <version>${spring.version}</version>
            </dependency>
            <dependency>
                <groupId>org.springframework</groupId>
                <artifactId>spring-aspects</artifactId>
                <version>${spring.version}</version>
            </dependency>
            <dependency>
                <groupId>org.springframework</groupId>
                <artifactId>spring-orm</artifactId>
                <version>${spring.version}</version>
            </dependency>
            <dependency>
                <groupId>org.springframework</groupId>
                <artifactId>spring-test</artifactId>
                <version>${spring.version}</version>
            </dependency>
            <dependency>
                <groupId>org.springframework</groupId>
                <artifactId>spring-web</artifactId>
                <version>${spring.version}</version>
            </dependency>
            <dependency>
                <groupId>org.hibernate</groupId>
                <artifactId>hibernate-core</artifactId>
                <version>${hibernate.version}</version>
            </dependency>
            <dependency>
                <groupId>org.apache.struts</groupId>
                <artifactId>struts2-core</artifactId>
                <version>${struts.version}</version>
            </dependency>
            <dependency>
                <groupId>org.apache.struts</groupId>
                <artifactId>struts2-spring-plugin</artifactId>
                <version>${struts.version}</version>
            </dependency>
        </dependencies>
    </dependencyManagement>
    <!-- 依赖管理 -->
    <dependencies>
        <!-- spring -->
        <dependency>
            <groupId>org.springframework</groupId>
            <artifactId>spring-context</artifactId>
        </dependency>
        <dependency>
            <groupId>org.springframework</groupId>
            <artifactId>spring-aspects</artifactId>
        </dependency>
        <dependency>
            <groupId>org.springframework</groupId>
            <artifactId>spring-orm</artifactId>
        </dependency>
        <dependency>
            <groupId>org.springframework</groupId>
            <artifactId>spring-test</artifactId>
        </dependency>
        <dependency>
            <groupId>org.springframework</groupId>
            <artifactId>spring-web</artifactId>
        </dependency>
        <!-- hibernate -->
        <dependency>
            <groupId>org.hibernate</groupId>
            <artifactId>hibernate-core</artifactId>
        </dependency>

        <!-- 数据库驱动 -->
        <dependency>
            <groupId>mysql</groupId>
            <artifactId>mysql-connector-java</artifactId>
            <version>5.1.6</version>
            <scope>runtime</scope>
        </dependency>
        <!-- c3p0 -->

        <dependency>
            <groupId>c3p0</groupId>
            <artifactId>c3p0</artifactId>
            <version>0.9.1.2</version>
        </dependency>


        <!-- 导入 struts2 -->
        <dependency>
            <groupId>org.apache.struts</groupId>
            <artifactId>struts2-core</artifactId>
        </dependency>
        <dependency>
            <groupId>org.apache.struts</groupId>
            <artifactId>struts2-spring-plugin</artifactId>
        </dependency>

        <!-- servlet jsp -->
        <dependency>
            <groupId>javax.servlet</groupId>
            <artifactId>servlet-api</artifactId>
            <version>2.5</version>
            <scope>provided</scope>
        </dependency>
        <dependency>
            <groupId>javax.servlet</groupId>
            <artifactId>jsp-api</artifactId>
            <version>2.0</version>
            <scope>provided</scope>
        </dependency>
        <!-- 日志 -->
        <dependency>
            <groupId>org.slf4j</groupId>
            <artifactId>slf4j-log4j12</artifactId>
            <version>1.7.2</version>
        </dependency>

        <!-- jstl -->
        <dependency>
            <groupId>javax.servlet</groupId>
            <artifactId>jstl</artifactId>
            <version>1.2</version>
        </dependency>
    </dependencies>
</project>
右下角出现:
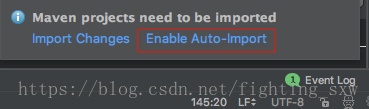
选择:Enable Auto-import
或者:

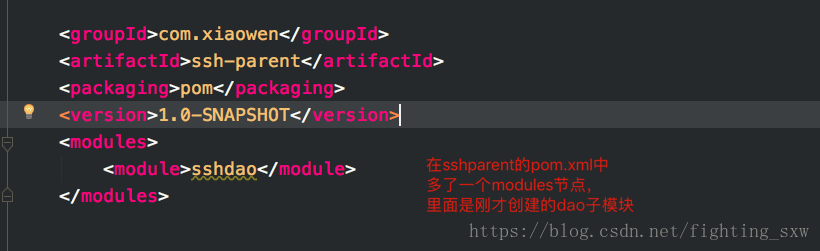
二、创建dao模块
右击ssh-parent:

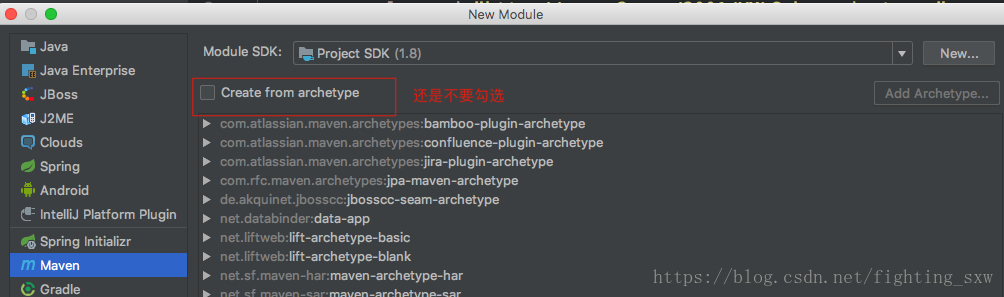
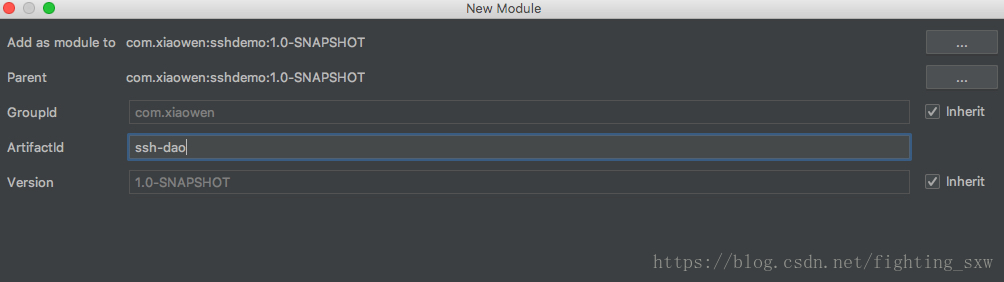
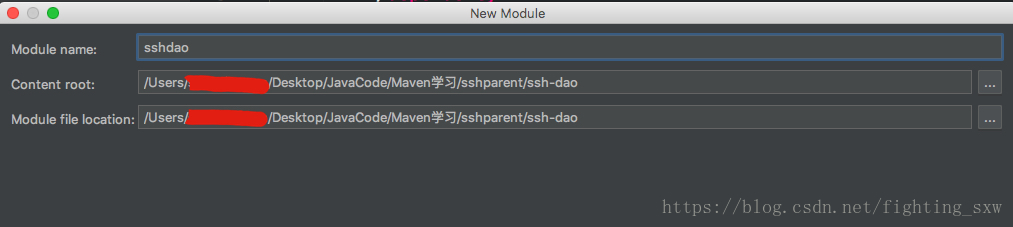
finish:

新建Customer实体类映射数据库customer表
新建CustomerDao,多Customer做一个简单的查询操作
在resources中新建spring配置文件和hibernate配置文件
在spring中管理Customer和CustomerDao
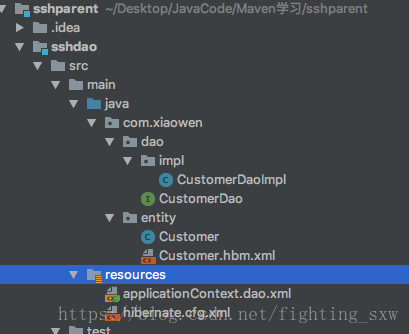
applicationContext.dao.xml:
<beans xmlns="http://www.springframework.org/schema/beans"
       xmlns:xsi="http://www.w3.org/2001/XMLSchema-instance" xmlns:context="http://www.springframework.org/schema/context"
       xmlns:aop="http://www.springframework.org/schema/aop" xmlns:tx="http://www.springframework.org/schema/tx"
       xsi:schemaLocation="http://www.springframework.org/schema/beans
    http://www.springframework.org/schema/beans/spring-beans.xsd
    http://www.springframework.org/schema/context
    http://www.springframework.org/schema/context/spring-context.xsd
    http://www.springframework.org/schema/aop
    http://www.springframework.org/schema/aop/spring-aop.xsd
    http://www.springframework.org/schema/tx
    http://www.springframework.org/schema/tx/spring-tx.xsd">


    <!-- 数据库连接池 -->
    <bean id="dataSource" class="com.mchange.v2.c3p0.ComboPooledDataSource">
        <property name="driverClass" value="com.mysql.jdbc.Driver" />
        <property name="jdbcUrl" value="jdbc:mysql://localhost:3306/maven" />
        <property name="user" value="root" />
        <property name="password" value="root" />
    </bean>

    <!-- 配置sessionFactory -->
    <bean id="sessionFactory" class="org.springframework.orm.hibernate5.LocalSessionFactoryBean">
        <!-- 依赖dataSource -->
        <property name="dataSource" ref="dataSource"/>
        <!-- 创建工厂需要加载hibernate映射文件 -->
        <property name="configLocations" value="classpath:hibernate.cfg.xml"></property>
    </bean>

    <bean id="customerDao" class="com.xiaowen.dao.impl.CustomerDaoImpl">
        <property name="sessionFactory" ref="sessionFactory"></property>

    </bean>

</beans>
hibernate.cfg.xml:
<?xml version='1.0' encoding='utf-8'?>
<!DOCTYPE hibernate-configuration PUBLIC
        "-//Hibernate/Hibernate Configuration DTD 3.0//EN"
        "http://www.hibernate.org/dtd/hibernate-configuration-3.0.dtd">

<hibernate-configuration>
    <!-- 会话工厂 -->
    <session-factory>
        <!-- 数据库方言,根据数据库选择 -->
        <property name="hibernate.dialect">org.hibernate.dialect.MySQL5Dialect</property>

        <!--为了方便调试是否在运行hibernate时在日志中输出sql语句 -->
        <property name="hibernate.show_sql">true</property>
        <!-- 是否对日志中输出的sql语句进行格式化 -->
        <property name="hibernate.format_sql">true</property>
        <!--关闭自动建表-->
        <property name="hibernate.hbm2ddl.auto">none</property>

        <!-- 加载映射文件 -->
        <mapping resource="com/xiaowen/entity/Customer.hbm.xml"/>
    </session-factory>
</hibernate-configuration>
三、创建service模块
创建流程与创建dao模块相同:
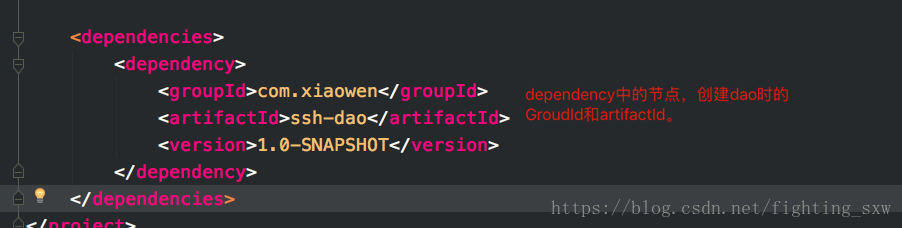
service模块需要依赖dao模块,所以在service的pom.xml中添加对dao的依赖:
然后创建CustomerService,放入spring中管理:
在CustomerService中需要用到CustomerDao,所以需要引入applicationContext.dao.xml,如果前面不添加依赖,这里就无法引入。
applicationContext.service.xml:
<beans xmlns="http://www.springframework.org/schema/beans"
xmlns:xsi="http://www.w3.org/2001/XMLSchema-instance" xmlns:context="http://www.springframework.org/schema/context"
xmlns:aop="http://www.springframework.org/schema/aop" xmlns:tx="http://www.springframework.org/schema/tx"
xsi:schemaLocation="http://www.springframework.org/schema/beans
http://www.springframework.org/schema/beans/spring-beans.xsd
http://www.springframework.org/schema/context
http://www.springframework.org/schema/context/spring-context.xsd
http://www.springframework.org/schema/aop
http://www.springframework.org/schema/aop/spring-aop.xsd
http://www.springframework.org/schema/tx
http://www.springframework.org/schema/tx/spring-tx.xsd">
<import resource="applicationContext.dao.xml"/>
<bean id="customerService" class="com.xiaowen.service.impl.CustomerServiceImpl">
<property name="customerDao" ref="customerDao"></property>
</bean>
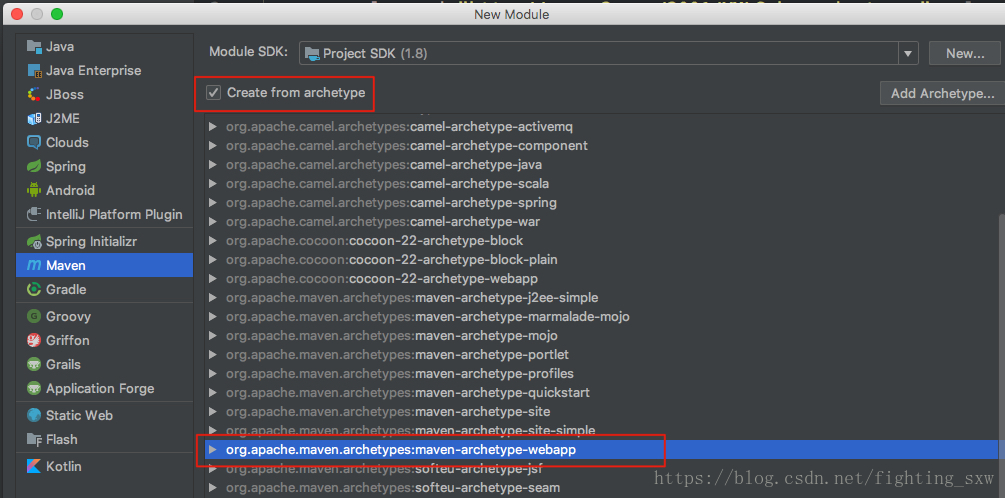
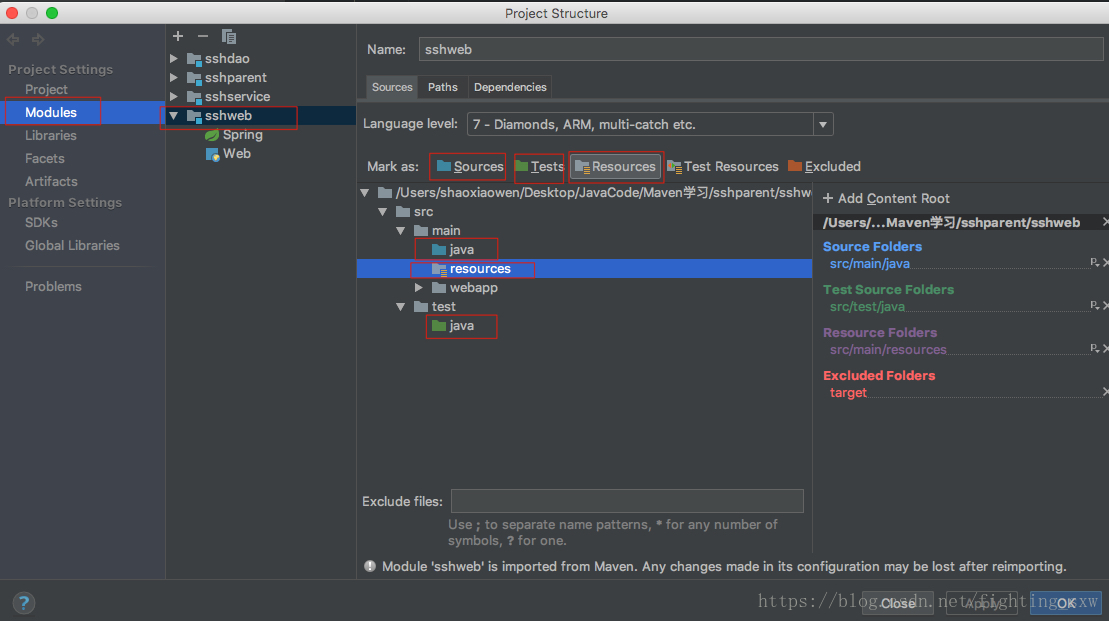
</beans>四、创建web层
创建web选择模板进行创建:
然后就和前面的流程一样:
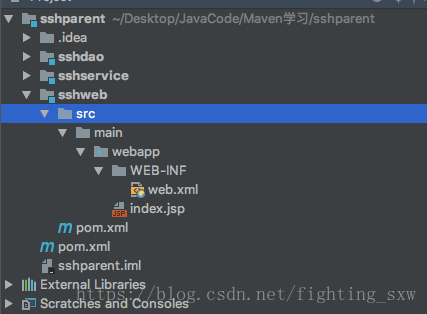
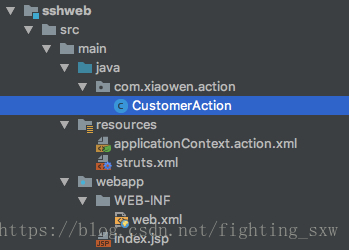
目录补全,需要手动创建一下:
web模块需要用到service模块,所以就在web模块的pom.xml文件中添加对service模块的依赖:
<dependencies>
        <dependency>
            <groupId>com.xiaowen</groupId>
            <artifactId>ssh-service</artifactId>
            <version>1.0-SNAPSHOT</version>
        </dependency>
    </dependencies>
新建页面,创建Action,配置struts,将Action实体放入Spring管理
业务流程:从前台页面传入custId,查询用户名称,然后显示在前台:
CustomerAction:
package com.xiaowen.action;

import com.opensymphony.xwork2.ActionSupport;
import com.xiaowen.entity.Customer;
import com.xiaowen.service.CustomerService;

public class CustomerAction extends ActionSupport {
    private Long custId;

    private Customer customer;

    private CustomerService customerService;

    public String findCustomerById(){
        System.out.println("用户id:"+custId);
        customer = customerService.findById(custId);
        System.out.println("查询到的用户名:"+customer.getCustName());
        return SUCCESS;
    }

    public Long getCustId() {
        return custId;
    }

    public void setCustId(Long custId) {
        this.custId = custId;
    }


    public Customer getCustomer() {
        return customer;
    }

    public void setCustomer(Customer customer) {
        this.customer = customer;
    }

    public void setCustomerService(CustomerService customerService) {
        this.customerService = customerService;
    }
}
Action用到了service和dao,所以web模块需要添加对service模块的依赖,而service添加了对dao的依赖,又因为依赖会传递 所以在web模块就不需要主动添加对dao模块的依赖了。
struts.xml:
<?xml version="1.0" encoding="UTF-8"?>

<!DOCTYPE struts PUBLIC
        "-//Apache Software Foundation//DTD Struts Configuration 2.3//EN"
        "http://struts.apache.org/dtds/struts-2.3.dtd">

<struts>
    <!-- 配置常量 -->
    <!-- 字符集 -->
    <constant name="struts.i18n.encoding" value="UTF-8"></constant>
    <!-- 开发模式 -->
    <constant name="struts.devMode" value="true"></constant>
    <!-- 主题 -->
    <constant name="struts.ui.theme" value="simple"></constant>
    <!-- 扩展名 -->
    <constant name="struts.action.extension" value="action"></constant>

    <package name="customer" namespace="/" extends="struts-default">
        <action name="findById" class="customerAction" method="findCustomerById">
            <result name="success">/index.jsp</result>
        </action>
    </package>

</struts>
applicationContext.action.xml:
<beans xmlns="http://www.springframework.org/schema/beans"
       xmlns:xsi="http://www.w3.org/2001/XMLSchema-instance" xmlns:context="http://www.springframework.org/schema/context"
       xmlns:aop="http://www.springframework.org/schema/aop" xmlns:tx="http://www.springframework.org/schema/tx"
       xsi:schemaLocation="http://www.springframework.org/schema/beans
    http://www.springframework.org/schema/beans/spring-beans.xsd
    http://www.springframework.org/schema/context
    http://www.springframework.org/schema/context/spring-context.xsd
    http://www.springframework.org/schema/aop
    http://www.springframework.org/schema/aop/spring-aop.xsd
    http://www.springframework.org/schema/tx
    http://www.springframework.org/schema/tx/spring-tx.xsd">

    <!--action的scope要选择prototype,多例模式,单例就成servlet了-->
    <bean id="customerAction" class="com.xiaowen.action.CustomerAction" scope="prototype">
        <property name="customerService" ref="customerService"></property>
    </bean>
    <import resource="applicationContext.service.xml"></import>
</beans>
index.jsp:
<%--
  Created by IntelliJ IDEA.
  User: xiaowen
  Date: 2018/6/27
  Time: 下午10:19
  To change this template use File | Settings | File Templates.
--%>
<%@ page contentType="text/html;charset=UTF-8" language="java" %>
<!DOCTYPE html PUBLIC "-//W3C//DTD HTML 4.01 Transitional//EN" "http://www.w3.org/TR/html4/loose.dtd">
<html>
<head>
    <title>Title</title>
</head>
<body>

    大家好我是:
    ${customer.custName}
</body>
</html>
最后一步,配置web.xml,不然前面都是白扯:
web.xml:
<?xml version="1.0" encoding="UTF-8"?>
<web-app xmlns="http://xmlns.jcp.org/xml/ns/javaee"
         xmlns:xsi="http://www.w3.org/2001/XMLSchema-instance"
         xsi:schemaLocation="http://xmlns.jcp.org/xml/ns/javaee http://xmlns.jcp.org/xml/ns/javaee/web-app_4_0.xsd"
         version="4.0">


    <display-name>Archetype Created Web Application</display-name>


    <!--===================监听spring====================================-->
    <!--让spring随web启动-->
    <listener>
        <listener-class>org.springframework.web.context.ContextLoaderListener</listener-class>
    </listener>
    <!--配置spring配置文件位置参数-->

    <context-param>
        <param-name>contextConfigLocation</param-name>
        <param-value>classpath:applicationContext.action.xml</param-value>
    </context-param>


    <filter>
        <filter-name>struts2</filter-name>
        <filter-class>org.apache.struts2.dispatcher.ng.filter.StrutsPrepareAndExecuteFilter</filter-class>
    </filter>
    <filter-mapping>
        <filter-name>struts2</filter-name>
        <url-pattern>/*</url-pattern>
    </filter-mapping>

</web-app>运行后在浏览器输入:http://localhost:8080/sshweb/findById.action?custId=1
