最近学习了卷积神经网络,推荐一些比较好的学习资源
1: https://www.zybuluo.com/hanbingtao/note/485480
2: http://blog.csdn.net/u010540396/article/details/52895074
对于网址,我大部分学习的资源和数学公式都是来源于此,强烈推荐学习。
对于网址2,我下面的代码就是在其基础上改写的,作者是用matlab实现的,这对于不会matlab的同学而言,会比较费时,毕竟,
我们要做的是搞懂卷积神经网络,而不是某一个编程语言。
而且最重要的是,我自己想弄明白CNN的前向网络和误差反向传播算法,自己亲自实现一遍,更有助于理解和记忆,哪怕是看着别人的代码学会的。
A:下面代码实现是LenNet-5的代码,但是只有一个卷积层,一个mean-pooling层,和一个全连接层,出来经过softmax层。
B:使用的数据集是MNIST,你可以到http://yann.lecun.com/exdb/mnist/
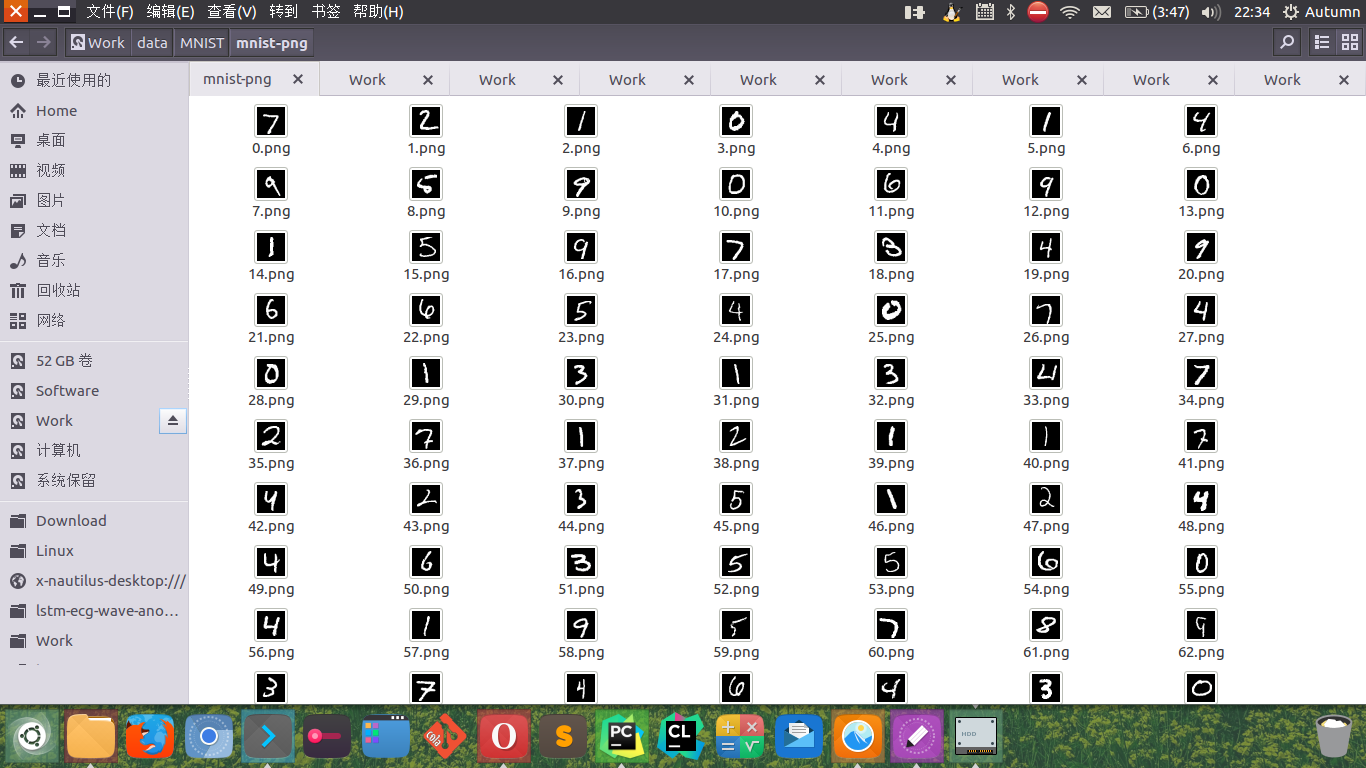
C:MNIST的数据解析,可以从我下面的analysisMNIST.py中修改路径,谢谢(http://blog.csdn.net/u014046170/article/details/47445919)然后取得到数据如下情况:
D:在C解析完之后,我把label文件的内容转置了,开始的时候是一行,我改成了一列。
注:代码里面的TODO是很多公式推导,我有空会敲出来,然后也作为超链接给弄出来,怕自己下次又给忘了。
我的总共有三个文件:
这是我定义的全局变量的文件 gParam.py
#! /usr/bin/env python
# -*- coding: utf-8 -*-

TOP_PATH = '/media/autumn/Work/data/MNIST/mnist-png/'
LAB_PATH = '/media/autumn/Work/data/MNIST/mnist-png/label1.txt'
C_SIZE = 5
F_NUM = 12
P_SIZE = 2
FILE_TYPE = '.png'
MAX_ITER_NUM = 50
这是我测试的文件myCnnTest.py
#! /usr/bin/env python
# -*- coding: utf-8 -*-

from numpy import *
import numpy as np
from myCnn import Ccnn
import math
import gParam

# code
cLyNum = 20
pLyNum = 20
fLyNum = 100
oLyNum = 10
train_num = 800

myCnn = Ccnn(cLyNum, pLyNum, fLyNum, oLyNum)
ylabel = myCnn.read_label(gParam.LAB_PATH)
for iter0 in range(gParam.MAX_ITER_NUM):
	for i in range(train_num):
		data = myCnn.read_pic_data(gParam.TOP_PATH, i)
		#print shape(data)
		ylab = int(ylabel[i])
		d_m, d_n = shape(data)
		m_c = d_m - gParam.C_SIZE + 1
		n_c = d_n - gParam.C_SIZE + 1
		m_p = m_c/myCnn.pSize
		n_p = n_c/myCnn.pSize
		state_c = zeros((m_c, n_c,myCnn.cLyNum))
		state_p = zeros((m_p, n_p, myCnn.pLyNum))
		for n in range(myCnn.cLyNum):
			state_c[:,:,n] = myCnn.convolution(data, myCnn.kernel_c[:,:,n])
			#print shape(myCnn.cLyNum)
			tmp_bias = ones((m_c,n_c)) * myCnn.cLyBias[:,n]
			state_c[:,:,n] = np.tanh(state_c[:,:,n] + tmp_bias)# 加上偏置项然后过激活函数
			state_p[:,:,n] = myCnn.pooling(state_c[:,:,n],myCnn.pooling_a)
		state_f, state_f_pre = myCnn.convolution_f1(state_p,myCnn.kernel_f, myCnn.weight_f)
		#print shape(state_f), shape(state_f_pre)
		#进入激活函数
		state_fo = zeros((1,myCnn.fLyNum))#全连接层经过激活函数的结果
		for n in range(myCnn.fLyNum):
				state_fo[:,n] = np.tanh(state_f[:,:,n] + myCnn.fLyBias[:,n])
		#进入softmax层
		output = myCnn.softmax_layer(state_fo)
		err = -output[:,ylab]
		#计算误差
		y_pre = output.argmax(axis=1)
		#print output
		#计算误差
		#print err
		myCnn.cnn_upweight(err,ylab,data,state_c,state_p,\
							state_fo, state_f_pre, output)
		# print myCnn.kernel_c
		# print myCnn.cLyBias
		# print myCnn.weight_f
		# print myCnn.kernel_f
		# print myCnn.fLyBias
		# print myCnn.weight_output

# predict
test_num = []
for i in range(100):
	test_num.append(train_num+i+1)

for i in test_num:
	data = myCnn.read_pic_data(gParam.TOP_PATH, i)
	#print shape(data)
	ylab = int(ylabel[i])
	d_m, d_n = shape(data)
	m_c = d_m - gParam.C_SIZE + 1
	n_c = d_n - gParam.C_SIZE + 1
	m_p = m_c/myCnn.pSize
	n_p = n_c/myCnn.pSize
	state_c = zeros((m_c, n_c,myCnn.cLyNum))
	state_p = zeros((m_p, n_p, myCnn.pLyNum))
	for n in range(myCnn.cLyNum):
		state_c[:,:,n] = myCnn.convolution(data, myCnn.kernel_c[:,:,n])
		#print shape(myCnn.cLyNum)
		tmp_bias = ones((m_c,n_c)) * myCnn.cLyBias[:,n]
		state_c[:,:,n] = np.tanh(state_c[:,:,n] + tmp_bias)# 加上偏置项然后过激活函数
		state_p[:,:,n] = myCnn.pooling(state_c[:,:,n],myCnn.pooling_a)
	state_f, state_f_pre = myCnn.convolution_f1(state_p,myCnn.kernel_f, myCnn.weight_f)
	#print shape(state_f), shape(state_f_pre)
	#进入激活函数
	state_fo = zeros((1,myCnn.fLyNum))#全连接层经过激活函数的结果
	for n in range(myCnn.fLyNum):
			state_fo[:,n] = np.tanh(state_f[:,:,n] + myCnn.fLyBias[:,n])
	#进入softmax层
	output = myCnn.softmax_layer(state_fo)
	#计算误差
	y_pre = output.argmax(axis=1)
	print '真实数字为%d',ylab, '预测数字是%d', y_pre
接下来是CNN的核心代码,里面有中文注释,文件名是myCnn.py
#! /usr/bin/env python
# -*- coding: utf-8 -*-

from numpy import *
import numpy as np
import matplotlib.pyplot as plt
import matplotlib.image as mgimg
import math
import gParam
import copy
import scipy.signal as signal


# createst uniform random array w/ values in [a,b) and shape args
# return value type is ndarray
def rand_arr(a, b, *args):
    np.random.seed(0)
    return np.random.rand(*args) * (b - a) + a

# Class Cnn
class Ccnn:
	def __init__(self, cLyNum, pLyNum,fLyNum,oLyNum):
		self.cLyNum = cLyNum
		self.pLyNum = pLyNum
		self.fLyNum = fLyNum
		self.oLyNum = oLyNum
		self.pSize = gParam.P_SIZE
		self.yita = 0.01
		self.cLyBias = rand_arr(-0.1, 0.1, 1,cLyNum)
		self.fLyBias = rand_arr(-0.1, 0.1, 1,fLyNum)
		self.kernel_c = zeros((gParam.C_SIZE,gParam.C_SIZE,cLyNum))
		self.kernel_f = zeros((gParam.F_NUM,gParam.F_NUM,fLyNum))
		for i in range(cLyNum):
			self.kernel_c[:,:,i] = rand_arr(-0.1,0.1,gParam.C_SIZE,gParam.C_SIZE)
		for i in range(fLyNum):
			self.kernel_f[:,:,i] = rand_arr(-0.1,0.1,gParam.F_NUM,gParam.F_NUM)
		self.pooling_a = ones((self.pSize,self.pSize))/(self.pSize**2)
		self.weight_f = rand_arr(-0.1,0.1, pLyNum, fLyNum)
		self.weight_output = rand_arr(-0.1,0.1,fLyNum,oLyNum)
	def read_pic_data(self, path, i):
		#print 'read_pic_data'
		data = np.array([])
		full_path = path + '%d'%i + gParam.FILE_TYPE
		try:
			data = mgimg.imread(full_path) #data is np.array
			data = (double)(data)
		except IOError:
			raise Exception('open file error in read_pic_data():', full_path)
		return data
	def read_label(self, path):
		#print 'read_label'
		ylab = []
		try:
			fobj = open(path, 'r')
			for line in fobj:
				ylab.append(line.strip())
			fobj.close()
		except IOError:
			raise Exception('open file error in read_label():', path)
		return ylab
	#卷积层
	def convolution(self, data, kernel):
		data_row, data_col = shape(data)
		kernel_row, kernel_col = shape(kernel)
		n = data_col - kernel_col
		m = data_row - kernel_row
		state = zeros((m+1, n+1))
		for i in range(m+1):
			for j in range(n+1):
				temp = multiply(data[i:i+kernel_row,j:j+kernel_col], kernel)
				state[i][j] = temp.sum()
		return state
	# 池化层
	def pooling(self, data, pooling_a):
		data_r, data_c = shape(data)
		p_r, p_c = shape(pooling_a)
		r0 = data_r/p_r
		c0 = data_c/p_c
		state = zeros((r0,c0))
		for i in range(c0):
			for j in range(r0):
				temp = multiply(data[p_r*i:p_r*i+1,p_c*j:p_c*j+1],pooling_a)
				state[i][j] = temp.sum()
		return state
	#全连接层
	def convolution_f1(self, state_p1, kernel_f1, weight_f1):
		#池化层出来的20个特征矩阵乘以池化层与全连接层的连接权重进行相加
		#wx(这里的偏置项=0),这个结果然后再和全连接层中的神经元的核
		#进行卷积,返回值:
		#1:全连接层卷积前,只和weight_f1相加之后的矩阵
		#2:和全连接层卷积完之后的矩阵
		n_p0, n_f = shape(weight_f1)#n_p0=20(是Feature Map的个数);n_f是100(全连接层神经元个数)
		m_p, n_p, pCnt = shape(state_p1)#这个矩阵是三维的
		m_k_f1, n_k_f1,fCnt = shape(kernel_f1)#12*12*100
		state_f1_temp = zeros((m_p,n_p,n_f))
		state_f1 = zeros((m_p - m_k_f1 + 1,n_p - n_k_f1 + 1,n_f))
		for n in range(n_f):
			count = 0
			for m in range(n_p0):
				temp = state_p1[:,:,m] * weight_f1[m][n]
				count = count + temp
			state_f1_temp[:,:,n] = count
			state_f1[:,:,n] = self.convolution(state_f1_temp[:,:,n], kernel_f1[:,:,n])
		return state_f1, state_f1_temp
	# softmax 层
	def softmax_layer(self,state_f1):
		# print 'softmax_layer'
		output = zeros((1,self.oLyNum))
		t1 = (exp(np.dot(state_f1,self.weight_output))).sum()
		for i in range(self.oLyNum):
			t0 = exp(np.dot(state_f1,self.weight_output[:,i]))
			output[:,i]=t0/t1
		return output
	#误差反向传播更新权值
	def cnn_upweight(self,err_cost, ylab, train_data,state_c1, \
					state_s1, state_f1, state_f1_temp, output):
		#print 'cnn_upweight'
			m_data, n_data = shape(train_data)
			# softmax的资料请查看 (TODO)
			label = zeros((1,self.oLyNum))
			label[:,ylab]	= 1
			delta_layer_output = output - label
			weight_output_temp = copy.deepcopy(self.weight_output)
			delta_weight_output_temp = zeros((self.fLyNum, self.oLyNum))
			#print shape(state_f1)
			#更新weight_output
			for n in range(self.oLyNum):
				delta_weight_output_temp[:,n] = delta_layer_output[:,n] * state_f1
			weight_output_temp = weight_output_temp - self.yita * delta_weight_output_temp

			#更新bais_f和kernel_f (推导公式请查看 TODO)
			delta_layer_f1 = zeros((1, self.fLyNum))
			delta_bias_f1 = zeros((1,self.fLyNum))
			delta_kernel_f1_temp = zeros(shape(state_f1_temp))
			kernel_f_temp = copy.deepcopy(self.kernel_f)
			for n in range(self.fLyNum):
				count = 0
				for m in range(self.oLyNum):
					count = count + delta_layer_output[:,m] * self.weight_output[n,m]
				delta_layer_f1[:,n] = np.dot(count, (1 - np.tanh(state_f1[:,n])**2))
				delta_bias_f1[:,n] = delta_layer_f1[:,n]
				delta_kernel_f1_temp[:,:,n] = delta_layer_f1[:,n] * state_f1_temp[:,:,n]
			# 1
			self.fLyBias = self.fLyBias - self.yita * delta_bias_f1
			kernel_f_temp = kernel_f_temp - self.yita * delta_kernel_f1_temp

			#更新weight_f1
			delta_layer_f1_temp = zeros((gParam.F_NUM,gParam.F_NUM,self.fLyNum))
			delta_weight_f1_temp = zeros(shape(self.weight_f))
			weight_f1_temp = copy.deepcopy(self.weight_f)
			for n in range(self.fLyNum):
				delta_layer_f1_temp[:,:,n] = delta_layer_f1[:,n] * self.kernel_f[:,:,n]
			for n in range(self.pLyNum):
				for m in range(self.fLyNum):
					temp = delta_layer_f1_temp[:,:,m] * state_s1[:,:,n]
					delta_weight_f1_temp[n,m] = temp.sum()
			weight_f1_temp = weight_f1_temp - self.yita * delta_weight_f1_temp

			# 更新bias_c1
			n_delta_c = m_data - gParam.C_SIZE + 1
			delta_layer_p = zeros((gParam.F_NUM,gParam.F_NUM,self.pLyNum))
			delta_layer_c = zeros((n_delta_c,n_delta_c,self.pLyNum))
			delta_bias_c = zeros((1,self.cLyNum))
			for n in range(self.pLyNum):
				count = 0
				for m in range(self.fLyNum):
					count = count + delta_layer_f1_temp[:,:,m] * self.weight_f[n,m]
				delta_layer_p[:,:,n] = count
				#print shape(np.kron(delta_layer_p[:,:,n], ones((2,2))/4))
				delta_layer_c[:,:,n] = np.kron(delta_layer_p[:,:,n], ones((2,2))/4) \
									  * (1 - np.tanh(state_c1[:,:,n])**2)
				delta_bias_c[:,n] = delta_layer_c[:,:,n].sum()
			# 2
			self.cLyBias = self.cLyBias - self.yita * delta_bias_c
			#更新 kernel_c1
			delta_kernel_c1_temp = zeros(shape(self.kernel_c))
			for n in range(self.cLyNum):
				temp = delta_layer_c[:,:,n]
				r1 = map(list,zip(*temp[::1]))#逆时针旋转90度
				r2 = map(list,zip(*r1[::1]))#再逆时针旋转90度
				temp = signal.convolve2d(train_data, r2,'valid')
				temp1 = map(list,zip(*temp[::1]))
				delta_kernel_c1_temp[:,:,n] = map(list,zip(*temp1[::1]))
			self.kernel_c = self.kernel_c - self.yita * delta_kernel_c1_temp
			self.weight_f = weight_f1_temp
			self.kernel_f = kernel_f_temp
			self.weight_output = weight_output_temp

		# predict
	def cnn_predict(self,data):
		return
这是单独解析MNIST的脚本,analysisMNIST.py,修改相应的路径后,运行能成功
#!/usr/bin/env python
# -*- coding: utf-8 -*-


from PIL import Image
import struct


def read_image(filename):
  f = open(filename, 'rb')


  index = 0
  buf = f.read()


  f.close()


  magic, images, rows, columns = struct.unpack_from('>IIII' , buf , index)
  index += struct.calcsize('>IIII')


  for i in xrange(images):
  #for i in xrange(2000):
    image = Image.new('L', (columns, rows))


    for x in xrange(rows):
      for y in xrange(columns):
        image.putpixel((y, x), int(struct.unpack_from('>B', buf, index)[0]))
        index += struct.calcsize('>B')


    print 'save ' + str(i) + 'image'
    image.save('/media/autumn/Work/data/MNIST/mnist-png/' + str(i) + '.png')


def read_label(filename, saveFilename):
  f = open(filename, 'rb')
  index = 0
  buf = f.read()


  f.close()


  magic, labels = struct.unpack_from('>II' , buf , index)
  index += struct.calcsize('>II')

  labelArr = [0] * labels
  #labelArr = [0] * 2000


  for x in xrange(labels):
  #for x in xrange(2000):
    labelArr[x] = int(struct.unpack_from('>B', buf, index)[0])
    index += struct.calcsize('>B')


  save = open(saveFilename, 'w')


  save.write(','.join(map(lambda x: str(x), labelArr)))
  save.write('\n')


  save.close()
  print 'save labels success'


if __name__ == '__main__':
  read_image('/media/autumn/Work/data/MNIST/mnist/t10k-images.idx3-ubyte')
  read_label('/media/autumn/Work/data/MNIST/mnist/t10k-labels.idx1-ubyte', '/media/autumn/Work/data/MNIST/mnist-png/label.txt')
最后:如果您想直接跑程序,您可以通过以下方式获取我的数据和源程序。由于考虑到个人的人工成本,我形式上只收取2块钱的人工费,既是对我的支持,也是对我的鼓励。谢谢大家的理解。把订单后面6位号码发送给我,我把源码和数据给您呈上。谢谢。
1:扫如下支付宝或微信二维码,支付2元
2:把支付单号的后6位,以邮件发送到我的邮箱[email protected]
3:您也可以在下方留言,把订单号写上来,我会核实。
谢谢大家。