
引言
3D模型渲染到2D界面的模型展示效果
在游戏开发中常常需要在UI界面上显示一个3D模型,例如时装界面里人物换装展示、Boss挑战界面里选择Boss展示等等。
本文将介绍一下在Cocos游戏开发中实现和平精英中3D模型渲染到2D界面的模型展示效果。
本文源工程在文末获取,小伙伴们自行前往。
本期知识点
1.RenderTexture
渲染贴图是 Camera 或 Canvas 组件的渲染目标对象,渲染管线会使用它的 RenderWindow 作为渲染的目标窗口。
我们可以把相机画面渲染到它上面,然后将精灵Sprite的贴图资源设置成它。
2.Camera
渲染场景中的相机对象,由项目层的 Camera 管理。
我们可以通过它的targetTexture指定此相机的渲染输出目标贴图,默认为空,直接渲染到屏幕。
3.SpriteFrame
精灵帧资源。
我们通过SpriteFrame的texture设置贴图对象资源,可以是 TextureBase 类型。

话不多说,一起来做个实例。
3D模型渲染到2D界面实例
接下来我们一步一步来实现和平精英中3D模型渲染到2D界面的模型展示效果。
1.环境
引擎版本:Cocos Creator 3.8.1
编程语言:TypeScript
2.资源准备
创建一个新工程,笔者用3.8.2体验,大家用3.8.1打开项目即可。
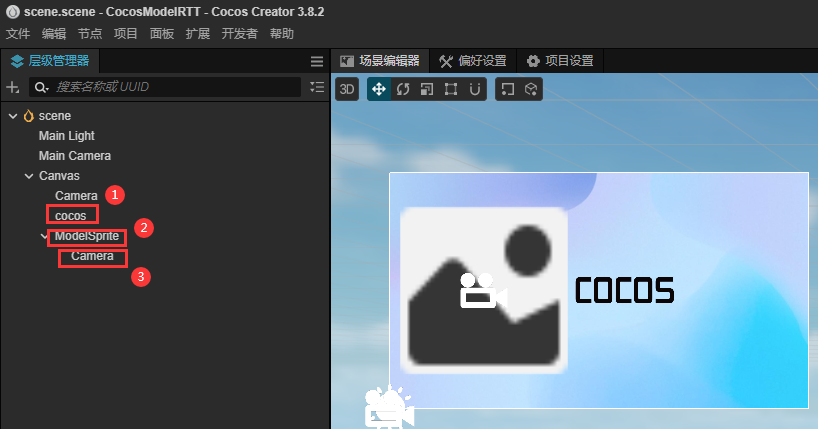
按照下面结构拼一下UI。cocos是背景图,ModelSprite是渲染到的目标精灵,Camera是拍模型的摄像机。
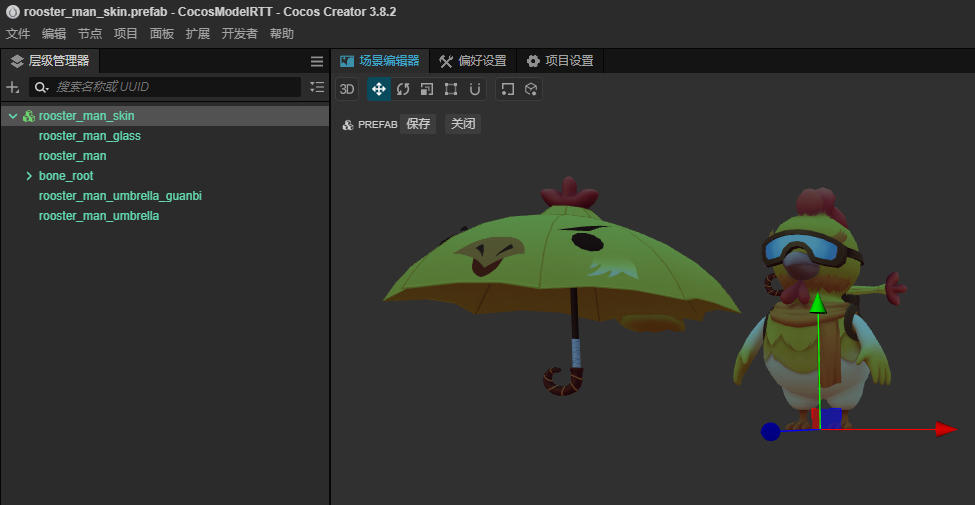
然后把商城上的鸡带走并做成预制体借用一下。
3.编写代码
新建一个ModelRtt组件,并且拖到ModelSprite上。其中包含几个属性。
modelUrl,模型的路径,直接通过resources.load加载。modelOffsetY,模型的偏移,用于调整模型显示的位置。orthoHeight,相机的正交视角高度,用于调整模型的大小。modelSprite,目标精灵。
export class ModelRtt extends Component {


    @property(CCString)
    modelUrl: string = "";
    @property(CCFloat)
    modelOffsetY: number = 0;
    @property(CCFloat)
    orthoHeight: number = 0;
    modelSprite: Sprite = null;
}
然后编写loadPrefab方法通过resources.load加载模型。
loadPrefab() {


    if (!this.modelUrl || !this.modelSprite) {


        error('Please provide a valid prefab path and target sprite.');
        return;
    }

    resources.load(this.modelUrl, Prefab, (err, prefab) => {


        if (err) {


            error('Failed to load the prefab:', err);
            return;
        }

        this.createModel(prefab);
    });
}
最后通过以下步骤完成3D模型渲染到2D界面。
- 创建
RenderTexture,大小建议512、1024或者2048。
const size = this.node.getComponent(UITransform).contentSize;
const modelRtt = new RenderTexture();
modelRtt.reset({


    width: size.width,
    height: size.height
});
- 创建模型,并且设置偏移。
const newNode = new Node();
newNode.parent = find("/");
const modelNode: Node = instantiate(prefab);
modelNode.parent = newNode;
modelNode.setPosition(new Vec3(0, this.modelOffsetY, 0));
- 进行拖拽事件的监听和实现模型转动。
let flag = false;
this.node.on(NodeEventType.TOUCH_START, () => {

     flag = true; }, this);
this.node.on(NodeEventType.TOUCH_END, () => {

     flag = true; }, this);
this.node.on(NodeEventType.TOUCH_MOVE, (event: EventTouch) => {


    if (flag) {


        modelNode.eulerAngles = new Vec3(0, modelNode.eulerAngles.y + event.getDeltaX(), 0);
    }
}, this);
- 获取我们在场景中创建的摄像机,并且设置一些相关参数。(这里面用动态添加的Camera不会动态渲染,暂时不做研究)。
// const camera = new Node("Camera").addComponent(Camera); //todo:动态添加的Camera模型不会动
const camera = this.node.getComponentInChildren(Camera);
camera.clearFlags = Camera.ClearFlag.SOLID_COLOR; //设置缓冲清楚标志位
camera.projection = renderer.scene.CameraProjection.ORTHO; //设置相机投影类型
camera.orthoHeight = this.orthoHeight; //设置正交视角高度
camera.clearColor = new Color(0, 0, 0, 0); //设置透明
camera.targetTexture = modelRtt; //设置目标RenderTexture
camera.node.parent = newNode;
camera.node.position = new Vec3(0, 0, 10);
- 设置目标精灵的精灵帧。
const spriteFrame = new SpriteFrame();
spriteFrame.texture = modelRtt;
spriteFrame.flipUVY = true;
this.modelSprite.spriteFrame = spriteFrame;
4.效果演示
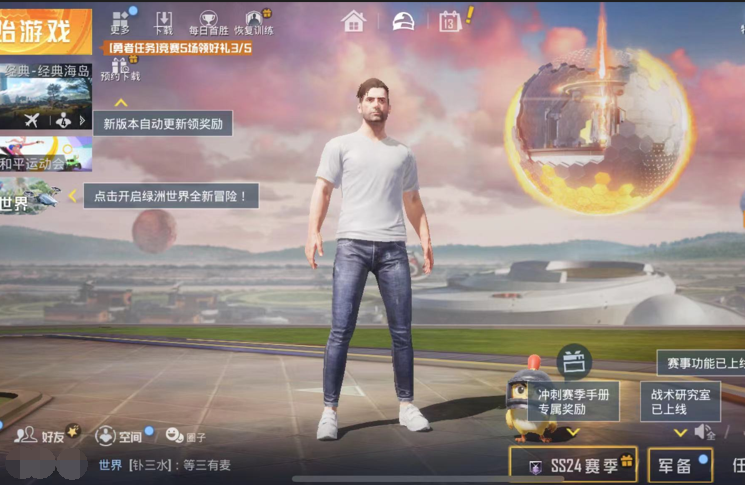
今天的节目到此为止。帮忙转发一下文章哦,下课!
结语
本文源工程可通过私信发送CocosModelRTT获取。
更多实用源码已经上架Cocos Store,可以通过阅读原文看看,付费不仅是知识的获取,更是对笔者的支持和认可,感谢!
我是"亿元程序员",一位有着8年游戏行业经验的主程。在游戏开发中,希望能给到您帮助, 也希望通过您能帮助到大家。
AD:笔者线上的小游戏《贪吃蛇掌机经典》《重力迷宫球》《填色之旅》大家可以自行点击搜索体验。
实不相瞒,想要个赞和在看!请把该文章分享给你觉得有需要的其他小伙伴。谢谢!
推荐专栏: