基本使用
创建一个类
import tkinter as tk
class Application(tk.Frame):
def __init__(self, master=None):
# super() 函数是用于调用父类(超类)的一个方法。
super().__init__(master)
self.master = master
# 创建组件
self.create_widgets()
def create_widgets(self):
# 按钮功能添加
model = tk.Button(self.master)
# 这个按钮的->文本设置
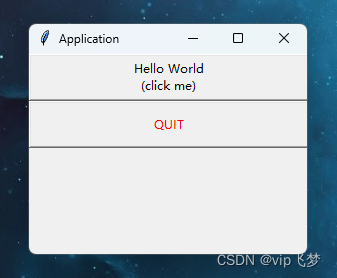
model["text"] = "Hello World\n(click me)"
# 这个按钮的->点击->终端显示内容
model["command"] = self.function
# 这个按钮的位置
model.grid(row=0,column=1,ipadx=100)
quit = tk.Button(
self.master, text="QUIT", fg="red",width=10,height=2, command=self.master.destroy
)
# 退出功能
quit.grid(row=1,column=1,ipadx=100)
def function(self):
print("这是一段内容...")
if __name__ == "__main__":
# 定义主窗口
root = tk.Tk()
# 窗口宽x高+位置x+位置y
root.geometry("280x200+600+300")
# 窗口标题
root.title("Application")
app = Application(master=root)
app.mainloop()
代码运行
窗口的基本设置
import tkinter as tk
dir="C:/Users/Administrator/Desktop/"
window = tk.Tk()
window.title("demo")
window.geometry("327x272")
window.iconphoto(False,tk.PhotoImage(file=dir+"pt.gif")) # 窗口图标,仅限gif图片
window.mainloop()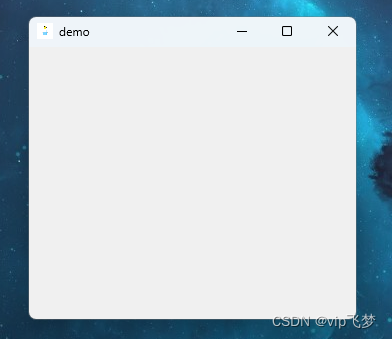
字体加载
字体加载(方法1)
"""
size            设置字体大小
weight          设置字体厚度,粗体还是正常;
                NORMAL : 表示正常
                BOLD : 表示粗体
slant           设置字体是否倾斜
ROMAN           不倾斜
ITALIC          倾斜
underline       是否有下划线
                1 表示有下划线
                0 表示没有
overstrike      是否有删除线
                1 表示有删除线
                0 表示没有删除线
"""
# 获取所有支持的字体
"""
fontfamilylist = tkFont.families(root=root)
print(fontfamilylist)
"""

import tkinter as tk
import tkinter.font as tkFont

root = tk.Tk()
# 方法1 : 直接用元组来表示 (family, size, style)
# 注意这里元组元素的顺序
LB1 = tk.Label(
    root, text="第一种方法", font=("华文楷体", "18", "bold italic underline overstrike ")
)
LB1.grid(
    row=0,
    column=0,
    sticky=tk.S + tk.N + tk.E + tk.W,
    ipadx=15,
    ipady=15,
    padx=15,
    pady=15,
)
root.mainloop()
代码运行

字体加载(方法2)
import tkinter as tk
import tkinter.font as tkFont
root = tk.Tk()
# 方法2 : 创建一个font对象
myfont = tkFont.Font(
family="华文宋体",
size=30,
weight=tkFont.BOLD,
slant=tkFont.ITALIC,
underline=1,
overstrike=1,
)
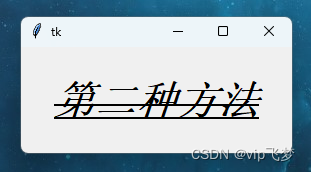
LB1 = tk.Label(root, text="第二种方法", font=myfont)
LB1.grid(
row=0,
column=0,
sticky=tk.S + tk.N + tk.E + tk.W,
ipadx=15,
ipady=15,
padx=15,
pady=15,
)
root.mainloop()
代码运行
菜单
顶部菜单
import tkinter as tk

root = tk.Tk()

def callback():
    print("调用了此函数...")

box = tk.Menu(root)
s1 = tk.Menu(box, tearoff=False)
box.add_cascade(label="菜单1", menu=s1)
s1.add_command(label="1-1-功能", command=callback)
s1.add_command(label="1-2-功能", command=callback)
s1.add_separator()
s1.add_command(label="1-3-退出")

s2 = tk.Menu(box, tearoff=False)
box.add_cascade(label="菜单2", menu=s2)
s2.add_command(label="2-1-功能", command=callback)
root.config(menu=box)
root.mainloop()
代码运行

下拉式菜单
import tkinter as tk
import tkinter.messagebox

win = tk.Tk()
win.config(bg="#87CEEB")
win.title("demo")
win.geometry("450x350+300+200")

# 创建一个执行函数,点击下拉菜单中命令时执行
def function(event):
    print("按下了(Ctr+N)键....")

def call_f1():
    print("触发了功能1按钮...")

# 创建主目录菜单(顶级菜单)
m = tk.Menu(win)
f1 = tk.Menu(m, tearoff=False)
# accelerator 添加快捷键
f1.add_command(label="功能1-1", command=call_f1, accelerator="Ctrl+N")
# 添加一条分割线
f1.add_separator()
f1.add_command(label="退出", command=win.quit)
m.add_cascade(label="功能1", menu=f1)
f2 = tk.Menu(m, tearoff=False)
f2.add_command(label="功能2-1")
m.add_cascade(label="功能2", menu=f2)
# 将主菜单设置在窗口上
win.config(menu=m)
# 绑定键盘事件,按下键盘上的相应的键时都会触发执行函数
win.bind("<Control-n>", function)
win.bind("<Control-N>", function)
# 显示主窗口
win.mainloop()
代码运行

扫描二维码关注公众号,回复:
17348505 查看本文章

选项
简单的多选框
import tkinter as tk
root = tk.Tk()
# 多选框
v1 = tk.IntVar()
v2 = tk.IntVar()
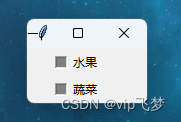
tk.Checkbutton(
root, text="水果", variable=v1, onvalue=1, height=1, width=10, selectcolor="grey"
).grid()
tk.Checkbutton(
root, text="蔬菜", variable=v2, onvalue=1, height=1, width=10, selectcolor="grey"
).grid()
root.mainloop()代码运行
批量多选框
import tkinter as tk

root = tk.Tk()
# 批量多选框
arr=["苹果","香蕉","葡萄"]
v=[]
for item in arr:
    v.append(tk.IntVar())
    tk.Checkbutton(root,text=item,variable=v[-1]).grid(sticky=tk.W)
root.mainloop()
"""
sticky常用属性
四个角
sticky=tk.NE(top right)
sticky=tk.SE(bottom right)
sticky=tk.SW(bottom left)
sticky=tk.NW(top left)
边的中间
sticky=tk.N(top center)
sticky=tk.E(right center)
sticky=tk.S(bottom center)
sticky=tk.W(left center)
其它
sticky=tk.N+tk.S                垂直拉伸 widget ,
sticky=tk.E+tk.W                水平拉伸 widget ,
sticky=tk.N+tk.E+tk.S+tk.W      水平和垂直拉伸 widget ,填充满整个单元
sticky=tk.N+tk.S+tk.W           垂直拉伸 widget 然后放置在左边
"""
代码运行

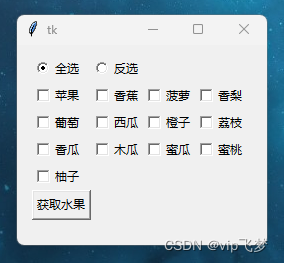
全选 / 反选 / 多选
import tkinter as tk

# 多功能多选框(全选/反选/实时获取)
array = ["苹果", "香蕉", "菠萝", "香梨", "葡萄", "西瓜", "橙子", "荔枝", "香瓜", "木瓜", "蜜瓜", "蜜桃", "柚子"]
v = []

# 全选
def select_all():
    for index, item in enumerate(array):
        v[index].set(item)

# 不全选
def unselect_all():
    for index, item in enumerate(array):
        if v[index].get() in array:
            v[index].set("")
        elif v[index].get() not in array:
            v[index].set(item)
        else:
            pass

# 点击勾选-实时获取
def get_select(x):
    print(x, "selected")

# 点击选项-获取总选择项
def show_select():
    selected = [item.get() for item in v if item.get()]
    print(selected)

window = tk.Tk()
window.geometry("250x200")
box = tk.Frame(window, pady=10, padx=15)
box.grid(row=0, column=0)
# 全选反选
opt = tk.IntVar()
tk.Radiobutton(box, text="全选", variable=opt, value=0, command=select_all).grid(
    row=0, column=0, sticky="w"
)
tk.Radiobutton(box, text="反选", variable=opt, value=1, command=unselect_all).grid(
    row=0, column=1, sticky="w"
)
# 设置勾选框,每四个换行
for index, item in enumerate(array):
    v.append(tk.StringVar())
    tk.Checkbutton(
        box,
        text=item,
        variable=v[-1],
        onvalue=item,
        offvalue="",
        command=lambda x=item: get_select(x),
    ).grid(row=index // 4 + 1, column=index % 4, sticky="w")

tk.Button(box, text="获取水果", command=show_select).grid(row=index // 4 + 2, column=0)
window.mainloop()
代码运行
列表选项
插入与删除
import tkinter as tk
root = tk.Tk()
# selectmode = SINGLE单选 | EXTENDED多选
box = tk.Listbox(root,selectmode=tk.SINGLE)
box.grid()
for item in ["项目1","项目2","项目3"]:
    box.insert(tk.END,item)
tk.Button(root,text="delete",command=lambda x=box: x.delete(tk.ACTIVE)).grid()
root.mainloop()
代码运行

加入滚动条
import tkinter as tk
root = tk.Tk()
scroll =tk.Scrollbar(root)
scroll.pack(side=tk.RIGHT,fill=tk.Y) # -> 靠右向下充满
box = tk.Listbox(root,yscrollcommand=scroll.set)
for i in range(20):
    box.insert(tk.END,i)
box.pack(side=tk.LEFT,fill=tk.BOTH)
scroll.config(command=box.yview) # -> 垂直方向滚动
root.mainloop()
代码运行

消息
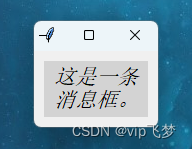
简单的消息框
import tkinter
root = tkinter.Tk()
var = tkinter.StringVar()
var.set("这是一条消息框。")
message = tkinter.Message(
    root, bg="lightgrey", textvariable=var, font="times 16 italic"
)
message.pack(padx=10, pady=10)
root.mainloop()
代码运行
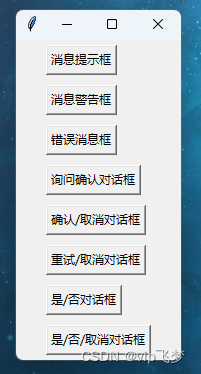
综合例子
"""
tkinter.messagebox.Message(master=None,**options) 创建一个默认消息框
tkinter.messagebox.showinfo(title=None,message=None,**options) 信息消息框
tkinter.messagebox.showwarning(title=None,message=None,**options) 警告消息框
tkinter.messagebox.showerror(title=None,message=None,**options) 警告消息框
tkinter.messagebox.askquestion(title=None,message=None,**options) 疑问消息框
tkinter.messagebox.askokcancel(title=None,message=None,**options) 疑问消息框
tkinter.messagebox.askretrycancel(title=None,message=None,**options) 疑问消息框
tkinter.messagebox.askyesno(title=None,message=None,**options) 疑问消息框
tkinter.messagebox.askyesnocancel(title=None,message=None,**options) 疑问消息框
"""
import tkinter as tk
from tkinter import messagebox as m
root = tk.Tk()
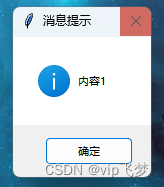
# 信息消息框
def fc1():d1 = m.showinfo (title="消息提示", message="内容1");print(d1)
# 警告消息框
def fc2():d2 = m.showwarning (title="消息警告", message="内容2");print(d2)
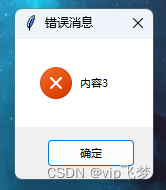
def fc3():d3 = m.showerror (title="错误消息", message="内容3");print(d3)
# 疑问消息框
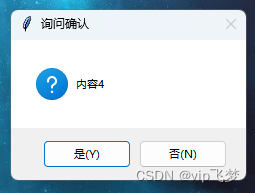
def fc4():d4 = m.askquestion (title="询问确认", message="内容4");print(d4)
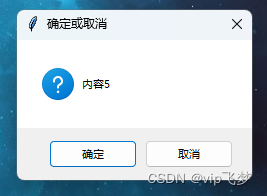
def fc5():d5 = m.askokcancel (title="确定或取消", message="内容5");print(d5)
def fc6():d6 = m.askretrycancel (title="重试或取消", message="内容6");print(d6)
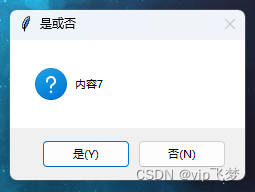
def fc7():d7 = m.askyesno (title="是或否", message="内容7");print(d7)
def fc8():
d8 = m.askyesnocancel(title="是或否或取消", message="内容8", default=m.CANCEL)
# @参数 /
# icon = INFO、ERROR、 QUESTION、WARNING
# default = YES(是)、NO(不是)、CANCEL(取消)、OK(确定)、RETRY(重试)、IGNORE(忽略)
# ----------------------------------------------------------------------------/
print(d8)
tk.Button(root, text="消息提示框", command=fc1).pack(padx=30, pady=5, anchor="w")
tk.Button(root, text="消息警告框", command=fc2).pack(padx=30, pady=5, anchor="w")
tk.Button(root, text="错误消息框", command=fc3).pack(padx=30, pady=5, anchor="w")
tk.Button(root, text="询问确认对话框", command=fc4).pack(padx=30, pady=5, anchor="w")
tk.Button(root, text="确认/取消对话框", command=fc5).pack(padx=30, pady=5, anchor="w")
tk.Button(root, text="重试/取消对话框", command=fc6).pack(padx=30, pady=5, anchor="w")
tk.Button(root, text="是/否对话框", command=fc7).pack(padx=30, pady=5, anchor="w")
tk.Button(root, text="是/否/取消对话框", command=fc8).pack(padx=30, pady=5, anchor="w")
root.mainloop()
代码运行


画图
综合例子
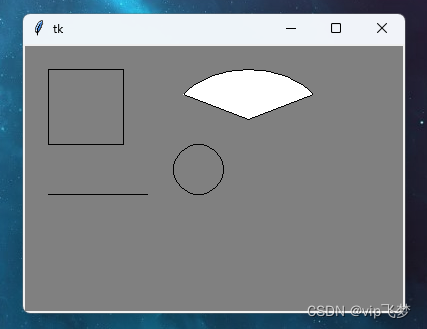
import tkinter as tk
root=tk.Tk()
cvs=tk.Canvas(root,bg='grey')
cvs.create_rectangle(25,25,100,100) # 矩形 (x,y,宽度,高度)
cvs.create_arc((150,25,300,125),start=30,extent=120,fill="white") # 扇形 (x0,y0,x1,y1),start-位置角度  extent-扇子展开角度
cvs.create_line((25,150,125,150)) # 线条 (x0,y0,x1,y1)
cvs.create_oval((150,100,200,150)) # 椭圆|圆(x0,y0,x1,y1)
cvs.grid()
root.mainloop()
代码运行
画五角星
import math
import tkinter as tk

root = tk.Tk()
w = tk.Canvas(root, width=200, height=100)
w.grid()
x = 100
y = 50
r = 50
# 画面:左上点->右上点->左下点->顶点->右下点-连接-左上点
top_x = int(r * math.sin(2 * math.pi / 5))
top_y = int(r * math.cos(2 * math.pi / 5))
bottom_x = int(r * math.sin(math.pi / 5))
bottom_y = int(r * math.cos(math.pi / 5))
points = [
    # 左上点
    x - top_x,
    y - top_y,
    # 右上点
    x + top_x,
    y - top_y,
    # 左下点
    x - bottom_x,
    y + bottom_y,
    # 顶点
    x,
    y - r,
    # 右下点
    x + bottom_x,
    y + bottom_y,
]
w.create_polygon(points, outline="red", fill="")
root.mainloop()
代码运行

图片
加载图片
import tkinter as tk
from PIL import ImageTk

dir = "C:/Users/Administrator/Desktop/"
root = tk.Tk()
root.title("Tk练习")
root.geometry("600x450+600+200")
canvas = tk.Canvas(root, width=500, height=400)
canvas.grid()
pt = ImageTk.PhotoImage(file=dir + "pt.gif")
canvas.create_image(50, 50, anchor=tk.NW, image=pt)
root.mainloop()
代码运行

文件
打开文件路径
"""
模块:import tkinter.filedialog
简介:用于创建文件/目录选择窗口的类和函数
tkinter.filedialog.asksaveasfilename()  选择以什么文件名保存,返回文件名
tkinter.filedialog.asksaveasfile()      选择以什么文件保存,创建文件并返回文件流对象
tkinter.filedialog.askopenfilename()    选择打开什么文件,返回文件名
tkinter.filedialog.askopenfile()        选择打开什么文件,返回IO流对象
tkinter.filedialog.askdirectory()       选择目录,返回目录名
tkinter.filedialog.askopenfilenames()   选择打开多个文件,以元组形式返回多个文件名
tkinter.filedialog.askopenfiles()       选择打开多个文件,以列表形式返回多个IO流对象

参数/作用
defaultextension	默认的扩展名,用于加到文件名后面(保存对话框)。例如:defaultextension=".txt",那么当用户输入一个文件名 “哈啊” 的时候,文件名会自动添加后缀为 “哈啊.txt”;如果用户输入文件名包含后缀,那么该选项不生效
filetypes	        指定筛选文件类型的下拉菜单选项 (如:filetypes=[(PNG,png), (JPG,jpg), (GIF,gif)])
initiadir	        对话框的启动目录 : 1. 指定打开/保存文件的默认路径;2. 默认路径是当前文件夹
initialfile         打开对话框时选中的文件
parent	            对话框窗口显示,1. 如果不指定该选项,那么对话框默认显示在根窗口上;2. 如果想要将对话框显示在子窗口 win 上,那么可以设置 parent=win
title	            指定文件对话框的标题栏
multiple            控制是否可以多选,为True则表示可以多选
"""
import tkinter as tk
import tkinter.filedialog
root = tk.Tk()
def openFilePath():
    file_name = tk.filedialog.askopenfilename()
    print(file_name)
tk.Button(root, text="open file", command=openFilePath).pack(padx=10,pady=10)
root.mainloop()
综合例子
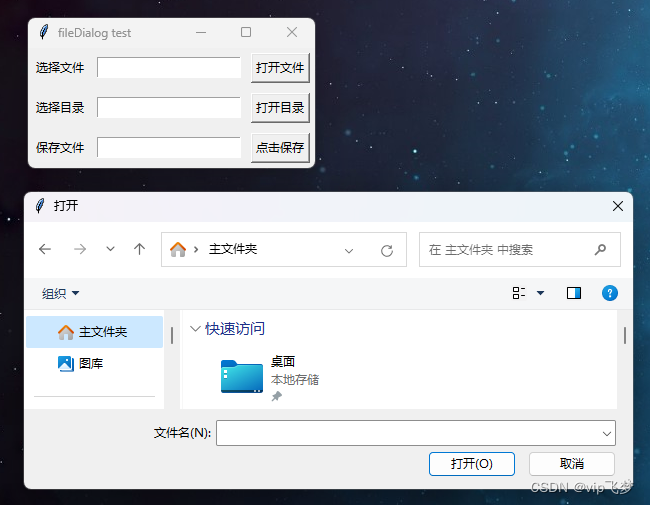
import tkinter as tk
from tkinter.filedialog import *

def openFile():
    filepath = askopenfilename()      # 选择打开什么文件,返回文件名
    if filepath.strip() != "":
        filename.set(filepath)        # 设置变量filename的值
    else:
        print("do not choose file")

def openDir():
    fileDir = askdirectory()          # 选择目录,返回目录名
    if fileDir.strip() != "":
        dirpath.set(fileDir)          # 设置变量outputpath的值
    else:
        print("do not choose Dir")

def fileSave():
    filenewpath = asksaveasfilename(
        defaultextension=".txt"
    )                                 # 设置保存文件,并返回文件名,指定文件名后缀为.txt
    if filenewpath.strip() != "":
        filenewname.set(filenewpath)  # 设置变量filenewname的值
    else:
        print("do not save file")

root = tk.Tk()
root.title("fileDialog test")
filename = tk.StringVar()
dirpath = tk.StringVar()
filenewname = tk.StringVar()

# 打开文件
tk.Label(root, text="选择文件").grid(row=1, column=0, padx=5, pady=5)
tk.Entry(root, textvariable=filename).grid(row=1, column=1, padx=5, pady=5)
tk.Button(root, text="打开文件", command=openFile).grid(row=1, column=2, padx=5, pady=5)

# 选择目录
tk.Label(root, text="选择目录").grid(row=2, column=0, padx=5, pady=5)  # 创建label 提示这是选择目录
tk.Entry(root, textvariable=dirpath).grid(
    row=2, column=1, padx=5, pady=5
)  # 创建Entry,显示选择的目录
tk.Button(root, text="打开目录", command=openDir).grid(
    row=2, column=2, padx=5, pady=5
)  # 创建一个Button,点击弹出打开目录窗口

# 保存文件
tk.Label(root, text="保存文件").grid(row=3, column=0, padx=5, pady=5)
tk.Entry(root, textvariable=filenewname).grid(row=3, column=1, padx=5, pady=5)
tk.Button(root, text="点击保存", command=fileSave).grid(row=3, column=2, padx=5, pady=5)

root.mainloop()
代码运行
按键操作
获取按键记录
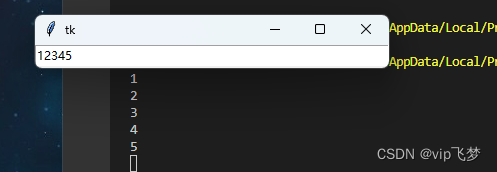
import tkinter as tk

root = tk.Tk()
def callBack(event):
    print(event.char)
test = tk.StringVar()
entry = tk.Entry(root, width=50)
entry.grid()
entry.bind("<Key>", callBack)
root.mainloop()
代码运行
鼠标操作
综合例子
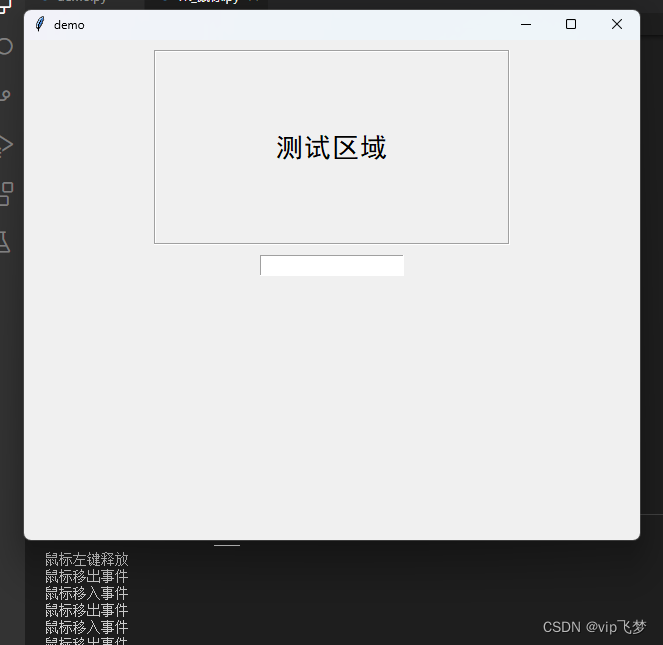
import tkinter as tk

win = tk.Tk()
win.title("demo")
screenwidth = win.winfo_screenwidth()  # 屏幕宽度
screenheight = win.winfo_screenheight()  # 屏幕高度
width = 500
height = 500
x = int((screenwidth - width) / 2)
y = int((screenheight - height) / 2)
win.geometry("{}x{}+{}+{}".format(width, height, x, y))
label = tk.Label(text="测试区域", relief="g", width=25, height=7, font=("黑体", 20))
label.pack(pady=10)

label.bind("<Button-1>", lambda e: print("鼠标左键按下"))  # 1-左键 2-中键 3-右键
label.bind("<ButtonRelease-1>", lambda e: print("鼠标左键释放"))
label.bind("<Button-3>", lambda e: print("鼠标右键按下"))
label.bind("<ButtonRelease-3>", lambda e: print("鼠标右键按下之后释放"))
label.bind("<B1-Motion>", lambda e: print("鼠标左键按下并移动"))
label.bind("<Enter>", lambda e: print("鼠标移入事件"))
label.bind("<Leave>", lambda e: print("鼠标移出事件"))
label.bind("<FocusIn>", lambda e: print("聚焦事件"))
label.bind("<FocusOut>", lambda e: print("失焦事件"))
label.focus_set()  # 直接聚焦",
tk.Entry().pack()
win.mainloop()

"""
# 鼠标参数
<Button-1>          鼠标点击事件(1:左键,2:中键,3:右键)
<B1-Motion>         鼠标拖动事件(1:左键,2:中键,3:右键)
<ButtonRelease-1>   鼠标按下之后释放
<Double-Button-1>   双击鼠标
<Enter>             鼠标指针进入到widget
<Leave>             鼠标离开widget
# 事件对象
widget              产生event的实例,不是名字,所有对象拥有
x,y                 鼠标位置,单位:像素
x_root,y_root       鼠标相对于屏幕左上角的位置,像素
char                仅键盘事件,string
num                 按钮num,仅鼠标事件
width/height        widget新大小
type                事件类型
"""
代码运行
点击获取坐标
import tkinter as tk

# 例子1
root = tk.Tk()
def callBack(event):
    print("点击位置:",event.x,event.y)
frame=tk.Frame(root,width=200,height=200)
frame.bind("<Button-1>",callBack)
frame.pack()
tk.mainloop()

# 例子2
"""
root = tk.Tk()
root.minsize(500,500)

def callback(event):
    print("点击位置: ", event.x, event.y)
    event.widget["bg"]="green"

frame = tk.Button(root, text="点击按钮")
frame.place(x=100, y=100, width=300, height=100)
frame.bind("<Button-1>", callback)

tk.mainloop()
"""

# 例子3
"""
root = tk.Tk()
def callBack(event):
    print("当前位置:", event.x, event.y)
frame = tk.Frame(root, width=200, height=200)
frame.bind("<Motion>", callBack)
frame.grid()
root.mainloop()
"""
代码运行

简单的画图板
import tkinter as tk

root = tk.Tk()
w = tk.Canvas(root, width=400, height=200)
w.grid()
def paint(event):
    size = 10
    x1, y1 = (event.x - size), (event.y - size)
    x2, y2 = (event.x + size), (event.y + size)
    w.create_oval(x1, y1, x2, y2, fill="black")
w.bind("<B1-Motion>", paint)
tk.Label(root,text="按住鼠标左键并移动,开始绘制")
root.mainloop()
代码运行
