本文仍然使用mediapipe做练手项目,封装一个PoseDetector类用作基础姿态检测类。
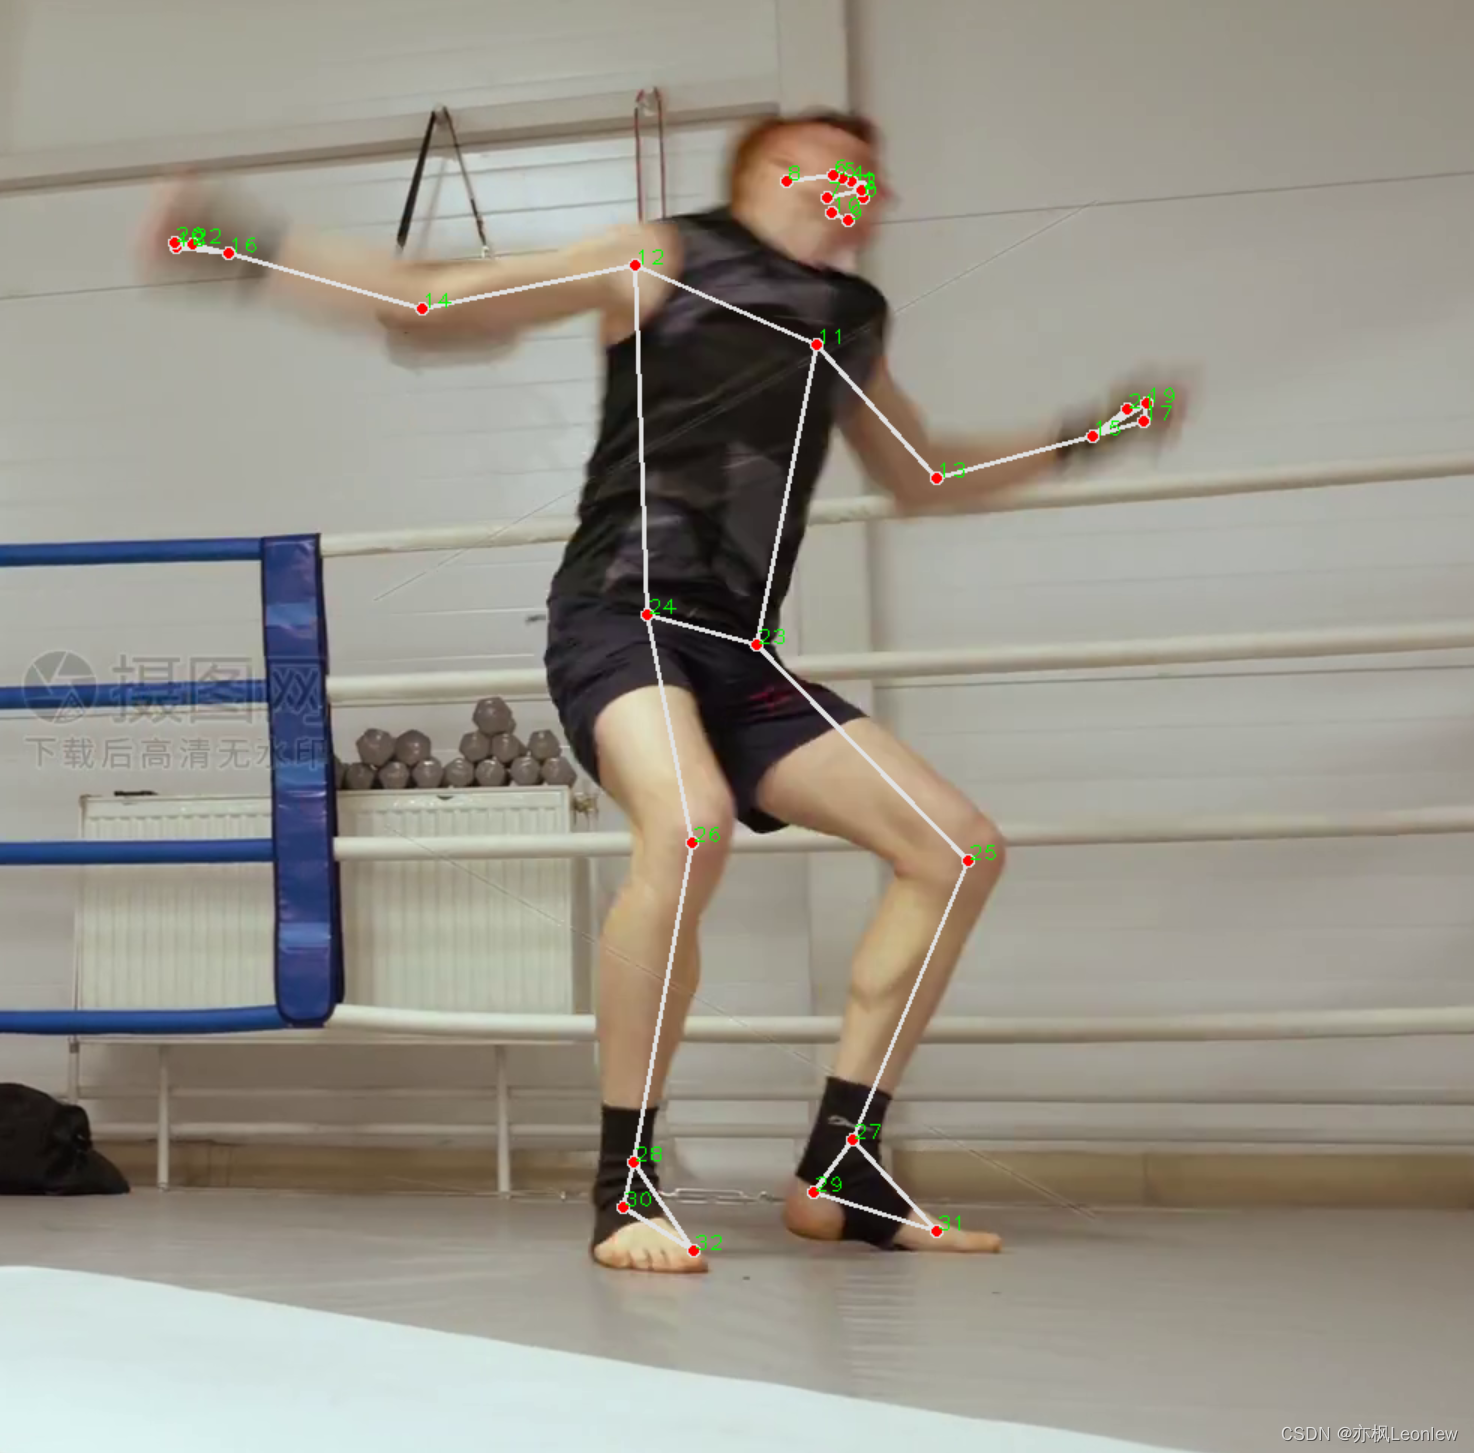
mediapipe中人体姿态检测的结果和手部跟踪检测的结果是类似的,都是输出一些定位点,各个定位点的id和对应人体的位置如下图所示:

关于mediapipe的pose解决方案类更详细的说明,可自行百度或参考这里:
import cv2 as cv
import mediapipe as mp
import time

#mediapipe的pose用于检测人体姿态
#参考资料:https://blog.csdn.net/weixin_43229348/article/details/120541448
class PoseDetector():
    def __init__(self,
                 mode = False,
                 modelComplexity = 1,
                 upperBodyOnly = False,
                 smoothLandmarks = True,
                 minDetectionConfidence = 0.5,
                 minTrackConfidence = 0.5):
        self.mpPose = mp.solutions.pose
        self.pose = self.mpPose.Pose(mode, modelComplexity, upperBodyOnly, smoothLandmarks, minDetectionConfidence, minTrackConfidence)
        self.mpDraw = mp.solutions.drawing_utils

    def Detect(self, img, drawOnImage = True):
        #mediapipe需要RGB,opencv默认的格式为BGR,进行转换
        imgRGB = cv.cvtColor(img, cv.COLOR_BGR2RGB)
        self.results = self.pose.process(imgRGB)

        if (self.results.pose_landmarks):
            #print(results.pose_landmarks)
            if drawOnImage:
                self.mpDraw.draw_landmarks(img, self.results.pose_landmarks, self.mpPose.POSE_CONNECTIONS)
        return img

    def GetPosition(self, img, drawOnImage = True):
        landmarkList = []
        if self.results.pose_landmarks:
            for id, landmark in enumerate(self.results.pose_landmarks.landmark):
                h,w,c = img.shape
                x = int(landmark.x * w)
                y = int(landmark.y * h)
                landmarkList.append([id, x, y])
                if (drawOnImage):
                    #cv.circle(img, (x,y), 5, (0,255,0))
                    cv.putText(img, str(id), (x,y), cv.FONT_HERSHEY_PLAIN, 1, (0,255,0), 1)
        return landmarkList


def DisplayFPS(img, preTime):
    curTime = time.time()
    if (curTime - preTime == 0):
        return curTime;
    fps = 1 / (curTime - preTime)
    cv.putText(img, "FPS:" + str(int(fps)), (10,70), cv.FONT_HERSHEY_PLAIN,
              3, (0,255,0), 3)
    return curTime

def main():
    poseDetector = PoseDetector()
    video = cv.VideoCapture('../../SampleVideos/acts.mp4')
    #FPS显示
    preTime = 0

    while True:
        ret,frame = video.read()
        if ret == False:
            break;

        frame = poseDetector.Detect(frame)
        poseDetector.GetPosition(frame)
        preTime = DisplayFPS(frame, preTime)
        cv.imshow('Real Time Hand Detection', frame)
        if cv.waitKey(10) & 0xFF == ord('q'):
            break;
    video.release()
    cv.destroyAllWindows()

if __name__ == "__main__":
    main()
运行结果:
可以参考我的B站视频: