介绍
Apache Superset 是一个现代的企业级商业智能 Web 应用程序。它快速、轻量、直观,并加载了各种选项,使所有技能的用户都可以轻松探索和可视化他们的数据,从简单的饼图到高度详细的 Deck.gl 地理空间图表。
安装
- 首先安装自制homebrew安装 管理器,然后运行以下命令:
brew install readline pkg-config libffi openssl mysql postgresql@14
- 配置环境变量
需要设置 LDFLAGS 和 CFLAGS 才能正确构建某些 Python 包。您可以使用以下命令导出这些变量
export LDFLAGS="-L$(brew --prefix openssl)/lib"
export CFLAGS="-I$(brew --prefix openssl)/include"
- 克隆代码到本地
git clone https://github.com/apache/superset.git
cd superset
- 安装
 # Create a virtual environment and activate it (recommended)
python3 -m venv venv # setup a python3 virtualenv
source venv/bin/activate

# Install external dependencies
pip install -r requirements/testing.txt

# Install Superset in editable (development) mode
pip install -e .

# Initialize the database
superset db upgrade

# Create an admin user in your metadata database (use `admin` as username to be able to load the examples)
superset fab create-admin

# Create default roles and permissions
superset init

# Load some data to play with.
# Note: you MUST have previously created an admin user with the username `admin` for this command to work.
superset load-examples    #optional

#Before running back-end services, front-end dependencies need to be downloaded and packaged, and js will be automatically loaded when running the back-end service

#install node
brew install node

#Install the domestic image source
npm install -g cnpm --registry=https://registry.npm.taobao.org

#install client dependencies
cd superset-frontend
cnpm i

# Start the Flask dev web server from inside your virtualenv.
# Note that your page may not have CSS at this point.
# See instructions below how to build the front-end assets.
superset run -p 8088 --reload --debugger --debug
安装运行遇到的问题
1. 执行superset load-examples报错需要证书才能拉下来
解决方案:
(1)报错ssl证书拉取不了, 将需要用到展示示例源码下载放到自己的本地,然后不通过远程拉取,自行修改该路径文件:superset/examples/helpers.py
(2)或者通过将该代码的根证书导入到本地根,liunx配置证书
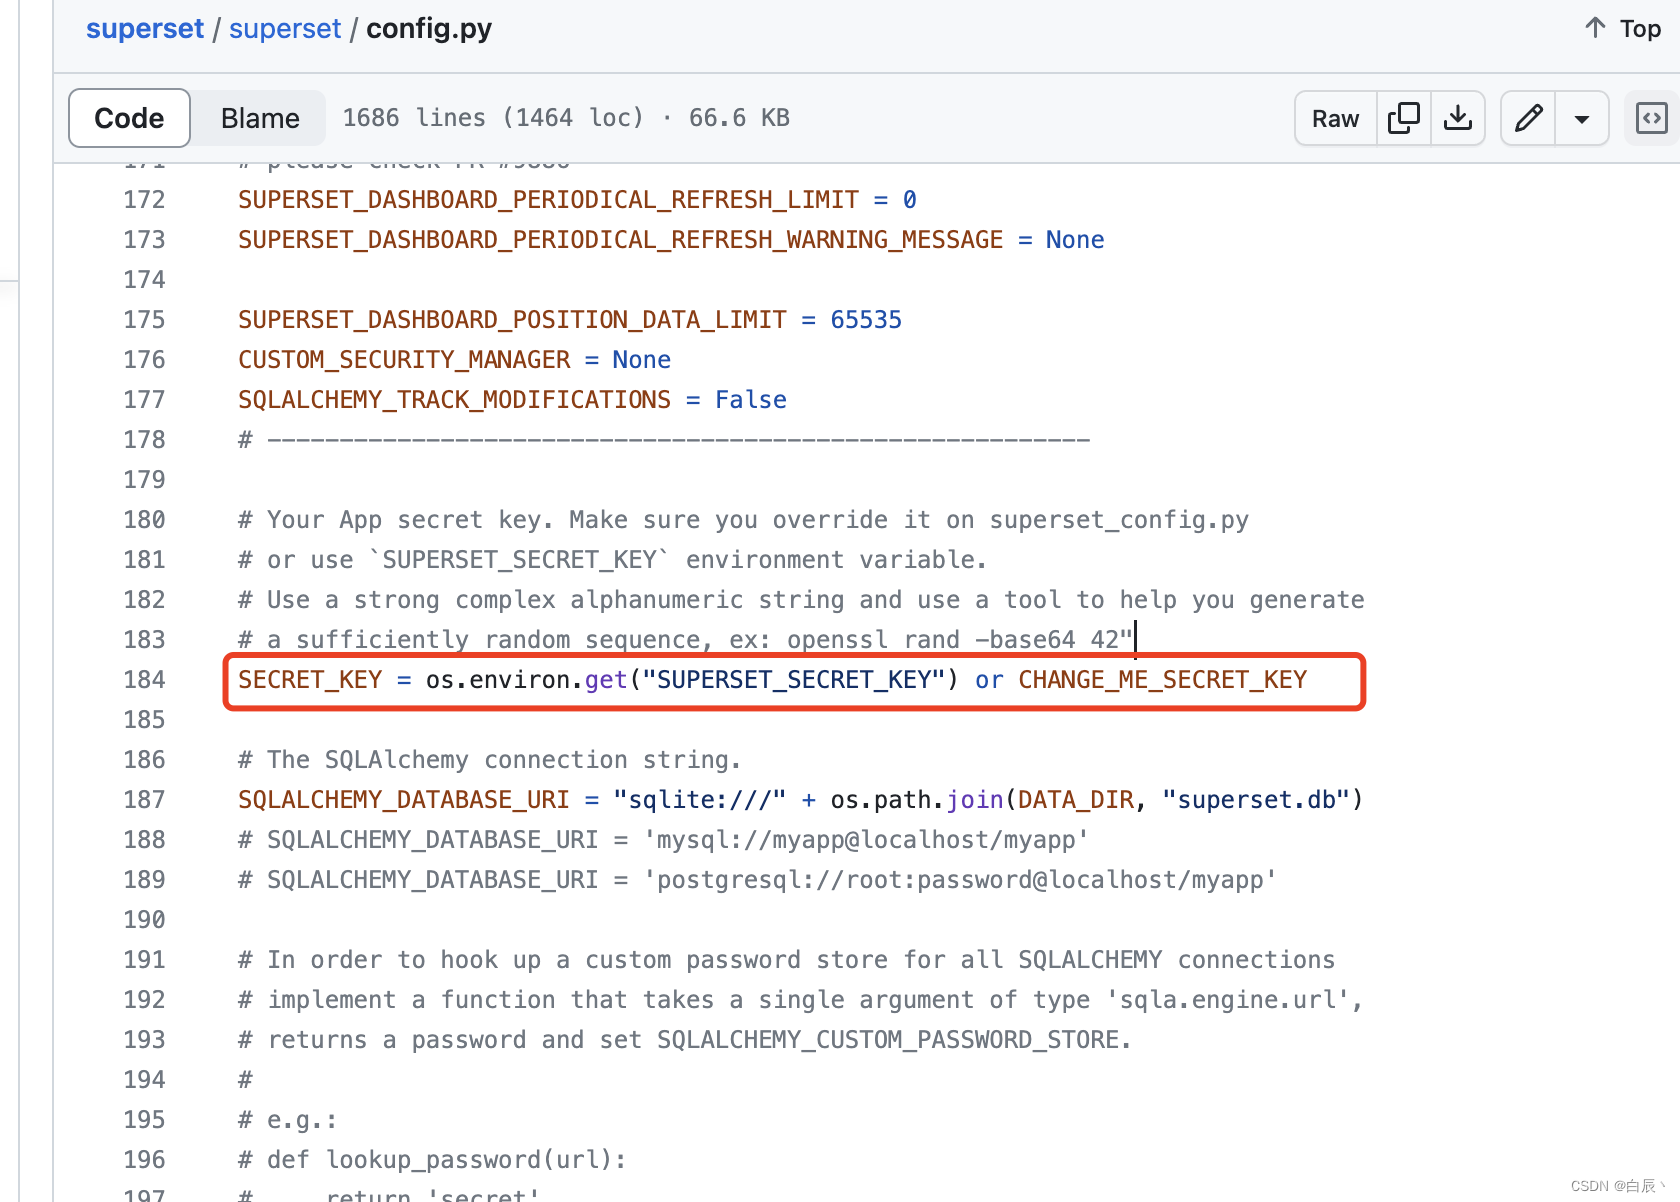
2. 执行superset安装时需要配置SUPERSET_SECRET_KEY环境变量,不然拒绝加载服务
更多详情参考官方超级配置集
 # Flask App Builder configuration
# Your App secret key will be used for securely signing the session cookie
# and encrypting sensitive information on the database
# Make sure you are changing this key for your deployment with a strong key.
# Alternatively you can set it with `SUPERSET_SECRET_KEY` environment variable.
# You MUST set this for production environments or the server will not refuse
# to start and you will see an error in the logs accordingly.
SECRET_KEY = 'YOUR_OWN_RANDOM_GENERATED_SECRET_KEY'
解决方式1:
#生成加密密钥
openssl rand -base64 42

#使用openssl生成的密钥,临时加载环境变量
export SUPERSET_SECRET_KEY='xxxxxxxxx'
解决方式2:
自行在 superset/config.py配置SUPERSET_SECRET_KEY
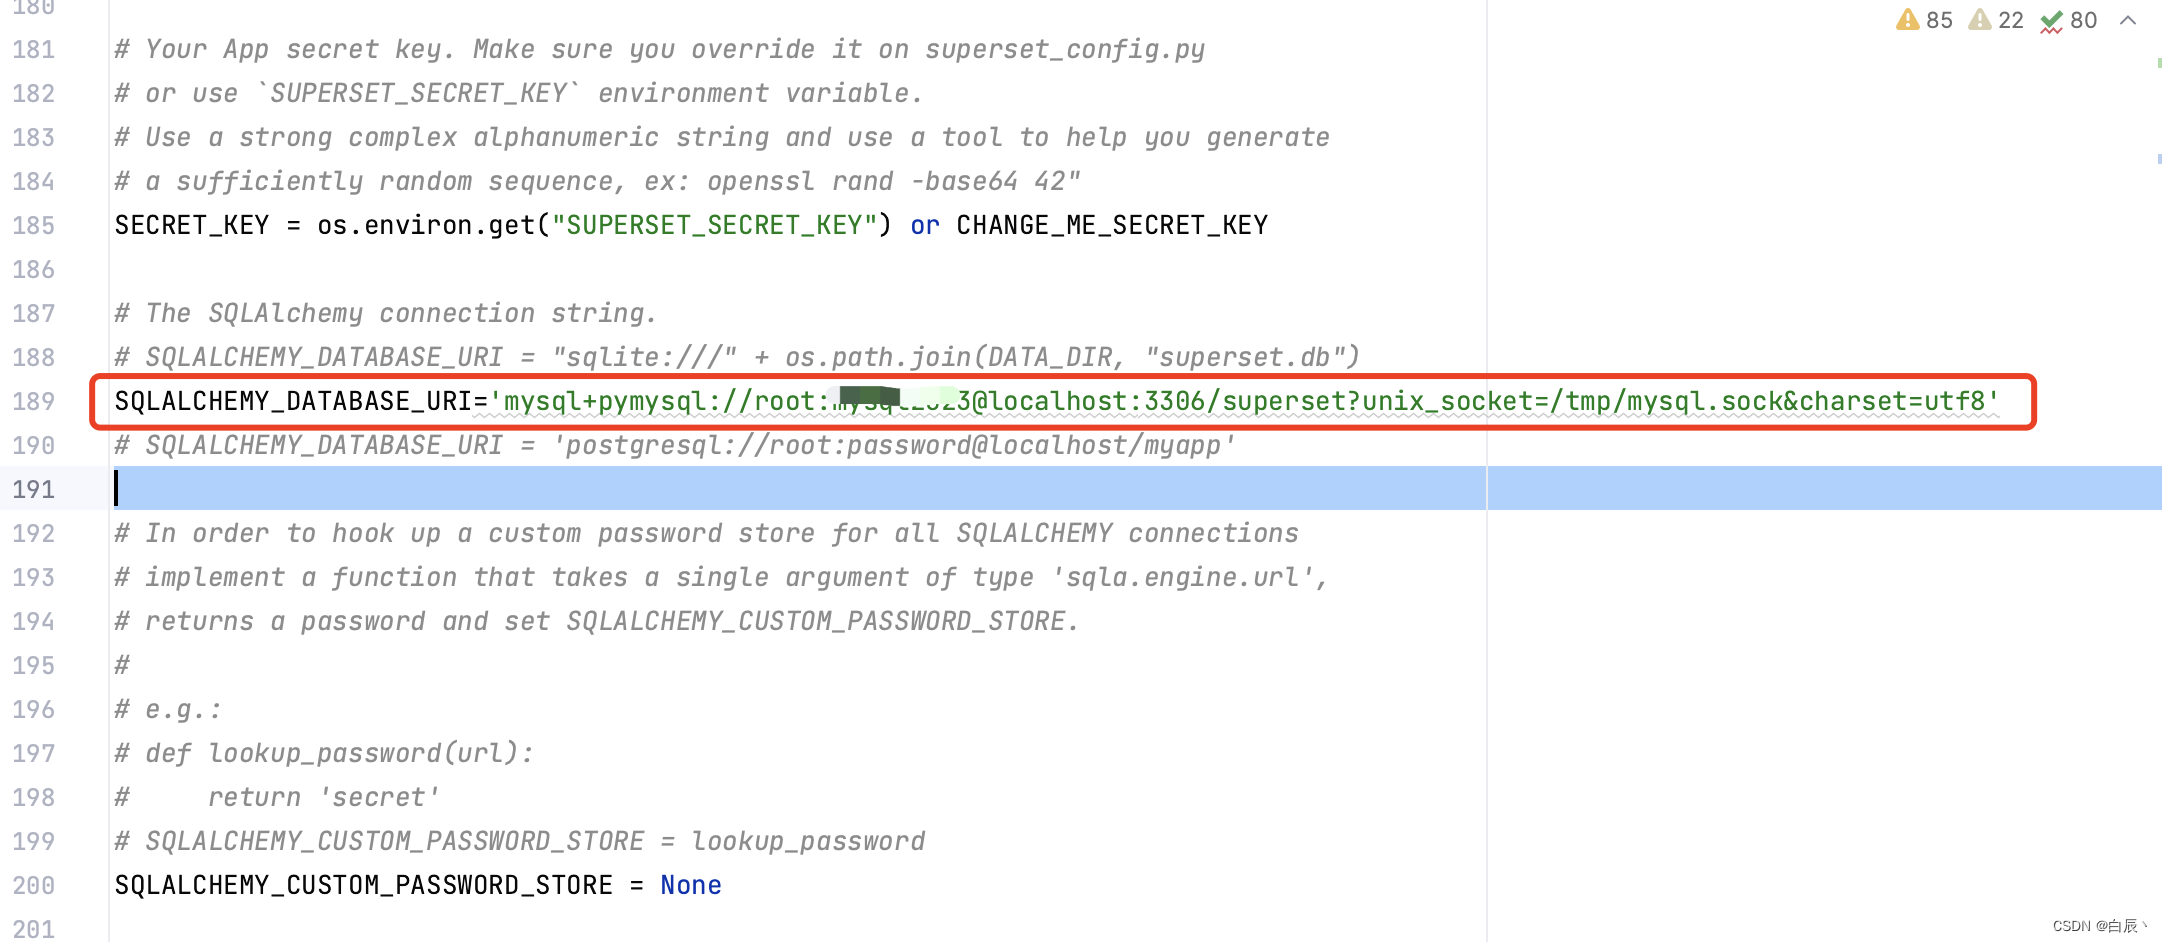
替换本地mysql
#安装pymysql依赖
pip install pymysql
修改 superset/config.py的mysql连接

注意事项:连接mysql 8.0以上报错
pymysql.err.OperationalError: (2003, "Can't connect to MySQL server on 'localhost' ([Errno 61] Connection refused)")
原因分析:
MySQL支持socket和TCP/IP连接。而mysql.sock文件的作用是连接localhost,叫做Unix域套接字文件。套接字文件被删除后,本地客户就不能连接。/tmp文件夹属于临时文件,随时可能被删除。
那么my.cnf配置文件中设置了[mysqld]的参数socket,但是没有设置[client]的参数socket就会出现这样的报错ERROR
2002 (HY000): Can’t connect to local MySQL server through socket
‘/tmp/mysql.sock’ (2)还有一点,当mysql.sock被设置在/tmp目录下,而client段被误删除并不会影响到数据库的登录问题(包括重启数据库),但是服务器重启后因为tmp为临时目录,mysql.sock文件被删除,就会影响登录。
方式一:
修改vim /etc/my.cnf
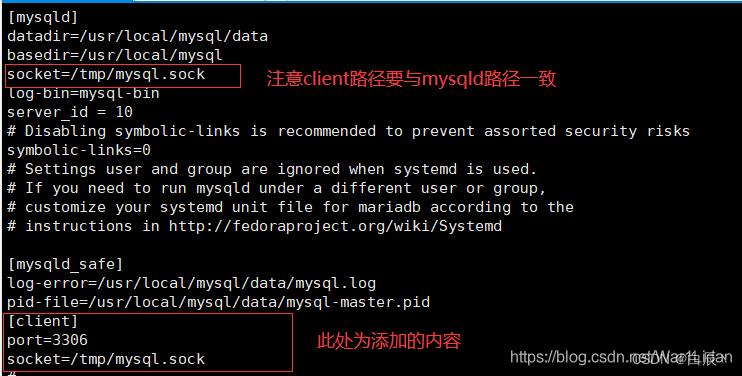
重启mysql
brew services restart mysql
方式二:
在pymysql连接时加上unix_socket=/tmp/mysql.sock,如上图
最后,此文章经过笔者不少踩坑才完成,来之不易,喜欢请三联下,谢谢!!