提示:文章写完后,目录可以自动生成,如何生成可参考右边的帮助文档
文章目录
前言
我们都知道在C++11中可以方便启动一个或多个线程,常规的手段是让线程执行完任务后自己结束自己,或者在达成一定的条件时退出。如果,我想在运行途中停下来怎么办?这篇文章就提供几种可行的方法。
取消点:线程并不是所有时刻都可以打断,只有当线程到达取消点的时候才可能被取消,通俗来说就是阻塞。诸如join、wait、sleep、IO操作都是典型的取消点。
一、pthread_cancel
这个是C形式的线程取消方式,搭配pthread_create方式创建的线程使用。
1.代码演示
main.cpp
#include <iostream>
using namespace std;

void *p_(void *) {


    printf("start\n");
    for (int i = 0; i < 100000; ++i) {


        if (i == 1000)
            printf("block\n");
    }
    printf("end\n");
    return nullptr;
}

void pthread_() {


    pthread_t p;
    pthread_create(&p, nullptr, p_, nullptr);
    pthread_cancel(p);
    pthread_join(p, nullptr);
}

int main() {


    pthread_();
    return 0;
}
CMakeLists.txt
cmake_minimum_required(VERSION 3.22)
project(Thread)

set(CMAKE_CXX_STANDARD 11)
find_package(Threads REQUIRED)
add_executable(Thread main.cpp)
target_link_libraries(Thread Threads::Threads)
打印:start
说明程序正好在printf("start\n");这句被结束掉了。如果你将主线程sleep下,就可以执行到printf("block\n");。printf("end\n");这句没有执行到,也正好符合终止线程的意图。
2.两个重要方法
pthread_cancel还有两个重要方法搭配使用,pthread_setcancelstate和pthread_setcanceltype。
1.pthread_setcancelstate
设置线程对cancel信号的响应策略,有两个可选项PTHREAD_CANCEL_ENABLE和PTHREAD_CANCEL_DISABLE,前者是默认的选项,表示响应pthread_cancel的调用,并设置为cancel状态;后者是说线程忽略信号,调用pthread_cancel的线程阻塞到可取消状态为止。
2.pthread_setcanceltype
设置线程对cancel信号的返回类型,也有两个可选项PTHREAD_CANCEL_DEFERRED和PTHREAD_CANCEL_ASYNCHRONOUS,前者是默认状态,表示线程运行到下一个取消点才退出;后者意思是直接退出,不用等线程运行到下一个取消点。
注意:pthread_setcanceltype设置必须先将pthread_setcancelstate设置为enable状态才会生效!
3.资源回收
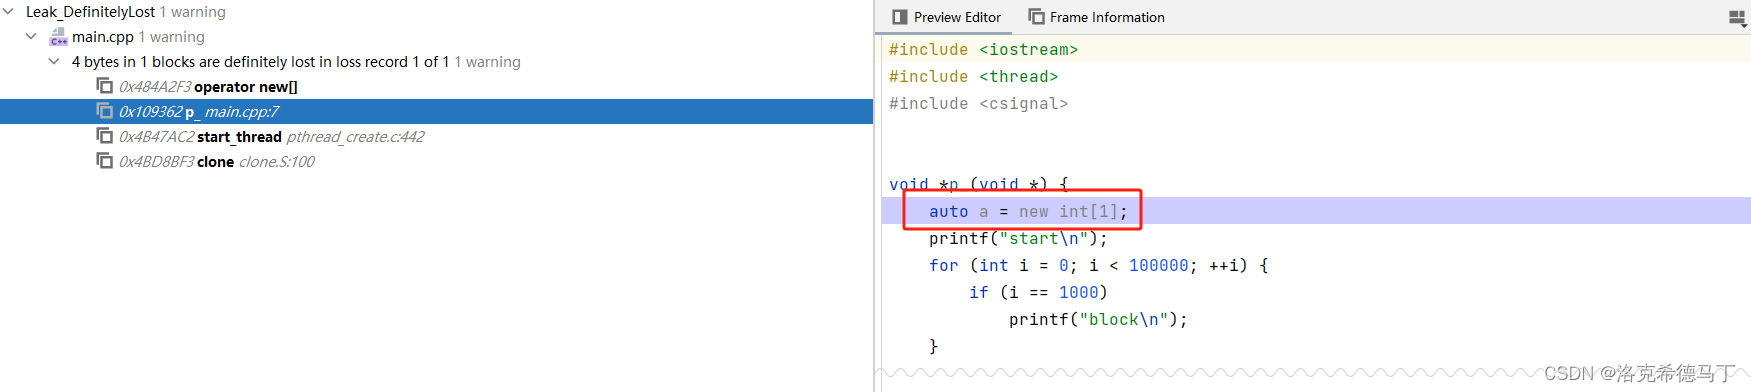
直接执行pthread_cancel会引发资源泄露的问题,请看代码:
#include <iostream>
using namespace std;

void *p_(void *) {


	auto a = new int{

    1};
    printf("start\n");
    for (int i = 0; i < 100000; ++i) {


        if (i == 1000)
            printf("block\n");
    }
    printf("end\n");
    return nullptr;
}

void pthread_() {


    pthread_t p;
    pthread_create(&p, nullptr, p_, nullptr);
    pthread_cancel(p);
    pthread_join(p, nullptr);
}

int main() {


    pthread_();
    return 0;
}
使用valgrind测试发现4字节的内存泄露。
资源回收的方法是有的,但是我更推荐使用Boost的方法,所以这里不深究了,感兴趣的请自行研究。
二、Boost
相比于pthread我觉得Boost的thread更好用。典型的C++书写方式,而且方法少而简单。只是不知道为什么C++11标准里没有interrupt这个函数(留待后续研究),使用起来也没发现什么问题,毕竟需要打断线程的场景其实不多。
1.看代码
main.cpp
#include <iostream>
#include <boost/thread.hpp>

void thread_() {


    try {


        for (int i = 0; i < 100000; ++i) {


            std::cout << i << std::endl;
            boost::this_thread::sleep(boost::posix_time::seconds(1));
        }
    } catch (boost::thread_interrupted) {


        std::cout << "interrupted" << std::endl;
    }
}

int main(int argc, char **argv) {


    boost::thread t(thread_);
    t.interrupt();
    t.join();
    return 0;
}
CMakeLists.txt
cmake_minimum_required(VERSION 3.22)
project(Boost_1_74_0)

set(CMAKE_CXX_STANDARD 11)
find_package(Boost 1.74 REQUIRED COMPONENTS thread)
add_executable(thread thread.cpp)
target_link_libraries(thread Boost::thread)
执行:
0
interrupted
触发了异常之后结束了。
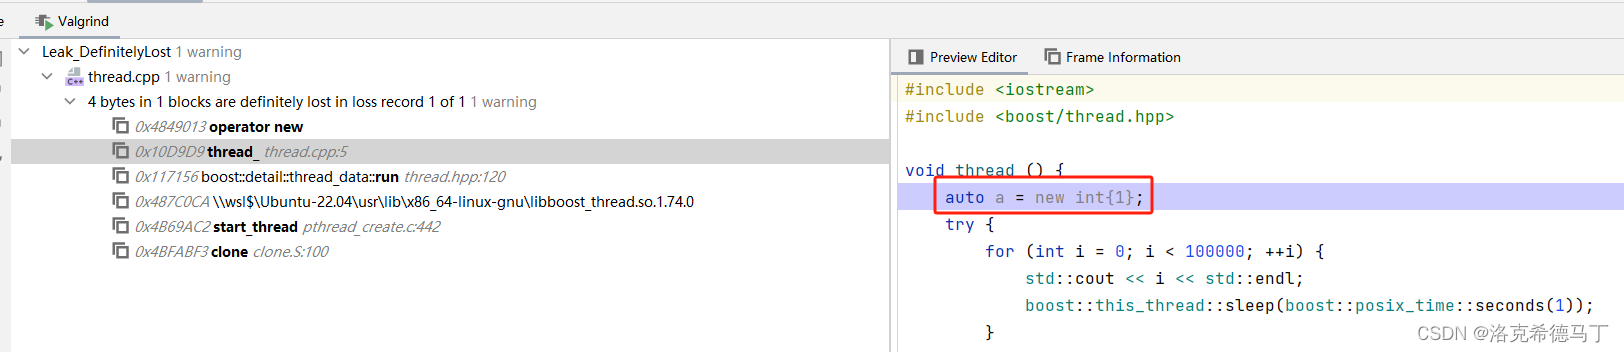
2.资源泄露
看代码:
#include <iostream>
#include <boost/thread.hpp>

void thread_() {


    auto a = new int{

    1};
    try {


        for (int i = 0; i < 100000; ++i) {


            std::cout << i << std::endl;
            boost::this_thread::sleep(boost::posix_time::seconds(1));
        }
    } catch (boost::thread_interrupted) {


        std::cout << "interrupted" << std::endl;
    }
}

int main(int argc, char **argv) {


    boost::thread t(thread_);
    t.interrupt();
    t.join();
    return 0;
}
运行valgrind,等待程序结束。
2.资源回收
方法很简单,Boost对interrupt做了异常包装,触发异常之后直接回收资源就行了。
看代码:
#include <iostream>
#include <boost/thread.hpp>

void thread_() {


    auto a = new int{

    1};
    try {


        for (int i = 0; i < 100000; ++i) {


            std::cout << i << std::endl;
            boost::this_thread::sleep(boost::posix_time::seconds(1));
        }
    } catch (boost::thread_interrupted) {


        std::cout << "interrupted" << std::endl;
        delete a;//这一句,资源回收
    }
}

int main(int argc, char **argv) {


    boost::thread t(thread_);
    t.interrupt();
    t.join();
    return 0;
}
运行valgrind,等待程序结束。所有资源都被回收了。
总结
1、优先使用Boost的方法,没别的原因,就是简单。
2、当然线程自身也可以打断自己,只不过我一般选择标志或自动结束更简单些。