远程GPU服务器配置
首先之前
拥有一台远程服务器,知晓如下信息
- IP和端口号(123.23.45.6:123456)
- root用户密码(111111)
远程服务器(ubuntu_18.04_vm)
客户端服务器(Windows10)
首先创建一个用户(建议)
不用root用户,避免以后pip安装的时候发生警告。(强迫症)
1. ssh登录到服务器
ssh -p 123456 [email protected]
[email protected]'s password:
输入密码111111后进入远程服务
2. 创建用户
useradd -d /home/us1 -m -s /bin/bash -g root,adm us1
创建一个用户us1, 用户主目录为文件夹为/home/us1/, 使用bash命令,加入root组和adm组
passwd us1
输入两次相同密码,修改us1用户的密码
3. 加入sudo组**(两种方式)
1) 修改文件
vim /etc/sudoers
找到root用户,在其下加入一行
us1 ALL=(ALL:ALL) ALL
2) 使用如下命令(这个方便)
usermod -a -G sudo us1
4. 切换用户
su us1
一、SSH免密登录
1. 本地机器生成私钥和密钥
① windows打开powershell 在本机生成公钥和私钥
ssh-keygen -t rsa
- 生成过程中会让输入密码,可以防止私钥被盗用(此步骤省略)
- 在默认位置(C:\Users\rexxa/.ssh/id_rsa) 生成公钥(id_rsa)和私钥(id_rsa.pub)
② 复制公钥(id_rsa.pub)的内容
cat id_rsa.pub
ssh-rsa AAAA… … = usera@DESKTOP-kdd
2. 远程机器设置免密登录
① 使用刚创建的用户和密码登录远程服务器
ssh -p 123456 [email protected]
② 将本地主机的公钥复制到 ~/.ssh/authorized_keys中
echo "ssh-rsa AAAA... ..... = usera@DESKTOP-kdd" ~/.ssh/authorized_keys
ps: 如果提示没有该文件夹,对本机执行ssh即可
ssh localhost
③ 免密登录:powershell
ssh -p 123456 [email protected]
二、配置环境
1. 更新系统包
更新系统包
sudo apt-get update
安装基本开发环境
sudo apt-get install build-essential
2. 安装CUDA
① 下载
最新发布链接: Nvidia官网 https://developer.nvidia.com/cuda-downloads
如需安装之前的版本:https://developer.nvidia.com/cuda-toolkit-archive
选项:Linuxx86_64Ubuntu18.04runfile(local)
获得如下指令:
wget https://developer.download.nvidia.com/compute/cuda/12.1.0/local_installers/cuda_12.1.0_530.30.02_linux.run
② 安装
sudo sh cuda_12.1.0_530.30.02_linux.run
accept >>> install >>>
③ 将库文件加入环境变量
安装完毕后会提示
Please make sure that
- PATH includes /usr/local/cuda-12.1/bin
- LD_LIBRARY_PATH includes /usr/local/cuda-12.1/lib64, or, add /usr/local/cuda-12.1/lib64 to /etc/ld.so.conf and run ldconfig as root
vim .bashrc
在文件的最后一行加入
LD_LIBRARY_PATH=/usr/local/cuda-12.1/lib64
④ 激活环境
bash
3. 安装miniconda
① 链接: 官网 https://docs.conda.io/en/latest/miniconda.html
复制Minconda3 Linux 64-bit 的地址
wget https://repo.anaconda.com/miniconda/Miniconda3-latest-Linux-x86_64.sh
bash Miniconda3-latest-Linux-x86_64.sh
开始安装,要么yes 要么enter
② 激活环境
bash
③ 创建一个新的环境 kdd 顺便安装pip
conda create -n kdd python=3.8 pip
激活环境
conda activate kdd
4. 安装Pytorch
链接: 官网 https://pytorch.org/get-started/locally/
其他版本:https://pytorch.org/get-started/previous-versions/
选项: Stable(1.13.1)LinuxpipPythonCUDA11.7
(注意要与前面的cuda版本对应上)
pip3 install torch torchvision torchaudio
三、测试安装
① 下载记事本文件
wget https://zh-v2.d2l.ai/d2l-zh.zip
② 安装解压软件
sudo apt-get install unzip
③ 解压文件
unzip -d ./d2l d2l-zh.zip
④ 安装课程基础包
pip install -U d2l jupyter
⑤ 运行jupyter
jupyter notebook --allow-root
⑥ 在本地映射端口
ssh -p 端口号 -L8888:localhost:8888 用户名@服务器IP
在本地浏览器中打开jupyter notebook的链接
⑦ 找一个课件代码测试GPU
/python/chapter-convolutional-modern/restnet.ipynb
运行全部代码
四、配置过程中可能遇到的问题
1. 设置免密登录时没有 .ssh 的文件夹
① 创建目录 ~/.ssh 并设置权限
mkdir ~/.ssh
chmod 700 /root/.ssh
② 创建文件 ~/.ssh/authorized_keys
vim ~/.ssh/authorized_keys
该文件不存在,所以vim会自动创建。按一下字母"i"然后同时按shift + Insert 进行粘贴(或者单击鼠标右键即可),前提是已经复制到剪切板中了。粘贴好后。再按ESC,然后输入冒号wq 即 :wq 就保存了。
2. root用户使用pip安装提示‘中断’问题
WARNING: Running pip as the ‘root’ user can result in broken permissions and conflicting behaviour with the system package manager. It is recommended to use a virtual environment instead: https://pip.pypa.io/warnings/venv
[参考]:https://blog.csdn.net/weixin_51080564/article/details/123584119
方案:创建一个虚拟目录
① 寻找pip位置
find / -name pip-*
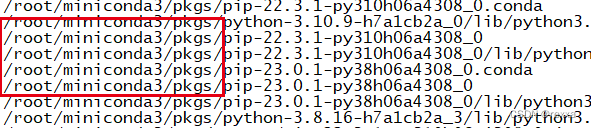
首先我们需要找到我们的pip安装位置,然后cd过去在该路径执行以下命令
② 创建虚拟目录
python3 -m venv tutorial-env
- 不回显是正常的
- 回显,表示缺少python3-venv包,安装即可
apt install python3-venv
③ 激活
source tutorial-env/bin/activate
④ 更新pip
pip install --upgrade pip
3. root用户打开jupyter notebook 需要输入–allow-root
Running as root is not recommended. Use --allow-root to bypass.
① 生成配置文件
jupyter notebook --generate-config --allow-root
② 打开生成的配置文件
vim /root/.jupyter/jupyter_notebook_config.py
③ 找到如下行,去掉#,将False 改成True
#c.NotebookApp.allow_root = False
④ 重新运行jupuyer notebook
jupyter notebook
4. Nvidia 驱动不上
① 检查驱动型号
ls /usr/src | grep nvidia

> nvidia-515.65.01
② 重新安装
sudo apt install dkms
sudo dkms install -m nvidia -v 515.65.01
5. 文件传输
sudo apt install lrzsz
rz # windows-->linux
sz filename # linux-->windows
6. Pip源
pip install -i https://pypi.tuna.tsinghua.edu.cn/simple some-package
>  http://mirrors.aliyun.com/pypi/simple/
>  https://pypi.mirrors.ustc.edu.cn/simple/
>  http://pypi.douban.com/simple/
7. 定时刷新
每隔2秒刷新一次,每次只在固定位置刷新
watch -n 2 -d nvidia-smi
8. 申请GPU主机
每隔2秒刷新一次,每次只在固定位置刷新
salloc -p gpu-rtx3090 --gres=gpu:1
squeue
scancel PID
sinfo
9. 将自己创建的环境添加到jupyterNotebook中
每隔2秒刷新一次,每次只在固定位置刷新
 pip install ipykernel
 python -m ipykernel install --name pyg