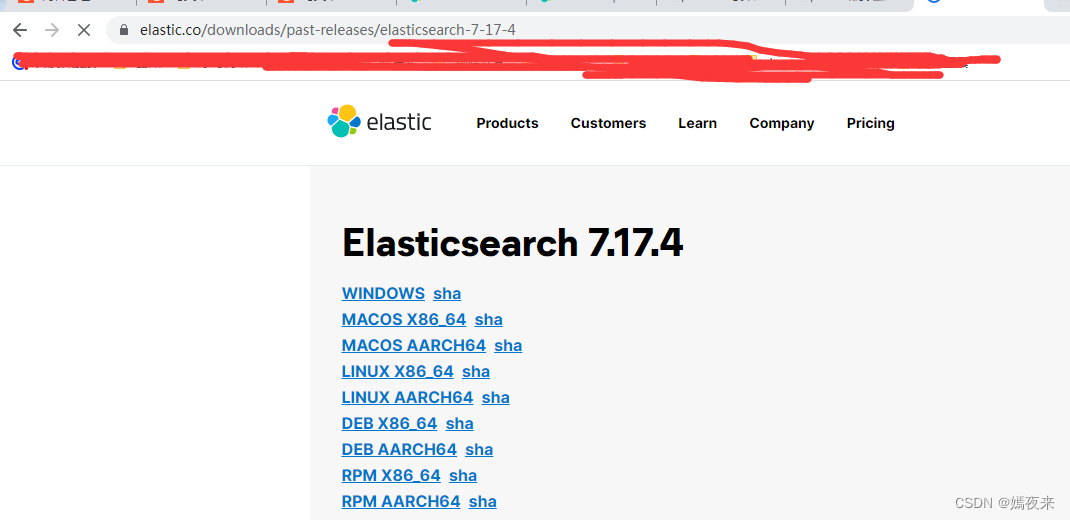
1 ElasticSearch下载
7.17.4版本下载地址::https://www.elastic.co/downloads/past-releases/elasticsearch-7-17-4
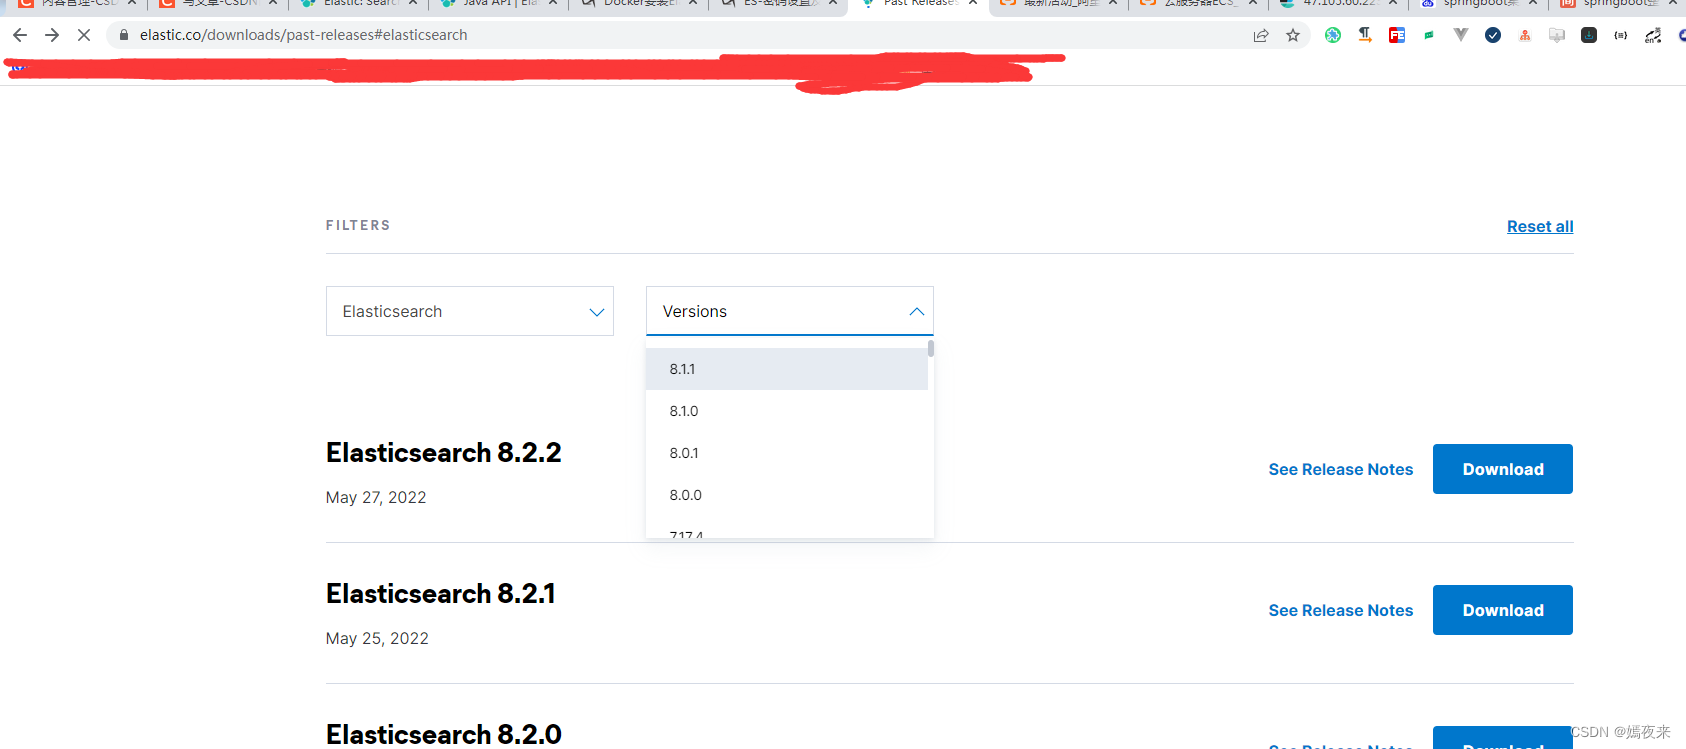
其他版本下载地址:https://www.elastic.co/downloads/past-releases#elasticsearch
2 ElasticSearch安装
这里只演示linux系统下elasticsearch的安装, 其他系统的安装操作基本都是类似的,一个会了其他的都是一样的。
下载安装压缩包
# 将入安装压缩包下载目录,下载安装压缩包到本地,如果opt目录下没有packages目录则创建

mkdir -p /opt/packages | cd /opt/packages | wget https://artifacts.elastic.co/downloads/elasticsearch/elasticsearch-7.17.4-linux-x86_64.tar.gz
解压安装压缩包
# 将压缩包解压到/usr/local/software/目录下,没有software目录手动创建后再执行命令

tar -zxf elasticsearch-7.17.4-linux-x86_64.tar.gz -C /usr/local/software

# 这一步可以操作也可以不操作,重命名

mv /usr/local/software/elasticsearch-7.17.4  /usr/local/software/elasticsearch
3 ElasticSearch配置
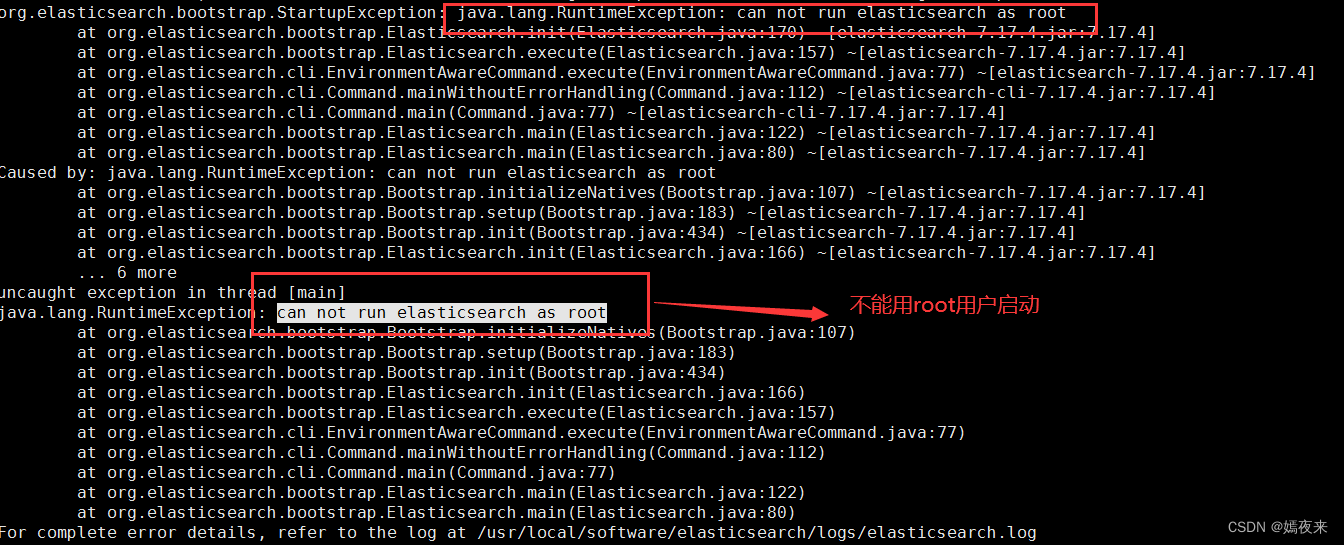
首先ElasticSearch启动是不允许使用root账号启动的,
主要解决方案有以下两种
3.1 elaticsearch默认不能用root用户启动的解决方案
1、方案一:修改elaticsearch配置,使其可以允许root用户启动(不建议)
# 在启动elasticSearch时加上参数-Des.insecure.allow.root=true,完整命令如下

./elasticsearch -Des.insecure.allow.root=true -d
或者修改elasicsearch可执行文件
# 用vim打开elasicsearch执行文件,在变量ES_JAVA_OPTS使用前添加以下命令

ES_JAVA_OPTS="-Des.insecure.allow.root=true"
1、方案二:创建一个用户专门用来管理elasticsearch服务(推荐)
# 1) 新建用户组
groupadd es
# 2) 新建用户
useradd es -g es -p Es@123456
# 3) 将elasticsearch安装目录授权给es用户进行管理
chown -R es:es usr/local/software/elasticsearch
# 4) 切换es用户登录
su - es
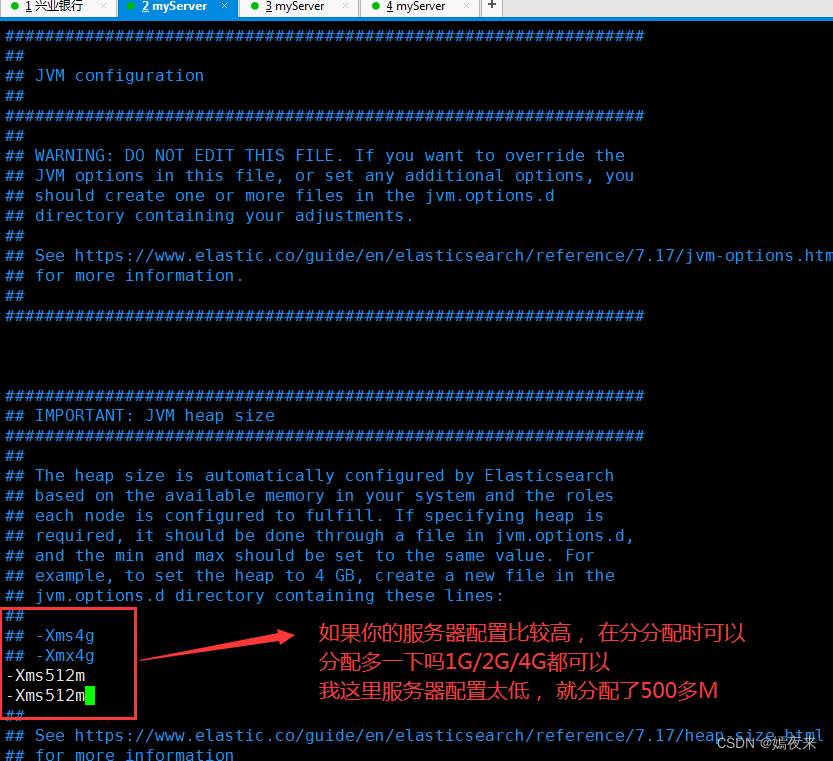
3.2 修改elaticsearch默认JVM堆内存空间设置
1】为什么要设置 ?
默认的JVM堆内存空间设置去启动es起不起来
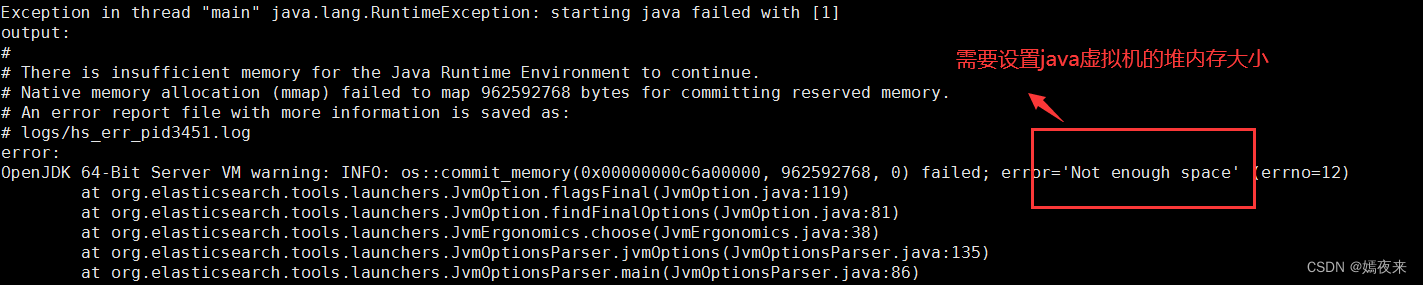
2】怎么修改设置
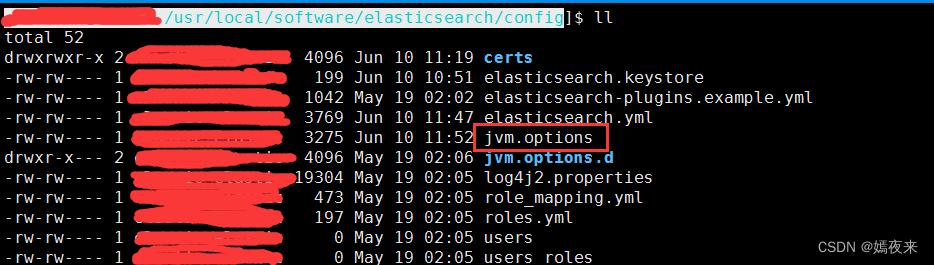
JVM堆内存空间设置的配置文件在安装目录下的config目录下, 如果你的安装目录跟我的一直, 那么 配置文件所在的目录应该就是/usr/local/software/elasticsearch/config/下的jvm.options文件
3.3 修改系统的VM参数配置, 这里需要使用root账号操作
vim /etc/sysctl.conf
在sysctl.conf增加以下配置项:
vm.max_map_count = 262144
保存退出即可
3.4 修改elasticsearch.yml配置文件
# ======================== Elasticsearch Configuration =========================
#
# NOTE: Elasticsearch comes with reasonable defaults for most settings.
#       Before you set out to tweak and tune the configuration, make sure you
#       understand what are you trying to accomplish and the consequences.
#
# The primary way of configuring a node is via this file. This template lists
# the most important settings you may want to configure for a production cluster.
#
# Please consult the documentation for further information on configuration options:
# https://www.elastic.co/guide/en/elasticsearch/reference/index.html
#
# ---------------------------------- Cluster -----------------------------------
#
# Use a descriptive name for your cluster:
#
#cluster.name: my-application
#
# ------------------------------------ Node ------------------------------------
#
# Use a descriptive name for the node:
#
node.name: es-node-1
#
# Add custom attributes to the node:
#
node.attr.rack: es-r1
#
# ----------------------------------- Paths ------------------------------------
#
# Path to directory where to store the data (separate multiple locations by comma):
#
#path.data: /usr/lcoal/software/elasticsearch/data
#
# Path to log files:
#
#path.logs: /user/local/software/elasticsearch/logs
#
# ----------------------------------- Memory -----------------------------------
#
# Lock the memory on startup:
#
#bootstrap.memory_lock: true
#
# Make sure that the heap size is set to about half the memory available
# on the system and that the owner of the process is allowed to use this
# limit.
#
# Elasticsearch performs poorly when the system is swapping the memory.
#
# ---------------------------------- Network -----------------------------------
#
# By default Elasticsearch is only accessible on localhost. Set a different
# address here to expose this node on the network:
#
network.host: 192.168.1.201
#
# By default Elasticsearch listens for HTTP traffic on the first free port it
# finds starting at 9200. Set a specific HTTP port here:
#
http.port: 9200
#
# For more information, consult the network module documentation.
#
# --------------------------------- Discovery ----------------------------------
#
# Pass an initial list of hosts to perform discovery when this node is started:
# The default list of hosts is ["127.0.0.1", "[::1]"]
#
discovery.seed_hosts: ["127.0.0.1", "192.168.1.201"]
#
# Bootstrap the cluster using an initial set of master-eligible nodes:
#
#cluster.initial_master_nodes: ["node-1", "node-2"]
#
# For more information, consult the discovery and cluster formation module documentation.
#
# ---------------------------------- Various -----------------------------------
#
# Require explicit names when deleting indices:
#
#action.destructive_requires_name: true
#
# ---------------------------------- Security ----------------------------------
#
#                                 *** WARNING ***
#
# Elasticsearch security features are not enabled by default.
# These features are free, but require configuration changes to enable them.
# This means that users don’t have to provide credentials and can get full access
# to the cluster. Network connections are also not encrypted.
#
# To protect your data, we strongly encourage you to enable the Elasticsearch security features.
# Refer to the following documentation for instructions.
#
# https://www.elastic.co/guide/en/elasticsearch/reference/7.16/configuring-stack-security.html
通过以上配置,基本的es就可以启动了
切换到es账号,进入到/usr/local/software/elasticsearch/bin目录下, 执行一下命令
# 第一种方式:命令方式启动,缺点执行命令之后,当前窗口不能在执行其他命令, 一旦关闭,es就自动停止了
./elasticsearch
# 守护进程后台启动,加上参数 -d, 缺点不能直观的从命令行看出es是否启动成功, 需要借助ps -aux | grep elasticsearch命令来查看进程是否启动成功
./elasticsearch -d

如下图说明elasticsearch启动成功
4 ElasticSearch安全设置
elasticsearch服务启动之后,默认是没有设置登录账号和密码的, 如果只是本地使用或者测试, 那没什么问题, 但是如果在云服务器或者公网访问, 这肯定是不可以的, 严令禁止, 如果在云服务上面部署和使用一定要设置登录用户和密码并进行权限设置。下面给大家讲讲怎么给es设置登录账号和密码。
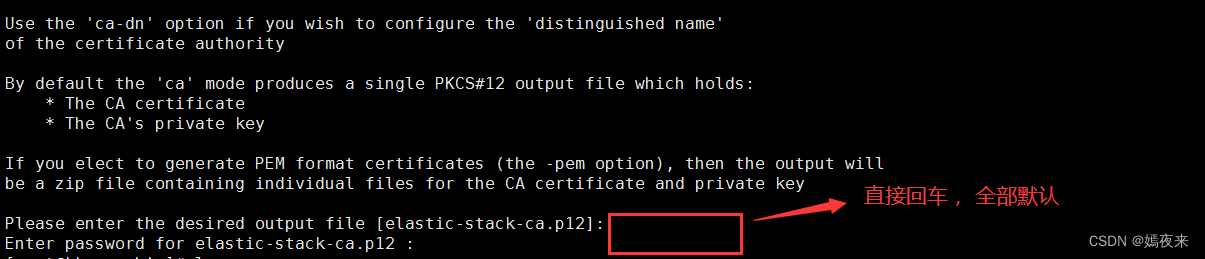
4.1 SSL证书生成
生成ca证书
# 1、进入目录
cd /usr/local/software/elasticsearch/bin
#/2、执行生成证书的命令
./elasticsearch-certutil ca


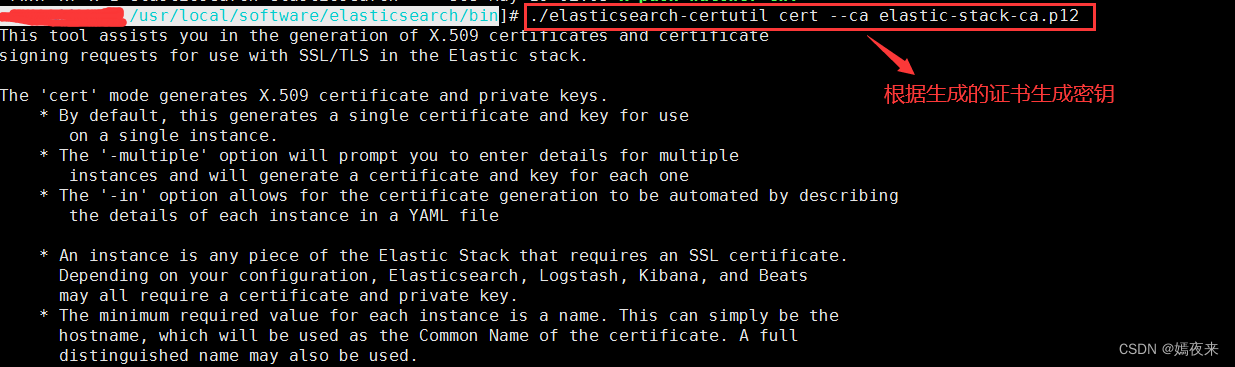
4.2 生成密钥对
# 1、进入目录
cd /usr/local/software/elasticsearch/bin
#/2、执行生成证书的命令
./elasticsearch-certutil cert --ca elastic-stack-ca.p12
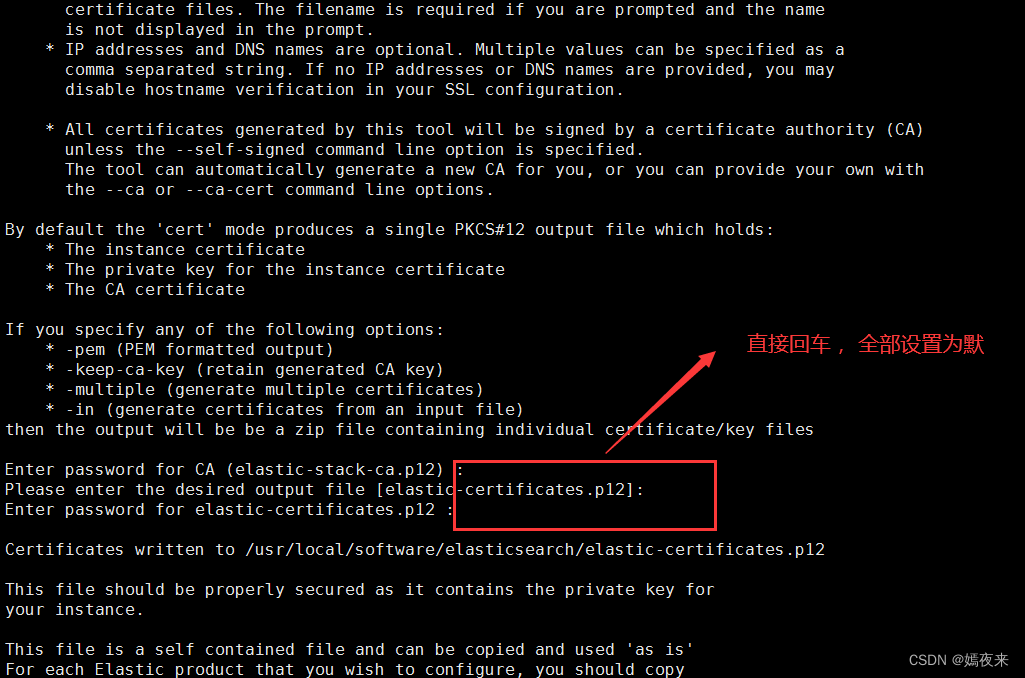

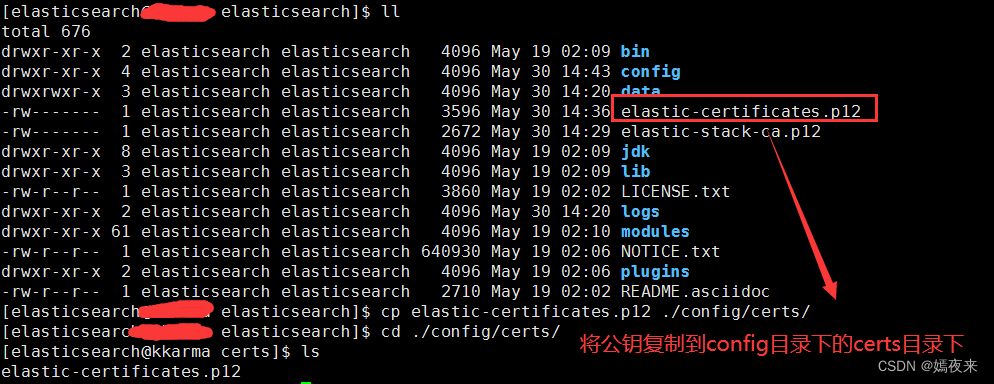
4.3 修改es的yml配置文件,增加安全配置
修改ES节点的配置文件
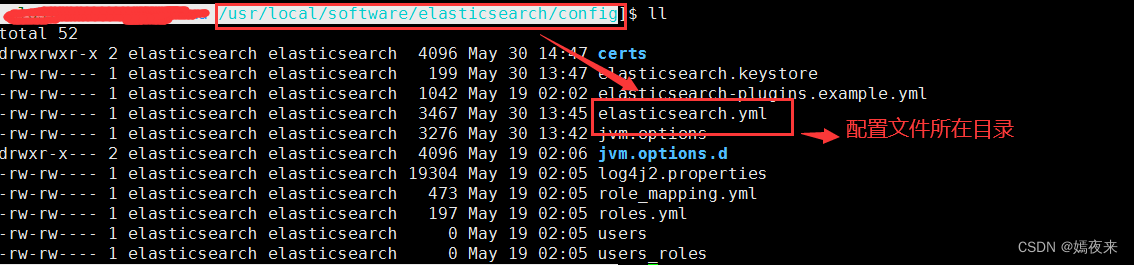
vim elasticsearch.yml
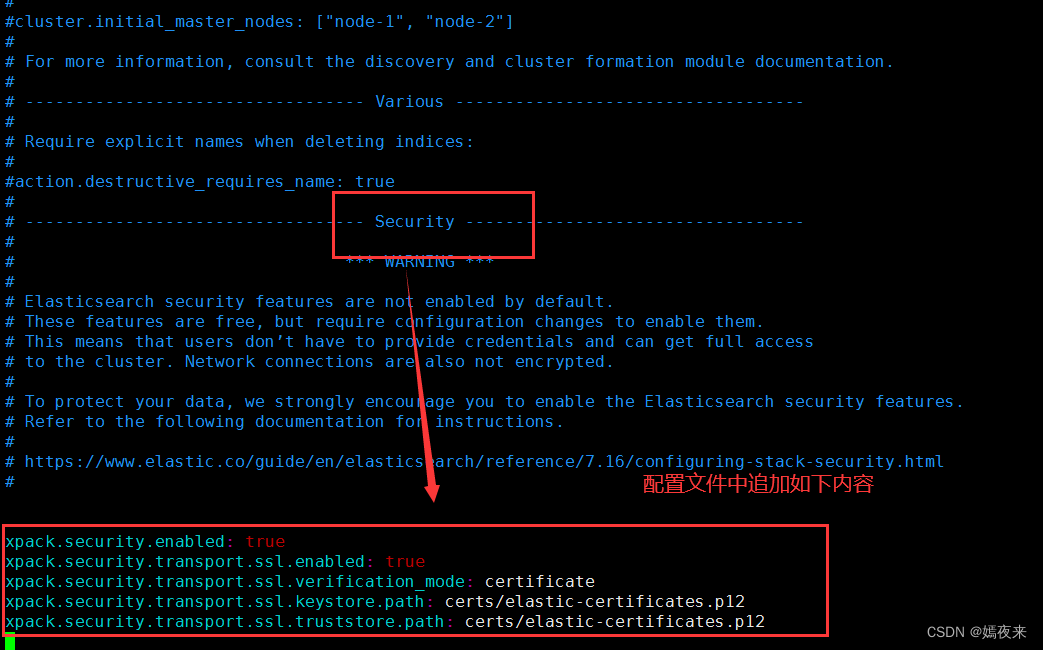
xpack.security.enabled: true
xpack.security.transport.ssl.enabled: true
xpack.security.transport.ssl.verification_mode: certificate
xpack.security.transport.ssl.keystore.path: certs/elastic-certificates.p12
xpack.security.transport.ssl.truststore.path: certs/elastic-certificates.p12
:wq!,记得一定要保存修改再退出
重启es服务
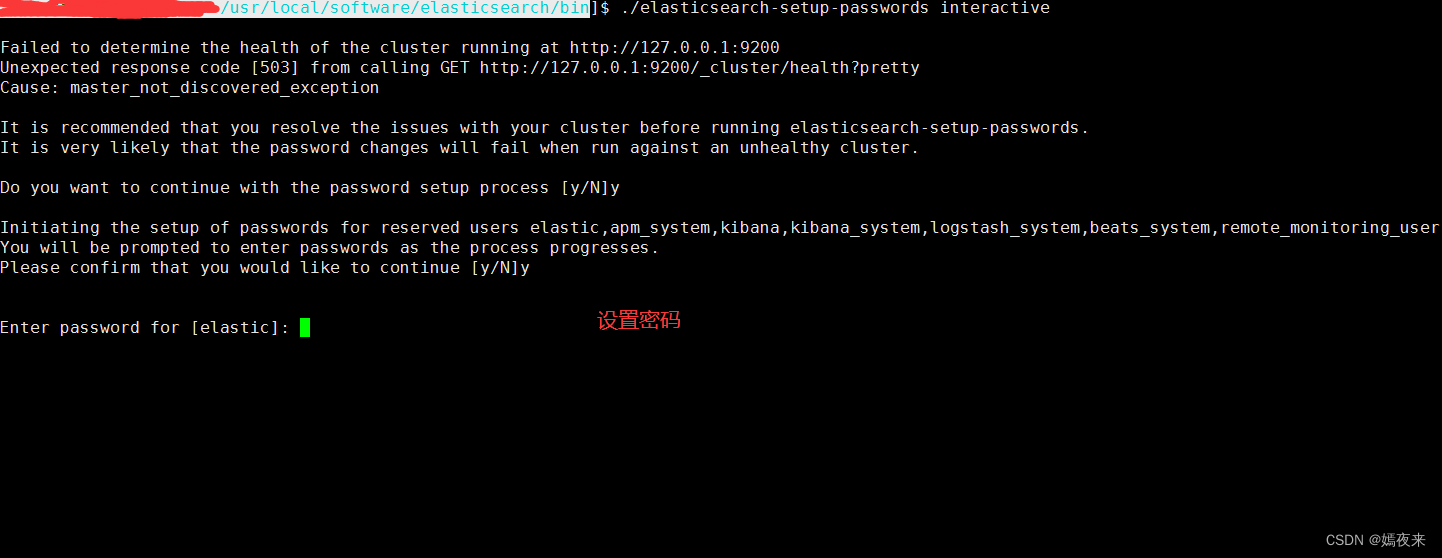
4.4设置账号密码
设置账号密码之前, 记得先把es服务先启动起来
如果es已经启动了, 需要重新启动,让修改的配置生效
es启动成功之后, 执行修改密码的命令
# 1、进入目录
cd /usr/local/software/elasticsearch/bin

# 2、执行修改密码的命令
./elasticsearch-setup-passwords interactive
 密码修改成功
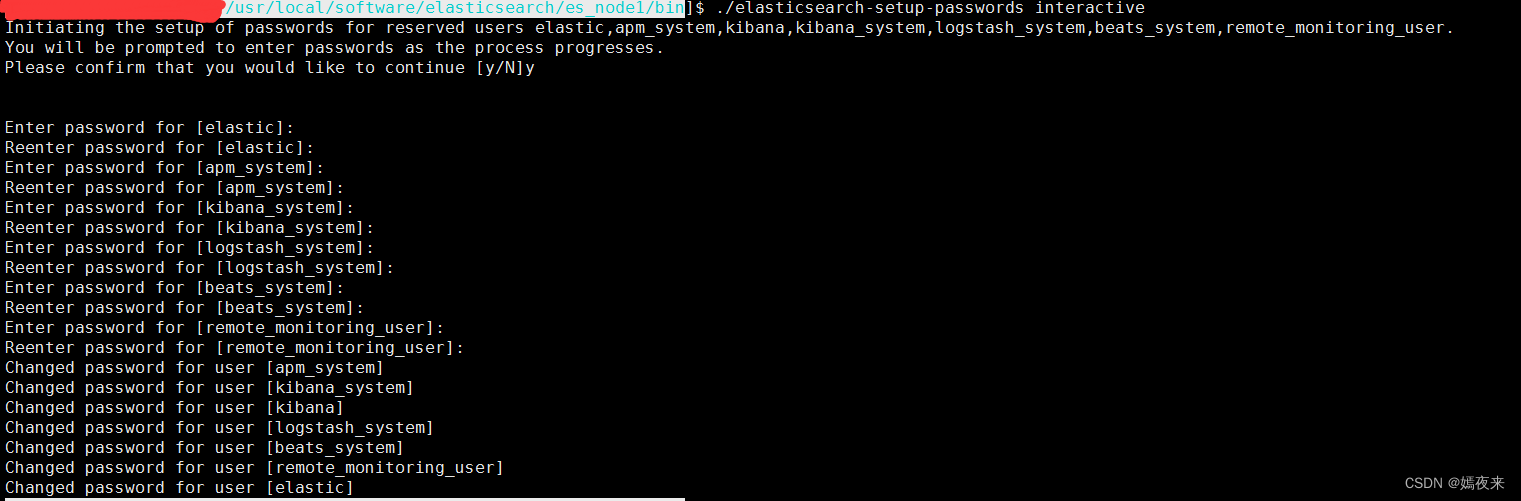
至此, 账号密码就设置完毕了, 重启es再次进行验证
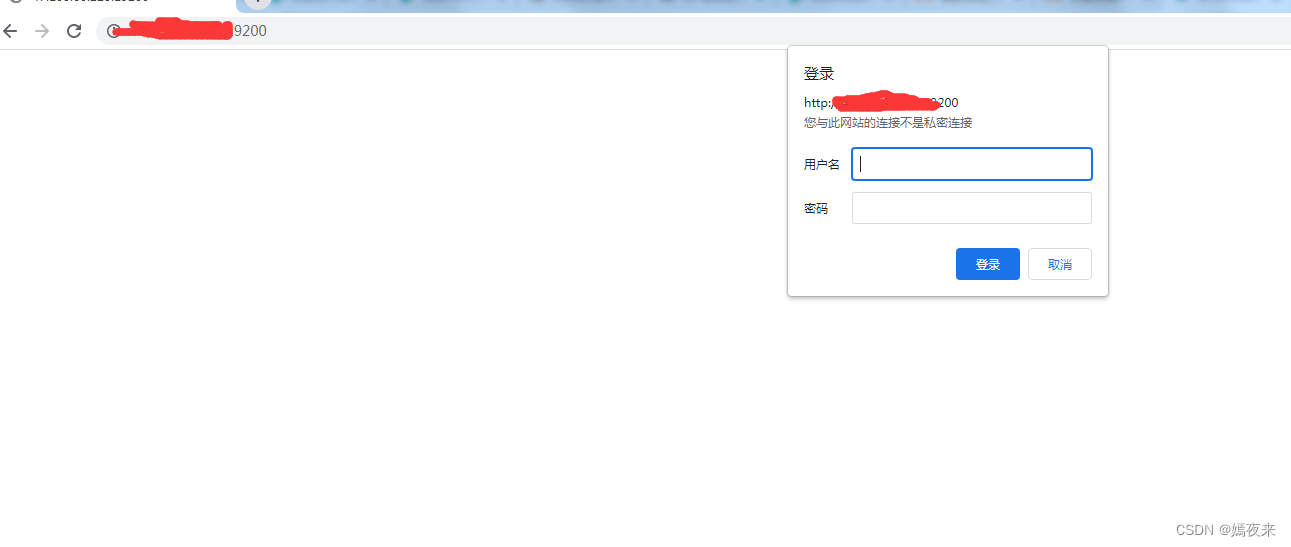
5 验证安全设置是否生效
确认es已经成功启动之后, 通过命令行行以下命令:

说明配置生效了。
6 开发外网可访问需要注意的点
- 配置文件elasticsearch.yml文件中
network.host参数最好配置为本机的地址,也可以设置为0.0.0.0,但是这个开放的权限就太大了,具体如何设置自行考量 - 配置文件elasticsearch.yml文件中
discovery.seed_hosts参数最好配置为本机的地址,也可以设置为[“本机IP”], 可以增加0.0.0.0配置,但是同上一条,这个开放的权限就太大了,具体如何设置自行考量 - 如果是云服务器,需要增加端口放行规则
- 服务器内部需要增加端口放行规则
- 需要重启防火墙,让修改的规则生效
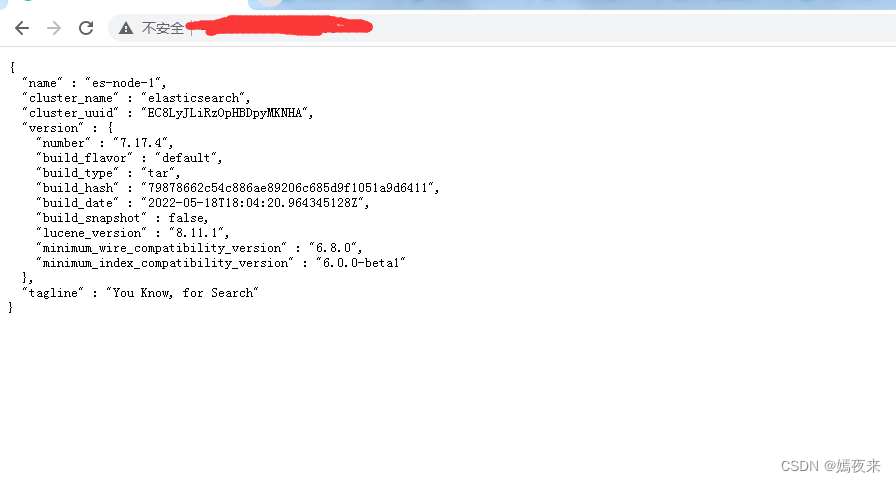
7 外网访问测试
说明账号密码安全设置设置成功了,输入账号和密码,如下图:
OK,至此单机的ES服务的搭建和配置就全部好了,后面给大家说说集群配置需要注意的点, 今天就到这里。