目前常用的.tiff格式图片转png格式图片,搜了一下,多数都是第三方平台直接转换,需要米,其实大可不必,自己撸代码就可以直接转换。
TIFF(Tagged Image File Format)是一种灵活的位图格式,主要用来存储包括照片和艺术图在内的图像。它最初由Aldus公司与微软公司一起为PostScript打印开发。TIFF与JPEG和PNG一起成为流行的高位彩色图像格式。TIFF是一个灵活适应性强的文件格式,通过在文件头中包含“标签”它能够在一个文件中处理多幅图像和数据。
目录
一、.tiff格式图片
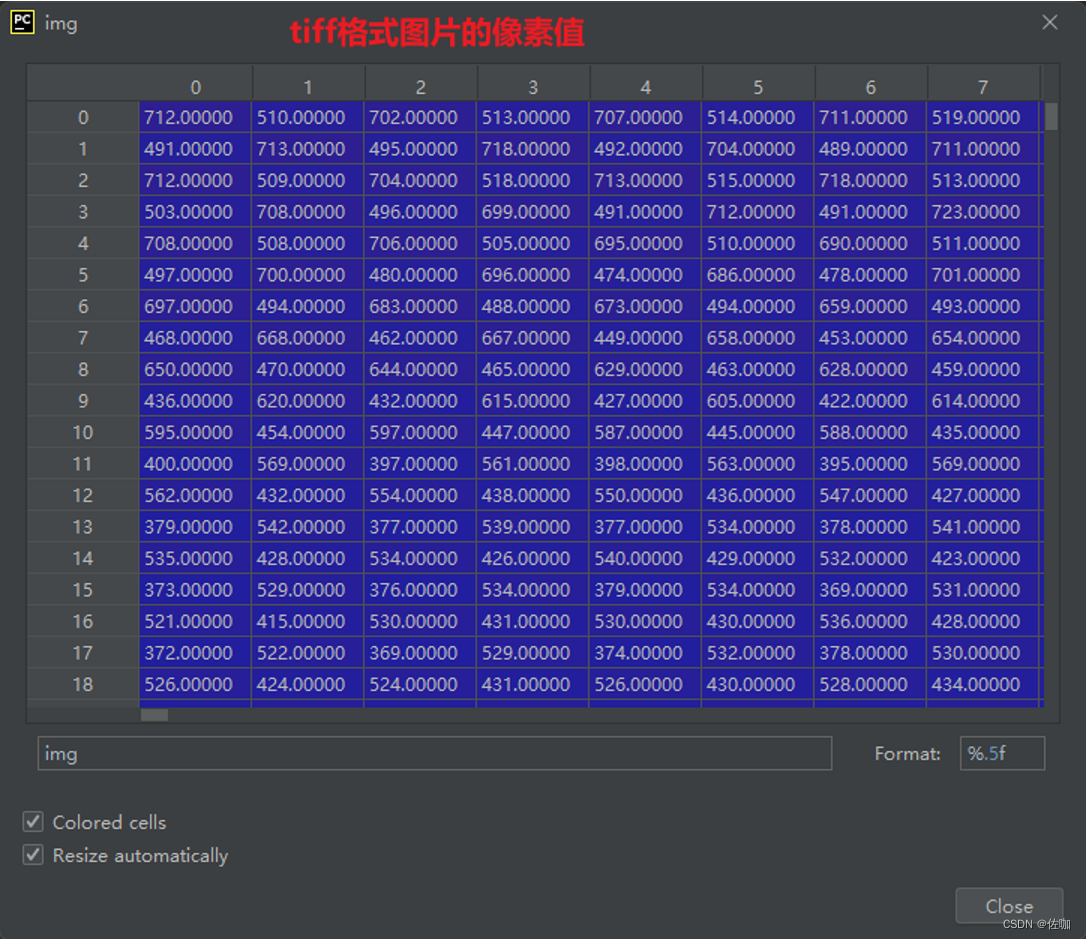
在Windows电脑端直接使用电脑工具打开.tiff格式图片,只看得到白色,这是因为.tiff格式的图片像素值超过255了,显示时都被强制转为了255显示,随便挑一副.tiff格式图片及查看像素值,如下:

为了直观查看图片中内容,需要转换为显示器能正常显示了png,jpg,bmp等可视化显示。
二、tiff转png,jpg代码
2.1 代码环境准备
使用此代码需要在Pytorch环境中才能正常运行,Pytorch的安装参考博文:Pytorch安装,Pytorch官网链接为:Pytorch官网安装
我自己的Pytorch版本及Python版本号参考如下:

2.2 代码参数修改
学者使用代码时只需修改图片路径和保存图片的路径即可。
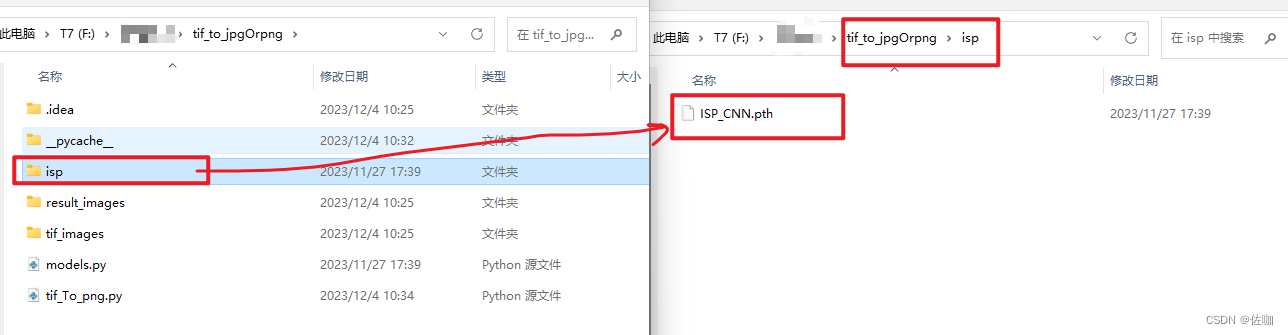
2.3 权重文件
在我提供的源码包中权重文件,具体位置如下,在isp文件中:
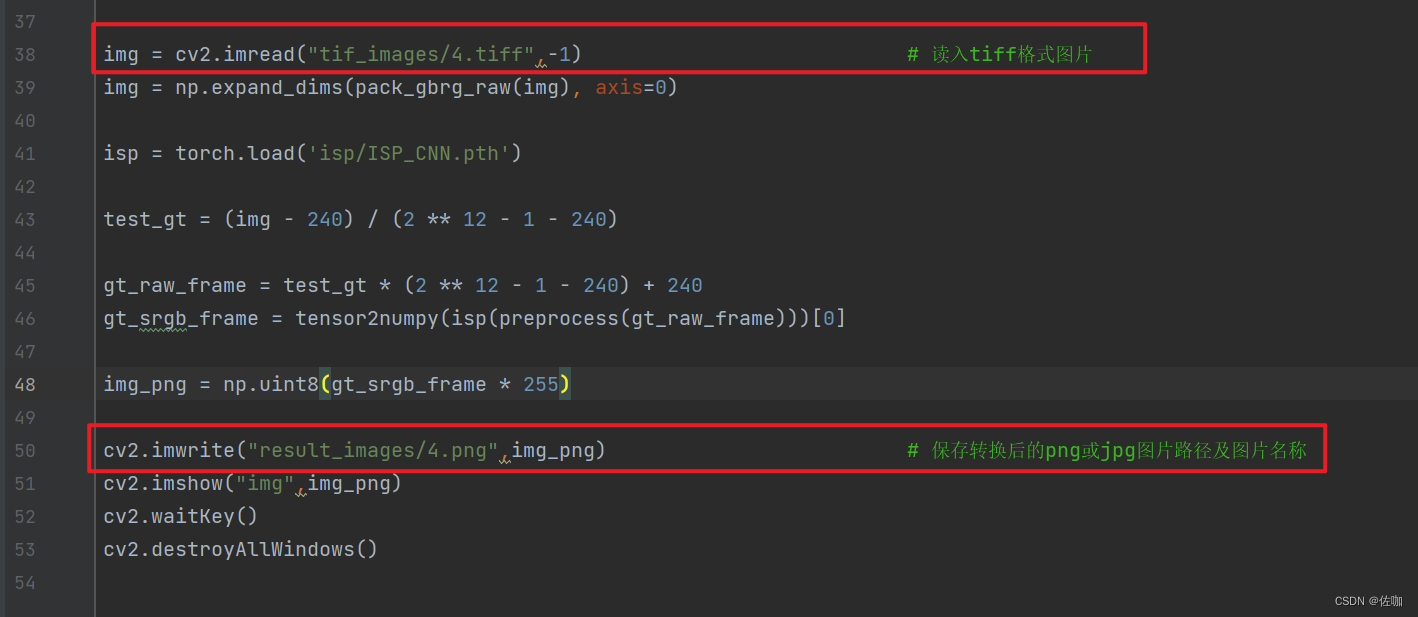
2.4 单帧转换代码
下面是tiff转换png格式的完整代码,该代码就是我提供的源码包中的tif_To_png.py文件。
import cv2
import numpy as np
import torch

def pack_gbrg_raw(raw):                                               # 定义一个名为pack_gbrg_raw的函数,它接受一个参数raw,这个参数是一个GBRG格式的Bayer原始图像
    #pack GBRG Bayer raw to 4 channels
    black_level = 240                                                 # 定义黑色和白色的级别。这两个值用于后续的图像归一化。
    white_level = 2**12-1
    im = raw.astype(np.float32)                                       # 将输入的原始图像转换为浮点数类型
    im = np.maximum(im - black_level, 0) / (white_level-black_level)  # 对图像进行归一化处理,使其值在0到1之间

    im = np.expand_dims(im, axis=2)                                   # 在第三个维度(即通道维度)上为图像增加一个维度。
    img_shape = im.shape
    H = img_shape[0]                                                  # 获取图像的形状,并将高度和宽度分别存储在H和W中。
    W = img_shape[1]

    out = np.concatenate((im[1:H:2, 0:W:2, :],          # r           # 将图像的四个通道(R,Gr,B,Gb)沿着第三个维度(即通道维度)进行拼接。
                          im[1:H:2, 1:W:2, :],          # gr
                          im[0:H:2, 1:W:2, :],          # b
                          im[0:H:2, 0:W:2, :]), axis=2) # gb
    return out

def tensor2numpy(raw):  # raw: 1 * 4 * H * W
    input_full = raw.permute((0, 2, 3, 1))   # 1 * H * W * 4
    input_full = input_full.data.cpu().numpy()
    output = np.clip(input_full,0,1)
    return output

def preprocess(raw):
    input_full = raw.transpose((0, 3, 1, 2))
    input_full = torch.from_numpy(input_full)
    input_full = input_full.cuda()
    return input_full


img = cv2.imread("tif_images/4.tiff",-1)                           # 读入tiff格式图片
img = np.expand_dims(pack_gbrg_raw(img), axis=0)

isp = torch.load('isp/ISP_CNN.pth')

test_gt = (img - 240) / (2 ** 12 - 1 - 240)

gt_raw_frame = test_gt * (2 ** 12 - 1 - 240) + 240
gt_srgb_frame = tensor2numpy(isp(preprocess(gt_raw_frame)))[0]

img_png = np.uint8(gt_srgb_frame * 255)

cv2.imwrite("result_images/4.png",img_png)                         # 保存转换后的png或jpg图片路径及图片名称
cv2.imshow("img",img_png)
cv2.waitKey()
cv2.destroyAllWindows()
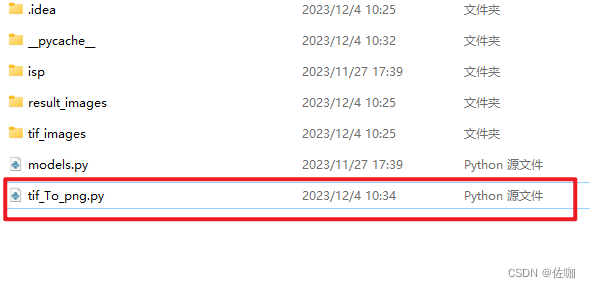
想要正常运行上面代码,还需要一个脚本文件models.py,该代码我放在了源码包中,学者自行下载使用。
2.4.1 源码包下载
源码包的下载链接为:源码包,提取码:5kh2
源码包中我提供了5张.tiff格式的测试图片,在tif_images文件夹中,如下:
2.5 批量多帧转换代码
学者使用下面代码,只需要修改两个地方即可,见下:


import cv2
import numpy as np
import torch
import os
import sys

def pack_gbrg_raw(raw):                                               # 定义一个名为pack_gbrg_raw的函数,它接受一个参数raw,这个参数是一个GBRG格式的Bayer原始图像
    #pack GBRG Bayer raw to 4 channels
    black_level = 240                                                 # 定义黑色和白色的级别。这两个值用于后续的图像归一化。
    white_level = 2**12-1
    im = raw.astype(np.float32)                                       # 将输入的原始图像转换为浮点数类型
    im = np.maximum(im - black_level, 0) / (white_level-black_level)  # 对图像进行归一化处理,使其值在0到1之间

    im = np.expand_dims(im, axis=2)                                   # 在第三个维度(即通道维度)上为图像增加一个维度。
    img_shape = im.shape
    H = img_shape[0]                                                  # 获取图像的形状,并将高度和宽度分别存储在H和W中。
    W = img_shape[1]

    out = np.concatenate((im[1:H:2, 0:W:2, :],          # r           # 将图像的四个通道(R,Gr,B,Gb)沿着第三个维度(即通道维度)进行拼接。
                          im[1:H:2, 1:W:2, :],          # gr
                          im[0:H:2, 1:W:2, :],          # b
                          im[0:H:2, 0:W:2, :]), axis=2) # gb
    return out

def tensor2numpy(raw):  # raw: 1 * 4 * H * W
    input_full = raw.permute((0, 2, 3, 1))   # 1 * H * W * 4
    input_full = input_full.data.cpu().numpy()
    output = np.clip(input_full,0,1)
    return output

def preprocess(raw):
    input_full = raw.transpose((0, 3, 1, 2))
    input_full = torch.from_numpy(input_full)
    input_full = input_full.cuda()
    return input_full

img_path = "CRVD_dataset/indoor_raw_noisy/indoor_raw_noisy_scene7/scene7/ISO1600"                        # tiff格式图片路径
save_path = "CRVD_dataset/indoor_raw_noisy/indoor_raw_noisy_scene7/scene7/ISO1600_png"                   # 转换后的保存路径

file = os.listdir(path=img_path)

for item in file:
    img = cv2.imread(os.path.join(img_path,item),-1)

    img = np.expand_dims(pack_gbrg_raw(img), axis=0)

    isp = torch.load('isp/ISP_CNN.pth')
    test_gt = (img - 240) / (2 ** 12 - 1 - 240)                   # 计算地面真实图像的标准化值
    gt_raw_frame = test_gt * (2 ** 12 - 1 - 240) + 240            # 计算输出的最终值
    gt_srgb_frame = tensor2numpy(isp(preprocess(gt_raw_frame)))[0]   # 将预处理后的图像转换为sRGB格式

    img_png = np.uint8(gt_srgb_frame * 255)


    out_file = item[:-5] + ".png"
    print('图片{}转换为png成功!'.format(item))

    cv2.imwrite(os.path.join(save_path,out_file), img_png)

    key = cv2.waitKey(30) & 0xff
    if key == 27:
        sys.exit(0)
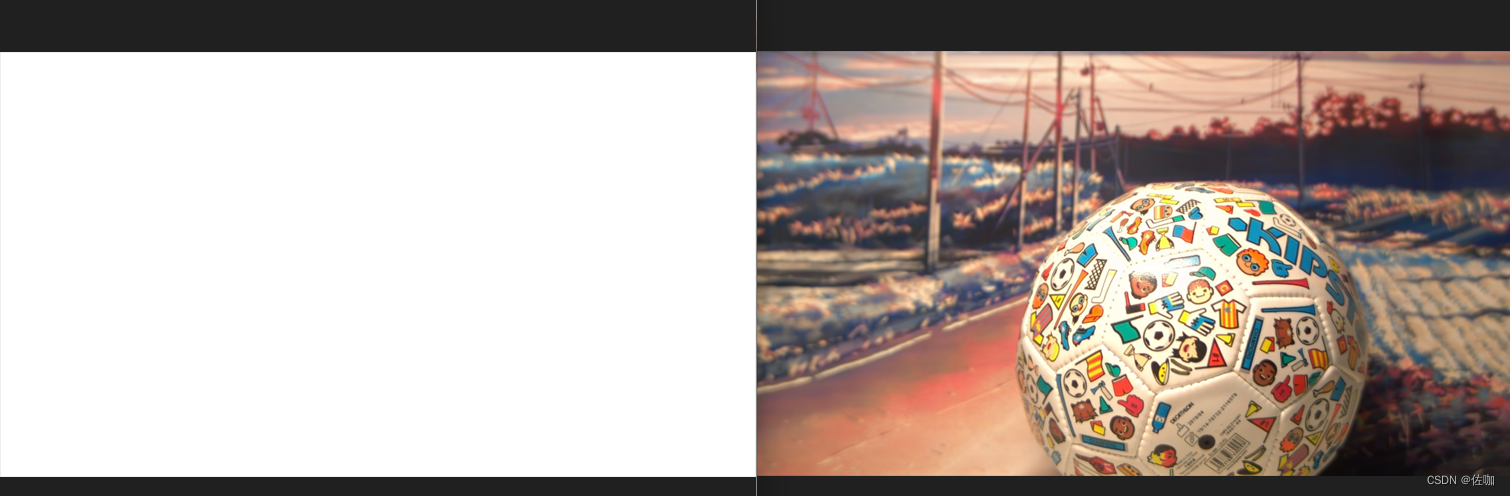
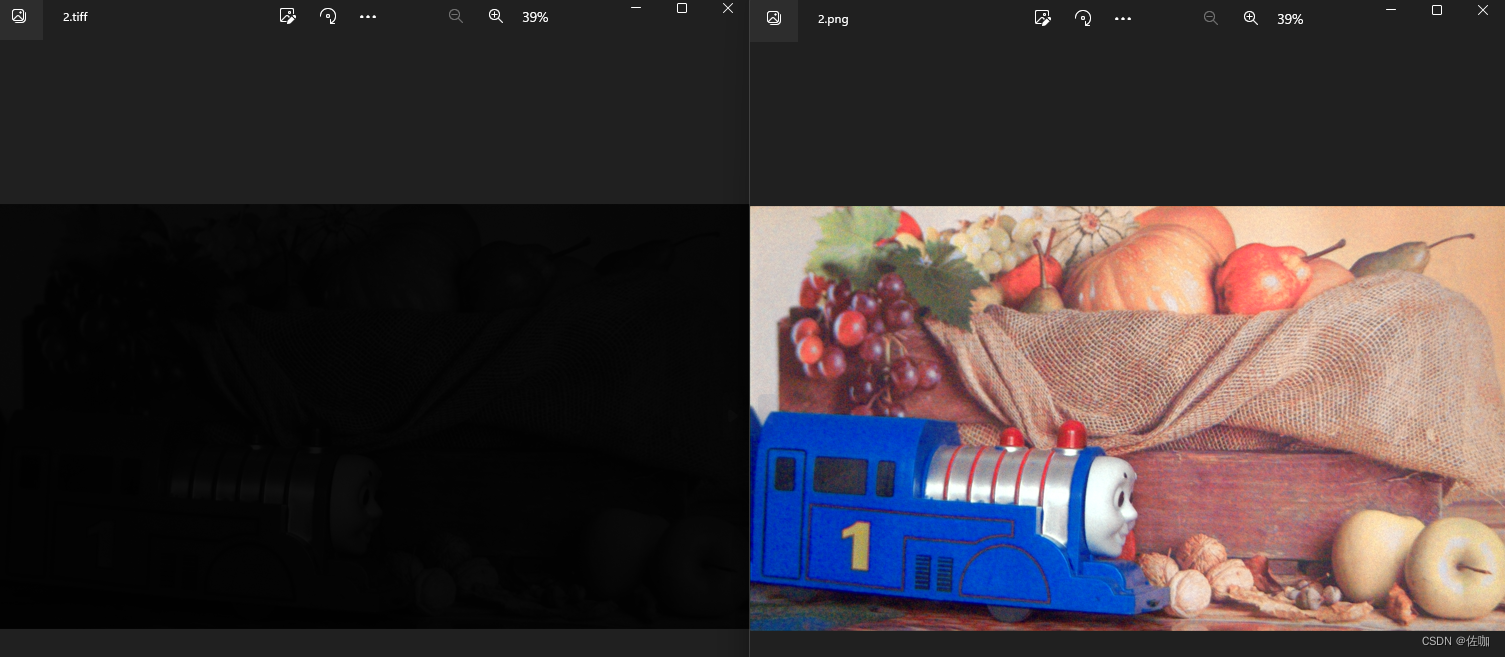
三、转换效果
3.1 转换测试场景1
3.2 转换测试场景2
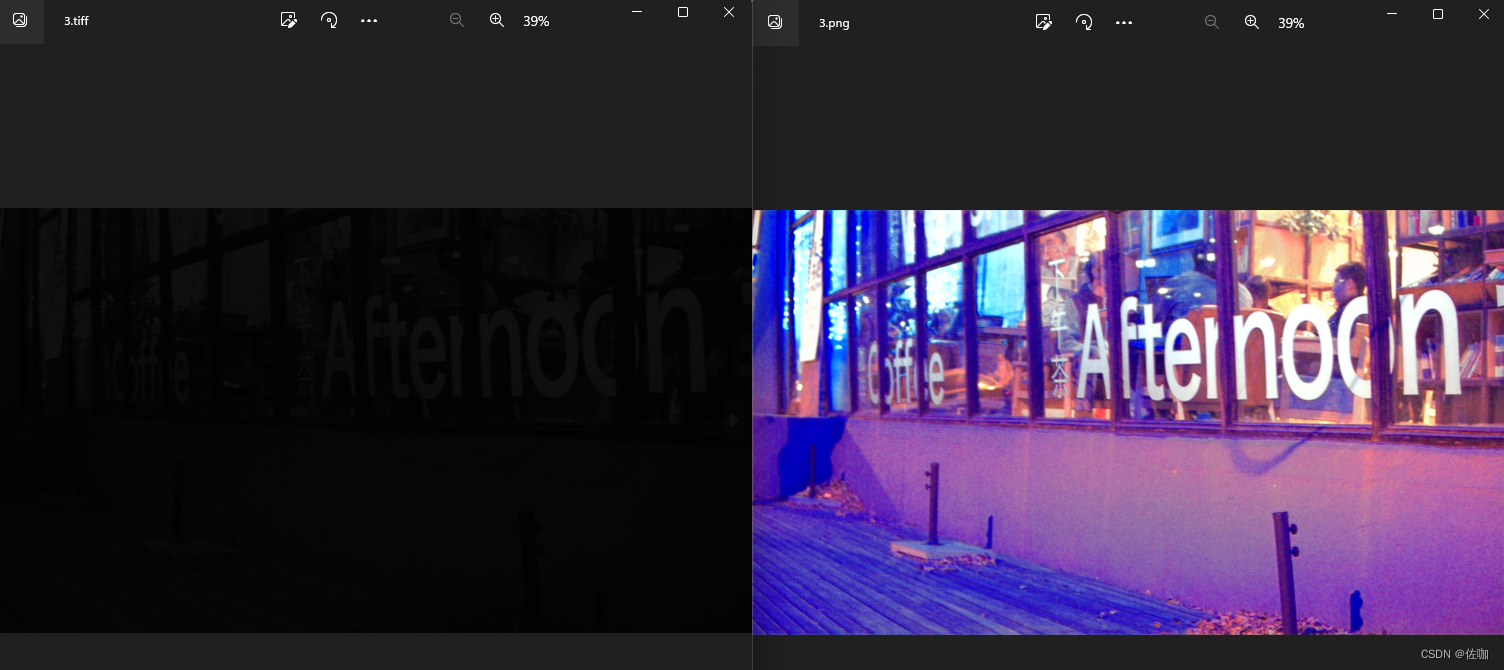
3.3 转换测试场景3
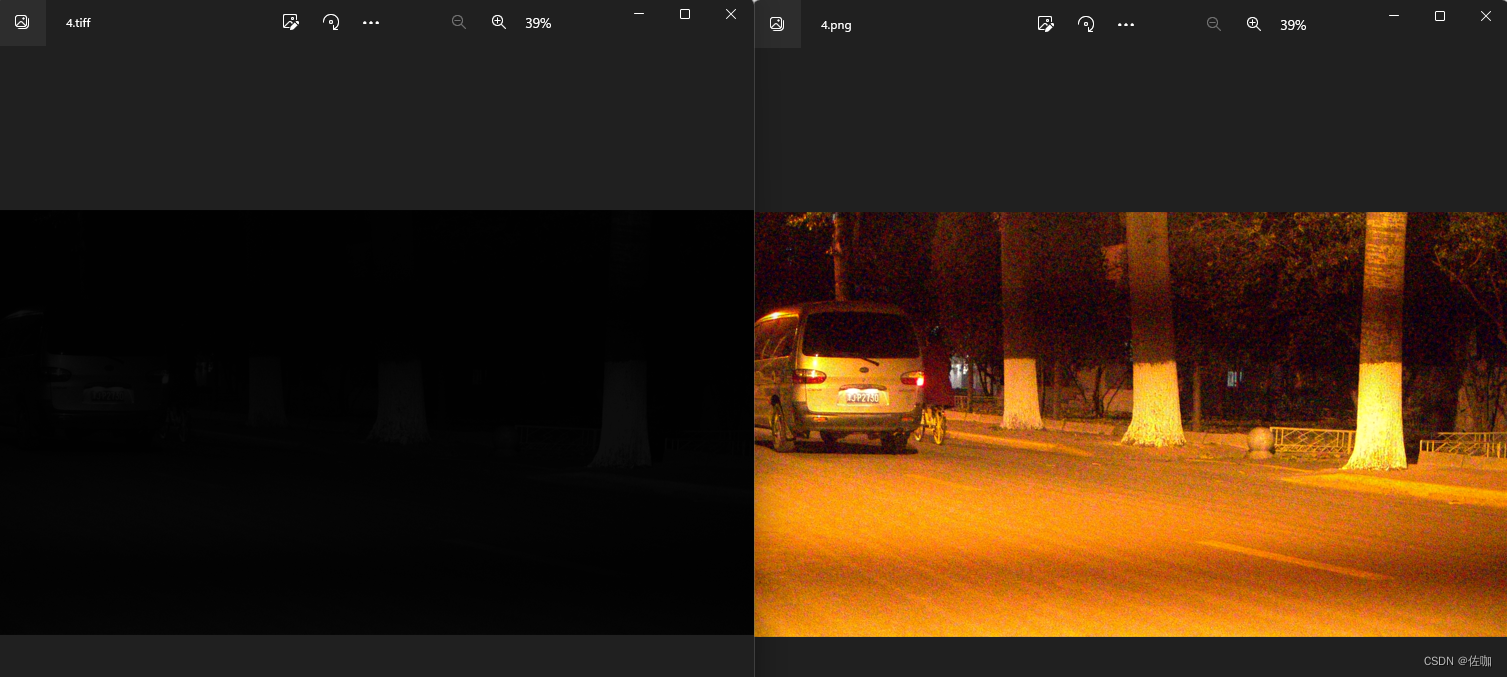
3.4 转换测试场景4
该场景下,原始的.tiff图像就是噪声图。
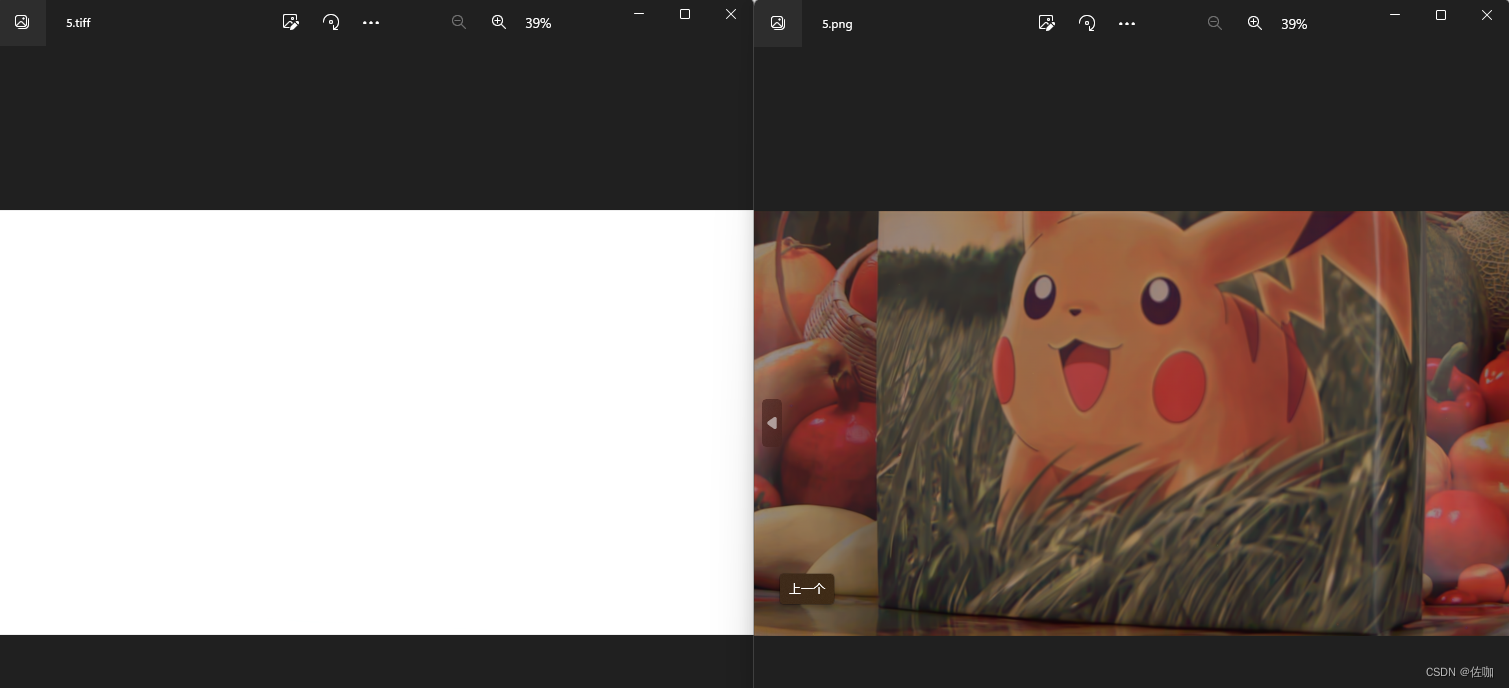
3.5 转换测试场景5
3.6 批量转换效果
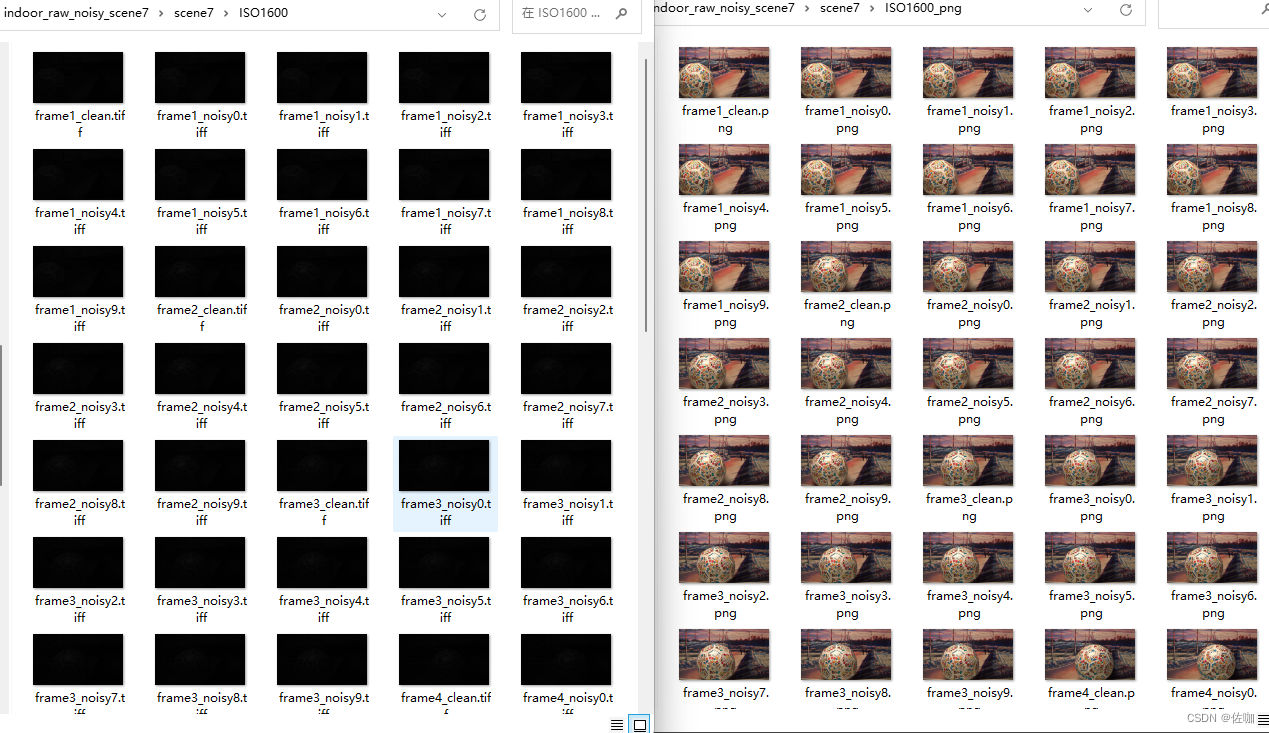
通过以上多场景测试,可以看到能够正常的转换回原始的色彩,图像细节都在。
四、总结
以上就是将.tiff格式图片转换为可视化的png,jpg,bmp等格式的完整过程,在我提供的示例代码中主要是将.tiff格式图片转为.png格式,学者如果想转为其它格式的图片,只需要在保存图片时修改后缀即可。
我上面测试的四个场景中,有的图片有噪声不是转换后才有的,是原始的.tiff格式就是噪声图,不用担心转换后改变原始图像细节。
总结不易,多多支持,谢谢!