目标
通过实现一个简单的功能:点击一个按钮后,展现当前时间,从而初步了解前后端交互
后端:实现获取时间接口
前端:实现按钮并调用后端接口,展示接口返回数据
1. 技术栈
后端:Java+Springboot+Maven
前端:Vue+axios+proxy
编辑器:Visual Studio Code
2. 后端实现
-
JDK21, Windows 具体安装
-
Spring Initializr ](https://start.spring.io/;)是一个用于生成 Spring Boot 项目的在线工具,帮助你快速初始化和配置 Spring Boot 应用程序的基本结构
-
在Spring Initializr 里选择好jdk后,点击下载一个demo压缩包,解压后,打开,一个Spring Boot项目就新建好了
-
下载项目构建工具, Maven ,windows下载Binary zip archive就可以
确认Maven是否下载
mvn -version
代码部分
在src/main/java/com/example/demo里修改默认java文件,实现获取现在接口,记得在pom.xml里添加相关依赖
package com.example.demo;

import java.text.SimpleDateFormat;
import java.util.Date;

import org.springframework.boot.SpringApplication;
import org.springframework.boot.autoconfigure.SpringBootApplication;
import org.springframework.web.bind.annotation.GetMapping;
import org.springframework.web.bind.annotation.RestController;

@SpringBootApplication
public class BTimeApplication {


	public static void main(String[] args) {


		SpringApplication.run(BTimeApplication.class, args);
	}

}

@RestController
class TimeController {


    @GetMapping("/api/current-time")
    public String getCurrentTime() {


        SimpleDateFormat sdf = new SimpleDateFormat("yyyy-MM-dd HH:mm:ss");
        return "Current time: " + sdf.format(new Date());
    }
}
运行
根目录下编译项目并构建可执行的jar文件
mvn clean install
target目录下,运行 Spring Boot 应用程序
java -jar your-application.jar
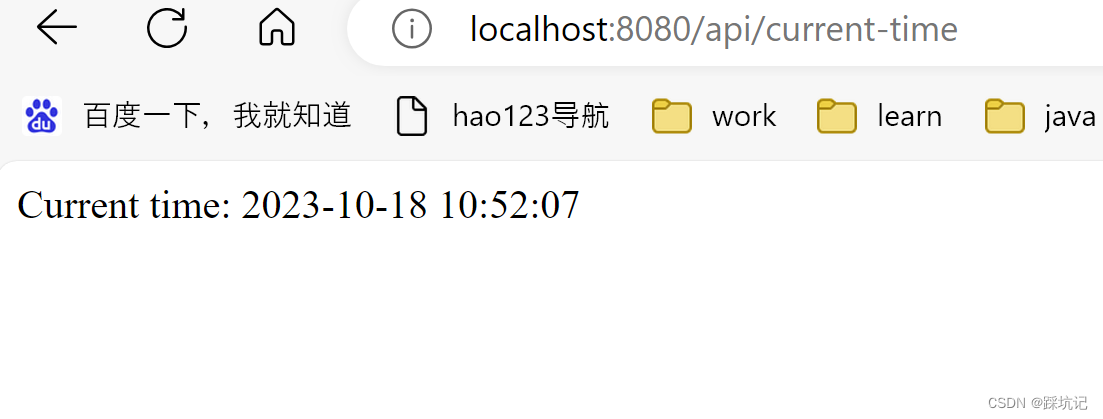
打开http://localhost:8080/api/current-time,即可看到当前时间
3. 前端实现
-
下载node , 查看是否存在node
node -v -
安装 Vue CLI
npm install -g @vue/cli -
使用Vue的axios或fetch API等进行网络请求
npm install axios -
创建一个新的 Vue 项目
vue create my-vue-app -
默认选择vue3
? Please pick a preset: (Use arrow keys)
Default ([Vue 3] babel, eslint)
Default ([Vue 2] babel, eslint)
Manually select features
代码部分
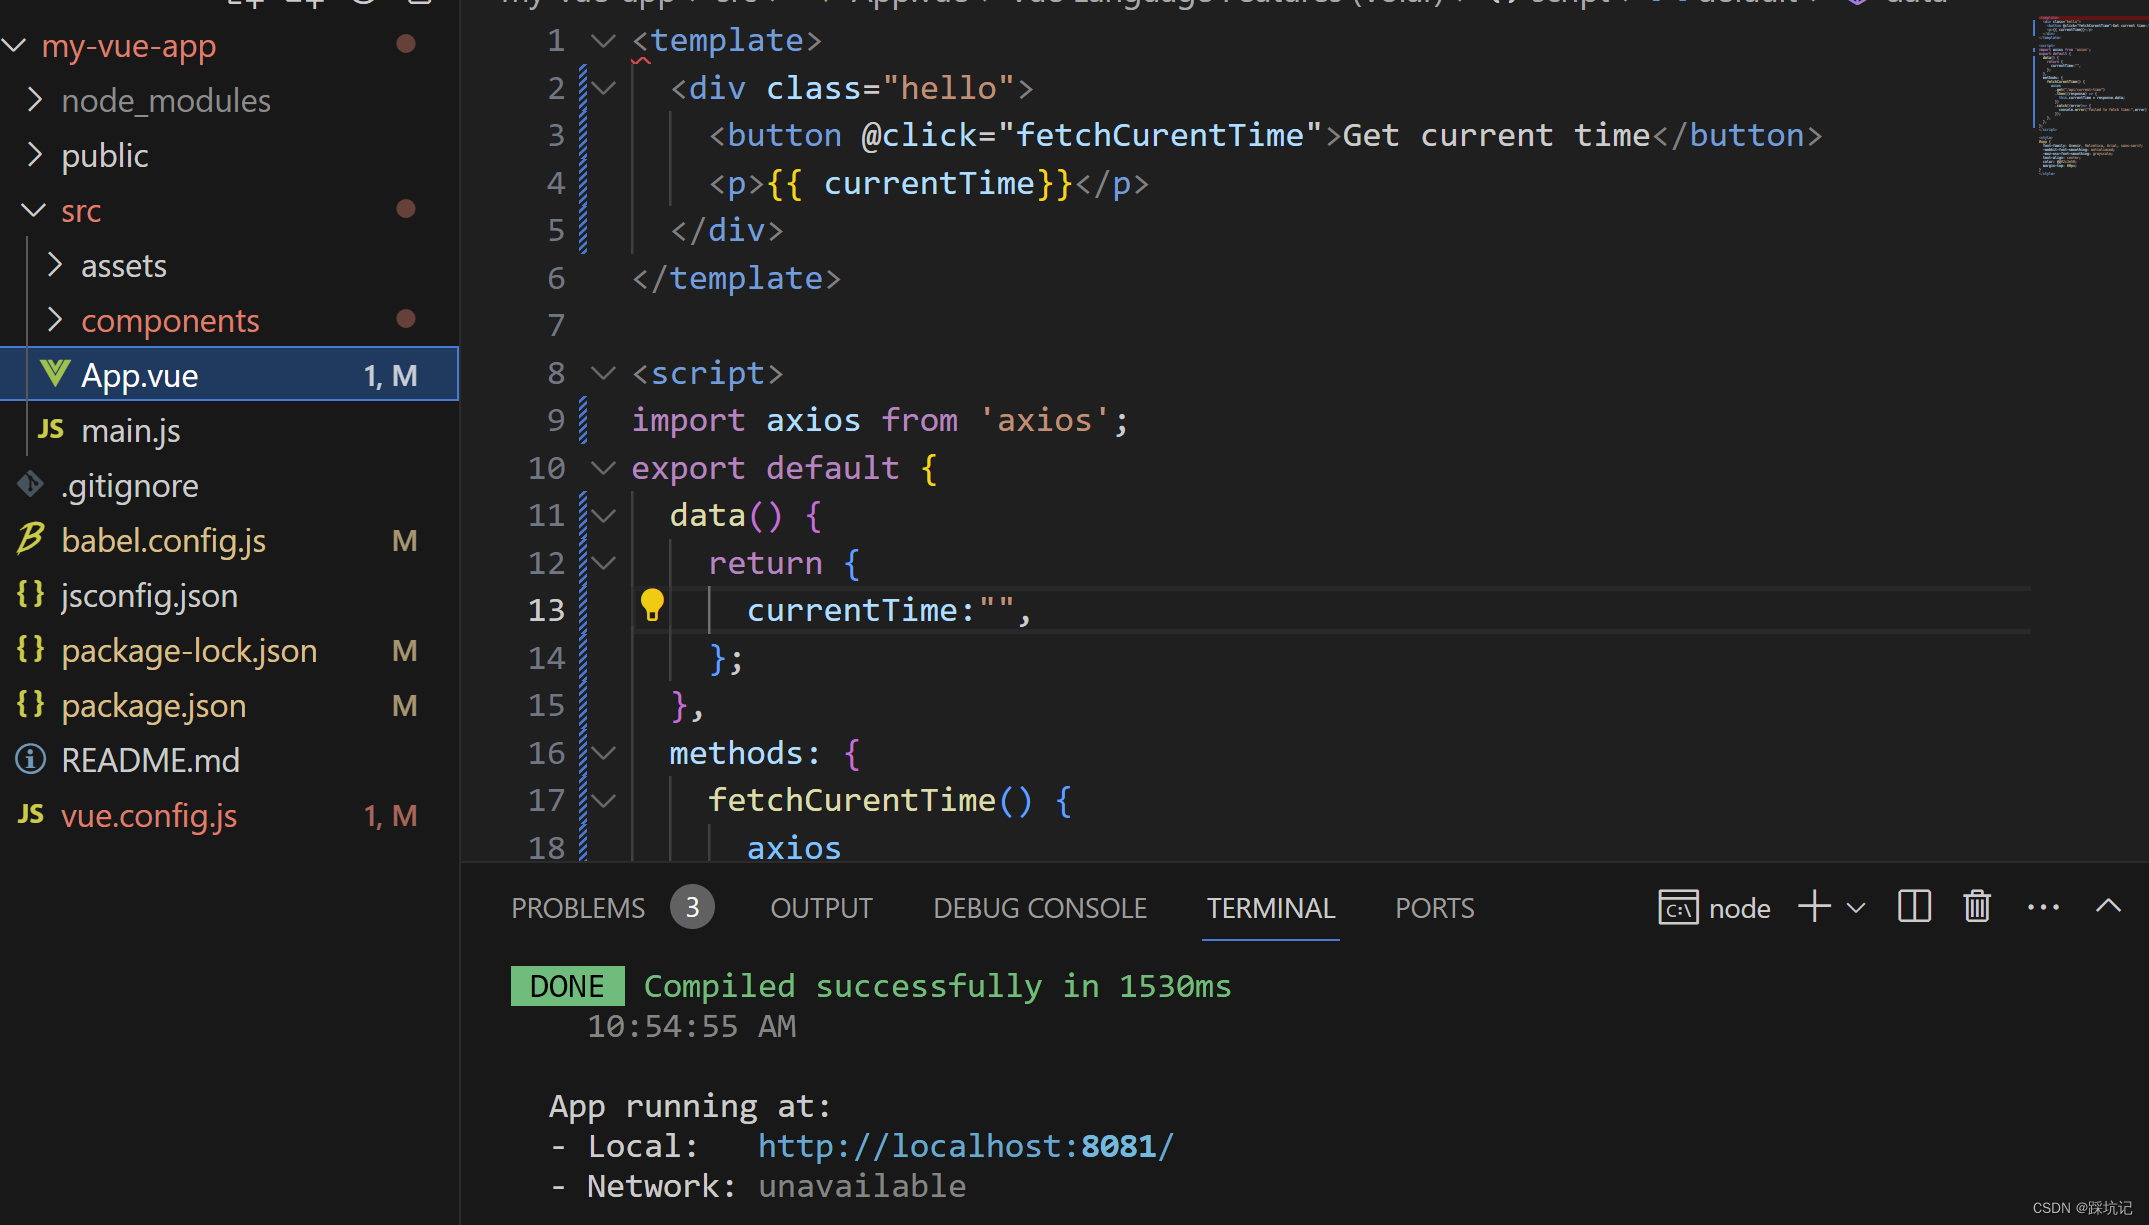
my-vue-app/src/App.vue替换下述代码
<template>
  <div class="hello">
    <button @click="fetchCurentTime">Get current time</button>
    <p>{

    {

     currentTime}}</p>
  </div>
</template>

<script>
import axios from 'axios';
export default {


  data() {


    return {


      currentTime:"",
    };
  },
  methods: {


    fetchCurentTime() {


      axios
        .get("/api/current-time")
        .then((response) => {


          this.currentTime = response.data;
        })
        .catch((error)=> {


          console.error("Failed to fetch time:",error)
        });
    },
  },
};
</script>

<style>
#app {


  font-family: Avenir, Helvetica, Arial, sans-serif;
  -webkit-font-smoothing: antialiased;
  -moz-osx-font-smoothing: grayscale;
  text-align: center;
  color: #2c3e50;
  margin-top: 60px;
}
</style>
运行
进入项目目录
cd my-vue-app
运行开发服务器
npm run serve
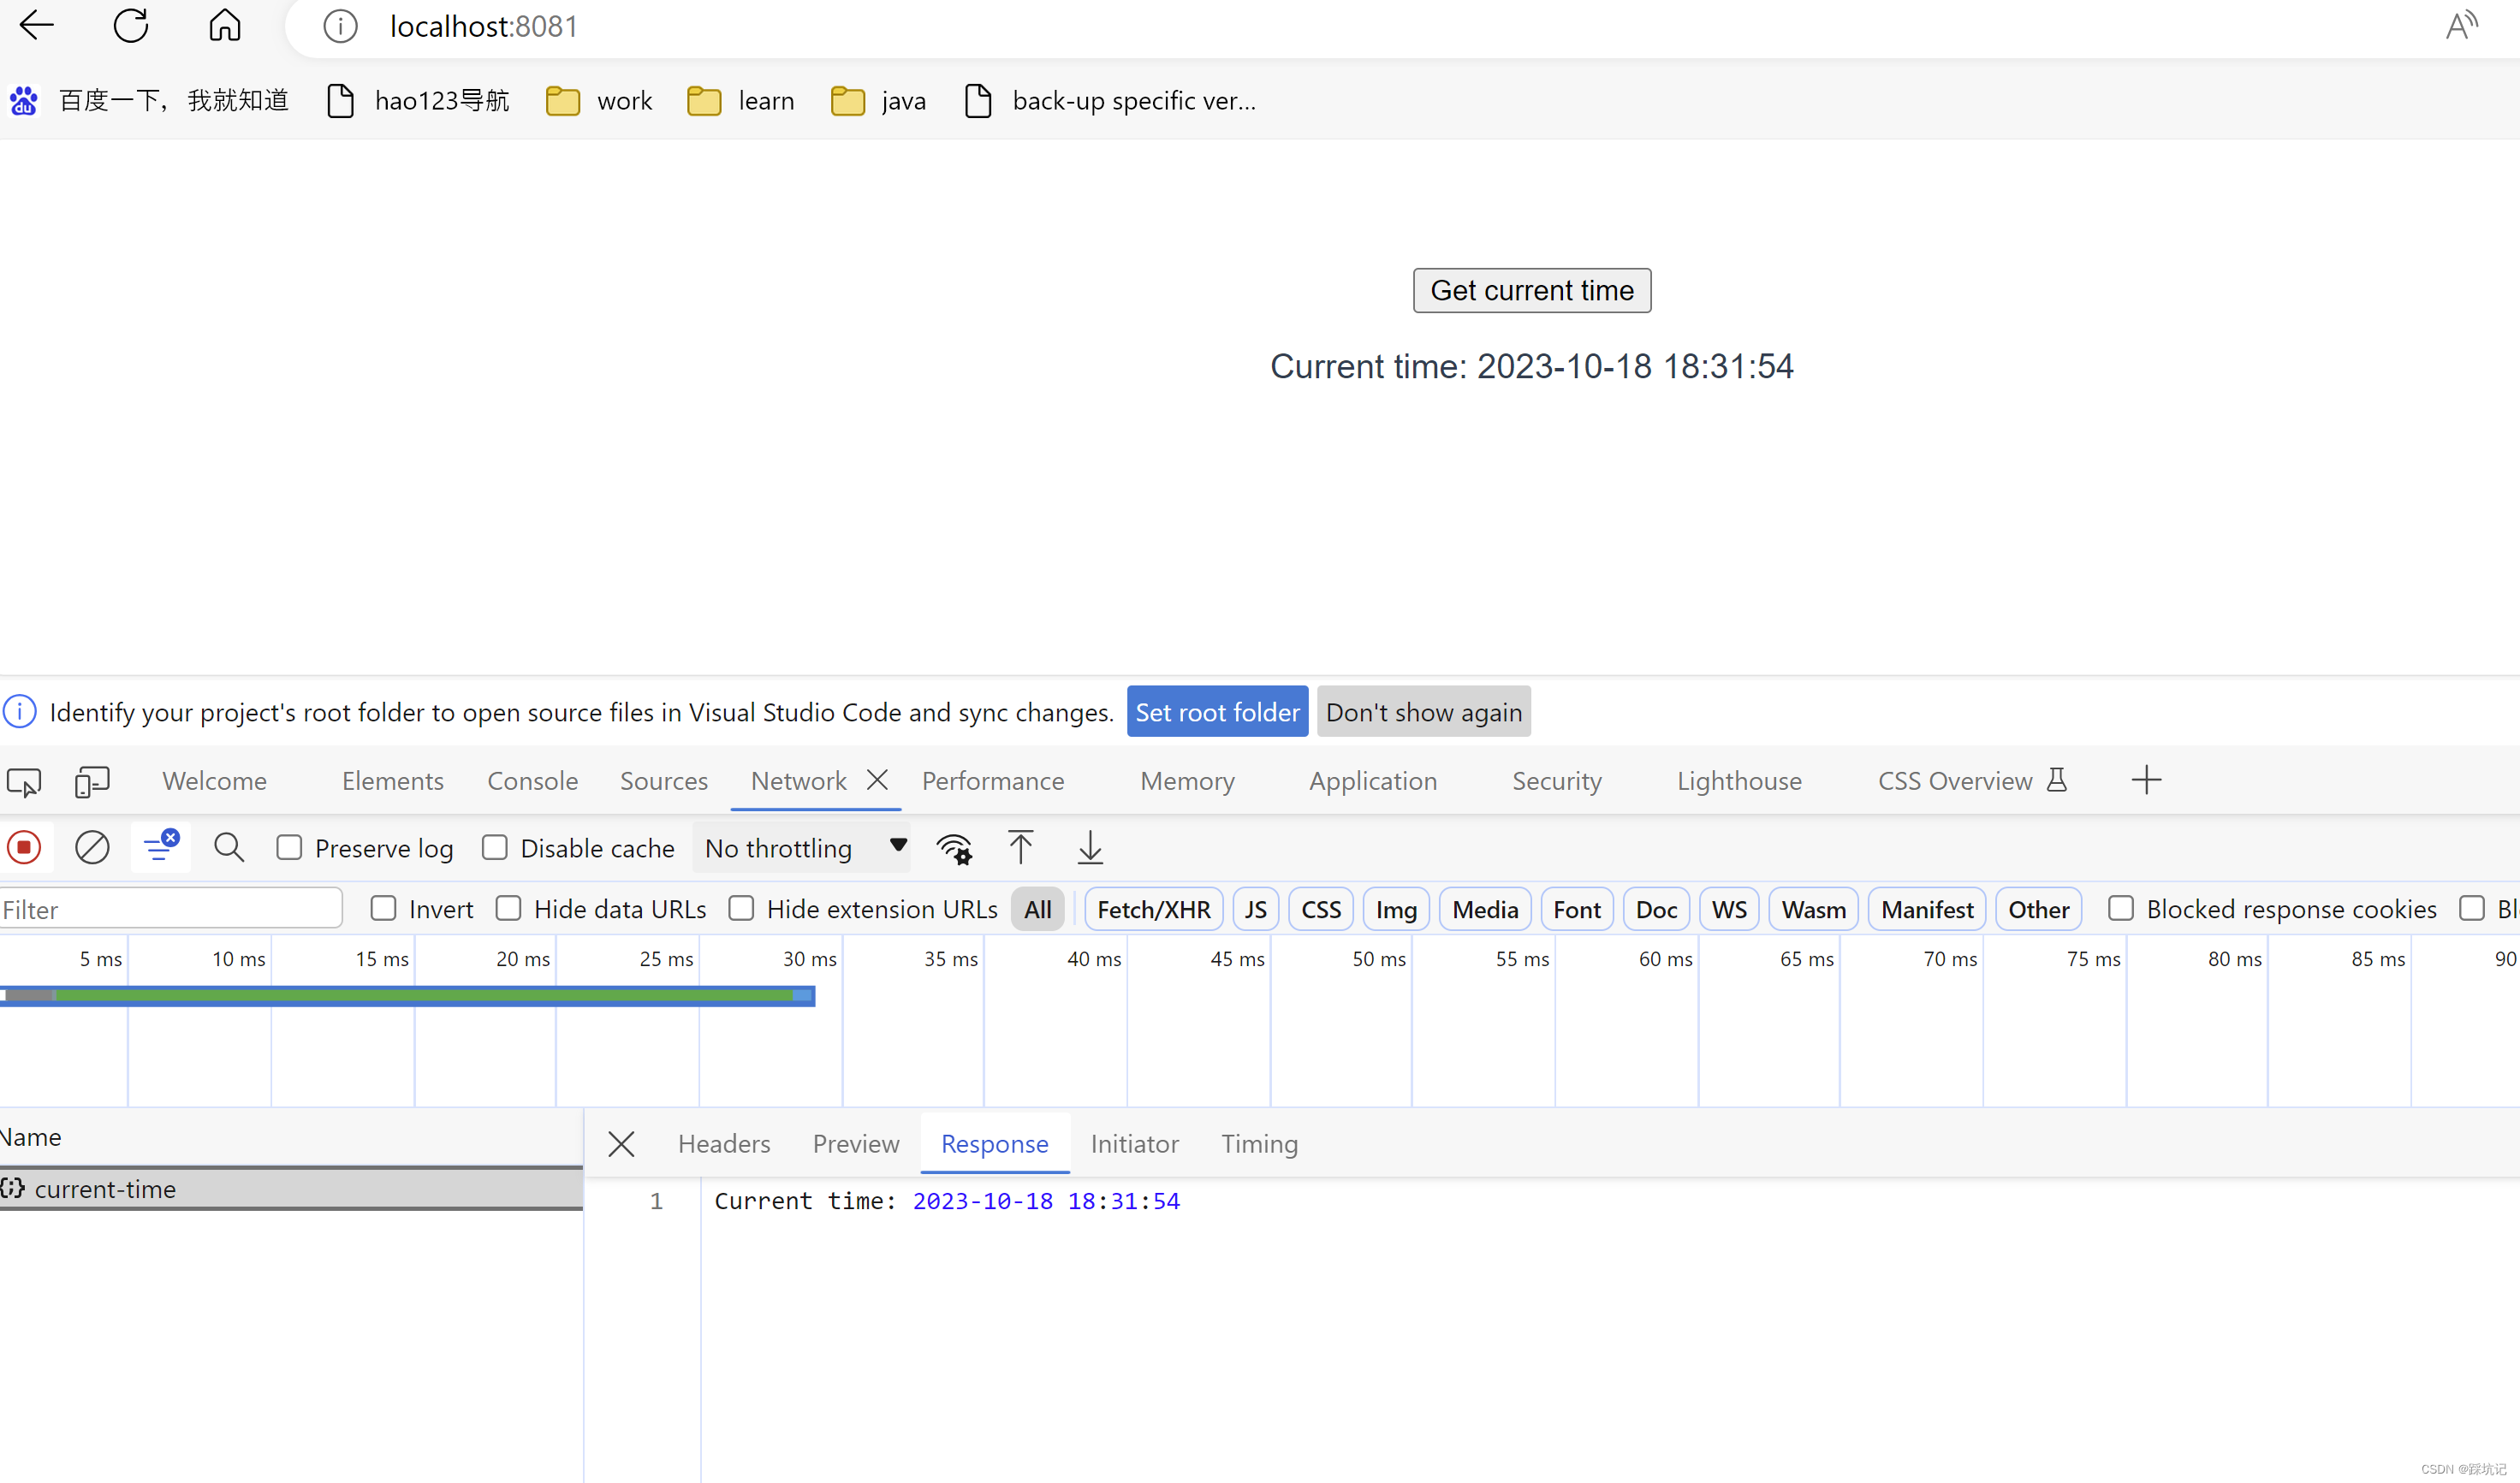
打开http://localhost:8081/,如下图
4. 问题
-
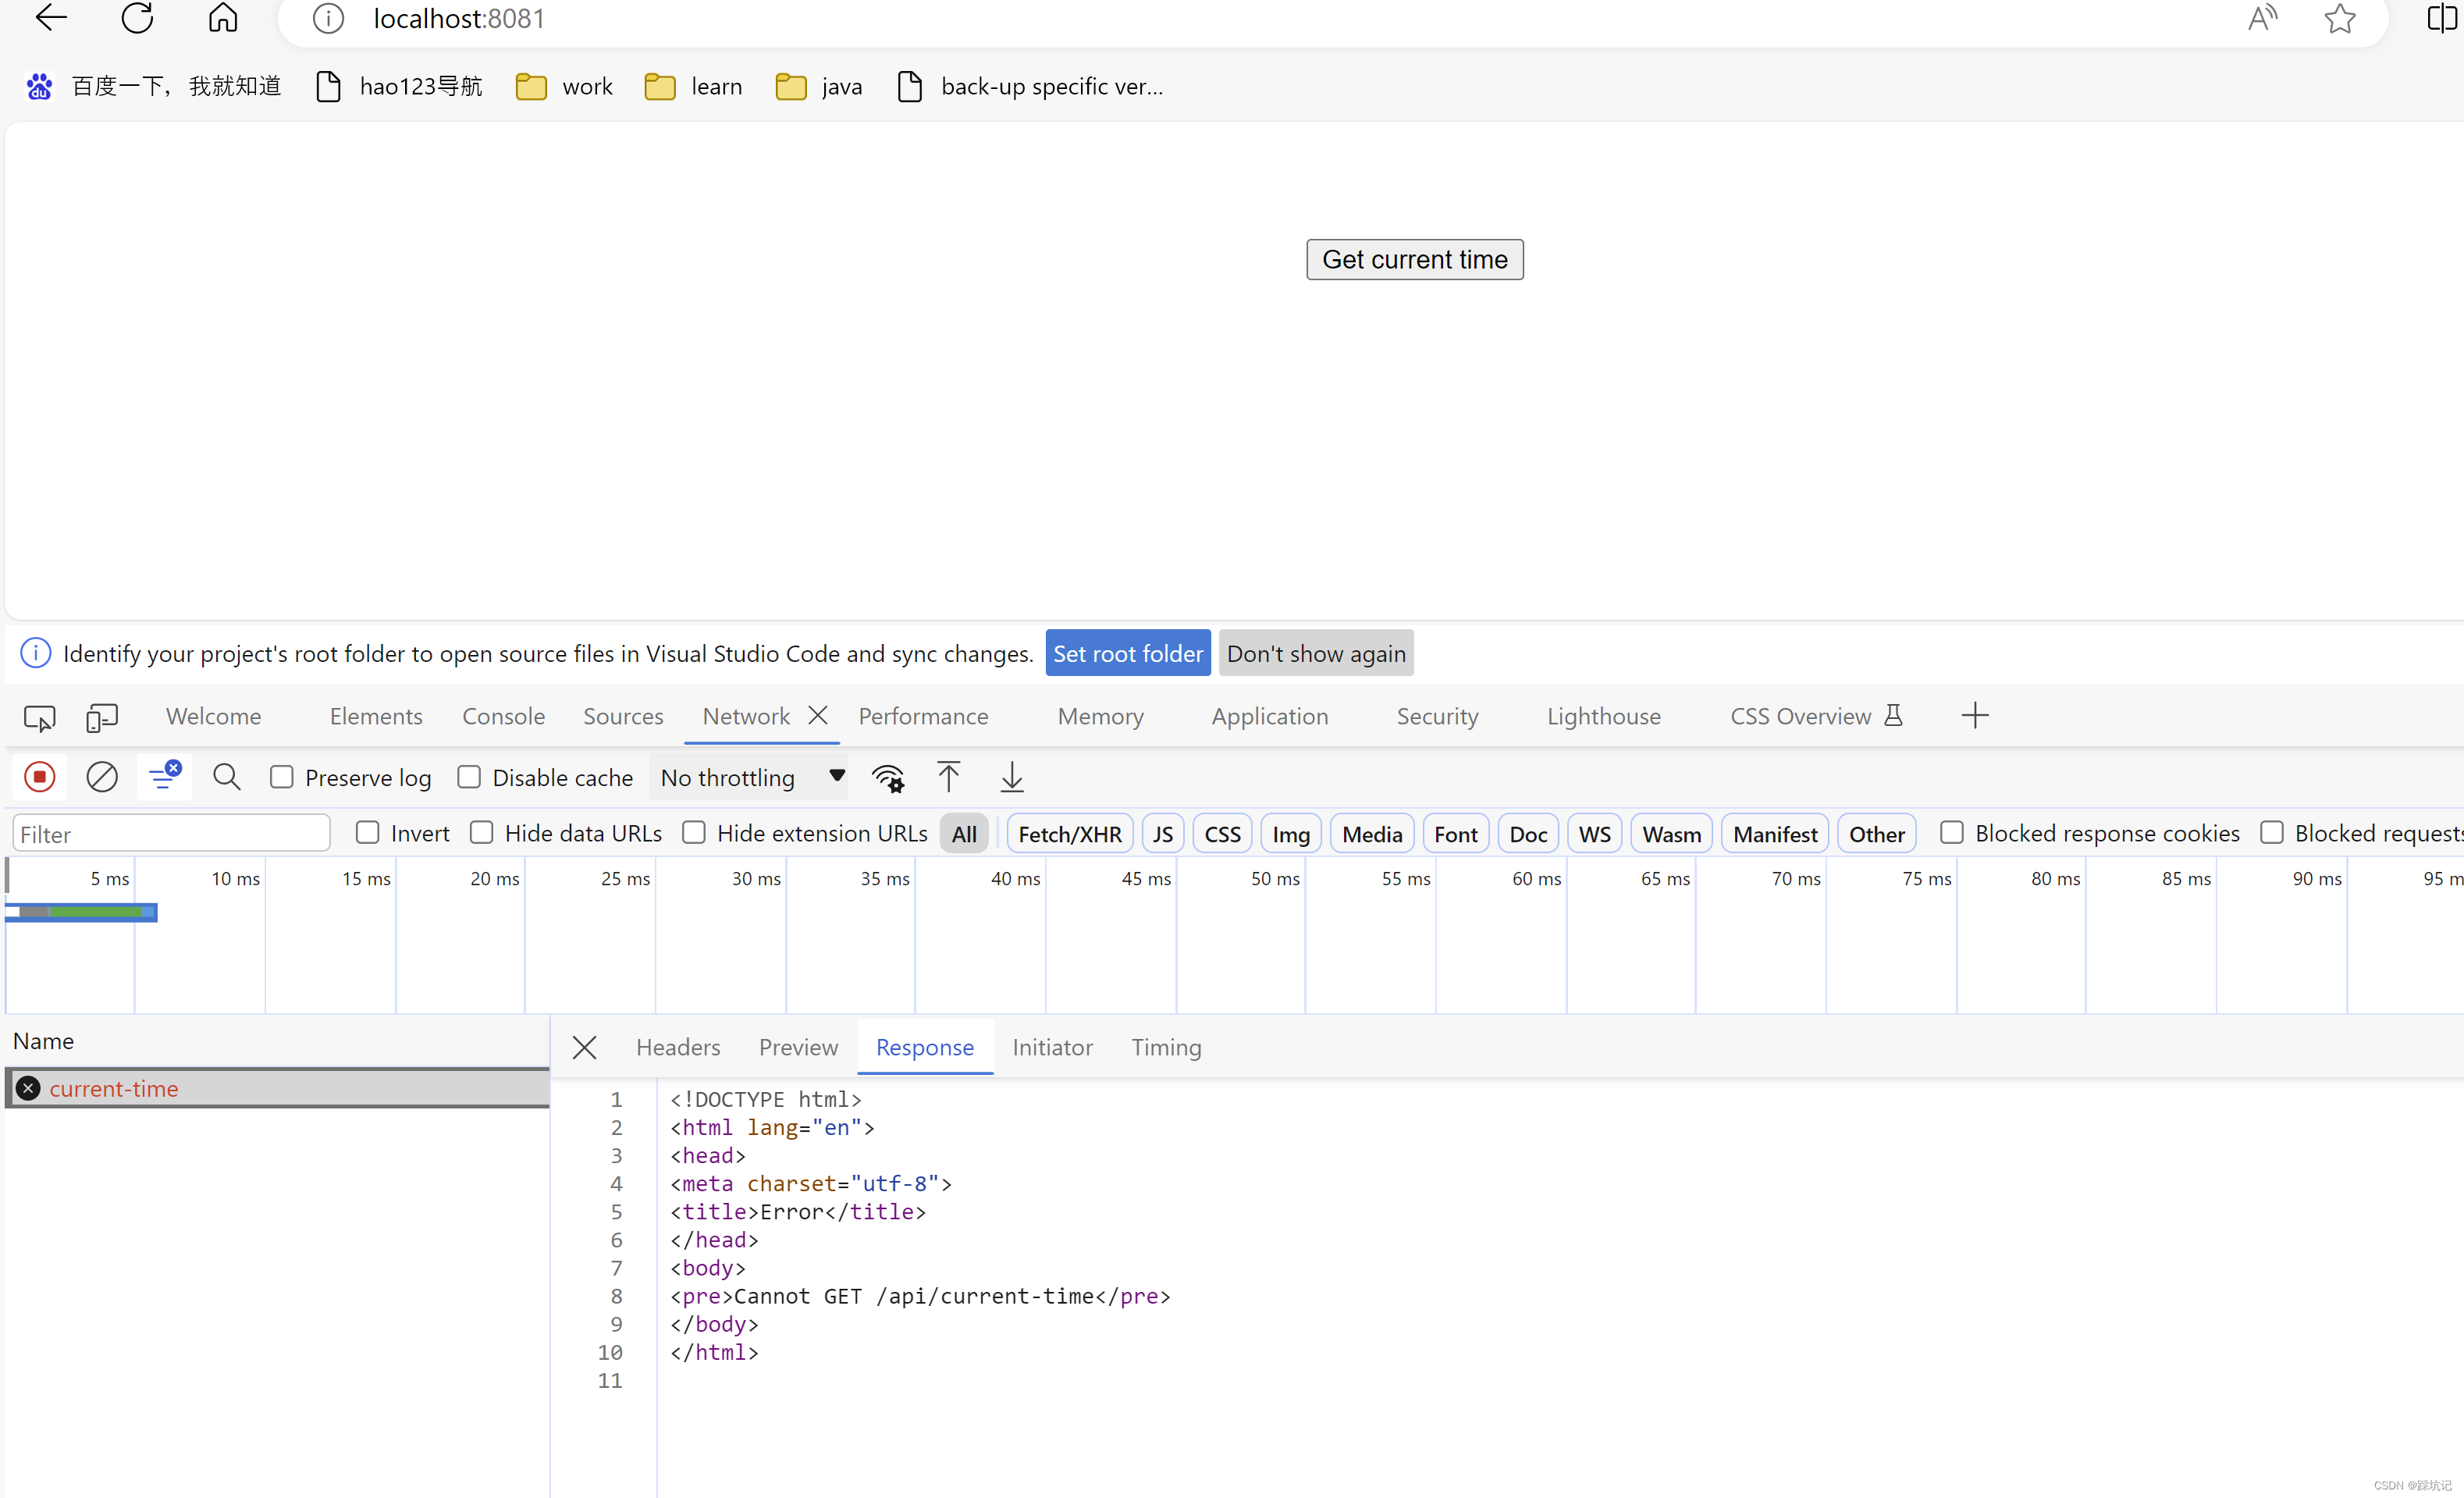
虽然vue默认端口也是8080,但由于后端服务占用了8080,vue会默认端口自增1,所以我们看到运行完开发服务器后,显示8081
-
打开前端网页后,我们发现接口调用失败,这就是常说的跨域问题,跨域问题有3种(域名,端口,协议),此处是前后端服务端口不一致导致的跨域问题,我们可以在前端添加代理解决,,
将所有以 /api 开头的请求代理到这个target地址在vue.config.js文件里添加以下代码
devServer: {


    proxy: {


      '/api': {


        target: 'http://localhost:8080', // 后端服务的地址
        ws: true,
        changeOrigin: true
      }
    }
  }
再重新运行,即可得到预期结果
-
当想在其他机器访问改网站时,需要先知道本机ip地址,一般ipv4即对应localhost
以管理员身份打开cmd, 输入ipconfig,返回的ipv4是我们需要的
利用http://ipv4:8081在其他机器上也可以正常访问网站
5. 总结
通过实现这个小功能,了解到前后端可以根据axios来进行通信,跨域问题可以通过代理或者cors来解决