原版模型测试并导出onnx
paddle 版面分析->
https://github.com/PaddlePaddle/PaddleOCR/blob/release/2.7/ppstructure/layout/README_ch.md
测试
python3 deploy/python/infer.py \
--model_dir=model/picodet_lcnet_x1_0_fgd_layout_cdla_infer/ \
--image_file=image/test.jpg \
--device=CPU
测试结果

修改模型输入为960*960
使用该工具https://github.com/jiangjiajun/PaddleUtils/tree/main/paddle
python paddle_infer_shape.py --model_dir paddle_model/picodet_lcnet_x1_0_fgd_layout_cdla_infer \
--model_filename model.pdmodel \
--params_filename model.pdiparams \
--save_dir ./new_model \
--input_shape_dict="{'image':[1,3,960,960]}"
导出为onnx model
paddle2onnx --model_dir model/picodet_lcnet_x1_0_fgd_layout_cdla_infer \
--model_filename model.pdmodel \
--params_filename model.pdiparams \
--opset_version 11 \
--input_shape_dict="{'image':[1, 3, 960, 960]}" \
--save_file ./onnx_model/pico_det_lcnet_960.onnx
onnx推理
python deploy/third_engine/onnx/infer.py \
--infer_cfg model/picodet_lcnet_x1_0_fgd_layout_cdla_infer/infer_cfg.yml \
--onnx_file onnx_model/pico_det_lcnet.onnx \
--image_file image/test.jpg
Version:0.9 StartHTML:0000000105 EndHTML:0000036175 StartFragment:0000000141 EndFragment:0000036139
c++推理
https://github.com/PaddlePaddle/PaddleDetection/blob/release/2.6/deploy/cpp/docs/linux_build.md
./build/ppocr --layout_model_dir=inference/layout/ \
--image_dir=../../ppstructure/docs/table/DBnet_test.jpg \
--type=structure --table=false --layout=true --det=false --rec=false

板端部署
模型转换onnx->om
1:准备pico_det的onnx模型--->
搭建好ATC的环境--> 海思SS928搭建NNN环境并添加opencv库-CSDN博客
首先设置环境变量
source /home/warren/Ascend/ascend-toolkit/latest/x86_64-linux/bin/setenv.bash
转化模型
量化
atc --model=/home/wzw/00-Ascend/model/pico_det_lcnet/pico_det_lcnet.onnx \
--framework=5 \
--output=/home/wzw/00-Ascend/model/pico_det_lcnet/pico_det_lcnet_quat\
--image_list="image:./image_data.bin" --input_type="image:FP32"
不量化
atc --model=/home/wzw/00-Ascend/model/pico_det_lcnet/pico_det_lcnet.onnx \
--framework=5 \
--output=/home/wzw/00-Ascend/model/pico_det_lcnet/00-result/pico_det_lcnet \
--image_list="image:./image_data.bin" --input_type="image:FP32" \ --net_optimize_enable=0 --layer_fusion_enable=0 --layer_m2m_enable=0
推理代码编写
安装opencv库 Hi3516DV500 SVP_NNN添加opencv库记录-CSDN博客
部署框架代码逻辑

mkdir -p build/intermediates/soc
cd build/intermediates/soc
cmake ../../../src -Dtarget=board -DCMAKE_BUILD_TYPE=Release -DCMAKE_CXX_COMPILER=aarch64-v01c01-linux-gnu-gcc
make

原版模型测试结果

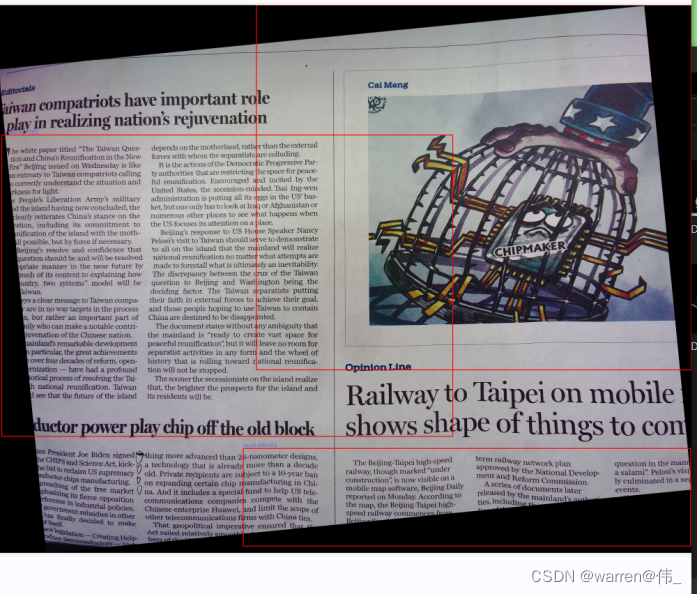
由此可见原始模型对于论文的识别准确度较高,但是对于报纸和杂志的识别并不精确,因此我们需要对其进行重新训练
重新训练模型
参考 https://github.com/PaddlePaddle/PaddleOCR/blob/release/2.7/ppstructure/layout/README_ch.md
默认使用的是PubLayNet数据集,但我们需要使用CLDA
首先准备好数据集 https://github.com/buptlihang/CDLA
因为该数据集的标注格式是labelme,但是训练现需要的是coco格式,使用该项目中的labelme2coco.py进行格式转换,
python3 labelme2coco.py ./train/ train_self --labels labels.txt
python3 labelme2coco.py ./val val_self --labels labels.txt
错误一
但是这里的label text有12个类,这样会导致超出索引的错误导致训练失败,因此我们需要改一下labels.txt;


但是直接更改会报如下错误错
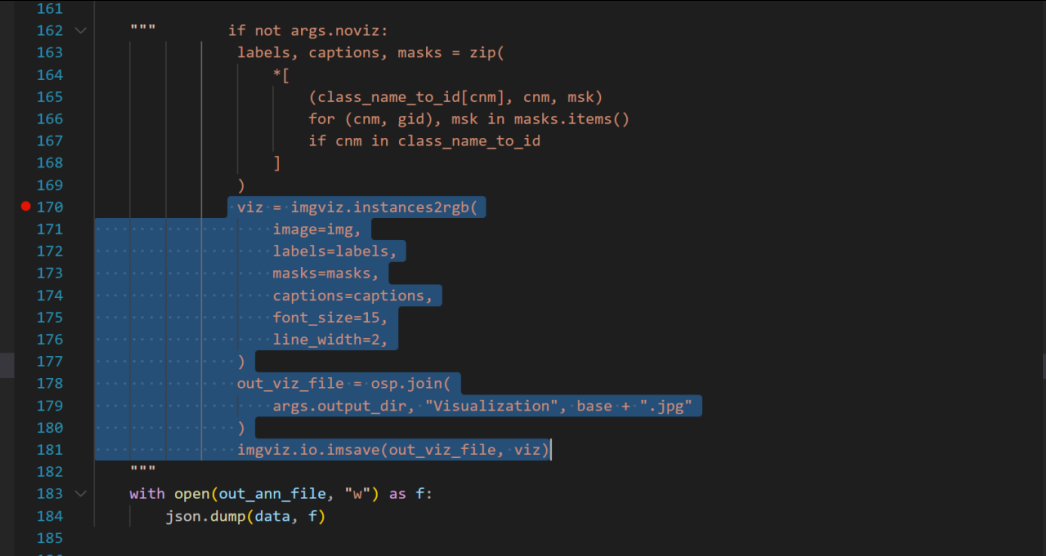
解决办法注释即可

训练
参照 https://github.com/PaddlePaddle/PaddleOCR/blob/release/2.7/ppstructure/layout/README_ch.md
首先复制一份
configs/picodet/legacy_model/application/layout_analysis/picodet_lcnet_x1_0_layout.yml
改名为picodet_lcnet_x1_0_layout_self.yml
num_class 改为10,更改红框的信息,这里需要注意的是imagedir的位置,batchzsize也需要调小,不然会导致内存溢出
内寸溢出,需要调整一下batch size

减小学习率
同时注意下版本

直接训练会有很多错误
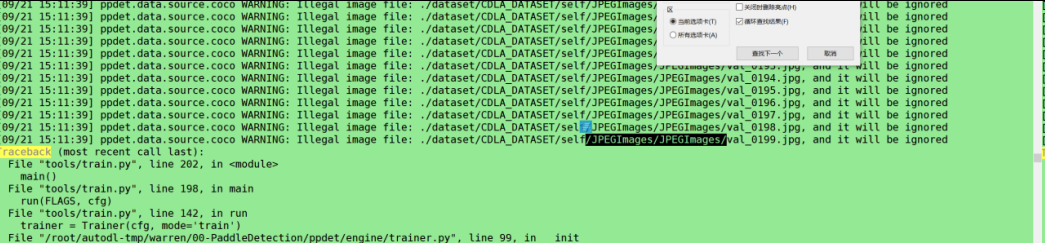
下图错误就是label.txt的个数没有改为10个
未匹配到coco数据集下载链接
解决办法注释如下代码
修改完成后训练成功
python3 tools/train.py \
-c configs/picodet/legacy_model/application/layout_analysis/picodet_lcnet_x1_0_layout_self.yml --eval
自己准备的数据集只需要按照coco格式调整即可;
测试生成的模型
python3 tools/infer.py \
-c configs/picodet/legacy_model/application/layout_analysis/picodet_lcnet_x1_0_layout_self.yml \
--slim_config configs/picodet/legacy_model/application/layout_analysis/picodet_lcnet_x2_5_layout.yml \
-o weights='output/picodet_lcnet_x1_0_layout_self/best_model.pdparams' \
--infer_dir='dataset/CDLA/val_self/image' --output_dir=output_dir/ --draw_threshold=0.4
导出模型
这里需要注意加上export.benchmark=True export.nms=False!!!不要加入后处理和nms
python3 tools/export_model.py \
-c configs/picodet/legacy_model/application/layout_analysis/picodet_lcnet_x1_0_layout_self.yml \
--slim_config configs/picodet/legacy_model/application/layout_analysis/picodet_lcnet_x2_5_layout.yml \
-o weights=./output/picodet_lcnet_x1_0_layout_self/best_model export.benchmark=True export.nms=False \
--output_dir=output_inference/
导出模型推理
python3 deploy/python/infer.py \
--model_dir=output_inference/picodet_lcnet_x1_0_layout_self/ \
--image_file=./image/DBnet_test.jpg \
--device=GPU

可以看到准确度已经有很大的提升了,重新部署到板端
重新训练后板端的的测试结果
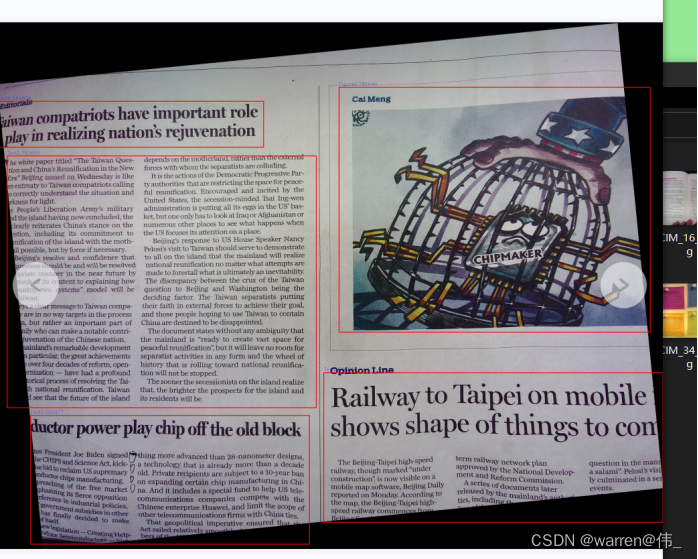
可以看到准确度提升很多;