文章目录
前言
在之前的文章中,我们解决了GPU实例化需要的 appdata 、v2f 数据准备 和 使GPU实例化后的顶点位置正确。
在这篇文章中,我们来实现一下GPU实例化后怎么使不同对象使用不同的材质颜色,这里只是用颜色作为例子,如果需要 GPU实例化后,不同对象使用不同属性,也是用此方法。
一、构建需要实例化的额外数据
因为我们需要修改材质的颜色,所以需要定义一个颜色属性。
但是,在使用GPU实例化定义属性时,得按如下方法定义
构建需要实例化的额外数据:
#ifdef UNITY_INSTANCING_ENABLED
UNITY_INSTANCING_BUFFER_START(prop自定义名字)
UNITY_DEFINE_INSTANCED_PROP(type, name)
UNITY_INSTANCING_BUFFER_END(prop自定义名字)
#endif
- 在UnityInstancing.cginc文件中,看一下Unity这句话做了什么
UNITY_INSTANCING_BUFFER_START(prop)
UNITY_INSTANCING_BUFFER_END(prop)
其实这两句话主要是,定义了一个结构体。

-
UNITY_DEFINE_INSTANCED_PROP(fixed4, _Color) 这句话定义结构体中的变量
-
在我的Shader中,使用材质的颜色属性作为测试:
UNITY_INSTANCING_BUFFER_START(prop)
UNITY_DEFINE_INSTANCED_PROP(fixed4, _Color)
UNITY_INSTANCING_BUFFER_END(prop)
二、在顶点着色器,将实例化 ID 从 appdata 存入 v2f 传给片元着色器
UNITY_TRANSFER_INSTANCE_ID(v, o); 当需要将实例化ID传到片断着色器时,在顶点着色器中添加.
- 在UnityInstancing.cginc文件中,看一下Unity这句话做了什么
由源码可知,这句话做了类似于 o,uv = i.uv; 这样的操作

三、在片断着色器中访问具体的实例化变量
UNITY_ACCESS_INSTANCED_PROP(arrayName, propName)
- 在UnityInstancing.cginc文件中,看一下Unity这句话做了什么

- 我把我测试使用的_Color替换成UNITY_ACCESS_INSTANCED_PROP(prop, _Color)
fixed4 frag (v2f i) : SV_Target
{
UNITY_SETUP_INSTANCE_ID(i);
return i.worldPos.y * 0.15 + UNITY_ACCESS_INSTANCED_PROP(prop, _Color);
}
三、使用代码修改Shader材质属性,实现GPU实例化后不同对象颜色不同的效果
做完以上步骤后,我们的Shader就支持GPU实例化后的不同对象使用不同的颜色属性了。但是,我们要用代码修改才有用,不是直接调节属性面板
我们可以看出,调节属性面板我们的所有 GPU实例化问题,属性颜色都会随之改变
1、在C#测试脚本生成小板凳的时候修改材质属性
- 我们在生成小板凳时。同时修改小板凳材质属性的颜色(不能这样修改,会导致GPU实例化失效):
using UnityEngine;

public class P2_6_5 : MonoBehaviour
{
    public GameObject Prefab;
    public int Count = 1;
    public int Range = 10;
    // Start is called before the first frame update
    void Start()
    {


        for (int i = 0;i < Count;i++)
        {
            Vector3 pos = Random.insideUnitCircle * Range;
            Color color = new Color(Random.value,Random.value,Random.value,Random.value);
            GameObject chair = Instantiate(Prefab,new Vector3(pos.x,0,pos.y),Quaternion.identity);

            chair.GetComponentInChildren<MeshRenderer>().material.SetColor("_Color", color);
        }
    }
}
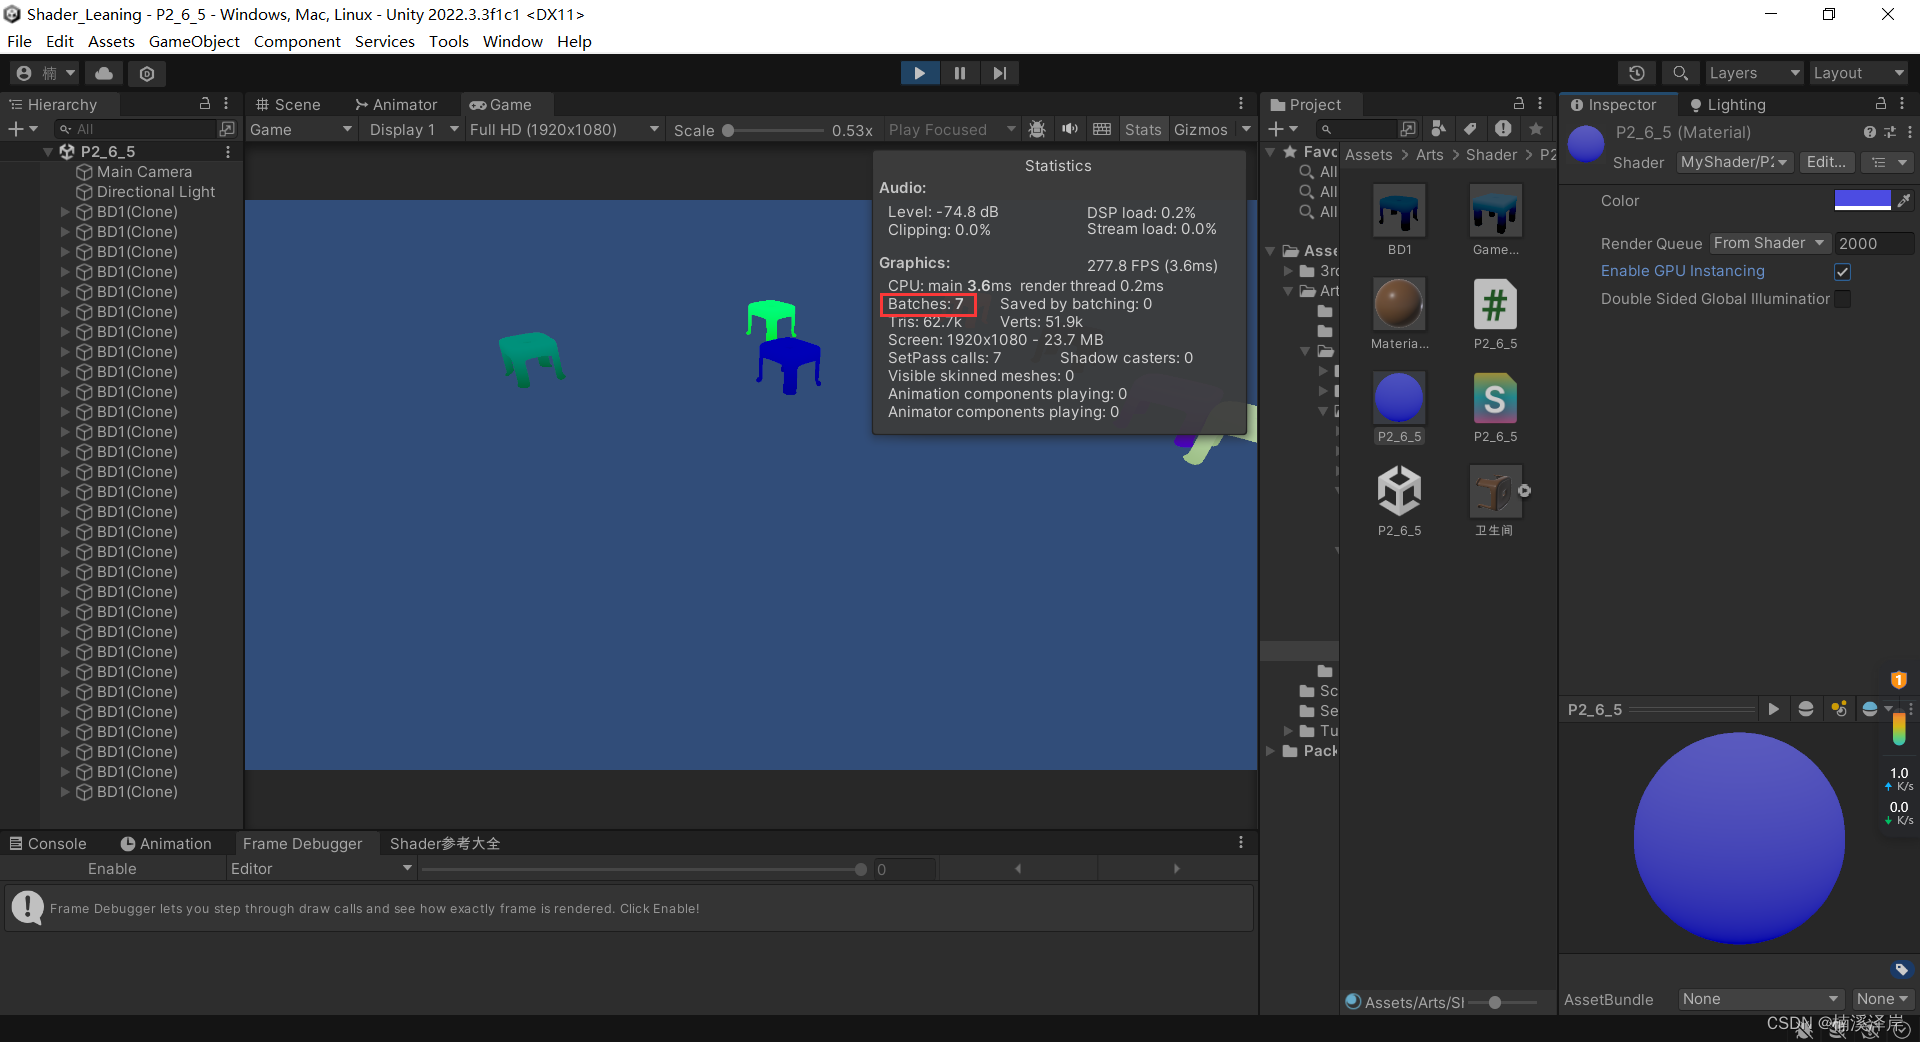
我们可以看见,虽然颜色变了。但是,GPU实例化失效了
2、我们需要使用材质属性块来修改才可以不让GPU实例化失效
MaterialPropertyBlock prop = new MaterialPropertyBlock();
prop.SetColor(“_Color”,color);
using UnityEngine;

public class P2_6_5 : MonoBehaviour
{
    public GameObject Prefab;
    public int Count = 1;
    public int Range = 10;
    // Start is called before the first frame update
    void Start()
    {


        for (int i = 0;i < Count;i++)
        {
            Vector3 pos = Random.insideUnitCircle * Range;
            Color color = new Color(Random.value,Random.value,Random.value,Random.value);
            GameObject chair = Instantiate(Prefab,new Vector3(pos.x,0,pos.y),Quaternion.identity);

            MaterialPropertyBlock prop = new MaterialPropertyBlock();
            prop.SetColor("_Color",color);
            chair.GetComponentInChildren<MeshRenderer>().SetPropertyBlock(prop);
        }
    }
}
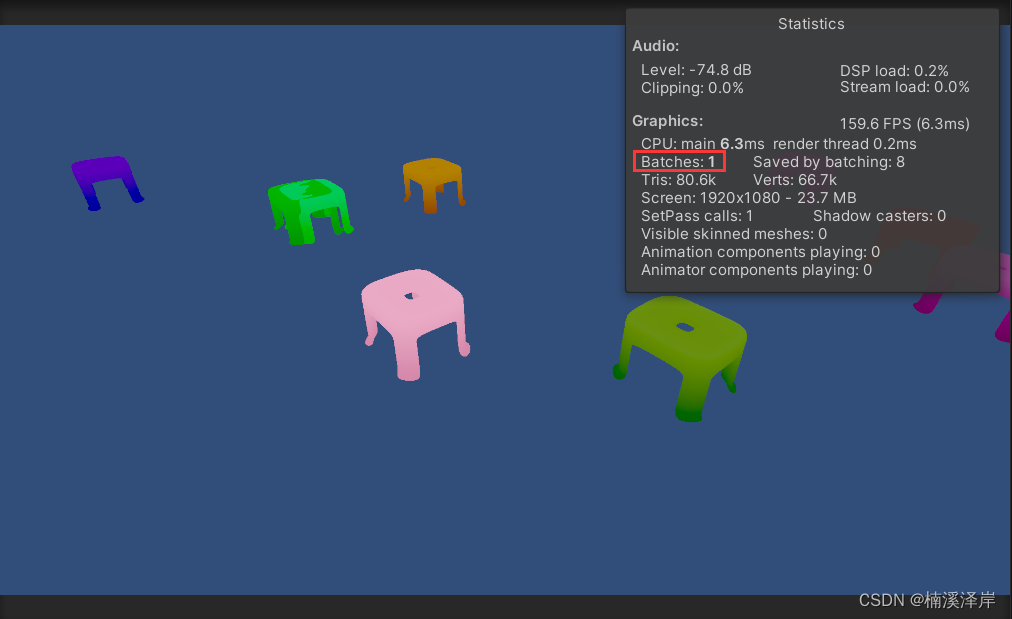
最终效果(CPU实例化成功,且不同对象有不同的颜色属性了):