文章目录
前言
“我会定期分享我的学习经验,也欢迎大家留言和交流,让我们共同学习和进步!感谢大家的支持,让我们一起开启这段充满技术乐趣的旅程吧!”
1. 链表的概念及结构
概念:链表是⼀种物理存储结构上非连续、非顺序的存储结构,数据元素的逻辑顺序是通过链表中的指针链接次序实现的
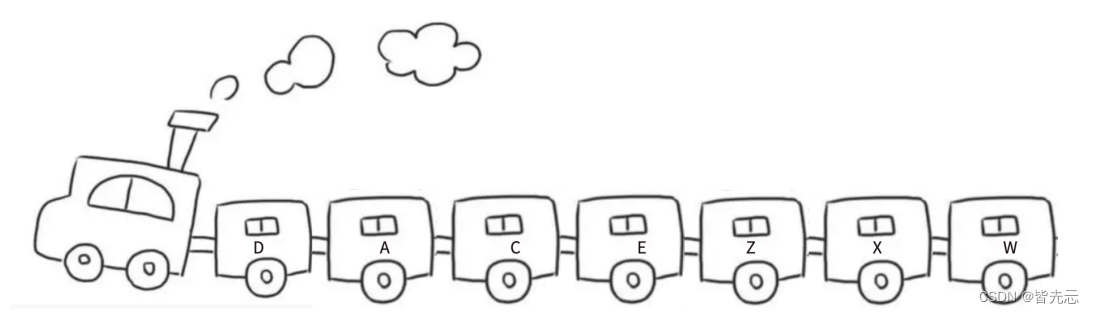
链表的结构跟火车车厢厢相似,淡季时车次的车厢会相应减少,旺季时车次的车厢会额外增加几节。只需要将火车里的某节节厢去掉/加上,不会影响其他车厢,每节车厢都是独立存在的。
车厢是独里存在的,且每节车厢都有车门。想象⼀下这样的场景,假设每节车厢的车门都是锁上的状态,需要不同的钥匙才能解锁,每次只能携带⼀把钥匙的情况下如何从车头走到车尾?
最简单的做法:每节车厢里都放⼀把下一节车厢的钥匙。
1.1在链表里,每节“车厢”是什么样的呢?

与顺序表不同的是,链表⾥的每节"车厢"都是独立申请下来的空间,我们称之为“结点/节点”,节点的组成主要有两个部分:当前节点要保存的数据和保存下一个节点的地址(指针变量)。
图中指针变量 plist保存的是第⼀个节点的地址,我们称plist此时“指向”第⼀个节点,如果我们希望plist“指向”第⼆个节点时,只需要修改plist保存的内容为0x0012FFA0。
1.2为什么还需要指针变量来保存下⼀个节点的位置?
链表中每个节点都是独立申请的(即需要插⼊数据时才去申请⼀块节点的空间),我们需要通过指针
变量来保存下⼀个节点位置才能从当前节点找到下⼀个节点。
2. 单链表的实现
1. 定义结构体(Seqlist)
在SList.h头文件中
typedef int SLNDataType;
typedef struct SListNode
{


  SLNDataType val;
  struct SListNode* next;
 //这里只是指针,不是结构体
}SLNode;
2. 打印函数(SLTPrint)
注意下述代码皆是:
在SList.h头文件中定义函数
在SList.c文件中实现函数
在Test.c文件中函数测试
SeqList.h文件中
定义函数:

SList.c文件中
实现函数:
void SLTPrint(SLNode* phead) //打印单链表
{


  SLNode* cur = phead;
  while (cur != NULL)
  {


    printf("%d->", cur->val);
    cur=cur->next;
  }
  printf("NULL");
}
小插曲,创建节点函数CreateNode
在实现下面的插入函数之前,还需要一个函数来开辟空间给新的节。
函数实现
SLNode* CreateNode(SLNDataType x) //新建节点,开辟空间
{


  SLNode* newnode = (SLNode*)malloc(sizeof(SLNode));
  if (newnode == NULL)
  {


    perror("malloc fail");
    exit(-1);
  }
  newnode->val = x;
  newnode->next = NULL;
  return newnode;
}
3. 尾插函数 (SLTPushBack)
定义函数:

实现函数:
void SLTPushBack(SLNode** pphead, SLNDataType x) //尾插
{


  SLNode* newnode = CreateNode(x);
  if (* pphead == NULL)
  {


    *pphead = newnode;
  }
  else
  {


    SLNode* tail = * pphead; //找尾
    while (tail->next != NULL)
    {


      tail = tail->next;  //因为tail是局部变量,而tail->next是结构体,出来作用域tail就销毁了
    }
    tail->next = newnode; //所以这里把newnode赋值给tail->next
  }
}
函数测试:
int main()
{


  SLNode* plist = NULL;
  SLTPushBack(&plist, 1);
  SLTPushBack(&plist, 2);
  SLTPushBack(&plist, 3);
  SLTPrint(plist);
  return 0;
}
运行结果:

4. 头插函数 (SLTPushFront)
定义函数:

实现函数:
void SLTPushFront(SLNode** pphead, SLNDataType x) //头插
{


  SLNode* newnode = (SLNode*)malloc(sizeof(SLNode));
  newnode->next =* pphead;
  newnode->val = x;
  *pphead = newnode;
}
函数测试:
int main()
{


  SLNode* plist = NULL;
  SLTPushFront(&plist,520 );
  SLTPushBack(&plist,1);
  SLTPushBack(&plist,1);
  SLTPushFront(&plist,520);
  SLTPrint(plist);
  return 0;
}
运行结果:

5. 尾删函数(SLTPopBack)
定义函数:

实现函数:
void SLTPopBack(SLNode** pphead)  //尾删
{


  assert(pphead);
  assert(*pphead);
  if ((*pphead)->next== NULL)
  {


    free(*pphead);
    *pphead = NULL;
  }
  else
  {


     SLNode* prev = NULL;
     SLNode* tail = *pphead;
     while (tail->next != NULL)
     {


       prev = tail;
       tail = tail->next;
     }
     free(tail);
     tail = NULL;
     prev->next = NULL;
  }
}
函数测试:
int main()
{
  SLNode* plist = NULL;
  SLTPushFront(&plist,520 );
  SLTPushBack(&plist,1314);
  SLTPushBack(&plist,00544);
  SLTPopBack(&plist);
  SLTPrint(plist);
  return 0;
}
运行结果:

6. 头删函数(SLTPopFront)
定义函数:

实现函数:
void SLTPopFront(SLNode** pphead) //头删
{


  assert(*pphead);
  SLNode* tail = *pphead;
  tail = tail->next;
  free(*pphead);
  *pphead = tail;
}
函数测试:
int main()
{


  SLNode* plist = NULL;
  SLTPushFront(&plist,5201314);
  SLTPushBack(&plist,00544);
  SLTPushBack(&plist,44944);
  SLTPopFront(&plist);
  SLTPrint(plist);
  return 0;
}
运行结果:

小插曲,pos查找函数 SLTFind
用来确定pos位置,方便后面调用
实现函数:
SLNode* SLTFind(SLNode** pphead, SLNDataType x) //pos的查找函数
{


  assert(pphead);
  SLNode* cur = *pphead;
  while (cur)
  {


    if (cur->val == x)
    {


      return cur;
    }
    cur = cur->next;
  }
  return NULL;
}
7. “插入指定位置前”函数(SLTInster)
定义函数:

实现函数:
void* SLTInster(SLNode** pphead, SLNode* pos, SLNDataType x) //指定位置前面插入
{


  assert(pos);
  assert(pphead);
  assert(*pphead);
  SLNode* node = CreateNode(x);
  if (*pphead == pos)
  {


    node->next = *pphead;
    *pphead = node;
  }

  SLNode* cur = *pphead;
  while (cur->next != pos)
  {


    cur = cur->next;
  }
  cur->next = node;
  node->next = pos;
}
函数测试:
int main()
{


  SLNode* plist =NULL;
  SLTPushBack(&plist,1);
  SLTPushBack(&plist,2);
  SLTPushBack(&plist,3);
  SLNode* Find = SLTFind(&plist, 3);
  SLTInster(&plist,Find,123);
  SLTPrint(plist);
  return 0;
}
运行结果:
如同在第一个值为3的节点前面插入了123;

8.“删除指定位置后”函数
定义函数:

实现函数:
void* SLTEraseAfter(SLNode* pos) //指定位置后面删除
{


  assert(pos && pos->next);
  SLNode* del = pos->next;
  pos->next = del->next;
  free(del);
}
函数测试:
int main()
{


  SLNode* plist =NULL;
  SLTPushBack(&plist,520);
  SLTPushBack(&plist,2);
  SLTPushBack(&plist,520);
  SLNode* Find = SLTFind(&plist, 2);
  SLTEraseAfter(Find);
  SLTPrint(plist);
  return 0;
}
运行结果:
如图在第一个值为520的节点后面删除了小3;

9.销毁单链表函数SLTDestroy
定义函数:

实现函数:
void SLTDestroy(SLNode** pphead) //销毁单链表
{


  assert(pphead);
  SLNode* cur= *pphead;
  while (cur)
  {


    SLNode* next = cur;
    free(cur);
    cur = next;
  }
  *pphead = NULL;
}
测试函数:
int main()
{


  SLNode* plist =NULL;
  SLTPushBack(&plist,1);
  SLTPushBack(&plist,2);
  SLTPushBack(&plist,3);
  SLTDestroy(&plist);
  return 0;
}
结语
感谢您阅读我的博客,我希望您能从中获得一些启发和帮助。如果您喜欢这篇博客,请分享给您的朋友,也欢迎留下您的评论和反馈。您的支持是我继续分享和创作的动力。谢谢!希望我们能在未来的博客中再次相见。祝您一切顺利,期待与您再次相会!