一,测试apache服务
[root@200 Desktop]# systemctl status firewalld                                 >>>>>>开启防火墙
firewalld.service - firewalld - dynamic firewall daemon
   Loaded: loaded (/usr/lib/systemd/system/firewalld.service; enabled)
   Active: active (running) since Sat 2018-06-09 08:52:16 EDT; 4min 36s ago
 Main PID: 476 (firewalld)
   CGroup: /system.slice/firewalld.service
           └─476 /usr/bin/python -Es /usr/sbin/firewalld --nofork --nopid...

Jun 09 08:52:16 localhost systemd[1]: Started firewalld - dynamic firewa....
Hint: Some lines were ellipsized, use -l to show in full.

[root@200 Desktop]# systemctl status iptables                                 >>>>>>>关闭iptables
iptables.service - IPv4 firewall with iptables
   Loaded: loaded (/usr/lib/systemd/system/iptables.service; disabled)
   Active: inactive (dead)

[root@200 Desktop]# yum install httpd -y                                     >>>>>>安装httpd服务
[root@200 Desktop]# systemctl start httpd                                    >>>>>>启用apache服务
[root@200 Desktop]# systemctl enable httpd.service
ln -s '/usr/lib/systemd/system/httpd.service' '/etc/systemd/system/multi-user.target.wants/httpd.service'
[root@200 Desktop]# firewall-cmd --list-all                                  >>>>>>此时主机都无法访问这台主机的http
public (default, active)
  interfaces: eth0
  sources:
  services: dhcpv6-client ssh                                                >>>>>>防火墙策略里面没有这个
  ports:
  masquerade: no
  forward-ports:
  icmp-blocks:
  rich rules:


[root@200 Desktop]# firewall-cmd --permanent --remove-service=http                  >>>>永久添加
success
[root@200 Desktop]# firewall-cmd --reload                                           >>>>>重新加载
^[[Asuccess
[root@200 Desktop]# firewall-cmd --list-all
public (default, active)
  interfaces: eth0
  sources:
  services: dhcpv6-client ssh
  ports:
  masquerade: no
  forward-ports:
  icmp-blocks:
  rich rules:
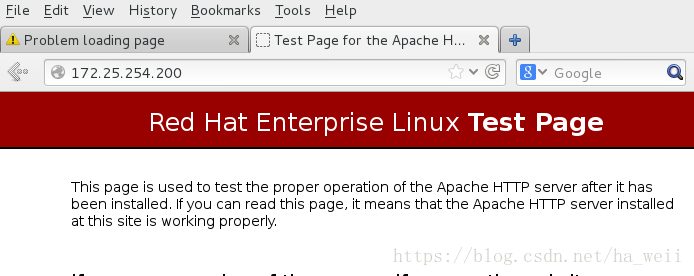
此时两台主机都可以访问本机的apache服务


二,基于ip的访问控制(添加规则:只有100这台主机只能访问80端口)
1,去掉永久添加httpd服务
[root@200 Desktop]# firewall-cmd --permanent --remove-service=http
success
[root@200 Desktop]# firewall-cmd --reload
^[[Asuccess
[root@200 Desktop]# firewall-cmd --list-all
public (default, active)
  interfaces: eth0
  sources:
  services: dhcpv6-client ssh
  ports:
  masquerade: no
  forward-ports:
  icmp-blocks:
  rich rules:                                                                >>>>>>此时两台主机都不可以访问
2,添加规则
[root@200 Desktop]# firewall-cmd --direct --add-rule ipv4 filter INPUT 1 -p tcp --dport 80 -s 172.25.254.100 -j ACCEPT
success
在filter表里面的INPUT链添加规则  -p 协议 --dport目的地端口  -s 源 -j 方式(ACCEPT REJECT DROP)
[root@200 Desktop]# firewall-cmd --direct --get-all-rules            >>>>>获取规则
ipv4 filter INPUT 1 -p tcp --dport 80 -s 172.25.254.100 -j ACCEPT
注意:ACCEPT 表示接受;REJECT 表示直接拒绝,有反馈信息 ;DROP表示丢包,也是拒绝,但是不给反馈;对于httpd服务来说,ACCEPT表示能够看到页面,REJECT显示Unable tp connect ,DROP就会一直加载页面,但是肯定加载不出页面,也不会显示拒绝的信息。
3,web浏览器测试:只有100才能访问

三,地址伪装
[root@200 Desktop]# firewall-cmd --list-all
public (default, active)
  interfaces: eth0
  sources:
  services: dhcpv6-client ssh
  ports:
  masquerade: no
  forward-ports:
  icmp-blocks:
  rich rules:
1,添加策略
[root@200 Desktop]# firewall-cmd --permanent --add-forward-port=port=22:proto=tcp:toport=22:toaddr=172.25.254.100
注意格式!!!!!                当别人通过22端口(sshd)连接我时,我把地址转换为100这个地址
success
[root@200 Desktop]# firewall-cmd --permanent --add-masquerade                      >>>>>>设置masquerade是yes
success
[root@200 Desktop]# firewall-cmd --reload                                          >>>>>--permanent添加的内容一定要重新加载
success
[root@200 Desktop]# firewall-cmd --list-all
public (default, active)
  interfaces: eth0
  sources:
  services: dhcpv6-client ssh
  ports:
  masquerade: yes
  forward-ports: port=22:proto=tcp:toport=22:toaddr=172.25.254.100                 >>>>>添加成功
  icmp-blocks:
  rich rules:
2,测试
[kiosk@156 Desktop]$ ssh [email protected]                            >>>>>156这台主机连接200(服务端)
[email protected]'s password:
Last login: Sat Jun  9 08:53:10 2018
[root@100xxx ~]# ifconfig                                               >>>>>由于有地址伪装,连接了100,而且上面的密码是100的密码才能成功
eth0: flags=4163<UP,BROADCAST,RUNNING,MULTICAST>  mtu 1500
        inet 172.25.254.100  netmask 255.255.255.0  broadcast 172.25.254.255
        inet6 fe80::5054:ff:fe00:9c0a  prefixlen 64  scopeid 0x20<link>
        ether 52:54:00:00:9c:0a  txqueuelen 1000  (Ethernet)
        RX packets 2736  bytes 6447018 (6.1 MiB)
        RX errors 0  dropped 0  overruns 0  frame 0
        TX packets 2502  bytes 122174 (119.3 KiB)
        TX errors 0  dropped 0 overruns 0  carrier 0  collisions 0
四,路由功能
1,服务端添加网卡配置两个ip在不同网段
[root@200 network-scripts]# ifconfig
eth0: flags=4163<UP,BROADCAST,RUNNING,MULTICAST>  mtu 1500
        inet 172.25.254.200  netmask 255.255.255.0  broadcast 172.25.254.255             <<<<172.25.254.200
        inet6 fe80::5054:ff:fe36:3496  prefixlen 64  scopeid 0x20<link>
        ether 52:54:00:36:34:96  txqueuelen 1000  (Ethernet)
        RX packets 3881  bytes 5423411 (5.1 MiB)
        RX errors 0  dropped 0  overruns 0  frame 0
        TX packets 3506  bytes 229657 (224.2 KiB)
        TX errors 0  dropped 0 overruns 0  carrier 0  collisions 0

eth1: flags=4163<UP,BROADCAST,RUNNING,MULTICAST>  mtu 1500
        inet 172.25.0.200  netmask 255.255.255.0  broadcast 172.25.0.255                <<<<<<172.25.0.200
        inet6 fe80::5054:ff:fe13:93ef  prefixlen 64  scopeid 0x20<link>
        ether 52:54:00:13:93:ef  txqueuelen 1000  (Ethernet)
        RX packets 734  bytes 41606 (40.6 KiB)
        RX errors 0  dropped 0  overruns 0  frame 0
        TX packets 47  bytes 6598 (6.4 KiB)
        TX errors 0  dropped 0 overruns 0  carrier 0  collisions 0
2,客户端配置ip和服务端172.25.0.200在同一个网段
[root@100xxx network-scripts]# ifconfig
eth0: flags=4163<UP,BROADCAST,RUNNING,MULTICAST>  mtu 1500
        inet 172.25.0.100  netmask 255.255.255.0  broadcast 172.25.0.255              <<<<<172.25.0.100
        inet6 fe80::5054:ff:fe00:9c0a  prefixlen 64  scopeid 0x20<link>
        ether 52:54:00:00:9c:0a  txqueuelen 1000  (Ethernet)
        RX packets 3814  bytes 6506828 (6.2 MiB)
        RX errors 0  dropped 0  overruns 0  frame 0
        TX packets 3470  bytes 169809 (165.8 KiB)
        TX errors 0  dropped 0 overruns 0  carrier 0  collisions 0
3,客户端网关设置为服务端的同网络段的ip
[root@100xxx network-scripts]# route -n
Kernel IP routing table
Destination     Gateway         Genmask         Flags Metric Ref    Use Iface
0.0.0.0         172.25.0.200    0.0.0.0         UG    1024   0        0 eth0                         >>>>网关设置很重要!!
172.25.0.0      0.0.0.0         255.255.255.0   U     0      0        0 eth0
4,此时客户端可以ping通网关
[root@100xxx network-scripts]# ping 172.25.0.200
PING 172.25.0.200 (172.25.0.200) 56(84) bytes of data.
64 bytes from 172.25.0.200: icmp_seq=1 ttl=64 time=4.61 ms
64 bytes from 172.25.0.200: icmp_seq=2 ttl=64 time=0.113 ms
^C
--- 172.25.0.200 ping statistics ---
2 packets transmitted, 2 received, 0% packet loss, time 1001ms
rtt min/avg/max/mdev = 0.113/2.364/4.616/2.252 ms
5,服务端设置net.ipv4.ip_forward=1
[root@200 network-scripts]# sysctl -a | grep ip_forward
net.ipv4.ip_forward = 0
[root@200 network-scripts]# vim /etc/sysctl.conf
net.ipv4.ip_forward = 1
[root@200 network-scripts]# sysctl -p                      >>>>>再次加载
net.ipv4.ip_forward = 1
4,服务端清除之前的地址伪装!!!!
[root@200 network-scripts]# firewall-cmd --permanent --remove-forward-port=port=22:proto=tcp:toport=22:toaddr=172.25.254.100
success
[root@200 ~]# firewall-cmd --permanent --add-masquerade            >>>>必须添加
success
[root@200 network-scripts]# firewall-cmd --reload
success
[root@200 network-scripts]# firewall-cmd --list-all
public (default, active)
  interfaces: eth0 eth1
  sources:
  services: dhcpv6-client ssh
  ports:
  masquerade: yes                                                 >>>>这个一定得是yes
  forward-ports:
  icmp-blocks:
  rich rules:
6,测试客户端
[root@100xxx network-scripts]# ping 172.25.254.200                        >>>>不再同一网段也可以ping通服务端
PING 172.25.254.200 (172.25.254.200) 56(84) bytes of data.
64 bytes from 172.25.254.200: icmp_seq=1 ttl=64 time=0.185 ms
64 bytes from 172.25.254.200: icmp_seq=2 ttl=64 time=0.179 ms
64 bytes from 172.25.254.200: icmp_seq=3 ttl=64 time=0.155 ms
^C
--- 172.25.254.200 ping statistics ---
3 packets transmitted, 3 received, 0% packet loss, time 2000ms
rtt min/avg/max/mdev = 0.155/0.173/0.185/0.013 ms
[root@100xxx network-scripts]# ping 172.25.254.156                        >>>>>>不在同一个网段也可以ping通其他客户端
PING 172.25.254.156 (172.25.254.156) 56(84) bytes of data.
64 bytes from 172.25.254.156: icmp_seq=1 ttl=63 time=0.241 ms
64 bytes from 172.25.254.156: icmp_seq=2 ttl=63 time=0.234 ms
^C
--- 172.25.254.156 ping statistics ---
2 packets transmitted, 2 received, 0% packet loss, time 1000ms
rtt min/avg/max/mdev = 0.234/0.237/0.241/0.015 ms
[root@100xxx network-scripts]# ssh [email protected]                    >>>>>>>服务端连接别的端口
[email protected]'s password:
Last login: Sat Jun  9 22:48:45 2018 from 172.25.254.200                  >>>>>>>172.25.0.100连接172.25.254.156,但是这里显示连接来自172.25.254.200
[root@156 ~]# w -i                                                        >>>>>>>显示连接记录,-i显示ip
 22:57:39 up  2:07,  4 users,  load average: 1.37, 2.28, 1.88
USER     TTY      FROM             LOGIN@   IDLE   JCPU   PCPU WHAT
kiosk    :0       :0               20:50   ?xdm?   2:11m  0.21s gdm-sessio
kiosk    pts/2    :0               20:51    4:51   0.10s  3.20s /usr/libex
kiosk    pts/3    :0               21:18   41:47  31.77s  0.04s bash
root     pts/4    172.25.254.200   22:56    3.00s  0.02s  0.00s w -i
我们用172.25.0.100成功连接172.25.254.156,但是显示172.25.254.156是被172.25.254.200连接,成功进行地址伪装