Vue+菜单权限+动态路由
实现原理:用户登录,服务端返回相关权限,进行持久化存储,筛选动态路由,同时菜单栏也需动态渲染
静态路由
静态路由,也叫常量路由,即所有角色都可以访问到的路由界面。如: login、 404等
ts
复制代码
const constantRoute = [
  {
    //登录
    path: '/login',
    component: () => import('@/views/login/index.vue'),
    name: 'login',
    meta: {
      title: '登录',
      hidden: true,
      icon: 'Promotion',
    },
  },

  {
    //登录成功以后的布局路由
    path: '/',
    component: () => import('@/layout/layout.vue'),
    name: 'layout',
    meta: {
      title: '',
      hidden: false,
      icon: '',
    },
    redirect: '/home',
    children: [
      {
        path: '/home',
        name: 'home',
        component: () => import('@/views/home/index.vue'),
        meta: {
          title: '首页',
          hidden: false,
          icon: 'House',
        },
      },
    ],
  },
  {
    //404
    path: '/404',
    component: () => import('@/views/404/index.vue'),
    name: '404',
    meta: {
      title: '404',
      hidden: true,
      icon: 'DocumentDelete',
    },
  },

]
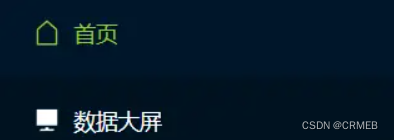
对应的菜单权限如图:
动态路由
即不同角色所拥有的权限路由,一般登录成功后,向后端发送请求,由服务器返回对应的权限,然后进行筛选过滤。
ts
复制代码
//返回的用户信息
[
  {
    "userId": 1,
    "avatar": "https://wpimg.wallstcn.com/f778738c-e4f8-4870-b634-56703b4acafe.gif",
    "username": "admin",
    "password": "111111",
    "desc": "平台管理员",
    "roles": ["平台管理员"],
    "buttons": ["cuser.detail"],
    "routes": [
      "Home",
      "User",
      "Role",
      "Permission",
      "Trademark",
      "Product",
      "Acl"
    ],
    "token": "Admin Token"
  },
]
//所有的权限路由
 const asyncRoute = [
        {
          path: '/acl',
          component: () => import('@/layout/index.vue'),
          name: 'Acl',
          meta: {
            title: '权限管理',
            icon: 'Lock',
          },
          redirect: '/acl/user',
          children: [
            {
              path: '/acl/user',
              component: () => import('@/views/acl/user/index.vue'),
              name: 'User',
              meta: {
                title: '用户管理',
                icon: 'User',
              },
            },
            {
              path: '/acl/role',
              component: () => import('@/views/acl/role/index.vue'),
              name: 'Role',
              meta: {
                title: '角色管理',
                icon: 'UserFilled',
              },
            },
            {
              path: '/acl/permission',
              component: () => import('@/views/acl/permission/index.vue'),
              name: 'Permission',
              meta: {
                title: '菜单管理',
                icon: 'Monitor',
              },
            },
          ],
        },
        {
          path: '/product',
          component: () => import('@/layout/index.vue'),
          name: 'Product',
          meta: {
            title: '商品管理',
            icon: 'Goods',
          },
          redirect: '/product/trademark',
          children: [
            {
              path: '/product/trademark',
              component: () => import('@/views/product/trademark/index.vue'),
              name: 'Trademark',
              meta: {
                title: '品牌管理',
                icon: 'ShoppingCartFull',
              },
            },
            {
              path: '/product/attr',
              component: () => import('@/views/product/attr/index.vue'),
              name: 'Attr',
              meta: {
                title: '属性管理',
                icon: 'ChromeFilled',
              },
            },
            {
              path: '/product/spu',
              component: () => import('@/views/product/spu/index.vue'),
              name: 'Spu',
              meta: {
                title: 'SPU管理',
                icon: 'Calendar',
              },
            },
            {
              path: '/product/sku',
              component: () => import('@/views/product/sku/index.vue'),
              name: 'Sku',
              meta: {
                title: 'SKU管理',
                icon: 'Orange',
              },
            },
          ],
        },
      ]
菜单权限
本次demo演示使用的是element-plus的el-menu组件。
在较为简单的开发中,菜单我们经常写死,这也就导致了不同的角色所看到的菜单列表是一致的。
所以,一般实现动态路由,也要二次封装一个对应的菜单权限组件。
实现步骤
- 通过pinia或者vuex全局状态管理工具,定义一个全局状态
menuRoutes,初始值为对应的静态路由数组

-
二次封装menu组件,通过
menuRoutes,递归渲染展示不同的菜单栏重点:需要使用到vue3的递归组件,因此需要定义组件名。同时
menuRoutes需要以父传子的方式传递
vue
复制代码
<template>
  <div>
    <template v-for="(item, index) in props.menuList" :key="item.path">
      <!-- 没有子路由 -->
      <template v-if="!item.children">
        <el-menu-item
          :index="item.path"
          v-if="!item.meta.hidden"
          @click="goRoute"
        >
          <template #title>
            <el-icon>
              <component :is="item.meta.icon" />
            </el-icon>
            <span>{

   { item.meta.title }}</span>
          </template>
        </el-menu-item>
      </template>
      <!-- 只有一个子路由 (例如home页,它是layout的子路由,但是只有一个,直接渲染home) -->
      <el-menu-item
        v-if="item.children && item.children.length == 1"
        :index="item.children[0].path"
        @click="goRoute"
      >
        <template #title>
          <el-icon>
            <component :is="item.children[0].meta.icon" />
          </el-icon>
          <span>{

   { item.children[0].meta.title }}</span>
        </template>
      </el-menu-item>
      <!-- 有多个子路由 -->
      <el-sub-menu
        :index="item.path"
        v-if="item.children && item.children.length > 1"
      >
        <template #title>
          <el-icon>
            <component :is="item.meta.icon"></component>
          </el-icon>
          <span>{

   { item.meta.title }}</span>
        </template>
         <!-- 子路由递归动态渲染 -->
        <Menu :menuList="item.children"></Menu>
      </el-sub-menu>
    </template>
  </div>
</template>

<script setup lang="ts">
import { ref, reactive, computed, onMounted, watch } from 'vue'
import { useRouter } from 'vue-router'
const $router = useRouter()
//获取父组件传递的路由数组
interface Iprops {
  menuList: any[]
}
const props = withDefaults(defineProps<Iprops>(), {
  menuList: () => [],
})

const goRoute = (vc: any) => {
  $router.push(vc.index)
}
</script>
<script lang="ts">
export default {
  name: 'Menu',
}
</script>
-
登录成功后,获取用户信息,从而获取对应的权限列表数据,传入
所有之前定义好的权限路由,进行过滤。最后通过addRoute方法追加动态路由。ts 复制代码 import { constantRoute, asyncRoute, anyRoute } from '@/router/routes' //getUserInfo const res = await getUserInfo() let routes = this.filterAsyncRoute( _.cloneDeep(asyncRoute), res.data.checkUser.routes, ) //修改菜单栏显示 this.menuRoutes = [...constantRoute, ...routes, anyRoute] //通过addRoute追加动态路由 let activeRoutes = [...routes, anyRoute] activeRoutes.forEach((route) => { router.addRoute(route) }) //过滤权限路由 filterAsyncRoute(asyncRoute: RouteRecordRaw[], routes: RouteRecordName[]) { let result: RouteRecordRaw[] = [] asyncRoute.forEach((item) => { if (routes.includes(item.name!)) { result.push(item) if (item.children) { item.children = this.filterAsyncRoute(item.children, routes) } } }) return result }, },
注意点:1、每次过滤权限路由的时候,必须深拷贝一份asyncRoute,懂的都懂(引用类型数据是地址)
2、pinia中的数据是非持久性缓存的,所以一刷新数据就会丢失。解决方案:使用pinia的持久性插件或者路由鉴权的同时,在路由前置导航守卫,每次跳转的时候,判断pinia中是否存储了用户信息,如果没有,重新调用getUserInfo方法,获取用户信息
3、是基于第二点,在组件外部通过同步语句获取仓库,是获取不到的,必须通过如下方式获取
javascript
复制代码
import pinia from '@/store/index'
let userStore = useUserStore(pinia)
4、至此,我们成功实现了菜单权限+动态路由,但还有个bug
BUG:如果我们在动态路由页面进行刷新,会导致白屏
原因:刷新页面的时候,触发了路由前置导航守卫,获取用户信息,如果获取到了,就放行。但是放行的时候,动态路由还没有加载完成! 得确保获取完用户信息且全部路由组件渲染完毕
解决办法:next({…to})
意义:死循环加载,直至路由组件加载完毕
学习更多Vue知识请关注CRMEB