大家在做后台管理系统时一般都会涉及到菜单的权限控制问题。当然解决问题的方法无非两种——前端控制和后端控制。我们公司这边的产品迭代速度较快,所以我们是从前端控制路由迭代到后端控制路由。下面我会分别介绍这两种方法的优缺点以及如何实现(不熟悉vue-router API的同学可以先去官网看一波API哈)。
我先简单说下项目的需求:如下图所示,有一级菜单和二级菜单,然后不同的人登录进去会展示不同的菜单。

前端控制路由的思路:将所有的路由映射表都拿到前端来维护,就是我的router.js里面将所有的菜单path与对应的components全部写进去,后面我会提到全部写进去的弊端。然后我的左侧菜单写成一个组件(sidebar.vue),在这个组件里写一份类似这样的data数据,然后通过登录时获取的level值来给data中固定的菜单加hidden,然后前端就根据hidden展示菜单。
// router.js 伪代码


const Login = r => require.ensure([],()=>r(require('../page/login/Login.vue')),'login');
const Home = r => require.ensure([],()=>r(require('../page/Home.vue')),'home');
const Forbidden = r => require.ensure([],()=>r(require('../page/403.vue')),'forbidden');
const NotFound = r => require.ensure([],()=>r(require('../page/404.vue')),'notfound');
const Dashboard = r => require.ensure([],()=>r(require('../page/dashboard/Dashboard.vue')),'dashboard');
const SplashScreen = r => require.ensure([],()=>r(require('../page/splashScreen/SplashScreen.vue')),'splashScreen');
const AddSplashScreen = r => require.ensure([],()=>r(require('../page/splashScreen/AddSplashScreen.vue')),'addSplashScreen');

const routes = [
    {
        path: '/',
        redirect: '/login'
    },{
        path: '/login',
        component: Login
    },{
        path: '/404',
        component: NotFound
    },{
        path: '/home',
        component: Home,
        redirect: '/home/splashScreen',
        children: [
            {
                path: '/home/splashScreen',
                component: SplashScreen,
                meta: {
                    title: '闪屏广告配置'
                }
            },{
                path: '/home/addSplashScreen',
                component: AddSplashScreen,
                meta: {
                    title: '新增闪屏广告'
                }
            }
        ]
    }
];
下面是菜单组件的伪代码
// sidebar.vue
<template>
    <div class="sidebar">
        <el-menu>
            ...
        </el-menu>
    </div>
</template>
<script>
    export default {
        data() {
            return {
                routes: [
                    {
                      index: '1',
                      title: '广告管理',
                      icon: 'iconfont icon-guanggao',
                      children: [
                        {
                          index: 'splashScreen',
                          title: '闪屏广告配置',
                          children: []
                        },
                      ]
                    },
                    {
                        index: '2',
                        title: '推送管理',
                        icon:'iconfont icon-tuisongguanli-',
                    }
                ]
            }
        },
        methods: {
            getLevel(){
                const level = sessionStorage.getItem('level');
                if(level === '0'){
                    this.routes.forEach(function(value){
                        if(value.title == "车机管理"){
                            value.hidden = true;
                            value.children.forEach(function(value){
                                if(value.title=="车机解绑"){
                                    value.hidden = true;
                                }
                            })
                        }
                    })
                }else if(level === '1'){
                    this.routes.forEach(function(value){
                        value.hidden = true
                        value.children.forEach(function(value){
                            value.hidden = true;
                        })
                    })
                }
            }
        },
        created(){
            this.getLevel();
        }
    }
</script>
虽然说这样可以实现权限功能,但有两个问题。
1. session里存的是level,我们可以打开浏览器控制台人为控制level,这样就失去了权限的意义。
2. 我们如果记住了path,可以直接在浏览器网址栏中手动输入path,然后回车就可以看到任何页面。这也是前端router.js写死所有路由的弊端。
在这里面前端只是通过后端传回的level来给router显示/隐藏,这样前端维护整个路由是比较复杂的而且是有重大隐患的。
现在呢我们来讲讲后端控制路由。先从操作流程来说,我们这边加入了一个dashboard中间页,这个页面只展示不同level下的一级路由,通过点击相应的一级路由进到对应的Page页面,该page页面也只展示相对应的所有的二级路由。

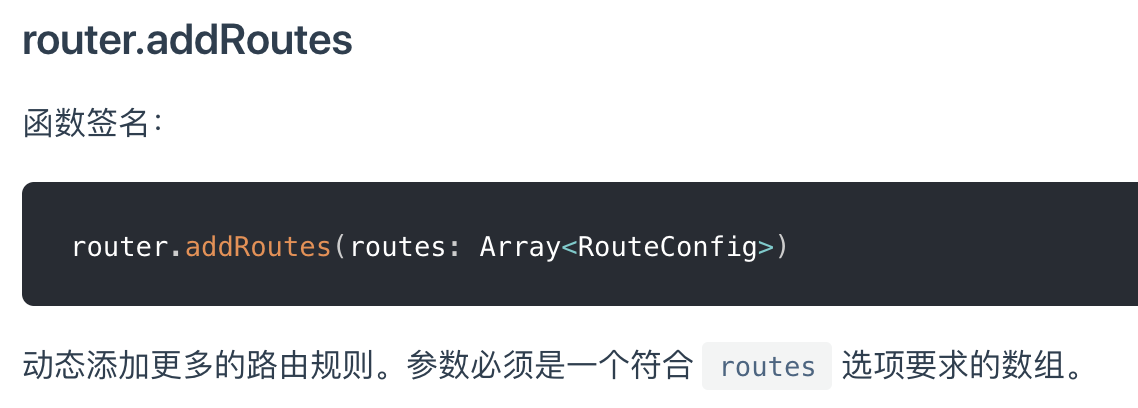
这里面出现了两个个新的概念叫 “动态添加路由”和“导航守卫”,就是我前端router.js中只写所有人可以访问的路由表,比如login和404页面等。其他所有的组件资源全部写到一个新的components.js文件中,然后通过后端返回的menuData去映射符合components.js中的key,如果有对应的,就把它动态添加到router中,通过addRoutes添加。动态添加路由这个方法要写到导航守卫beforeEach这个钩子函数中。导航守卫的意思是我路由跳转到下个页面之前要做些什么。就是说我们登录后会跳到dashboard页面,在进到这个页面之前我们需要将后端请求回来的menuData进行二次封装,把他根据权限返回回来的data与我们前端components.js去做map匹配,将最终的数据通过addRoutes来push到我们的路由中,之后才能进到我们的dashborad页面,再通过dashborad页面进到对应的page页面,就是说我们把所有的权限控制全在dashboard页面进入之前就做完了。这里面还有一个小的优化的点:当我们通过前面说的浏览器菜单栏访问到非权限页面或者不存在的页面时,需要根据vue-router中的匹配优先级来最后addRoutes 404和*这个页面,这样就可以直接到达404页面而非空页面。
// components.js 所有的页面资源
const home = () => import('../page/Home.vue');
const splashScreen = () => import('../page/splashScreen/SplashScreen.vue');
const addSplashScreen = () => import('../page/splashScreen/AddSplashScreen.vue');
const editSplashScreen = () => import('../page/splashScreen/EditSplashScreen.vue');

export default {
    home,
    splashScreen,
    addSplashScreen,
    editSplashScreen,

};
// router.js 看,只写通用的页面是不是很清爽
import Vue from 'vue';
import Router from 'vue-router';

Vue.use(Router);

const Login = () => import('../page/login/Login.vue');
const Home = () => import('../page/Home.vue');
const Forbidden = () => import('../page/403.vue');
const Dashboard = () => import('../page/dashboard/Dashboard.vue');
const routes = [
    {
        path: '/',
        redirect: '/login'
    },{
        path: '/login',
        component: Login
    },{
        path: '/403',
        component: Forbidden
    },
    {
        path: '/dashboard',
        component: Dashboard,
    },
];
export default new Router({
    mode: 'history',
    routes: routes,
    base: __dirname,
    linkActiveClass: 'link-active'

})
// main.js  伪代码 只保留具体的相关逻辑
import routeMap from './router/component.js';
const NotFound = () => import('./page/404.vue');
const formatRoutes = function (routes, routeData) {
    if (!routeData) {
        routeData = {
            name: 'home',
            path: '/home',
            // 组件匹配成功的话才可以访问具体的页面
            component: routeMap['home'],
            children: [],
        };
    }
    routes.length && routes.forEach(route => {
        if(route.component) {
            route.component = routeMap[route.component];
            routeData.children.push({
                path: route.path,
                name: route.index,
                component: route.component,
                meta: {
                    title: route.title,
                },
            })
        }
        if (route.children && route.children.length) {
            formatRoutes(route.children, routeData);
        }
    });
    return routeData;
};

let isFetchRemote = true;

//使用钩子函数对路由进行权限跳转
router.beforeEach((to, from, next) => {
    const username = sessionStorage.getItem('username');
    if(!username && to.path !== '/login'){
        next({path: '/login'});
    }
    else if (isFetchRemote && to.path !== '/login') {
        ajaxPost('/resourceAPI/getMenuData').then(res =>{
            if (res.status === 200 && res.data.errno === 0) {
                isFetchRemote = false;
                const menuData = res.data.result;
                localStorage.setItem('menudata', JSON.stringify(menuData));
                const routeData = formatRoutes(menuData);
                resourceApp.$router.addRoutes([routeData].concat([
                    {name:'404',path:'/404',component:NotFound},
                    {path:'*',redirect: '/404'}]));
                resourceApp.$router.push({
                    path: to.path,
                    query: to.query
                });
            }
            else {
                isFetchRemote = true;
            }
            next();
        })
        .catch(err => {
            console.log(err);
        });
    }
    else {
        next();
    }
});


const resourceApp = new Vue({
    router,
    render: h => h(App)
}).$mount('#app');
// menuData请求数据
// 一级菜单与二级菜单的区别是一级菜单带有component这个值,比如下面的短信管理就是只有一级菜单
{
    "errno": 0,
    "errmsg": "获取权限成功",
    "result": [
        {
            "index": "1",
            "title": "广告管理",
            "icon": "iconfont icon-guanggao",
            "children": [
                {
                    "index": "splashScreen",
                    "icon": "",
                    "title": "闪屏关羽配置",
                    "path": "/home/splashAdverse",
                    "component": "splashAdverse",
                    "isShow": true
                },
                {
                    "index": "addSplashScreen",
                    "icon": "",
                    "title": "新增关羽广告",
                    "path": "/home/addAdverse",
                    "component": "addAdverse",
                    "isShow": false
                },

            ]
        },
        {
            "index": "message",
            "title": "短信管理",
            "icon": "iconfont icon-duanxinguanli",
            "path": "/home/message",
            "component": "message",
            "children": [
                {
                    "index": "addMessage",
                    "title": "新增短信",
                    "icon": "",
                    "path": "/home/addMessage",
                    "component": "addMessage",
                    "isShow": false
                }

            ]
        }
    ]
}
而sidebar和dashboard这两个组件都只需要通过session拿到后端的menudate就可以。
// dashboard 伪代码
<template>
    <div class="nav_list">
        <div class="nav_list_item" v-for="item in navList" @click="goPage(item)">
            <i :class="item.icon"></i>
            <h2>{{item.title}}</h2>
        </div>
    </div>
</template>

<script>
    created(){
        const routeArr = JSON.parse(localStorage.getItem('menudata'));
        this.navList = routeArr;
    },
    methods: {
        goPage(item){
            // 只有一级菜单
            if(item.component){
                this.$router.push(item.path);
            }else{
                // 二级菜单的数据结构中只在children中有path
                this.$router.push(item.children[0]['path']);
            }
        }
    }
</script>
// sidebar 伪代码
<script>
    export default {
        data() {
            return {
                routes: [],
            }
        },
        methods: {
            bouncer(arr){
                return arr.filter(function(val){
                  return !(!val || val === "");
                });
            }
        },
        created(){
            const menuData = JSON.parse(localStorage.getItem('menudata'));
            // 通过当前router的path来map对应的整个路由数组
            let routes = menuData.map((item)=>{

                // 只有一级路由
                if(item.component && item.path == this.$route.path){
                    console.log(item)
                    return item;
                }else{
                    if(item.children[0]['path'] == this.$route.path){
                        console.log(item)
                        return item;
                    }
                }
            })
            // 去掉数组中的undefined、null 等空值 假值
            this.routes = this.bouncer(routes);
        }
    }
</script>
通过这种方式来控制权限,我们如果在浏览器控制台改了session中的level或者在浏览器导航栏改path,都会回归到导航守卫中,就是发请求重新获取menuData,当我addRoutes后如果没有匹配到这个值就回到404,当然通过改level也不会达到修改权限的控制,因为我们是动态获取路由,不是之前的前端控制路由。
目前为止,我感觉通过后端控制权限这种实现方式应该是最理想的一种吧,当然大家有更好的方法或者对此文有任何问题,欢迎大家留言哈。