使用场景:比如我想开发一个网上商城项目,这个网上商城呢,比较复杂,分为pc端web管理后台,微信端销售公众号,那么我们分成四个项目,pc端网站,微信端网站,还有一个后台服务项目,接口服务项目。
对数据库的操作的相关接口放到接口服务项目,这些接口的实现放在后台服务项目,pc端网站和微信端网站都依赖接口服务项目,调用后台数据库数据。在这种场景下就是应该使用Dubbo这种分布式服务框架了。当然这只是Dubbo的一个最浅显的功能。
有些猿友可能会问到了,为什么搞那么多各项目啊,不是自找麻烦麽。当你一个项目越来越复杂的时候,是必须要怎么干的,至于为什么,慢慢会有体会。
下面我们马上介绍Dubbo:
一、Dubbo概念介绍(必须看!)
1.1、Dubbo是什么?
Dubbo是一个分布式服务框架,致力于提供高性能和透明化的RPC远程服务调用方案,以及SOA服务治理方案。简单的说,dubbo就是个服务框架,如果没有分布式的需求,其实是不需要用的,只有在分布式的时候,才有dubbo这样的分布式服务框架的需求,并且本质上是个服务调用的东东,说白了就是个远程服务调用的分布式框架
其核心部分包含:
1》远程通讯: 提供对多种基于长连接的NIO框架抽象封装,包括多种线程模型,序列化,以及“请求-响应”模式的信息交换方式。
2》集群容错: 提供基于接口方法的透明远程过程调用,包括多协议支持,以及软负载均衡,失败容错,地址路由,动态配置等集群支持。
3》自动发现: 基于注册中心目录服务,使服务消费方能动态的查找服务提供方,使地址透明,使服务提供方可以平滑增加或减少机器。
1.2. Dubbo能做什么?
1.透明化的远程方法调用,就像调用本地方法一样调用远程方法,只需简单配置,没有任何API侵入。
2.软负载均衡及容错机制,可在内网替代F5等硬件负载均衡器,降低成本,减少单点。
3. 服务自动注册与发现,不再需要写死服务提供方地址,注册中心基于接口名查询服务提供者的IP地址,并且能够平滑添加或删除服务提供者。
1.3. dubbo的架构
dubbo架构图如下所示:
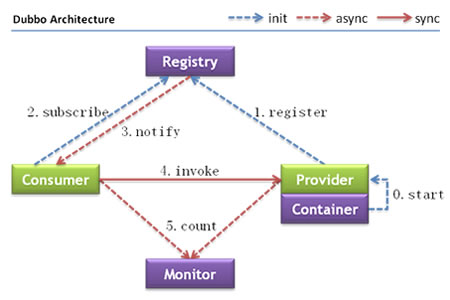
节点角色说明:
Provider: 暴露服务的服务提供方。
Consumer: 调用远程服务的服务消费方。
Registry: 服务注册与发现的注册中心。
Monitor: 统计服务的调用次调和调用时间的监控中心。
Container: 服务运行容器。
对于这些角色来说,其他都还好,Monitor可能猿友们前期使用会把它忽略,但是后期会发现它的作用十分明显哦,如服务的调用量越来越大,服务的容量问题就暴露出来,这个服务需要多少机器支撑?什么时候该加机器?为了解决这个问题,第一步,要将服务现在每天的调用量,响应时间,都统计出来,作为容量规划的参考指标。其次,要可以动态调整权重,在线上,将某台机器的权重一直加大,并在加大的过程中记录响应时间的变化,直到响应时间到达阀值,记录此时的访问量,再以此访问量乘以机器数反推总容量。
调用关系说明:
0 服务容器负责启动,加载,运行服务提供者。
1 服务提供者在启动时,向注册中心注册自己提供的服务。
2 服务消费者在启动时,向注册中心订阅自己所需的服务。
3 注册中心返回服务提供者地址列表给消费者,如果有变更,注册中心将基于长连接推送变更数据给消费者。
4 服务消费者,从提供者地址列表中,基于软负载均衡算法,选一台提供者进行调用,如果调用失败,再选另一台调用。
5 服务消费者和提供者,在内存中累计调用次数和调用时间,定时每分钟发送一次统计数据到监控中心。
1.4. dubbo使用方法
Dubbo采用全Spring配置方式,透明化接入应用,对应用没有任何API侵入,只需用Spring加载Dubbo的配置即可,Dubbo基于Spring的Schema扩展进行加载。如果不想使用Spring配置,而希望通过API的方式进行调用(不推荐)
Dubbo采用全Spring配置方式,透明化接入应用,对应用没有任何API侵入,只需用Spring加载Dubbo的配置即可,Dubbo基于Spring的Schema扩展进行加载。
二、注册中心、消费者、提供者搭建实例
只看理论不动手实践好意思说自己是程序员麽?!!!必须搭建起来看看到底是什么样的!
或许你在公司有人搭建好给你使用,但是如果你不自己搭建一次,那么很难去理解它的架构,而且一些配置文件你不知道是什么,那么你一旦遇到一些问题,自己很难去解决。因此,十分建议猿友自己动手实践一下。
更好的查看目前发布的接口的消费者和提供者,因此一般都会配置dubbo-admin,方便监控。一般企业使用dubbo也会搭建一个dubbo-admin的,因此建议猿友们也尝试去搭建一下,流程是比较简单的。关于dubbo的搭建请看博文:http://blog.csdn.net/u013142781/article/details/50396621,写的也是非常的详细。
2.1、Zookeeper的搭建
关于Zookeeper的介绍和搭建,博主写了另外一篇博文,比较简短,详情请看:http://blog.csdn.net/u013142781/article/details/50395650
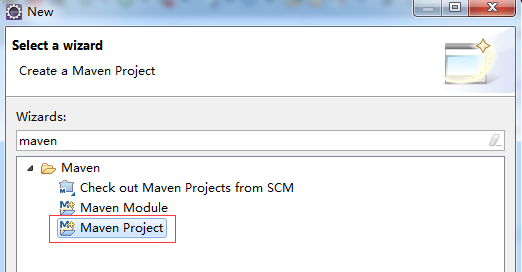
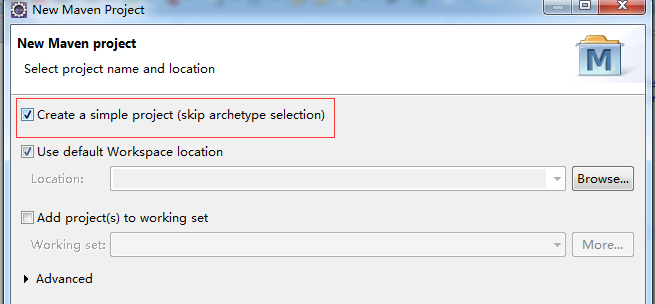
2.2、配置提供者
2.2.1、创建provider项目如下:

2.2.2、配置pom.xml,如下:
|
1
2
3
4
5
6
7
8
9
10
11
12
13
14
15
16
17
18
19
20
21
22
23
24
25
26
27
28
29
30
31
32
33
34
35
36
37
38
39
40
41
42
43
44
45
46
47
48
49
50
51
52
53
54
55
56
57
58
59
60
61
62
63
64
65
66
67
68
69
70
71
72
73
74
75
76
77
78
79
80
81
82
83
84
85
86
87
88
89
|
<project xmlns=
"http://maven.apache.org/POM/4.0.0"
xmlns:xsi=
"http://www.w3.org/2001/XMLSchema-instance"
xsi:schemaLocation=
"http://maven.apache.org/POM/4.0.0 http://maven.apache.org/xsd/maven-4.0.0.xsd"
>
<modelVersion>
4.0
.
0
</modelVersion>
<groupId>com.luo</groupId>
<artifactId>provider</artifactId>
<version>
0.0
.
1
-SNAPSHOT</version>
<properties>
<spring.version>
3.2
.
8
.RELEASE</spring.version>
</properties>
<dependencies>
<dependency>
<groupId>com.alibaba</groupId>
<artifactId>dubbo</artifactId>
<version>
2.5
.
3
</version>
<exclusions>
<exclusion>
<groupId>org.springframework</groupId>
<artifactId>spring</artifactId>
</exclusion>
</exclusions>
</dependency>
<dependency>
<groupId>com.github.sgroschupf</groupId>
<artifactId>zkclient</artifactId>
<version>
0.1
</version>
</dependency>
<!-- spring相关 -->
<dependency>
<groupId>org.springframework</groupId>
<artifactId>spring-core</artifactId>
<version>${spring.version}</version>
</dependency>
<dependency>
<groupId>org.springframework</groupId>
<artifactId>spring-beans</artifactId>
<version>${spring.version}</version>
</dependency>
<dependency>
<groupId>org.springframework</groupId>
<artifactId>spring-context</artifactId>
<version>${spring.version}</version>
</dependency>
<dependency>
<groupId>org.springframework</groupId>
<artifactId>spring-jdbc</artifactId>
<version>${spring.version}</version>
</dependency>
<dependency>
<groupId>org.springframework</groupId>
<artifactId>spring-web</artifactId>
<version>${spring.version}</version>
</dependency>
<dependency>
<groupId>org.springframework</groupId>
<artifactId>spring-webmvc</artifactId>
<version>${spring.version}</version>
</dependency>
<dependency>
<groupId>org.springframework</groupId>
<artifactId>spring-aop</artifactId>
<version>${spring.version}</version>
</dependency>
<dependency>
<groupId>org.springframework</groupId>
<artifactId>spring-tx</artifactId>
<version>${spring.version}</version>
</dependency>
<dependency>
<groupId>org.springframework</groupId>
<artifactId>spring-orm</artifactId>
<version>${spring.version}</version>
</dependency>
<dependency>
<groupId>org.springframework</groupId>
<artifactId>spring-context-support</artifactId>
<version>${spring.version}</version>
</dependency>
<dependency>
<groupId>org.springframework</groupId>
<artifactId>spring-test</artifactId>
<version>${spring.version}</version>
</dependency>
<dependency>
<groupId>org.springframework</groupId>
<artifactId>spring-jms</artifactId>
<version>${spring.version}</version>
</dependency>
</dependencies>
</project>
|
2.2.3、添加配置文件、接口和接口实现

src/main/Java下添加包:com.luo.service,然后里面添加接口TestService.java:
|
1
2
3
4
5
|
package
com.luo.service;
public
interface
TestService {
public
String getName();
}
|
src/main/java下添加包:com.luo.service.impl,然后里面添加接口实现类TestServiceImpl.java:
|
1
2
3
4
5
6
7
8
9
10
11
|
package
com.luo.service.impl;
import
com.luo.service.TestService;
public
class
TestServiceImpl
implements
TestService {
public
String getName() {
return
"luoguohui"
;
}
}
|
src/main/resources下添加配置文件application.xml:
|
1
2
3
4
5
6
7
8
9
10
11
12
13
14
15
16
17
18
19
20
21
22
|
<?xml version=
"1.0"
encoding=
"UTF-8"
?>
<beans xmlns=
"http://www.springframework.org/schema/beans"
xmlns:xsi=
"http://www.w3.org/2001/XMLSchema-instance"
xmlns:dubbo=
"http://code.alibabatech.com/schema/dubbo"
xsi:schemaLocation="http:
//www.springframework.org/schema/beans
http:
//www.springframework.org/schema/beans/spring-beans.xsd
http:
//code.alibabatech.com/schema/dubbo
http:
//code.alibabatech.com/schema/dubbo/dubbo.xsd ">
<!-- 具体的实现bean -->
<bean id=
"testService"
class
=
"com.luo.service.impl.TestServiceImpl"
/>
<!-- 提供方应用信息,用于计算依赖关系 -->
<dubbo:application name=
"provider"
/>
<!-- 使用zookeeper注册中心暴露服务地址 -->
<dubbo:registry address=
"zookeeper://127.0.0.1:2181"
/>
<!-- 用dubbo协议在
20880
端口暴露服务 -->
<dubbo:protocol name=
"dubbo"
port=
"29014"
/>
<!-- 声明需要暴露的服务接口 -->
<dubbo:service
interface
=
"com.luo.service.TestService"
ref=
"testService"
/>
</beans>
|
src/test/java下添加包com.luo.service,然后里面添加服务测试类TestServiceTest.java:
|
1
2
3
4
5
6
7
8
9
10
11
12
13
14
15
16
17
18
19
20
|
package
com.luo.service;
import
java.io.IOException;
import
org.springframework.context.support.ClassPathXmlApplicationContext;
public
class
TestServiceTest {
public
static
void
main(String[] args) {
ClassPathXmlApplicationContext context =
new
ClassPathXmlApplicationContext(
new
String[]{
"application.xml"
});
context.start();
System.out.println(
"提供者服务已注册成功"
);
try
{
System.in.read();
//让此程序一直跑,表示一直提供服务
}
catch
(IOException e) {
e.printStackTrace();
}
}
}
|
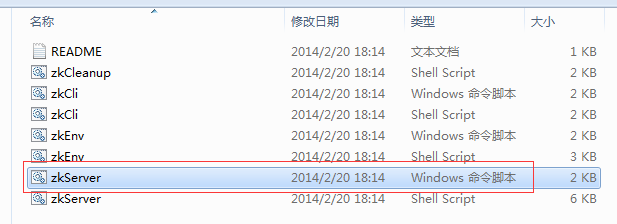
2.2.4、运行,注意顺序,一定严格安照下面的顺序
1、运行zookeeper
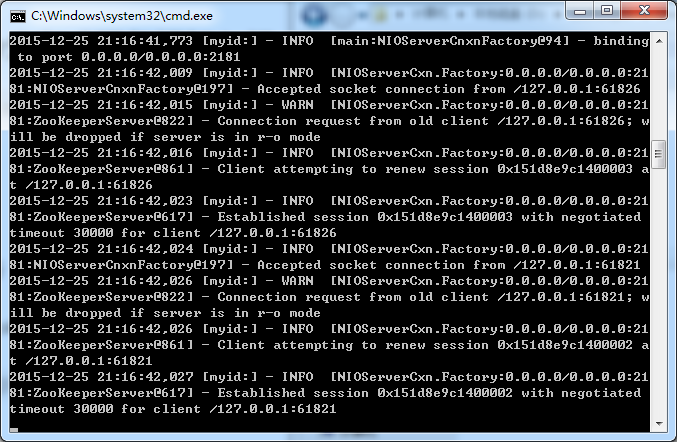
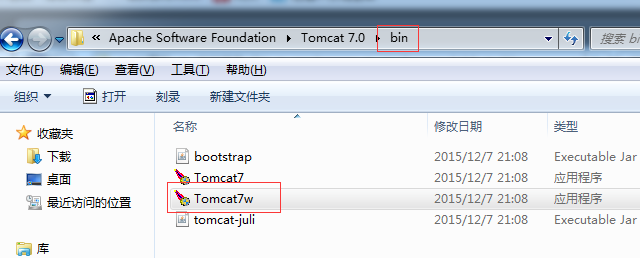
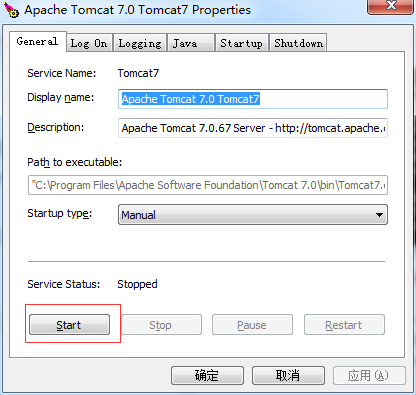
不要关闭黑框,让它打开着,zookeeper 2、运行dubbo-admin,这里博主之前已经把它的war包放到tomcat的webapps下了,因此只需要运行tomcat(记得运行tomcat之前一定要把其启动端口改成8090,原因请看博文http://blog.csdn.net/u013142781/article/details/50396621),好启动tomcat:
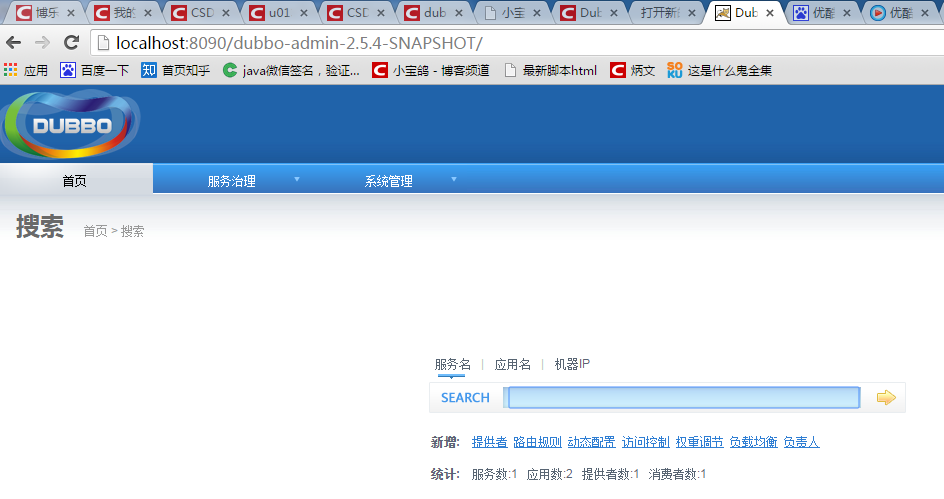
然后访问localhost:8090/dubbo-admin-2.5.4-SNAPSHOT,结果如下(用户名/密码:root/root),说明启动dubbo-admin成功了
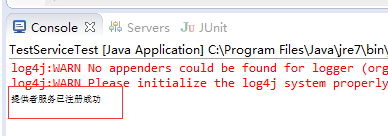
3、运行TestServiceTest,Run As –>Java Application,会看到控制台如下:
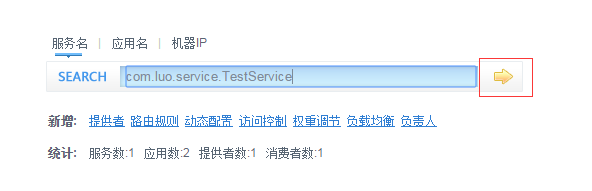
保持这个provider一直启动着。 同时在duubo-admin上搜索:com.luo.service.TestService,会看到如下结果:
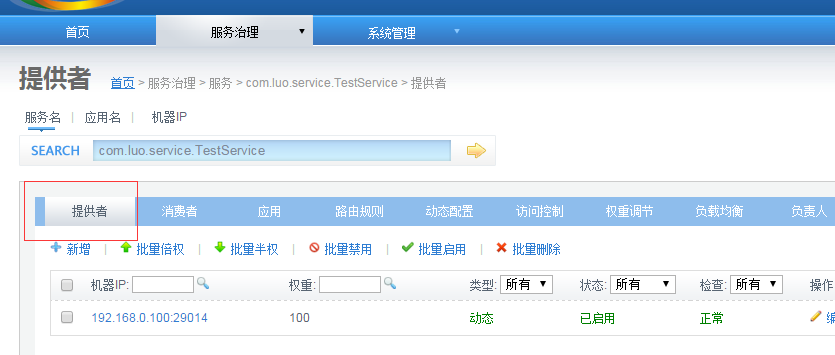
ok,提供者完成!
2.3、配置消费者
2.3.1、创建maven项目,流程跟provider一样,这里我起的项目名为consumer,配置pom.xml文件,如下:
|
1
2
3
4
5
6
7
8
9
10
11
12
13
14
15
16
17
18
19
20
21
22
23
24
25
26
27
28
29
30
31
32
33
34
35
36
37
38
39
40
41
42
43
44
45
46
47
48
49
50
51
52
53
54
55
56
57
58
59
60
61
62
63
64
65
66
67
68
69
70
71
72
73
74
75
76
77
78
79
80
81
82
83
84
85
86
87
88
89
90
91
92
93
94
95
96
97
98
|
<project xmlns=
"http://maven.apache.org/POM/4.0.0"
xmlns:xsi=
"http://www.w3.org/2001/XMLSchema-instance"
xsi:schemaLocation=
"http://maven.apache.org/POM/4.0.0 http://maven.apache.org/xsd/maven-4.0.0.xsd"
>
<modelVersion>
4.0
.
0
</modelVersion>
<groupId>com.luo</groupId>
<artifactId>consumer</artifactId>
<version>
0.0
.
1
-SNAPSHOT</version>
<properties>
<spring.version>
3.2
.
8
.RELEASE</spring.version>
</properties>
<dependencies>
<!-- 添加provider的jar包 -->
<dependency>
<groupId>com.luo</groupId>
<artifactId>provider</artifactId>
<version>
0.0
.
1
-SNAPSHOT</version>
</dependency>
<!-- 添加dubbo依赖 -->
<dependency>
<groupId>com.alibaba</groupId>
<artifactId>dubbo</artifactId>
<version>
2.5
.
3
</version>
<exclusions>
<exclusion>
<groupId>org.springframework</groupId>
<artifactId>spring</artifactId>
</exclusion>
</exclusions>
</dependency>
<!-- 添加zk客户端依赖 -->
<dependency>
<groupId>com.github.sgroschupf</groupId>
<artifactId>zkclient</artifactId>
<version>
0.1
</version>
</dependency>
<!-- spring相关 -->
<dependency>
<groupId>org.springframework</groupId>
<artifactId>spring-core</artifactId>
<version>${spring.version}</version>
</dependency>
<dependency>
<groupId>org.springframework</groupId>
<artifactId>spring-beans</artifactId>
<version>${spring.version}</version>
</dependency>
<dependency>
<groupId>org.springframework</groupId>
<artifactId>spring-context</artifactId>
<version>${spring.version}</version>
</dependency>
<dependency>
<groupId>org.springframework</groupId>
<artifactId>spring-jdbc</artifactId>
<version>${spring.version}</version>
</dependency>
<dependency>
<groupId>org.springframework</groupId>
<artifactId>spring-web</artifactId>
<version>${spring.version}</version>
</dependency>
<dependency>
<groupId>org.springframework</groupId>
<artifactId>spring-webmvc</artifactId>
<version>${spring.version}</version>
</dependency>
<dependency>
<groupId>org.springframework</groupId>
<artifactId>spring-aop</artifactId>
<version>${spring.version}</version>
</dependency>
<dependency>
<groupId>org.springframework</groupId>
<artifactId>spring-tx</artifactId>
<version>${spring.version}</version>
</dependency>
<dependency>
<groupId>org.springframework</groupId>
<artifactId>spring-orm</artifactId>
<version>${spring.version}</version>
</dependency>
<dependency>
<groupId>org.springframework</groupId>
<artifactId>spring-context-support</artifactId>
<version>${spring.version}</version>
</dependency>
<dependency>
<groupId>org.springframework</groupId>
<artifactId>spring-test</artifactId>
<version>${spring.version}</version>
</dependency>
<dependency>
<groupId>org.springframework</groupId>
<artifactId>spring-jms</artifactId>
<version>${spring.version}</version>
</dependency>
</dependencies>
</project>
|
其实就是在provider的基础上添加了如下依赖(provider的依赖):
|
1
2
3
4
5
6
|
<!-- 添加provider的jar包 -->
<dependency>
<groupId>com.luo</groupId>
<artifactId>provider</artifactId>
<version>
0.0
.
1
-SNAPSHOT</version>
</dependency>
|
2.3.2、添加如下两个文件
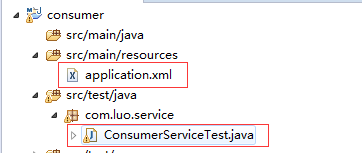
application.xml内容如下:
|
1
2
3
4
5
6
7
8
9
10
11
12
13
14
15
16
17
18
|
<?xml version=
"1.0"
encoding=
"UTF-8"
?>
<beans xmlns=
"http://www.springframework.org/schema/beans"
xmlns:xsi=
"http://www.w3.org/2001/XMLSchema-instance"
xmlns:dubbo=
"http://code.alibabatech.com/schema/dubbo"
xsi:schemaLocation="http:
//www.springframework.org/schema/beans
http:
//www.springframework.org/schema/beans/spring-beans.xsd
http:
//code.alibabatech.com/schema/dubbo
http:
//code.alibabatech.com/schema/dubbo/dubbo.xsd ">
<!-- 消费方应用名,用于计算依赖关系,不是匹配条件,不要与提供方一样 -->
<dubbo:application name=
"consumer"
/>
<!-- 使用multicast广播注册中心暴露发现服务地址 -->
<dubbo:registry protocol=
"zookeeper"
address=
"zookeeper://127.0.0.1:2181"
/>
<!-- 生成远程服务代理,可以和本地bean一样使用demoService -->
<dubbo:reference id=
"testService"
interface
=
"com.luo.service.TestService"
/>
</beans>
|
ConsumerServiceTest.java的内容如下:
|
1
2
3
4
5
6
7
8
9
10
11
12
13
14
15
16
17
18
19
20
21
22
|
package
com.luo.service;
import
java.io.IOException;
import
org.springframework.context.support.ClassPathXmlApplicationContext;
public
class
ConsumerServiceTest {
public
static
void
main(String[] args) {
ClassPathXmlApplicationContext context =
new
ClassPathXmlApplicationContext(
new
String[] {
"application.xml"
});
context.start();
TestService testService = (TestService) context.getBean(
"testService"
);
System.out.println(testService.getName());
try
{
System.in.read();
}
catch
(IOException e) {
e.printStackTrace();
}
}
}
|
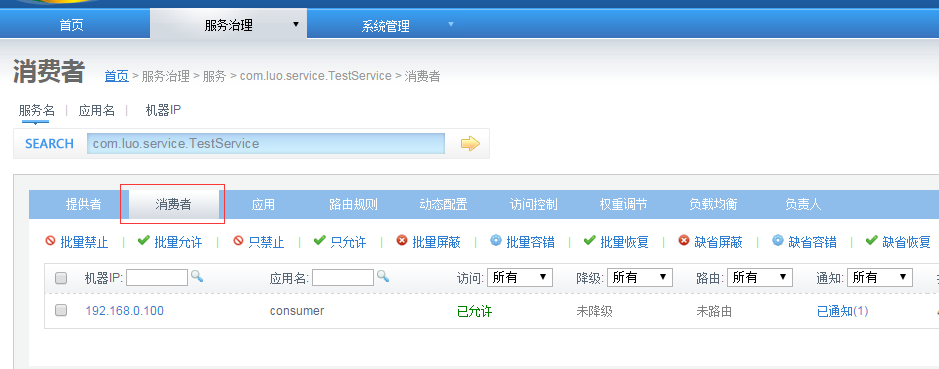
2.3.3、运行 在保持zookeeper、dubbo-admin和provider运行着的基础上,运行ConsumerServiceTest.java,Run As –> Java Application,会看到控制台如下:
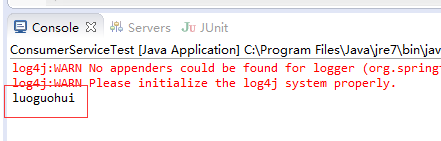
控制台内容luoguohui就是提供者打印出来的 另外也会看到dubbo-admin中com.luo.service.TestService有消费者了:
3、源码下载
http://download.csdn.net/detail/u013142781/9377617
来源:http://www.importnew.com/19732.html