友情链接:threejs 中文文档
目录
1. three.js Canvas画布布局
Canvas元素
Canvas是HTML的元素之一,Canvas元素的CSS布局规律和div、img等其它HTML元素相似,webgl就是依赖于canvas实现,threejs是基于webgl封装的,自然也要依赖canvas,具体说就是把三场场景渲染到canvas画布上。
<!-- canvas元素默认是行内块元素 -->
<canvas style="background-color: #ff0000;" width="300" height="180"></canvas>
案例源码“CSS布局案例.html”
<head>
    <style>
        body {
            overflow: hidden;
            margin: 0px;
        }
    </style>
</head>
<body style="background: #555555;">
    <div style="height: 55px;background-color: #444444;">上面布局</div>
    <!-- 下 -->
    <div>
        <div id="left" style="position: absolute;top: 60px;background-color: #444444;width: 195px;">下面左侧布局</div>
        <div id="webgl" style="position: absolute;top: 60px;left: 200px;background-color: #444444;">下面右侧布局</div>
    </div>
    <script>
        const width = window.innerWidth - 200;
        const height = window.innerHeight - 60;
        document.getElementById('left').style.height = height + 'px';
        document.getElementById('webgl').style.width = width + 'px';
        document.getElementById('webgl').style.height = height + 'px';
    </script>
</body>
threejs Canvas画布尺寸设置
- canvas画布的宽度: window.innerWidth减掉左侧div元素宽度195px和布局间距5px
- canvas画布的高度: window.innerHeight减掉顶部div元素高度55px和布局间距5px
// 200表示左侧div元素宽度195px+间距5px
const width = window.innerWidth - 200; //canvas画布高度
//60表示顶部div元素高度55px+间距5px
const height = window.innerHeight - 60; //canvas画布宽度
...
const camera = new THREE.PerspectiveCamera(30, width / height, 1, 3000);
renderer.setSize(width, height);
Canvas随着窗口变化
// 画布跟随窗口变化
window.onresize = function () {
    const width = window.innerWidth - 200; //canvas画布高度
    const height = window.innerHeight - 60; //canvas画布宽度
    renderer.setSize(width, height);
    camera.aspect = width / height;
    camera.updateProjectionMatrix();
};
2. threejs 透明度
通过Three.js渲染一个模型的时候,不希望canvas画布有背景颜色,也就是canvas画布完全透明,可以透过canvas画布看到画布后面叠加的HTML元素图文,呈现出来一种三维模型悬浮在网页上面的效果。
.setClearAlpha()方法
改变背景透明度值
renderer.setClearAlpha(0.8);背景透明alpha: true
// 在构造函数参数中设置alpha属性的值
const renderer = new THREE.WebGLRenderer({
  alpha: true
});
3. threejs将渲染结果保存为图片
超链接元素a下载文件
在学习下面内容之前,如果你有兴趣,可以选择补充下前端相关知识,具体说就是通过超链接元素a合成一个文件,并下载。
<button type="button" name="button" onclick="saveFile()">下载</button>
<script>
  function saveFile() {
    // 创建一个超链接元素,用来下载保存数据的文件
    const link = document.createElement('a');
    // 通过超链接herf属性,设置要保存到文件中的数据
    link.href = window.URL.createObjectURL(new Blob(['一些数据']));
    link.download = '文件名称.txt';//下载文件名
    link.click();//js代码触发超链接元素a的鼠标点击事件,开始下载文件到本地
  }
</script>
配置webgl渲染器
// WebGL渲染器设置
const renderer = new THREE.WebGLRenderer({
    //想把canvas画布上内容下载到本地,需要设置为true
    preserveDrawingBuffer:true,
});
按钮绑定鼠标事件
Canvas画布通过.toDataURL()方法可以获取画布上的像素信息。canvas.toDataURL("image/png");表示以png格式获取像素数据,可以直接赋值给超链接元素a的.herf属性下载到本地。
// 鼠标单击id为download的HTML元素,threejs渲染结果以图片形式下载到本地
document.getElementById('download').addEventListener('click',function(){
    // 创建一个超链接元素,用来下载保存数据的文件
    const link = document.createElement('a');
    // 通过超链接herf属性,设置要保存到文件中的数据
    const canvas = renderer.domElement; //获取canvas对象
    link.href = canvas.toDataURL("image/png");
    link.download = 'threejs.png'; //下载文件名
    link.click(); //js代码触发超链接元素a的鼠标点击事件,开始下载文件到本地
})
3. 深度冲突(模型闪烁)
在开发中,如果有两个重合的矩形平面Mesh,通过浏览器预览,当你旋转三维场景的时候,你会发现模型渲染的时候产生闪烁。
这种现象,主要是两个Mesh重合,电脑GPU分不清谁在前谁在后,这种现象,可以称为深度冲突Z-fighting。
Mesh模型重合渲染测试
// 两个矩形平面Mesh重合,产生闪烁
// 闪烁原因:两个矩形面位置重合,GPU无法分清谁在前谁在后
const geometry = new THREE.PlaneGeometry(250, 250);
const material = new THREE.MeshLambertMaterial({
    color: 0x00ffff,
    side: THREE.DoubleSide,
});
const mesh = new THREE.Mesh(geometry, material);

const geometry2 = new THREE.PlaneGeometry(300, 300);
const material2 = new THREE.MeshLambertMaterial({
    color: 0xff6666,
    side: THREE.DoubleSide,
});
const mesh2 = new THREE.Mesh(geometry2, material2);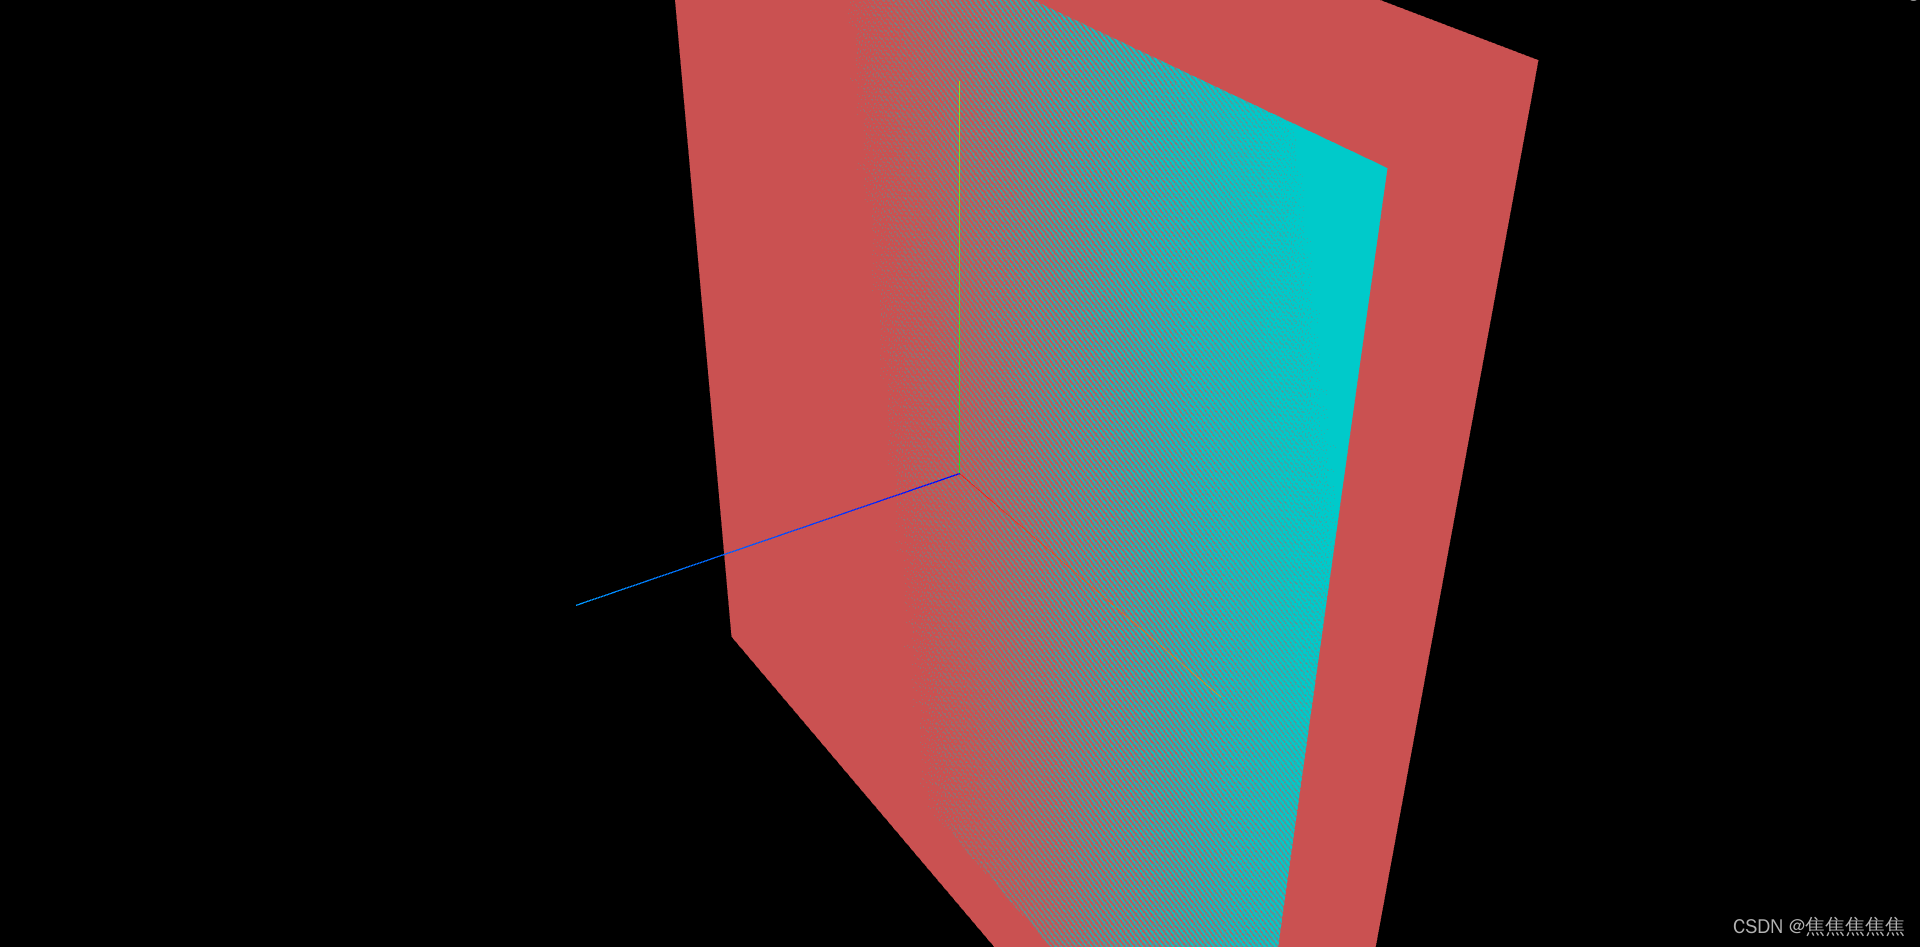
改变模型位置
改变Mesh的位置,拉开两个mesh的距离,使其不重合
mesh2.position.z = 1;4. 模型加载进度条
在项目开发时,有很多大型3D模型加载的时候会非常慢,这时候往往需要加一个进度条,表示模型的加载进度。
进度条HTML、CSS、JavaScript代码
<head>
    <style>
        /* 进度条css样式 */
        #container {
            position: absolute;
            width: 400px;
            height: 16px;
            top: 50%;
            left:50%;
            margin-left: -200px;
            margin-top: -8px;
            border-radius: 8px;
            border: 1px solid #009999;
            overflow: hidden;
        }
        #per {
            height: 100%;
            width: 0px;
            background: #00ffff;
            color: #00ffff;
            line-height: 15px;
        }
    </style>
</head>
<body style="background-color: #001111;">
    <div id="container">
        <!-- 进度条 -->
        <div id="per"> </div>
    </div>
    <script>
        const percentDiv = document.getElementById("per");// 获取进度条元素
        percentDiv.style.width = 0.8*400 + "px";//进度条元素长度
        percentDiv.style.textIndent = 0.8*400 + 5 +"px";//缩进元素中的首行文本
        percentDiv.innerHTML =  "80%";//进度百分比
    </script>
</body>
threejs代码
模型加载器的.load()方法,参数一为模型路径;参数二为一个函数,加载结束调用;参数也三为一个函数,每当模型加载部分内容,该函数就会被调用,一次加载过程中一般会被调用多次,直到模型加载完成。jiu
const percentDiv = document.getElementById("per"); // 获取进度条元素
loader.load("../工厂.glb", function (gltf) {
    model.add(gltf.scene);
    // 加载完成,隐藏进度条
    // document.getElementById("container").style.visibility ='hidden';
    document.getElementById("container").style.display = 'none';
}, function (xhr) {
    // 控制台查看加载进度xhr
    // 通过加载进度xhr可以控制前端进度条进度
    const percent = xhr.loaded / xhr.total;
    console.log('加载进度' + percent);


    percentDiv.style.width = percent * 400 + "px"; //进度条元素长度
    percentDiv.style.textIndent = percent * 400 + 5 + "px"; //缩进元素中的首行文本
    // Math.floor:小数加载进度取整
    percentDiv.innerHTML = Math.floor(percent * 100) + '%'; //进度百分比
})![]()
文章中部分素材选取自Threejs中文网:Three.js中文网